
1983 928S
 06-05-2016, 11:20 PM
#31
Burning Brakes
Thread Starter
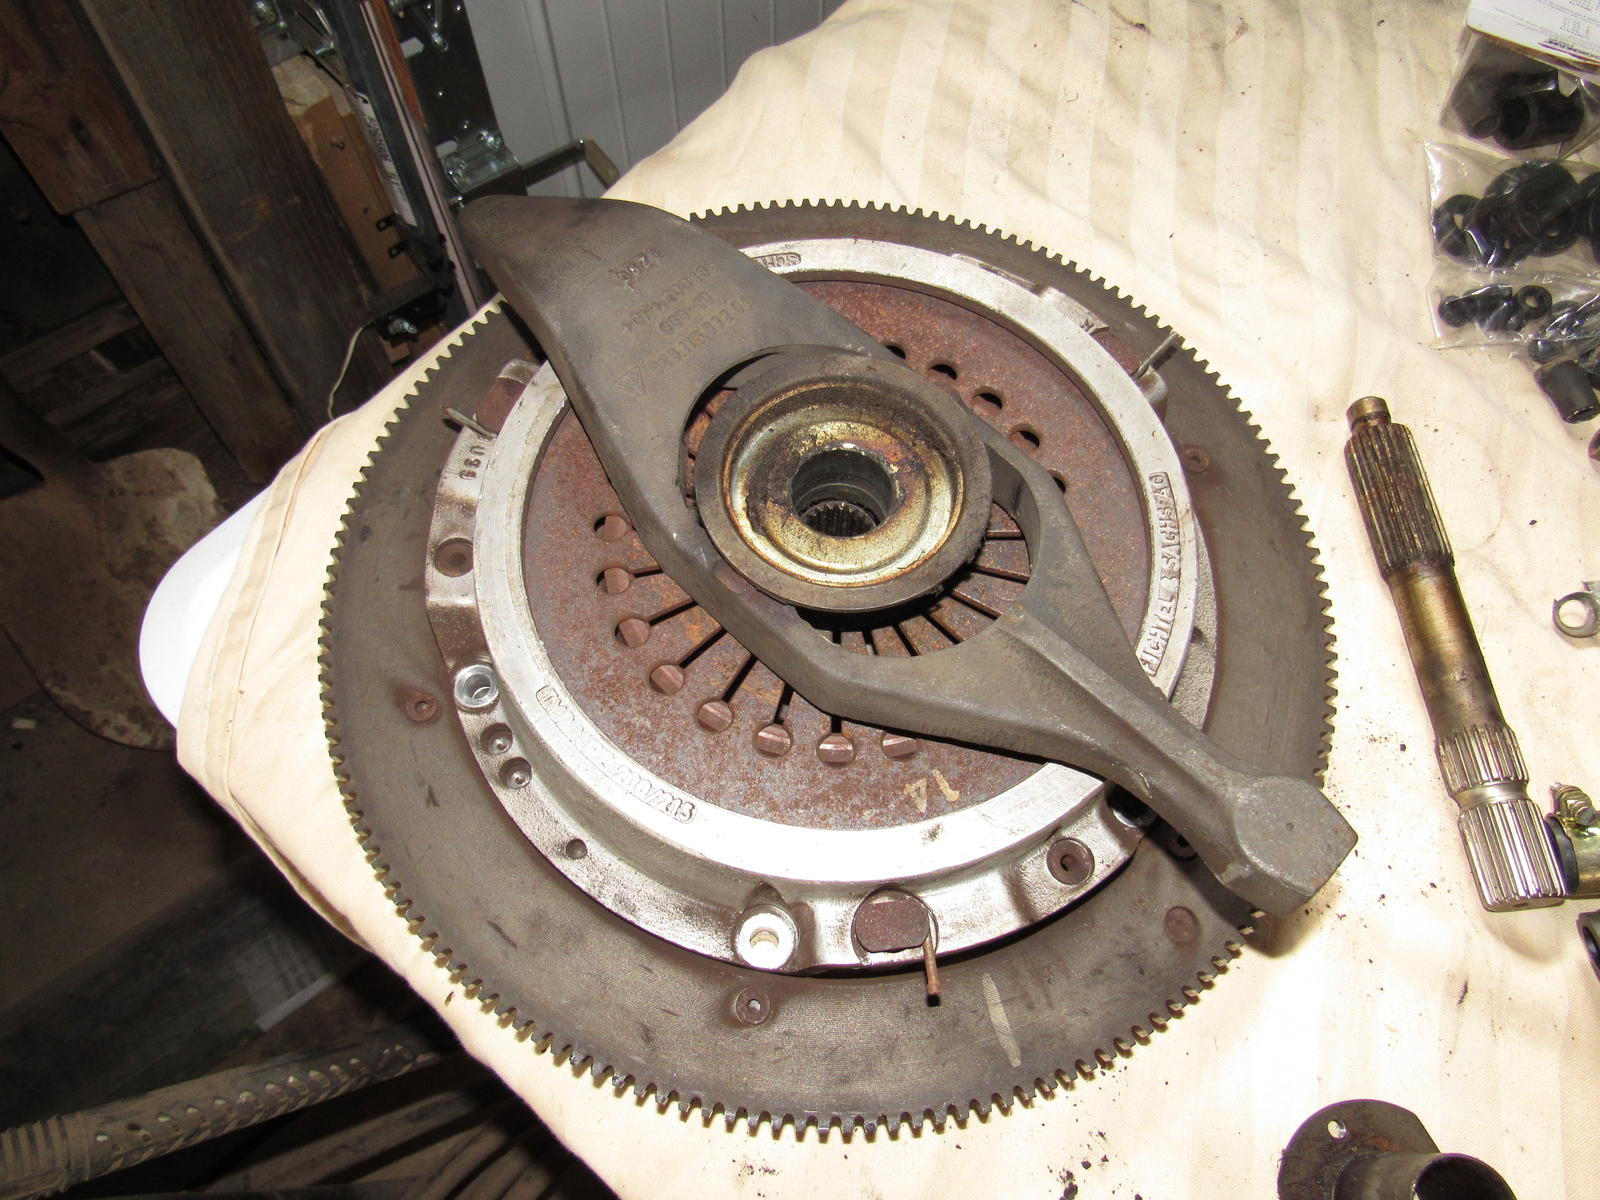
OK engine is out. About midway through some crazy thunderstorm came through and seemed like a bad omen but it went smoothly. I battled a bit yesterday with the intermediate shaft moving back with the coupling but finally separated the two and dropped the clutch out. It looks to be pretty fresh and I didn't take much time to mess with it but how does it come apart? I'd like to juice up the throwout bearing.
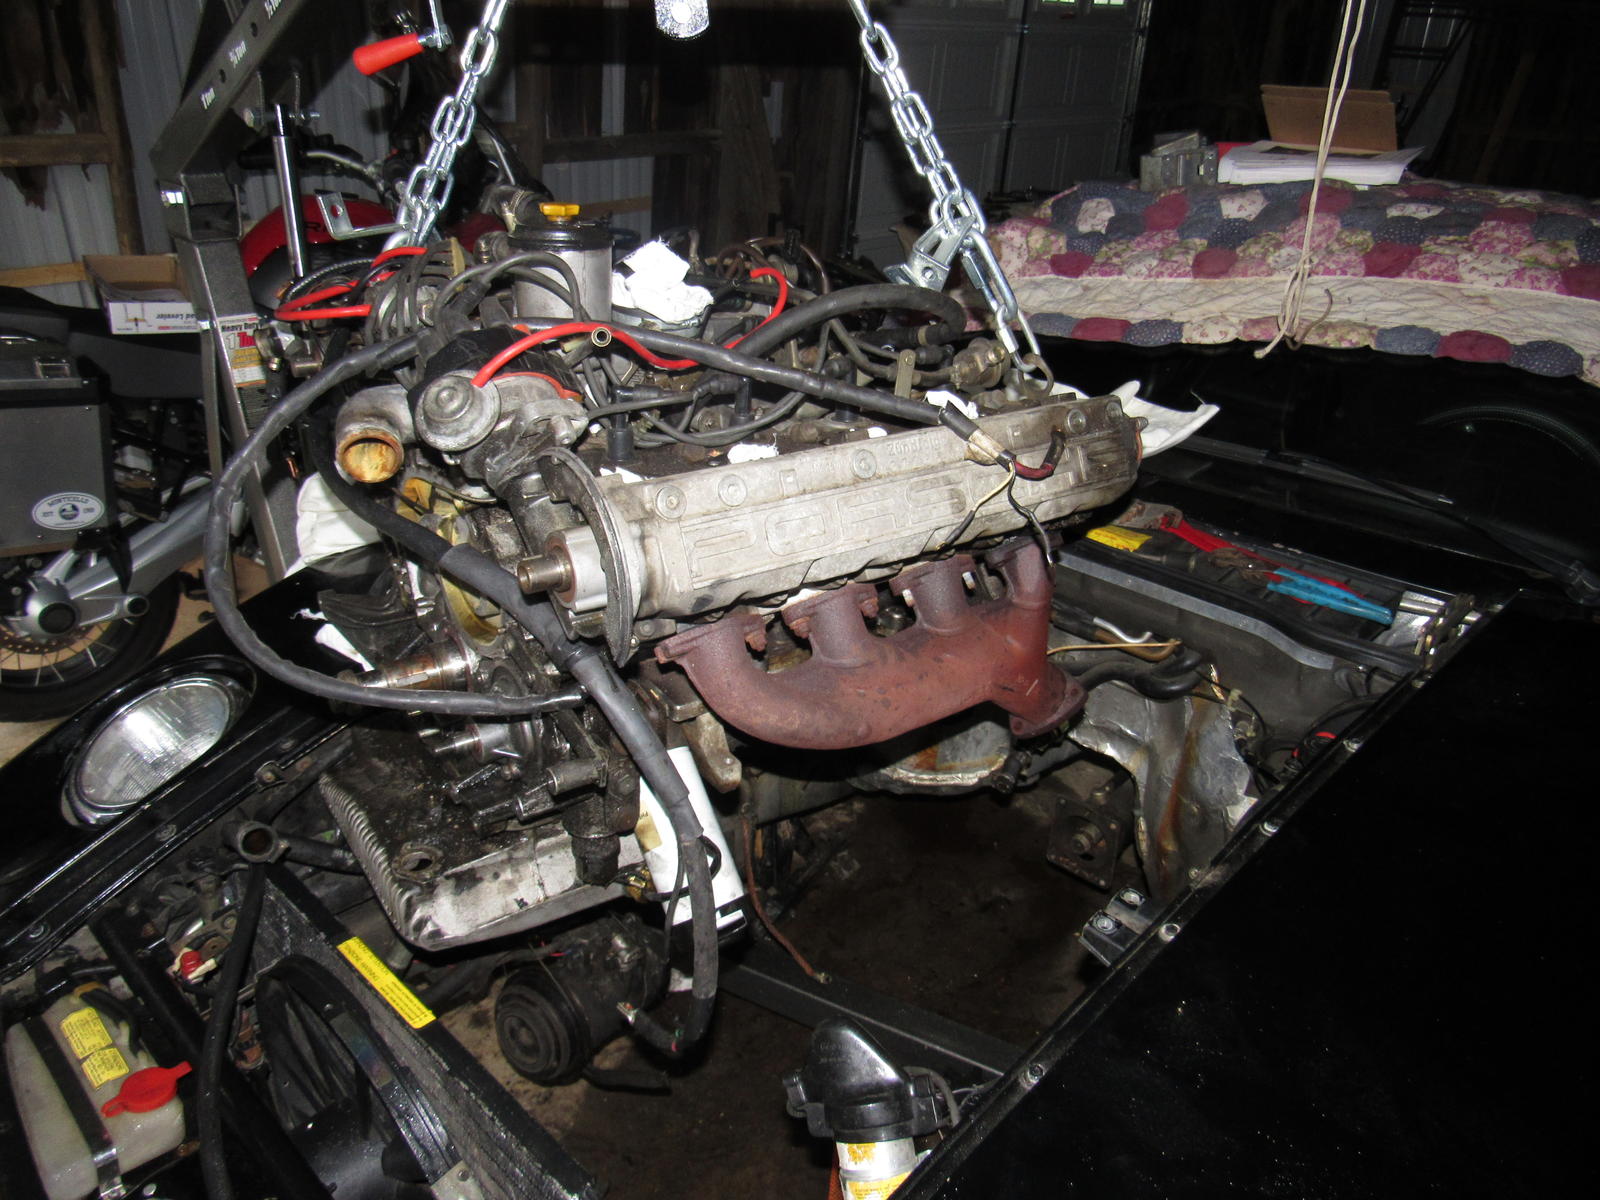
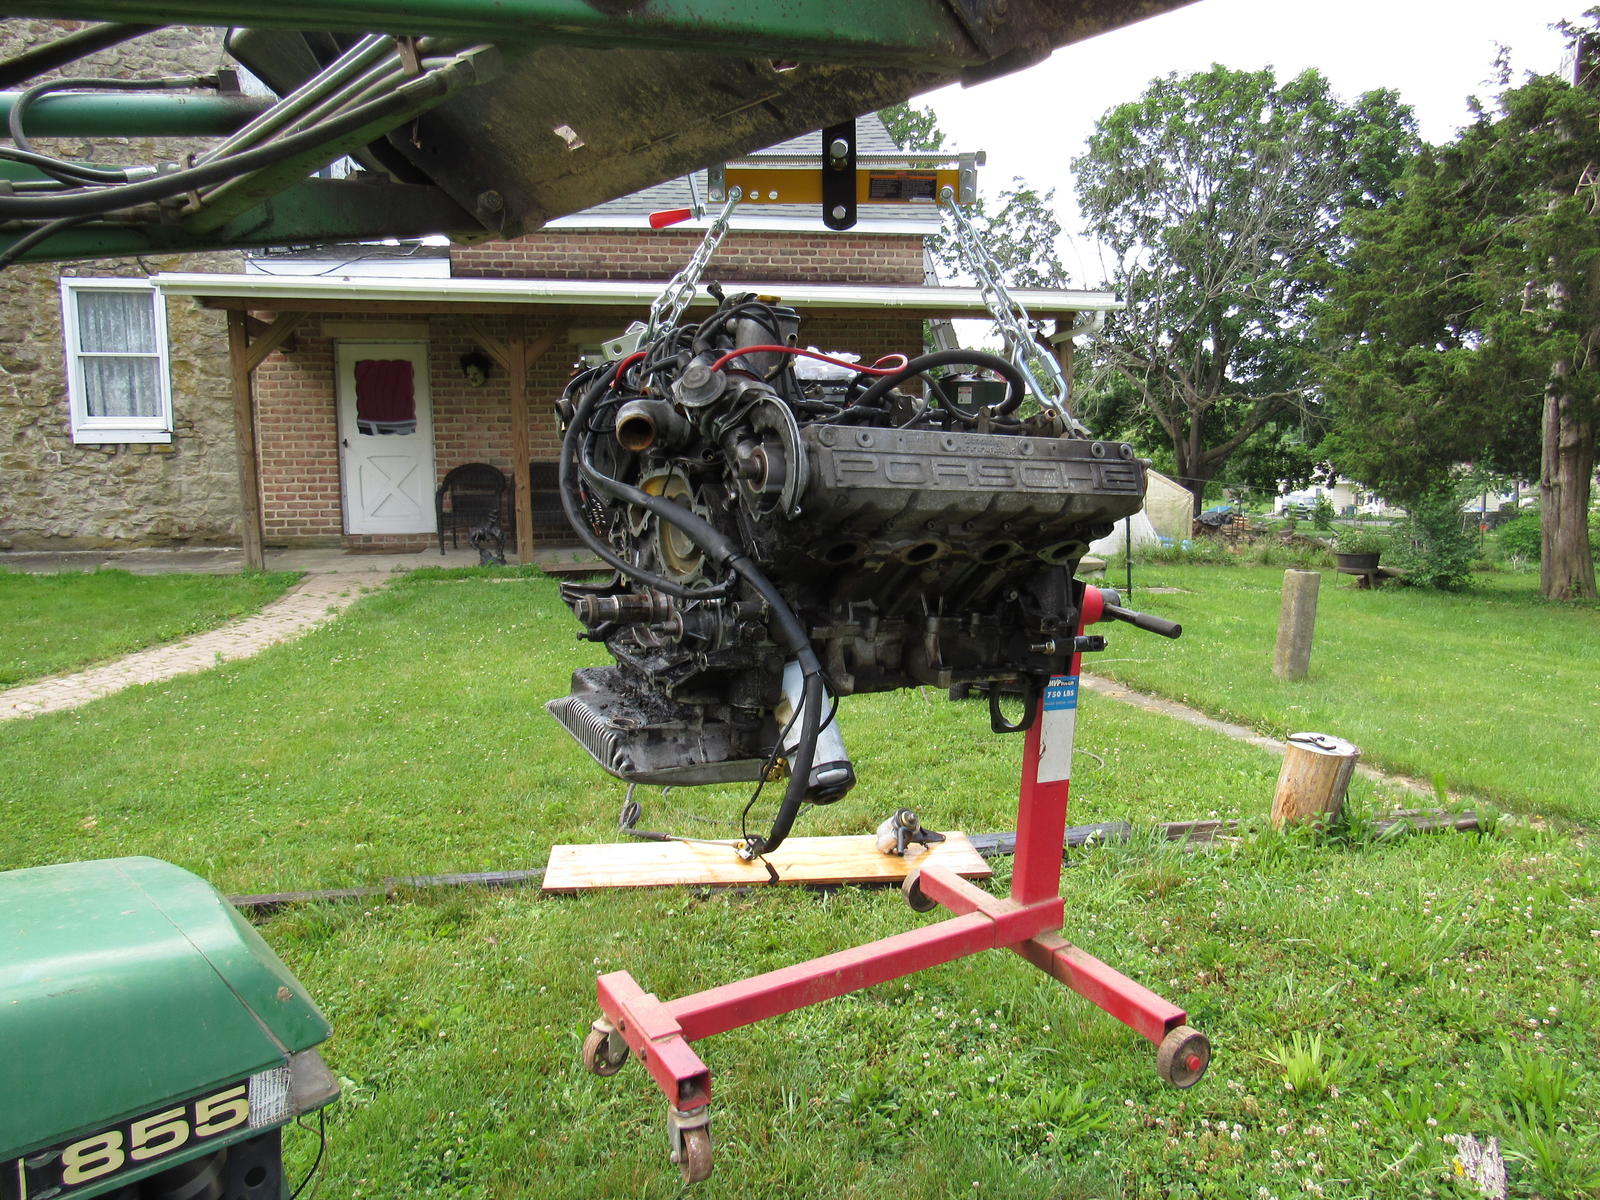
Here it is on the way up

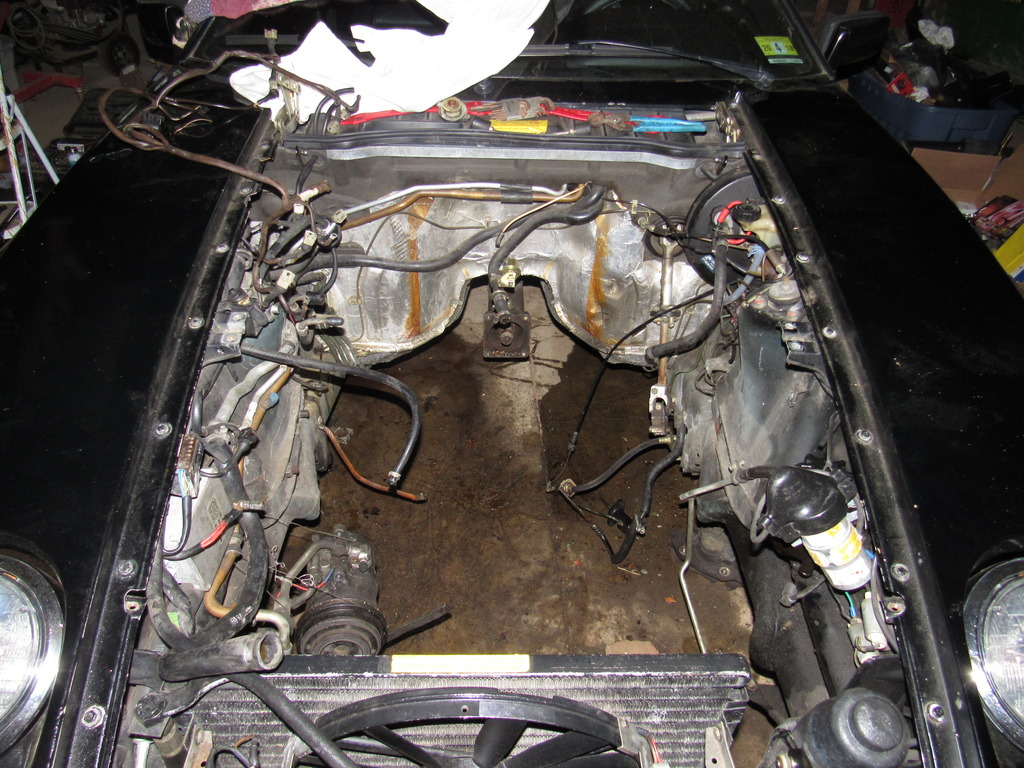
The bright side is I now have plenty of access to replace the front shifter cup on the torque tube.

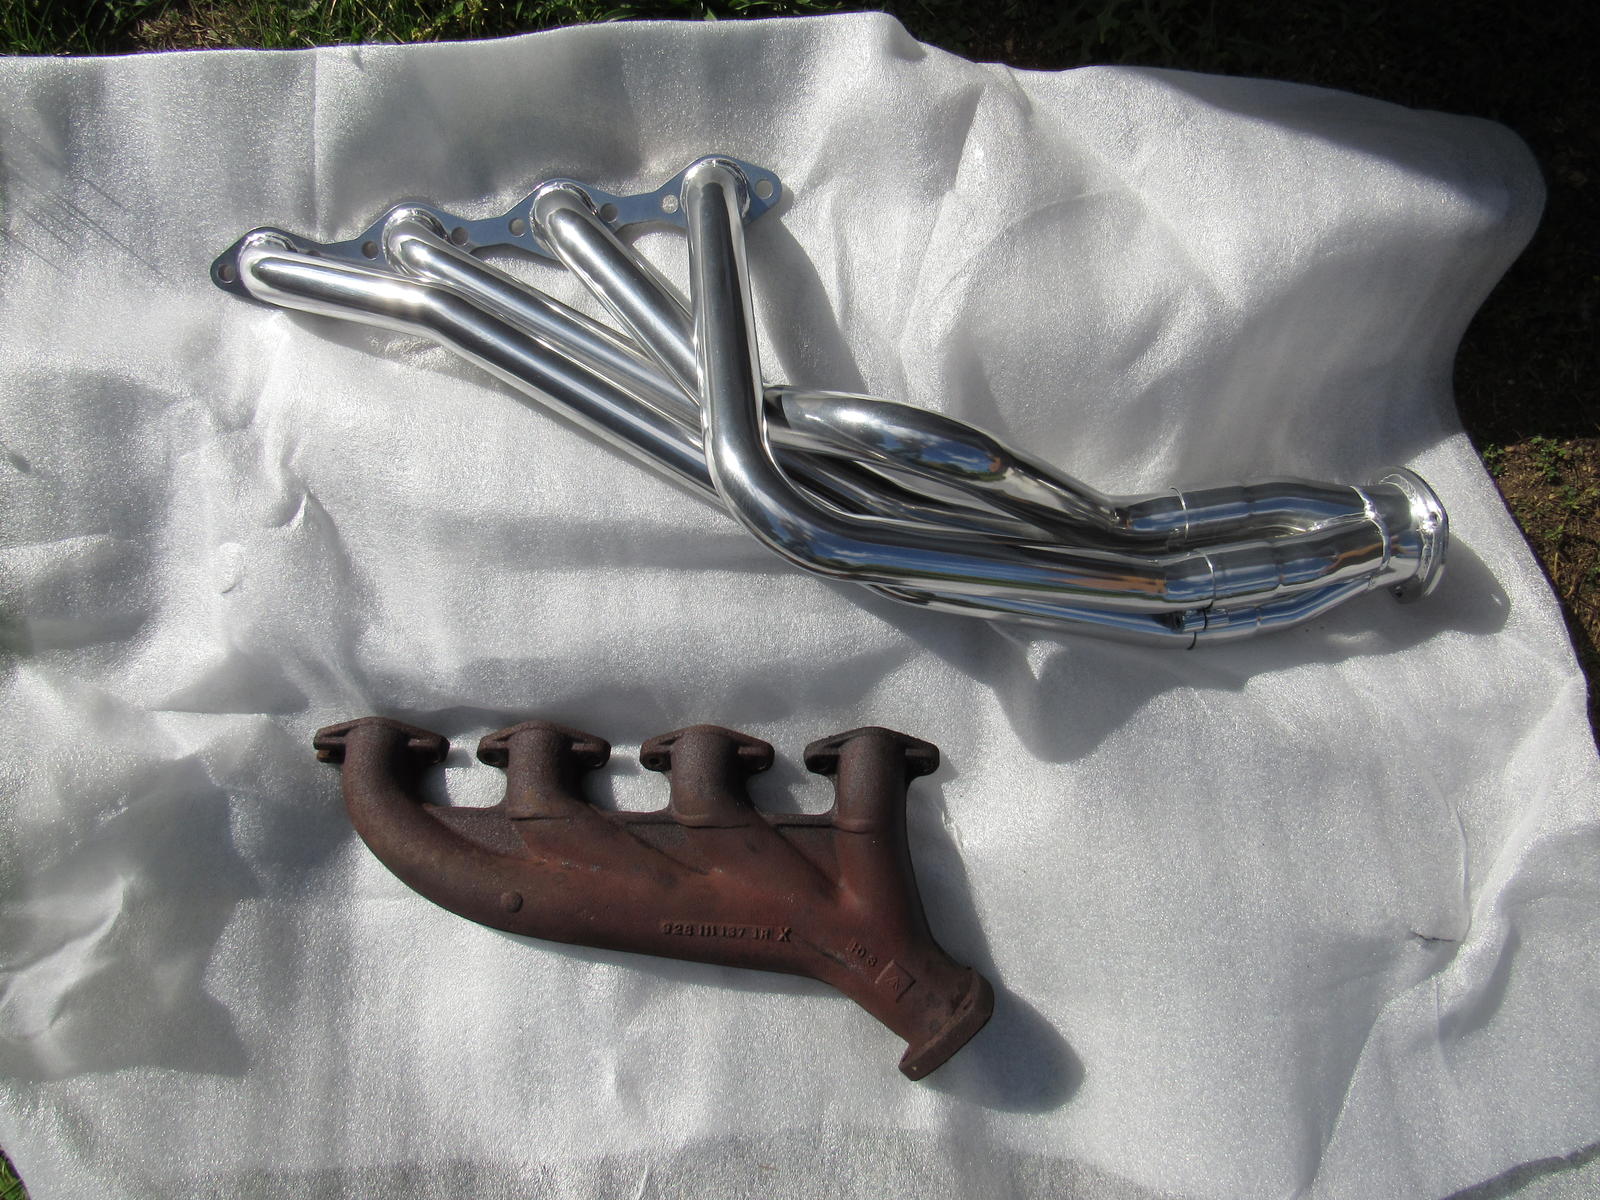
I also removed the exhaust manifolds which are surprisingly heavy and removed the studs that were left. That was easy as could be when you have plenty of room. The studs appear to be high quality so I don't know why four of them snapped off.
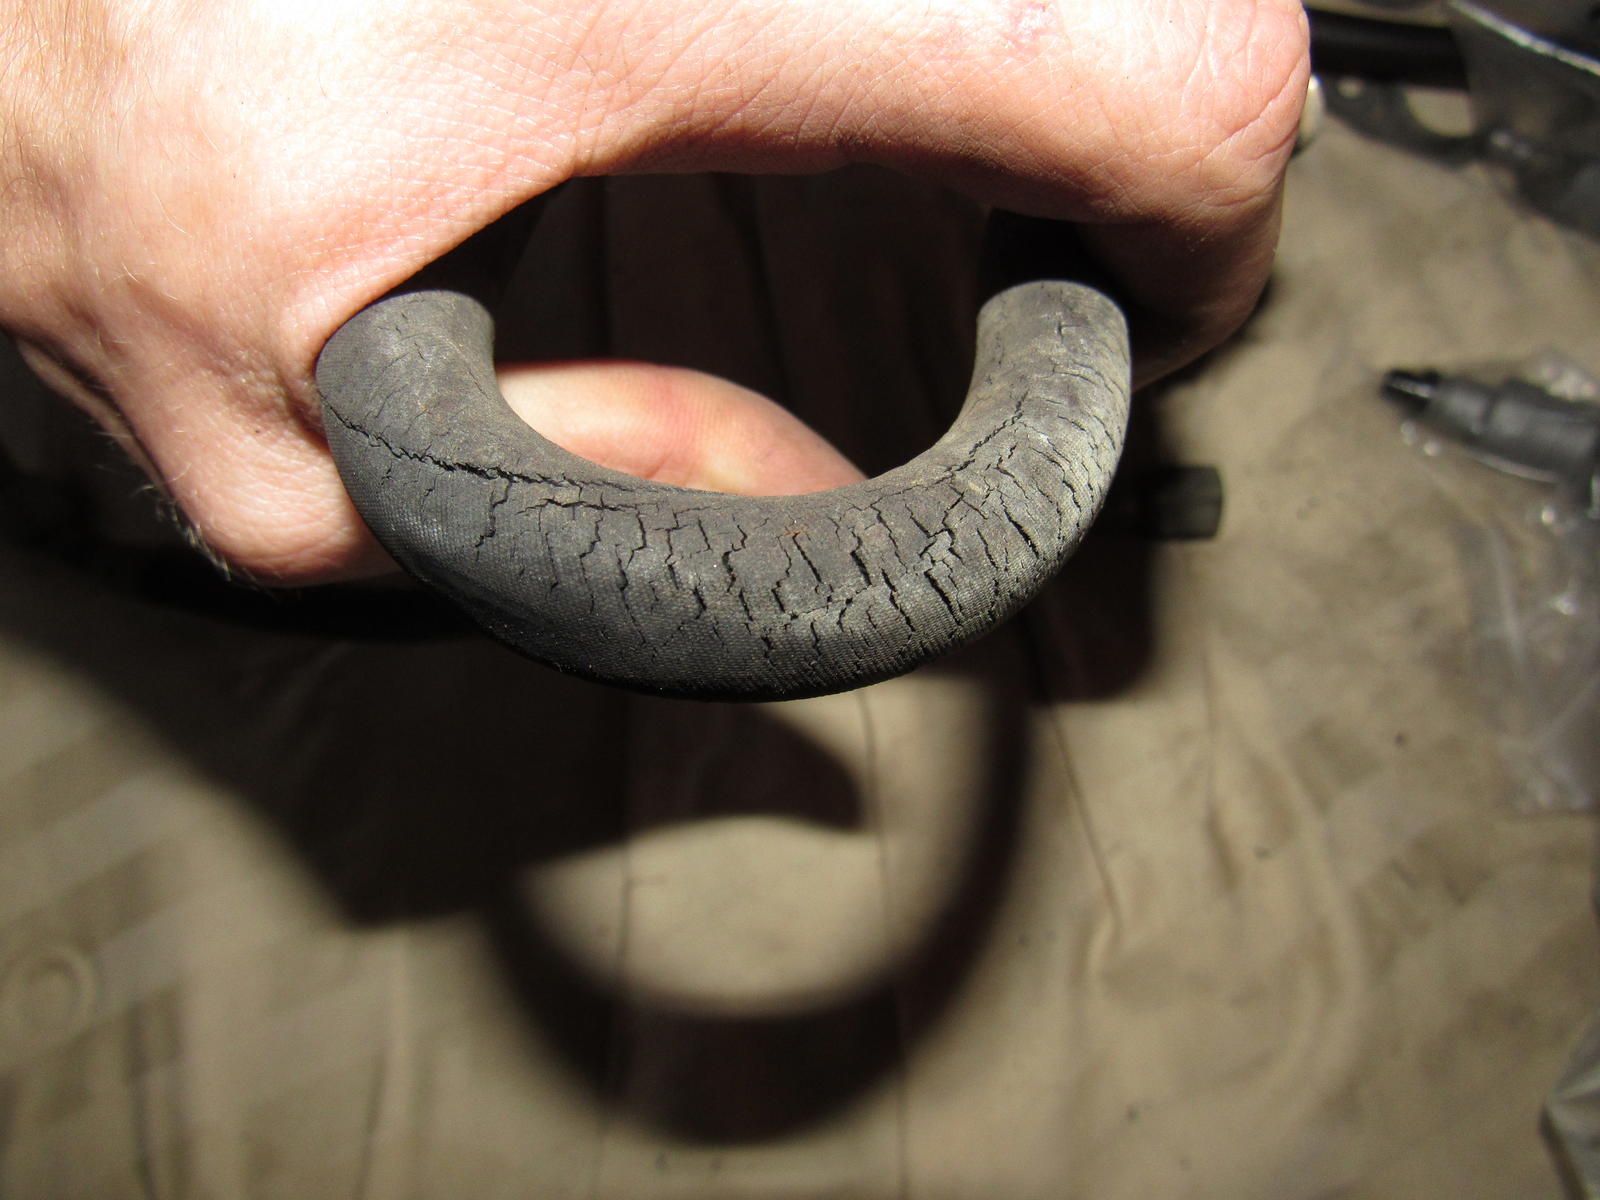
Any suggestions now that the engine bay is wide open? The clutch and brake systems operated well but there is a blue cloth covered hose that is ratty looking.
Oh and my 'green wire' connector disintegrated when I unplugged it and I just about got sick when I saw the price of the replacement. Crazy glue will do for now
Here it is on the way up
The bright side is I now have plenty of access to replace the front shifter cup on the torque tube.
I also removed the exhaust manifolds which are surprisingly heavy and removed the studs that were left. That was easy as could be when you have plenty of room. The studs appear to be high quality so I don't know why four of them snapped off.
Any suggestions now that the engine bay is wide open? The clutch and brake systems operated well but there is a blue cloth covered hose that is ratty looking.
Oh and my 'green wire' connector disintegrated when I unplugged it and I just about got sick when I saw the price of the replacement. Crazy glue will do for now
Last edited by Majestic Moose; 07-07-2017 at 11:47 PM.
 06-06-2016, 08:30 AM
#33
Burning Brakes
Thread Starter
I'm glad I could give back and show someone a trick. Just go slowly to avoid damaging the bearing or surfaces behind the seal when the drill breaks through.
06-06-2016, 10:39 AM
#34
Rennlist Member
Join Date: Jan 2015
Location: Near Mushroom Capital of the World
Posts: 3,017
Received 196 Likes
on
124 Posts
Moving at a great pace. Congratulations on a nice looking car.
Now is the time to change the infamous blue hose for the clutch system with the new "black" covered blue hose from Roger.
Brake booster looks very clean and shows no signs of leaking around the rubber seals and grommets from the pic, so I would leave it alone.
Have you checked the vacuum of the heater valve?
 06-06-2016, 06:14 PM
#36
Burning Brakes
Thread Starter
Moving at a great pace. Congratulations on a nice looking car.
Now is the time to change the infamous blue hose for the clutch system with the new "black" covered blue hose from Roger.
Brake booster looks very clean and shows no signs of leaking around the rubber seals and grommets from the pic, so I would leave it alone.
Have you checked the vacuum of the heater valve?
Now is the time to change the infamous blue hose for the clutch system with the new "black" covered blue hose from Roger.
Brake booster looks very clean and shows no signs of leaking around the rubber seals and grommets from the pic, so I would leave it alone.
Have you checked the vacuum of the heater valve?
Ah I knew it would be good to ask, I'll check the area more carefully, the blue hose is a hydraulic line right? I know the heater valve is brand new, replaced by the PO but I have no idea if the mechanisms that operate it work. As an aside, the AC system is charged but blows warm air.
So press down on thrust washer and remove snap ring, that sounds easy enough.
06-06-2016, 09:26 PM
#37
Burning Brakes
Thread Starter
I can now see why it is known as the infamous blue hose, I can't even see where it goes and that's with full access sitting in the engine bay. Everything looks good though.
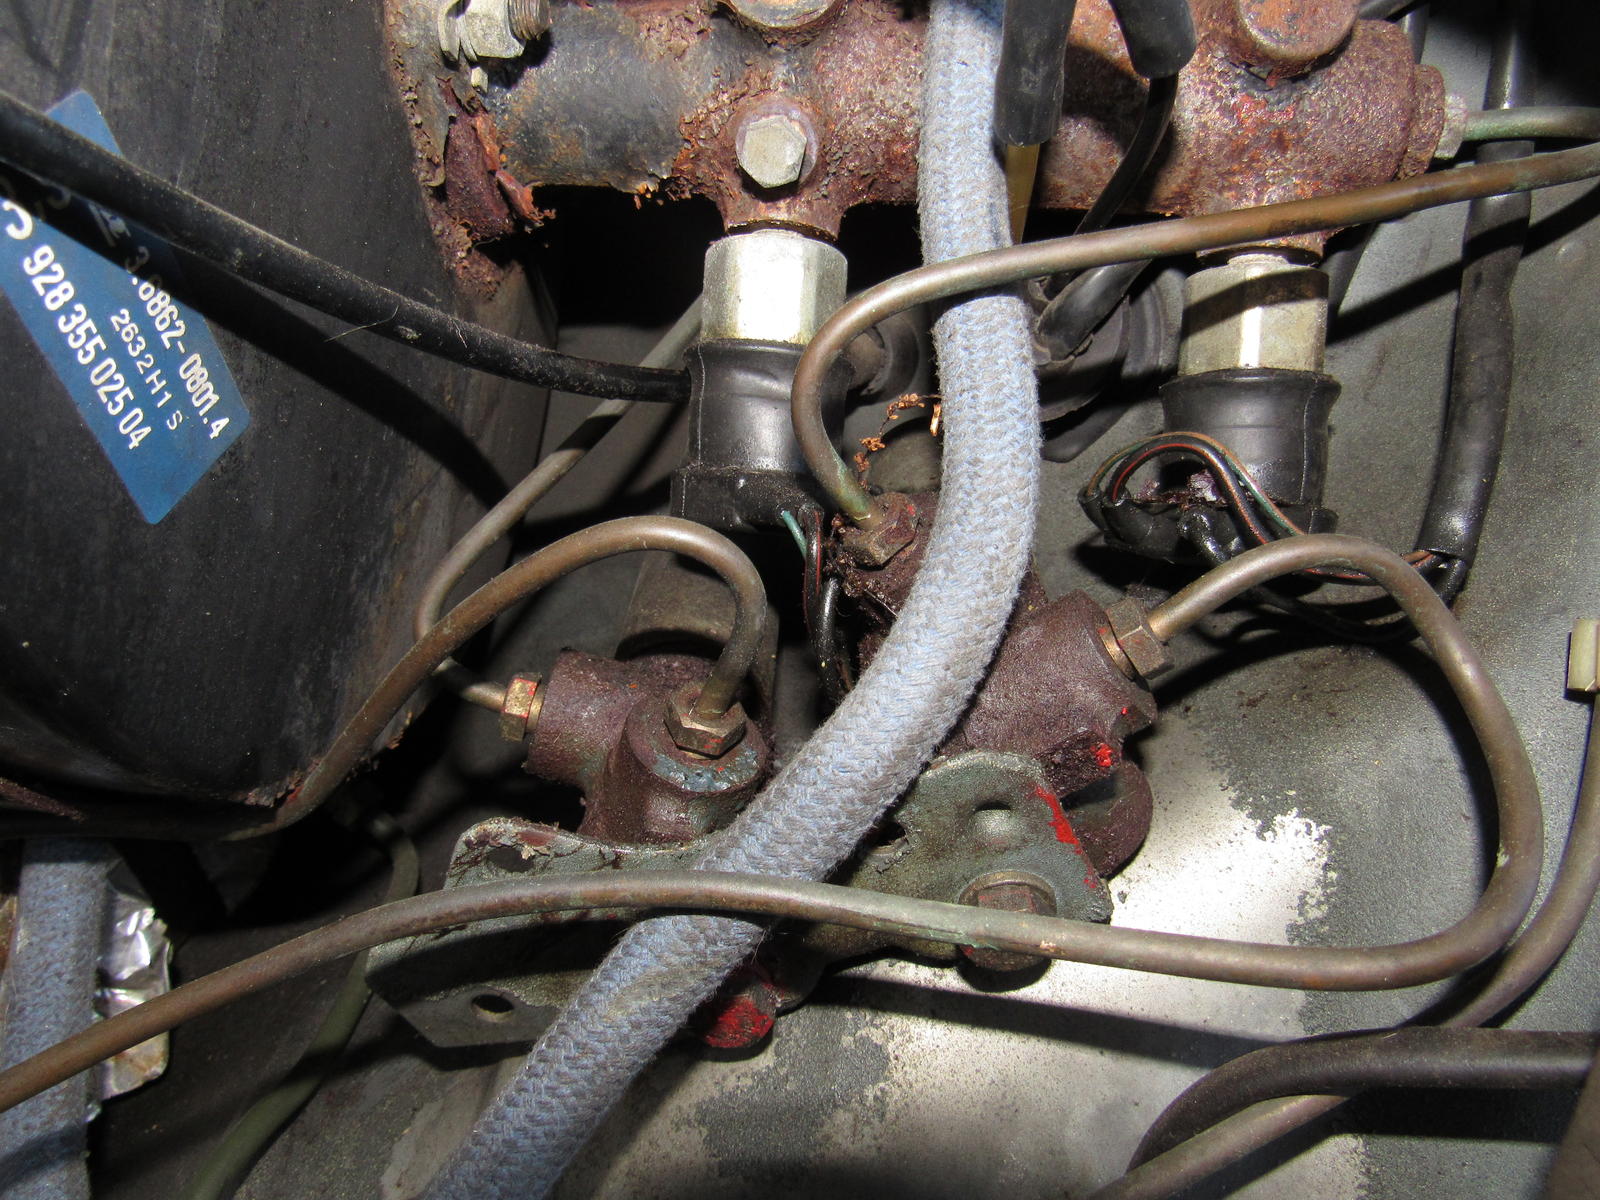
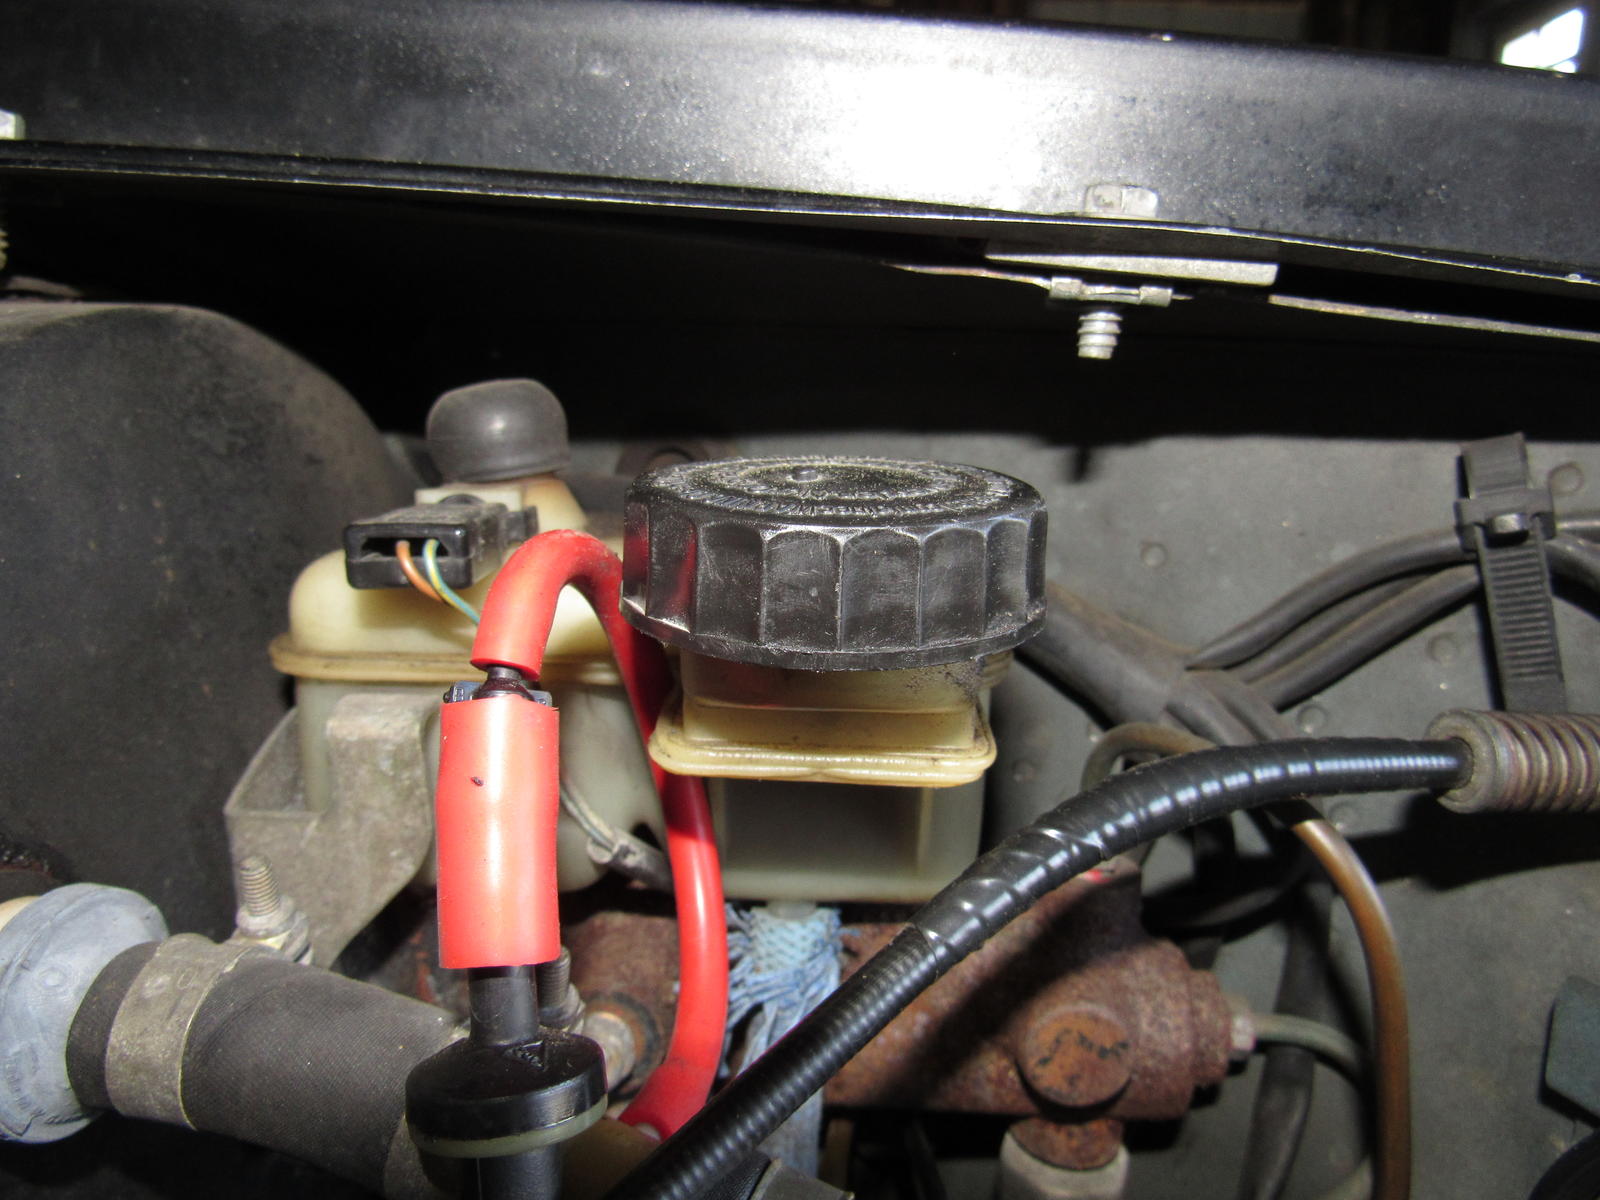
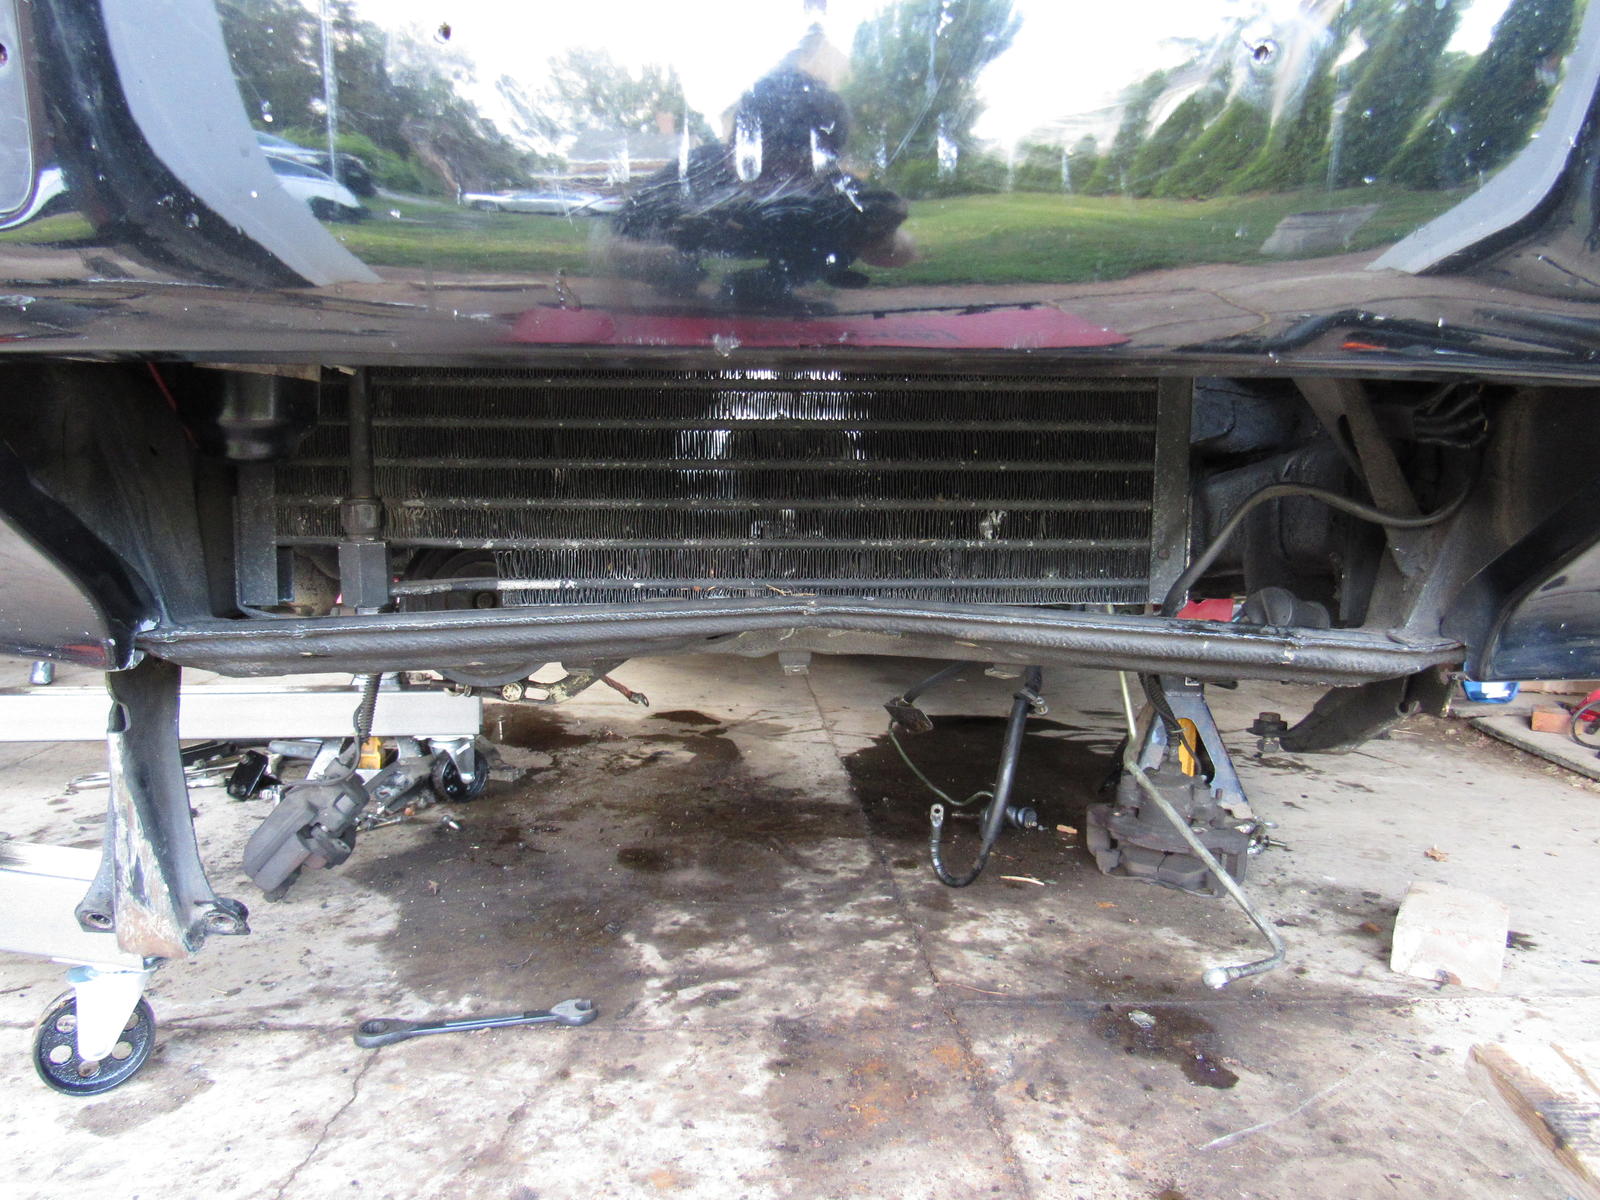
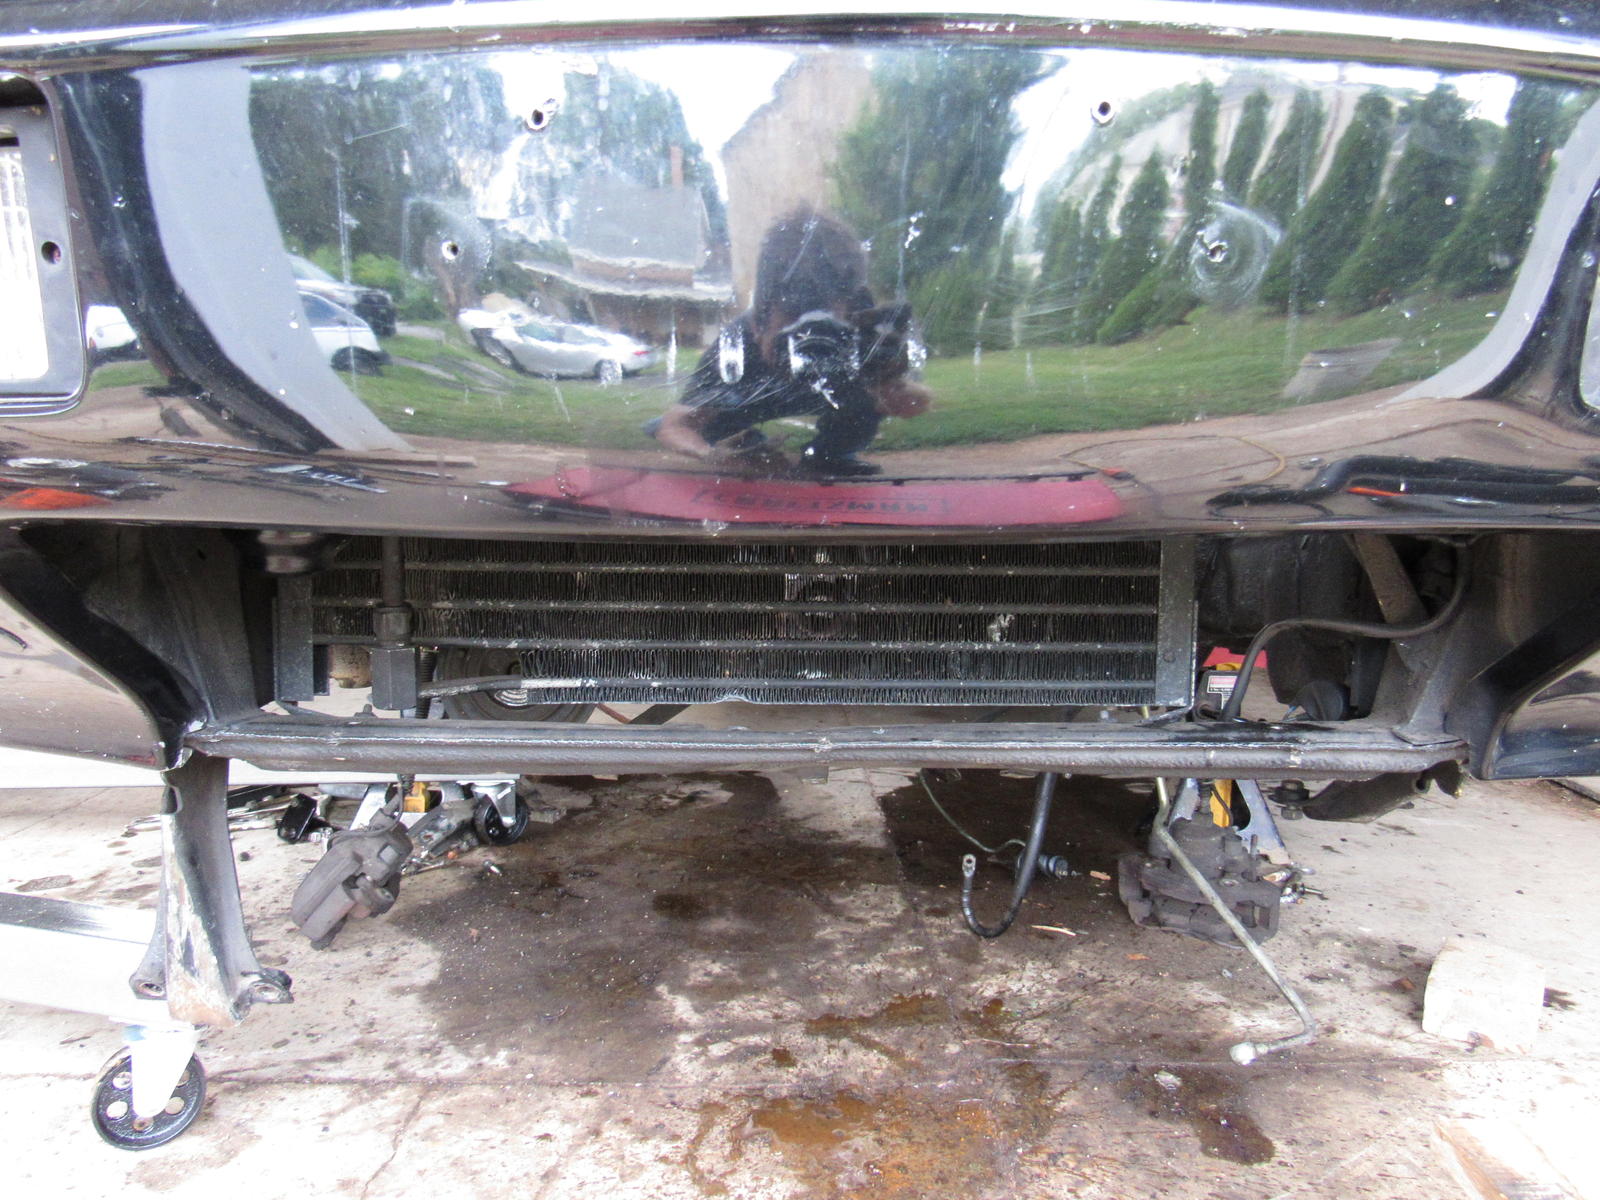
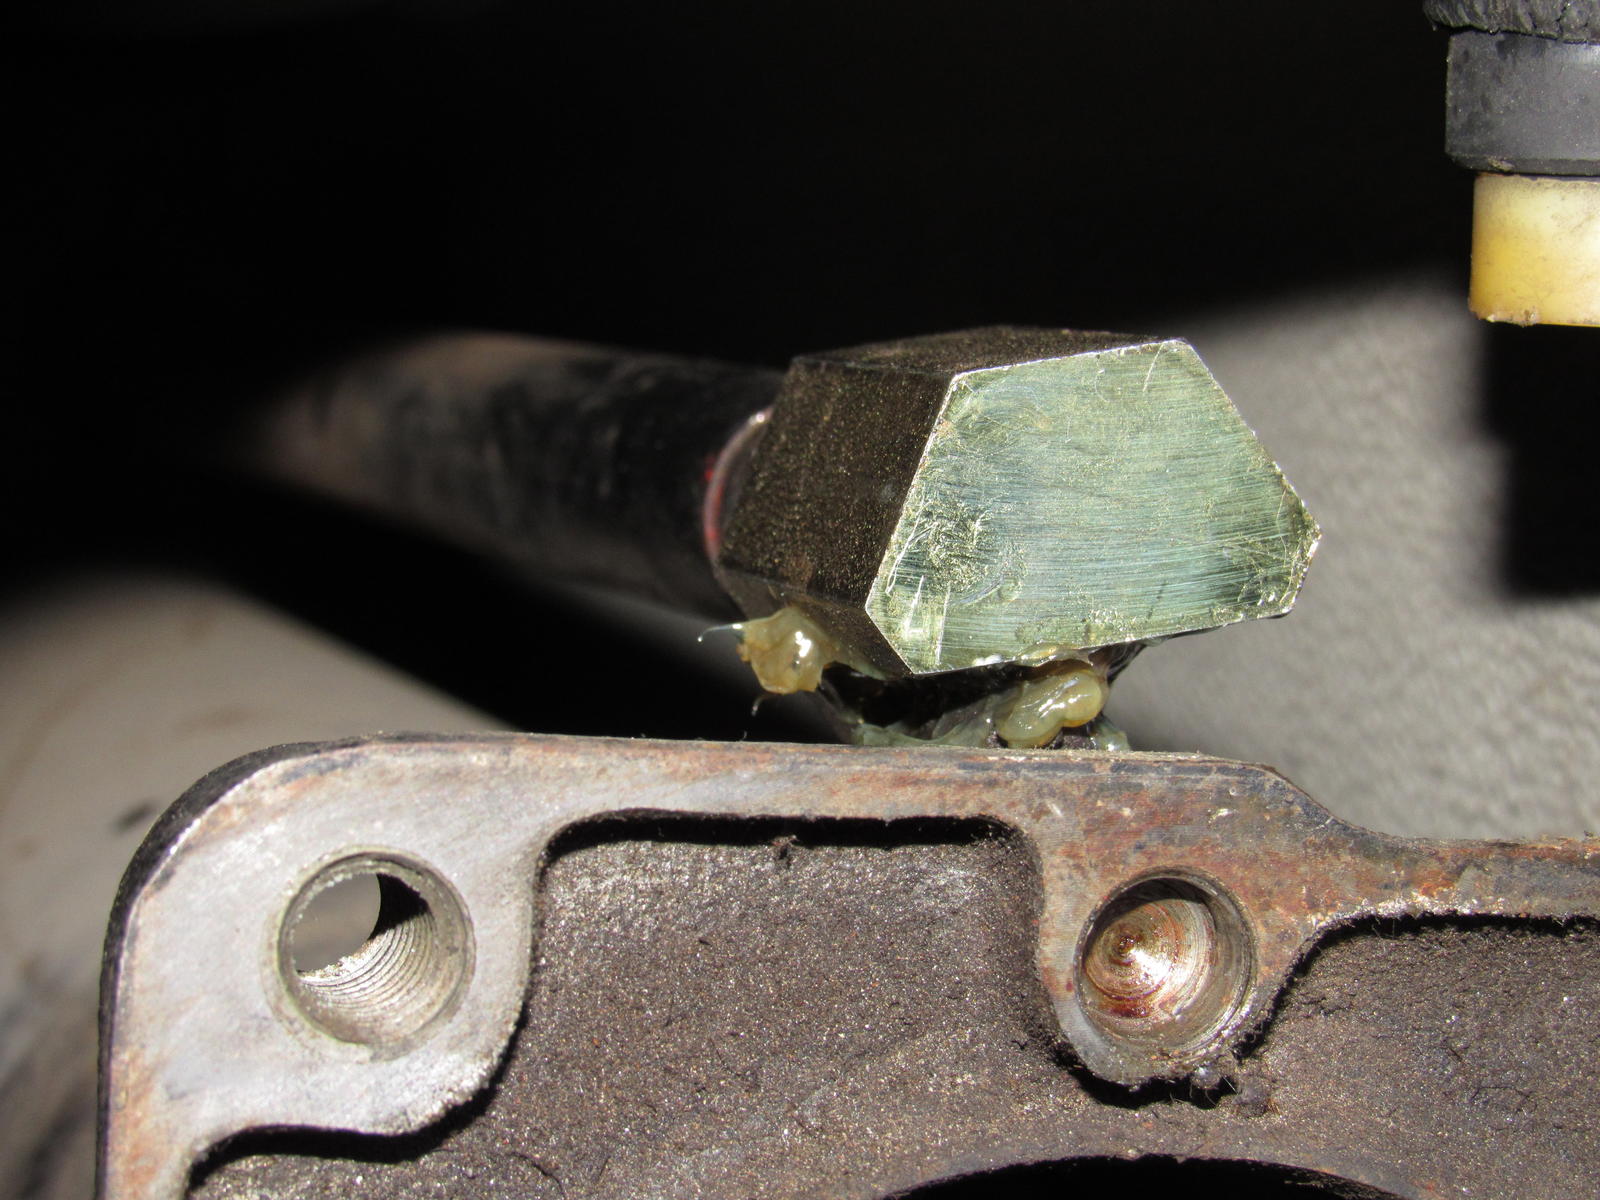
I looked at the heater valve and the connector to the vacuum tube was so loose it fell off and that is now fixed. Now the one eyesore on the car was the radiator support that someone tried using as a jacking point and bent. I was able to persuade back to level with a piece of 2x4 and a 3# hammer.
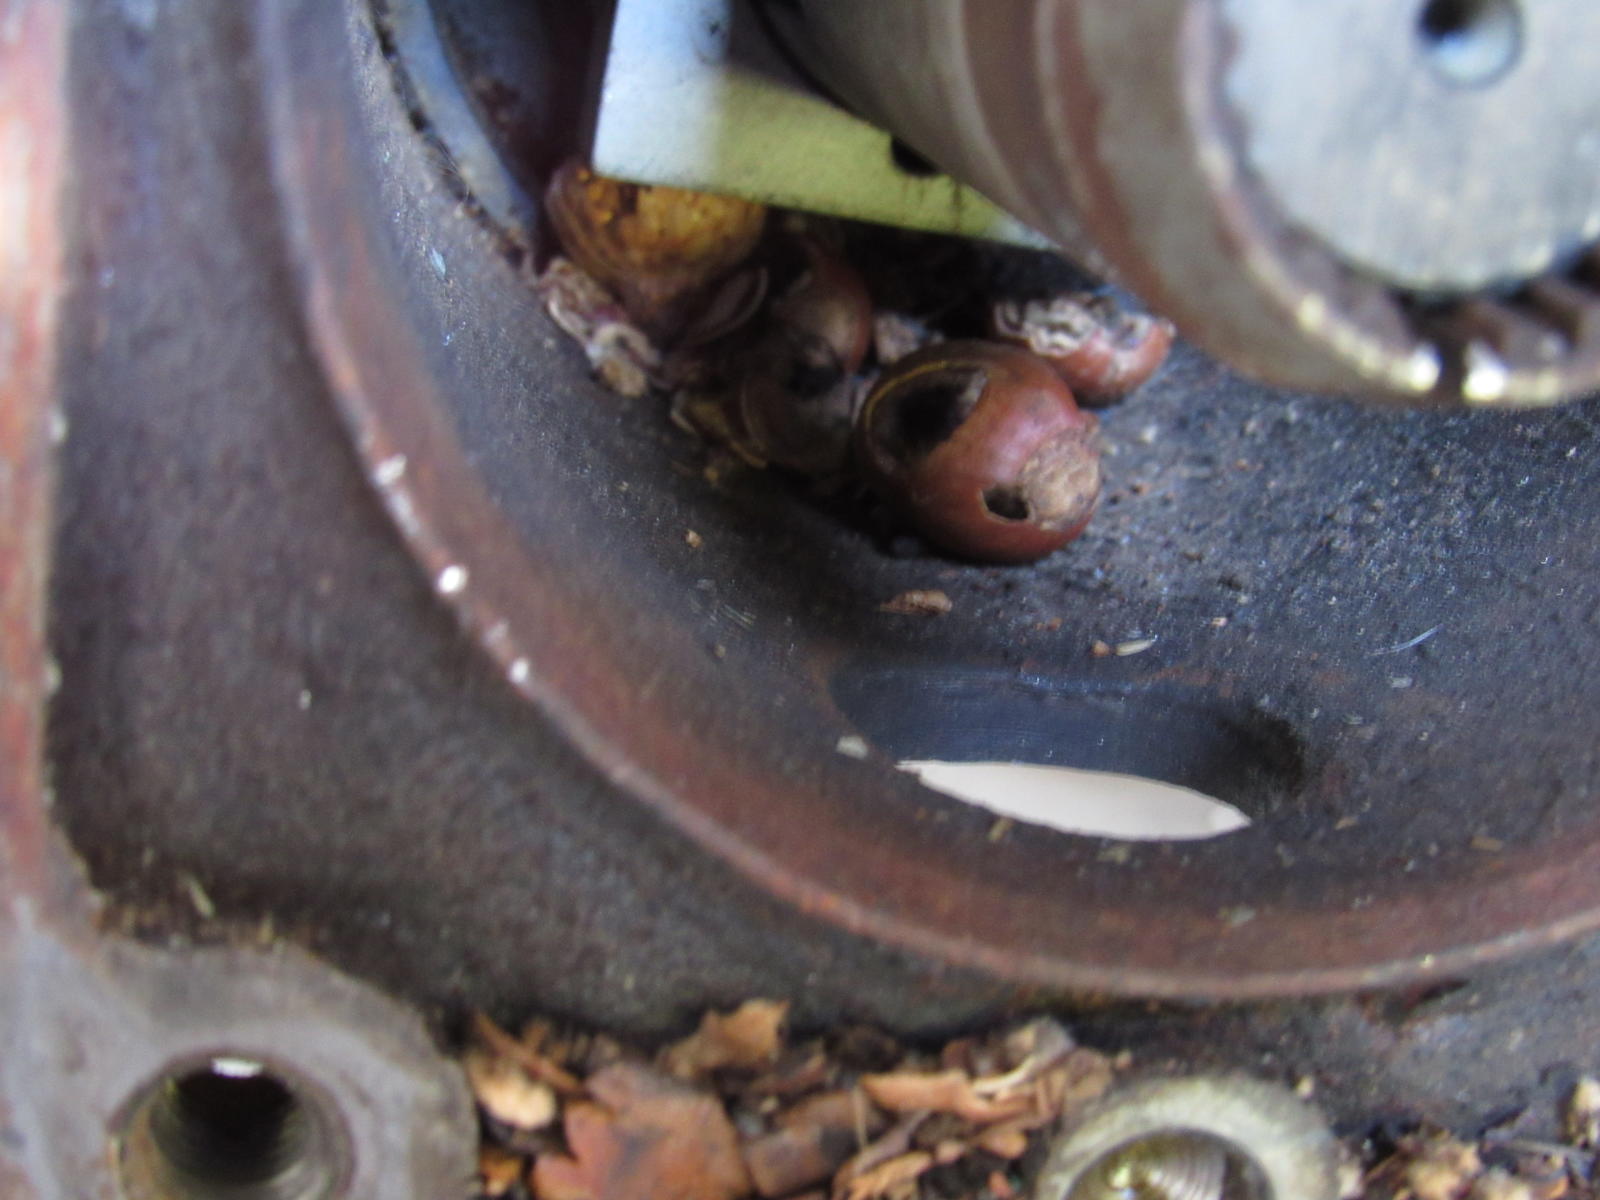
Lastly I found evidence of a furry friend living in the torque tube:
I looked at the heater valve and the connector to the vacuum tube was so loose it fell off and that is now fixed. Now the one eyesore on the car was the radiator support that someone tried using as a jacking point and bent. I was able to persuade back to level with a piece of 2x4 and a 3# hammer.
Lastly I found evidence of a furry friend living in the torque tube:
Last edited by Majestic Moose; 07-07-2017 at 11:54 PM.
06-07-2016, 11:56 AM
#38
Rennlist Member
06-11-2016, 02:13 PM
#39
Burning Brakes
Thread Starter
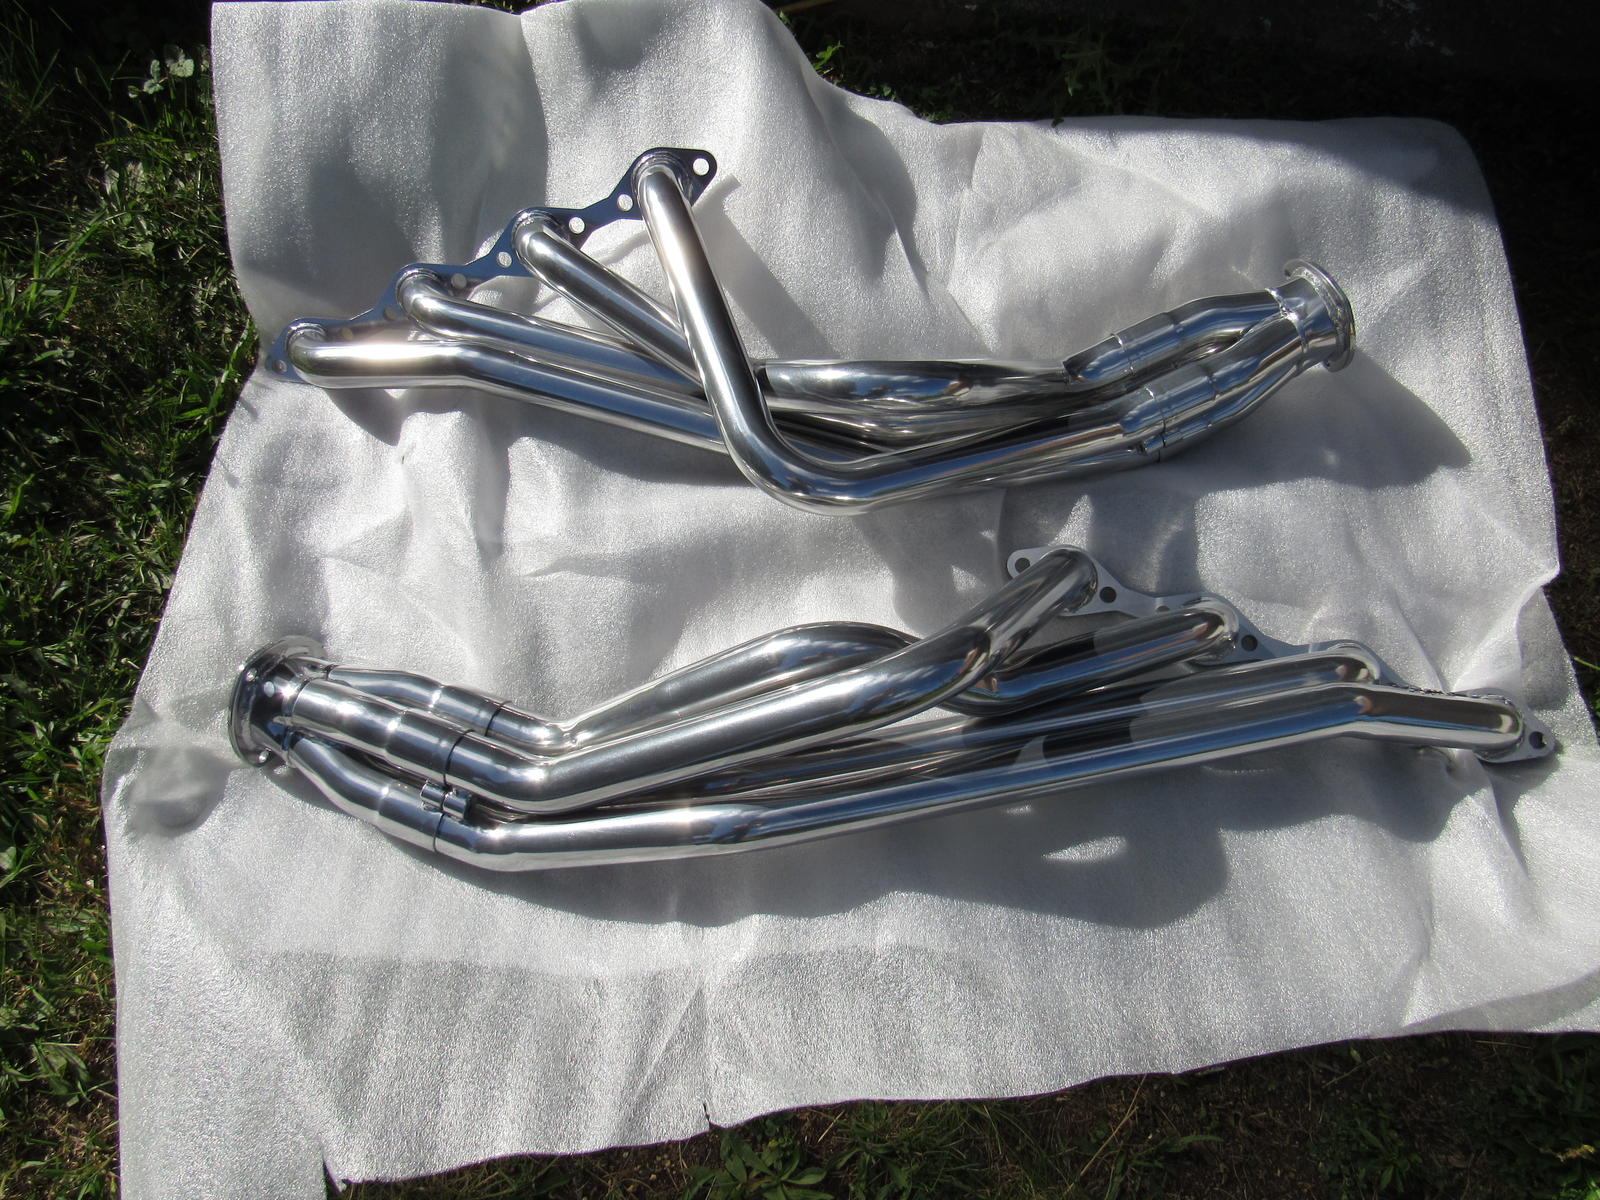
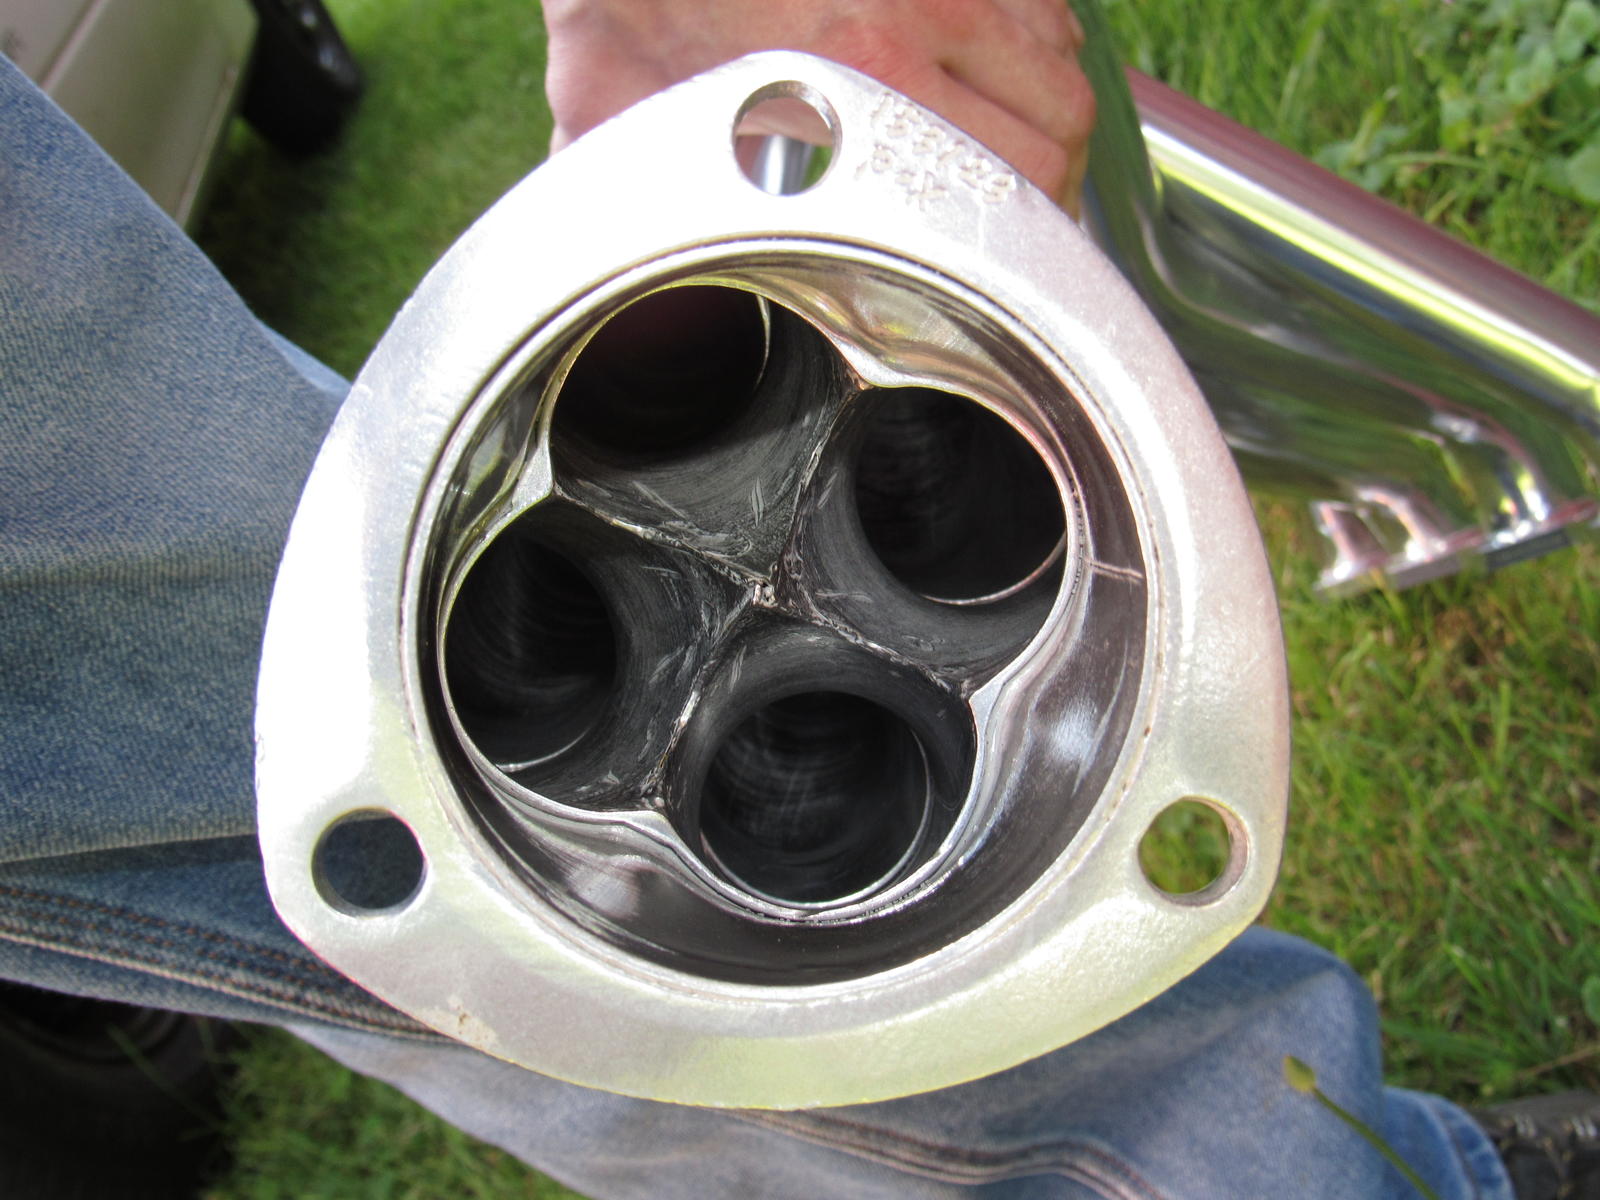
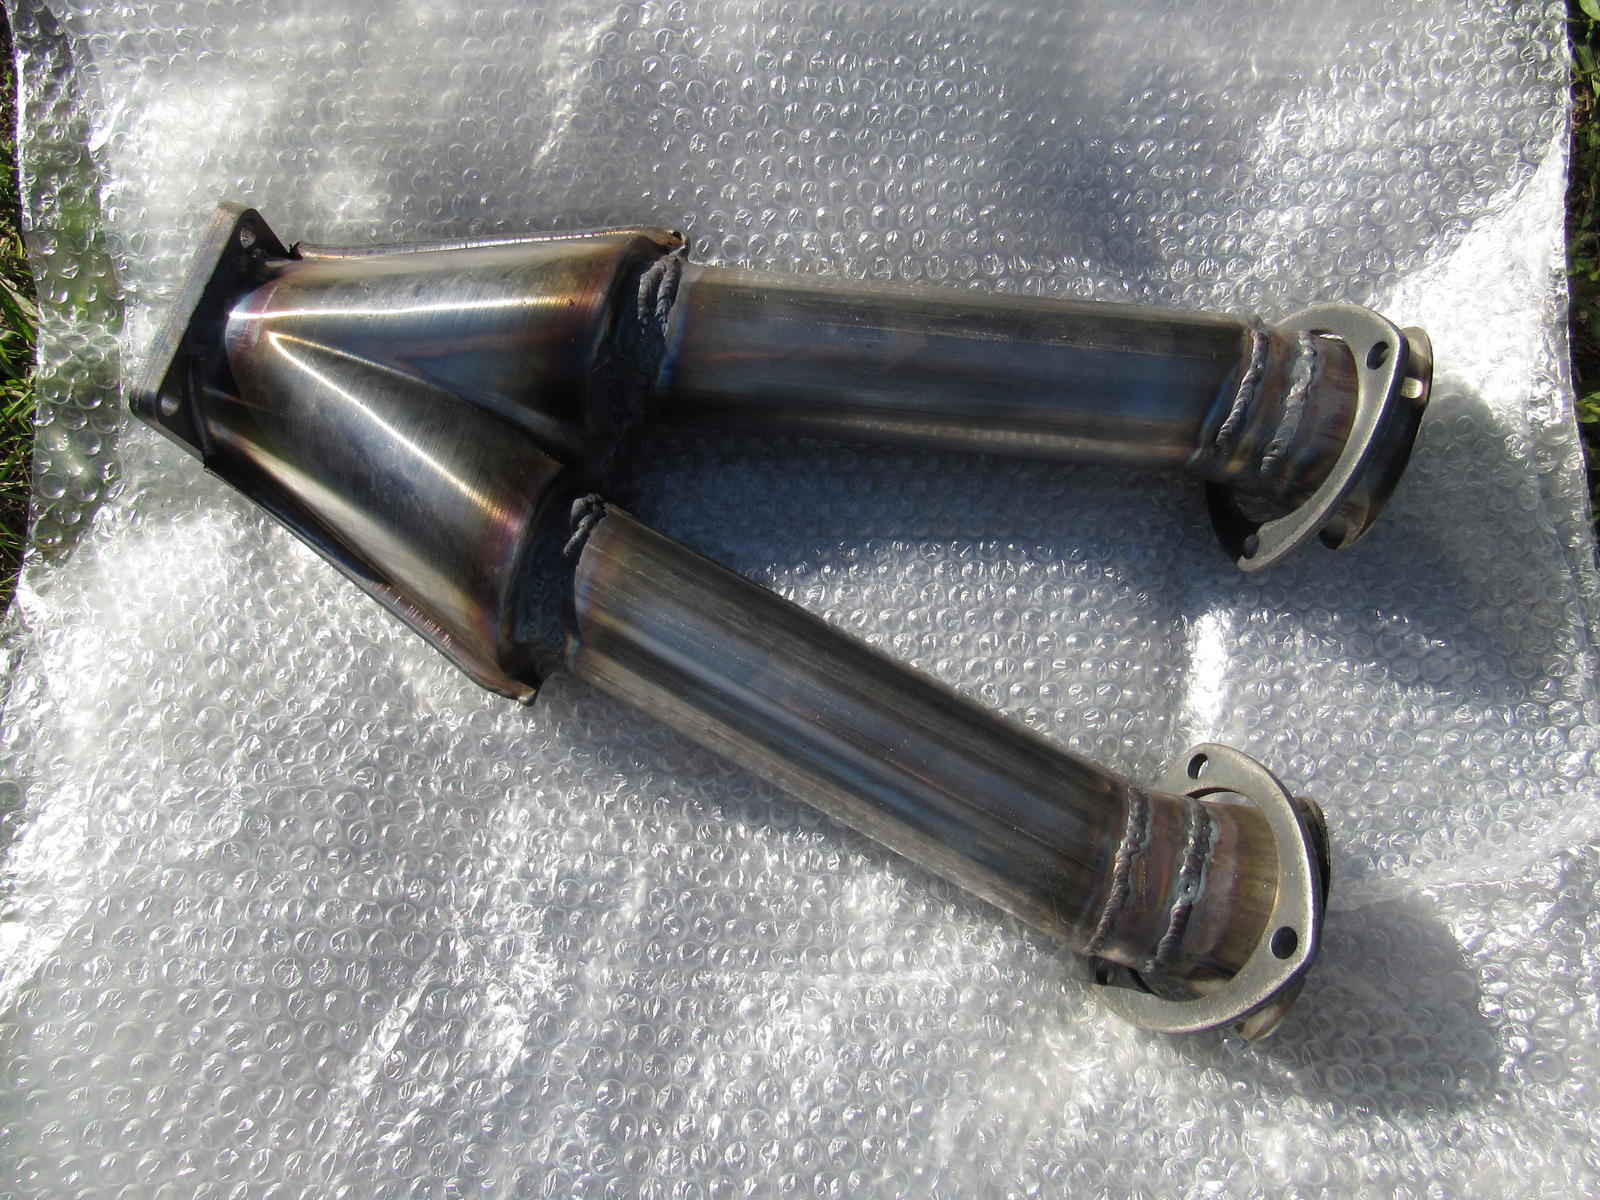
Things are going well, I received the headers and Y pipe, just waiting for the Borla cat-back portion of the exhaust.
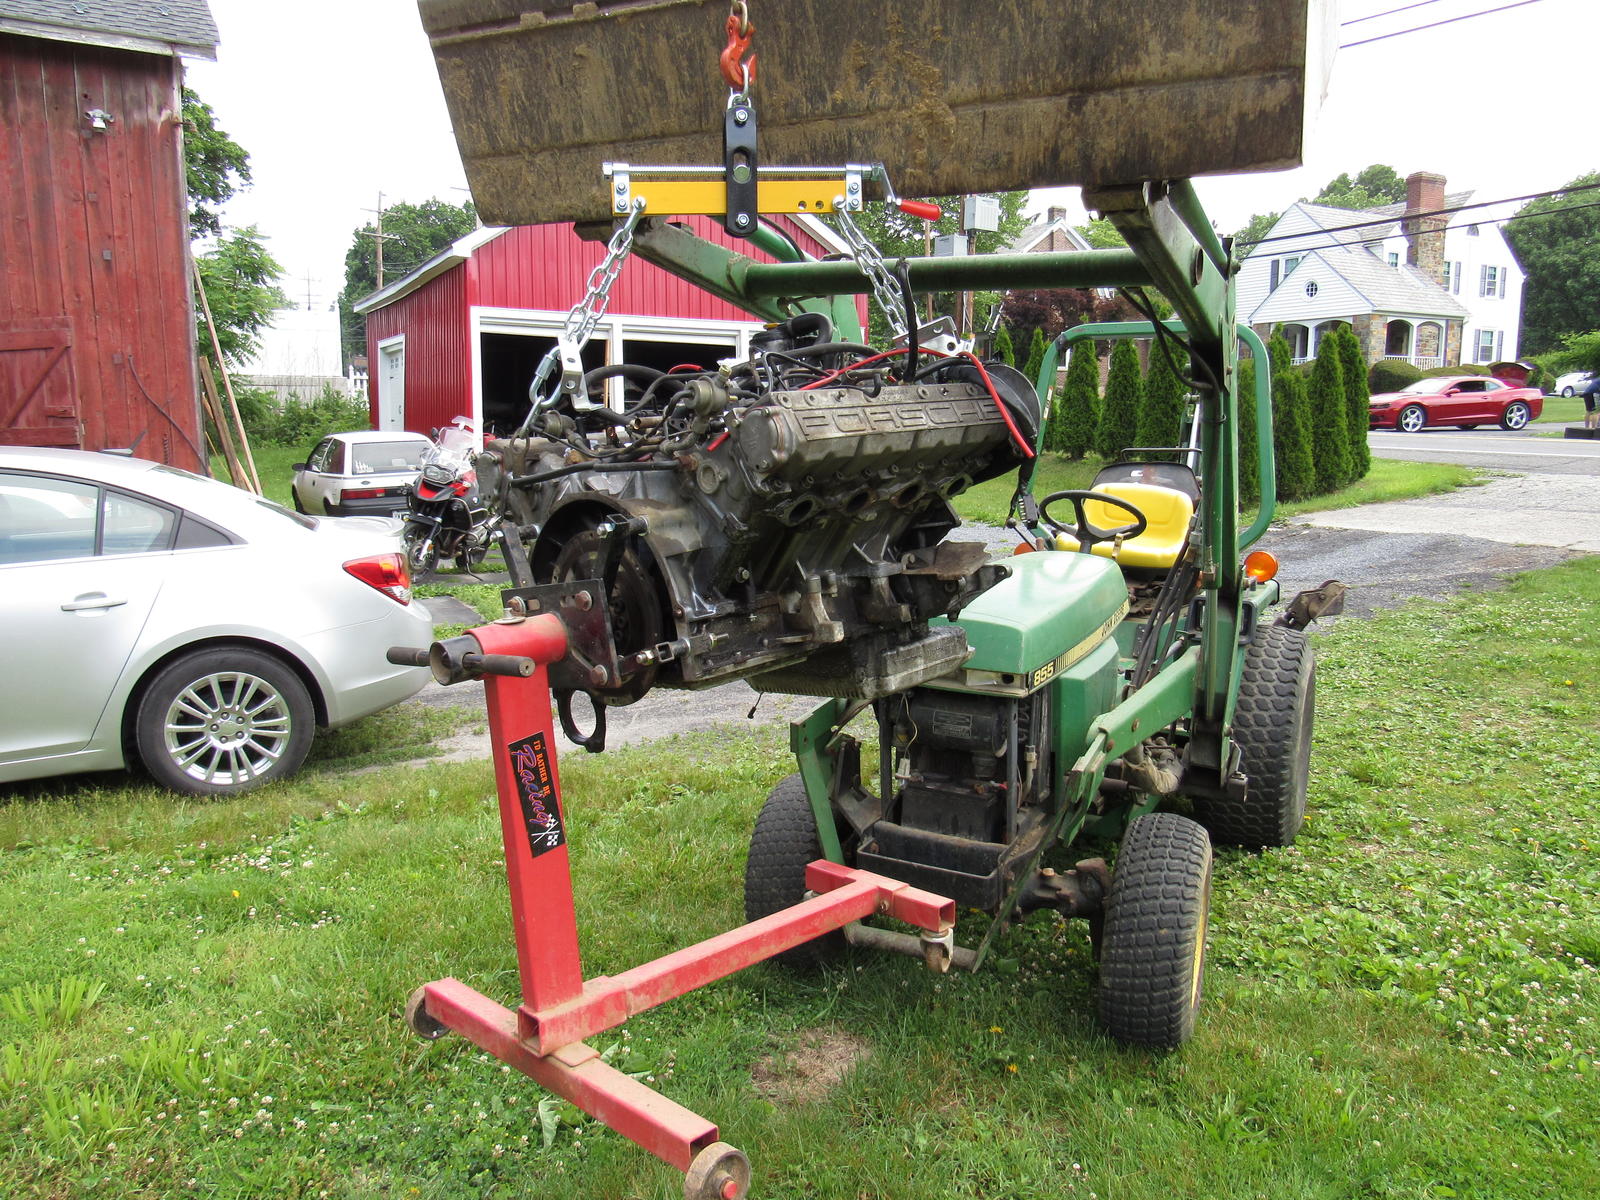
My neighbor helped me pull the engine outdoors so I could power wash the caked on oil and more importantly the coolant passages. This worked out really well and took a while for the water to start coming out clear.
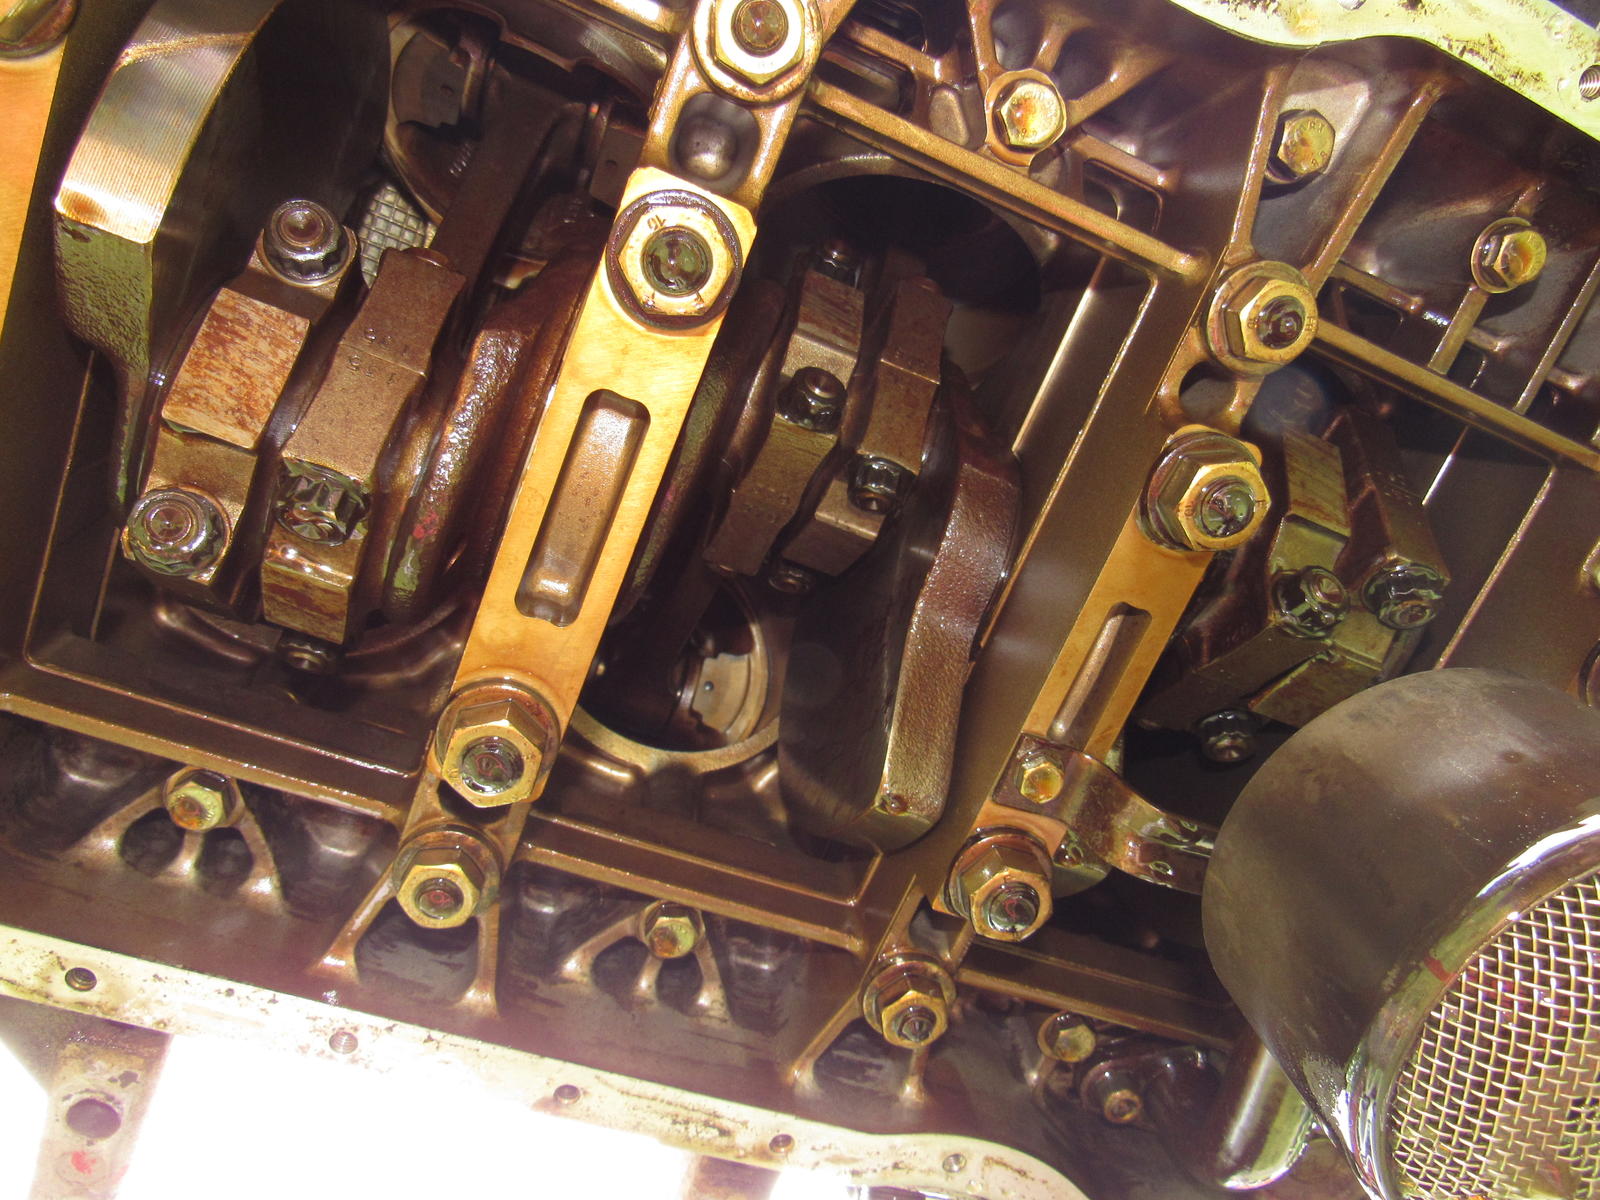
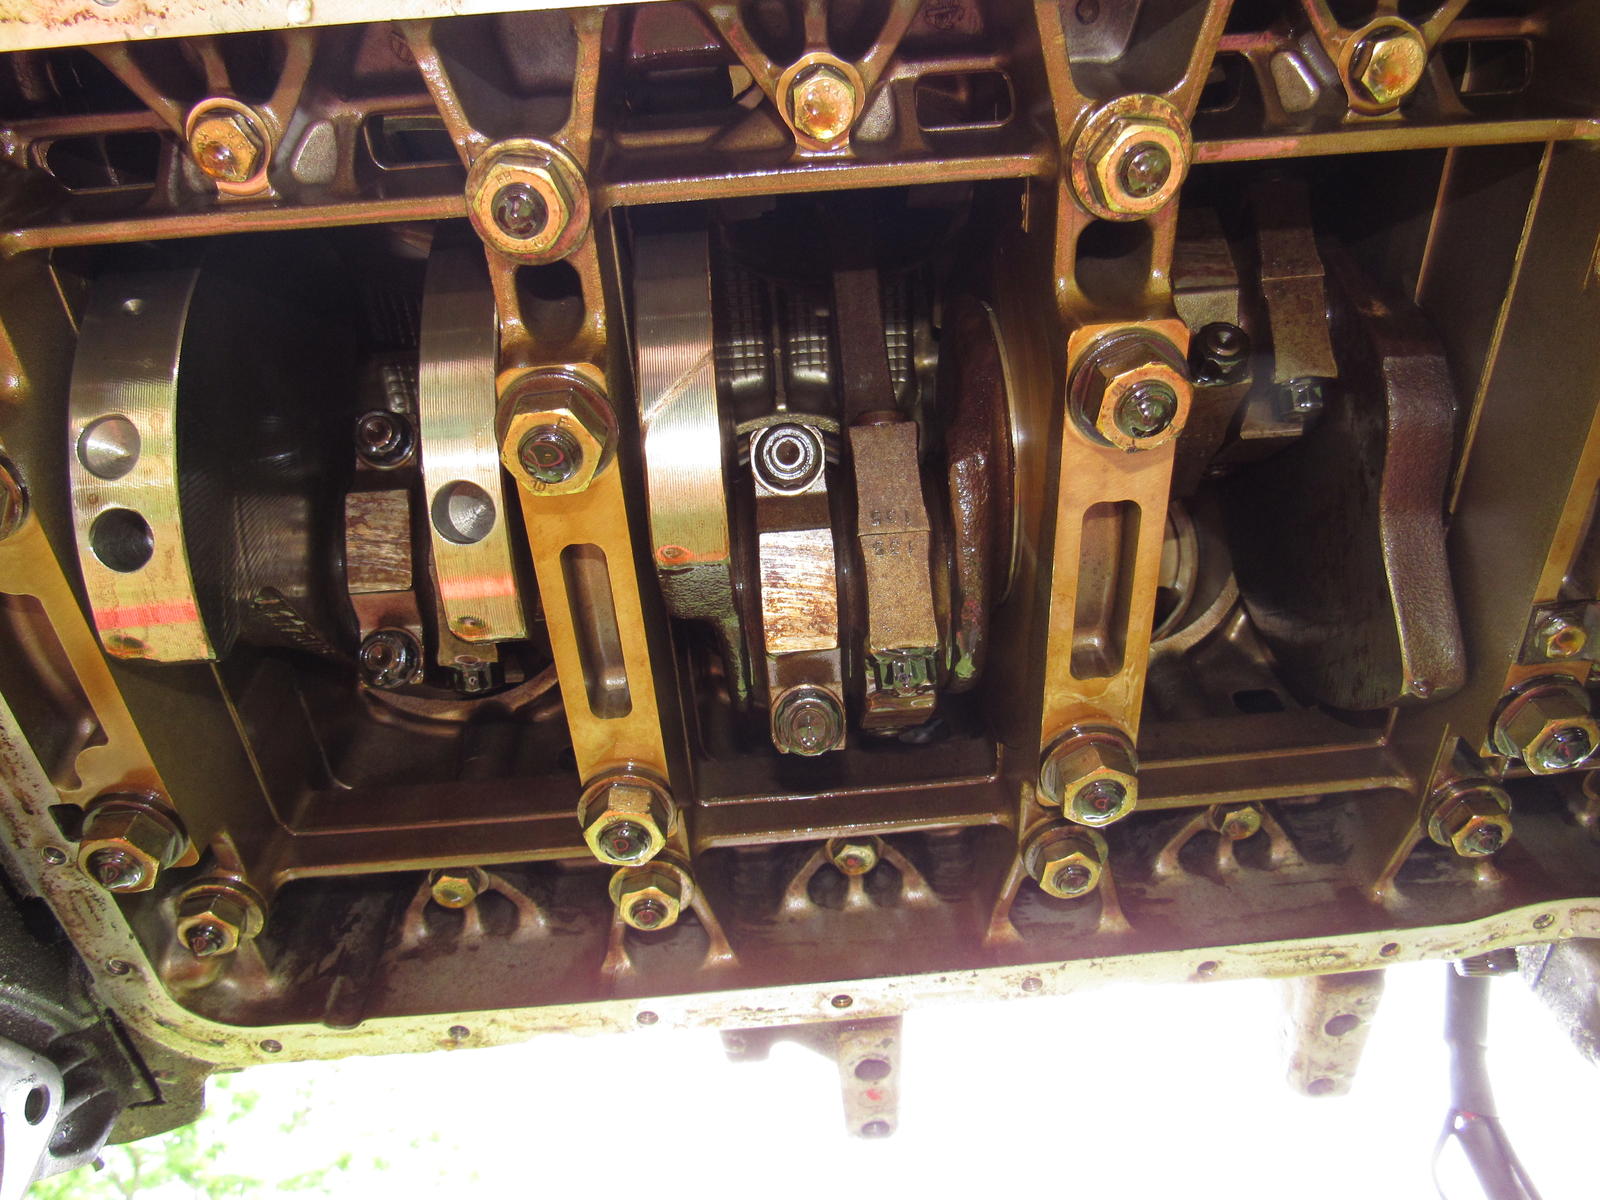
I've dropped the oil pan and am happy to find no sludge at all.

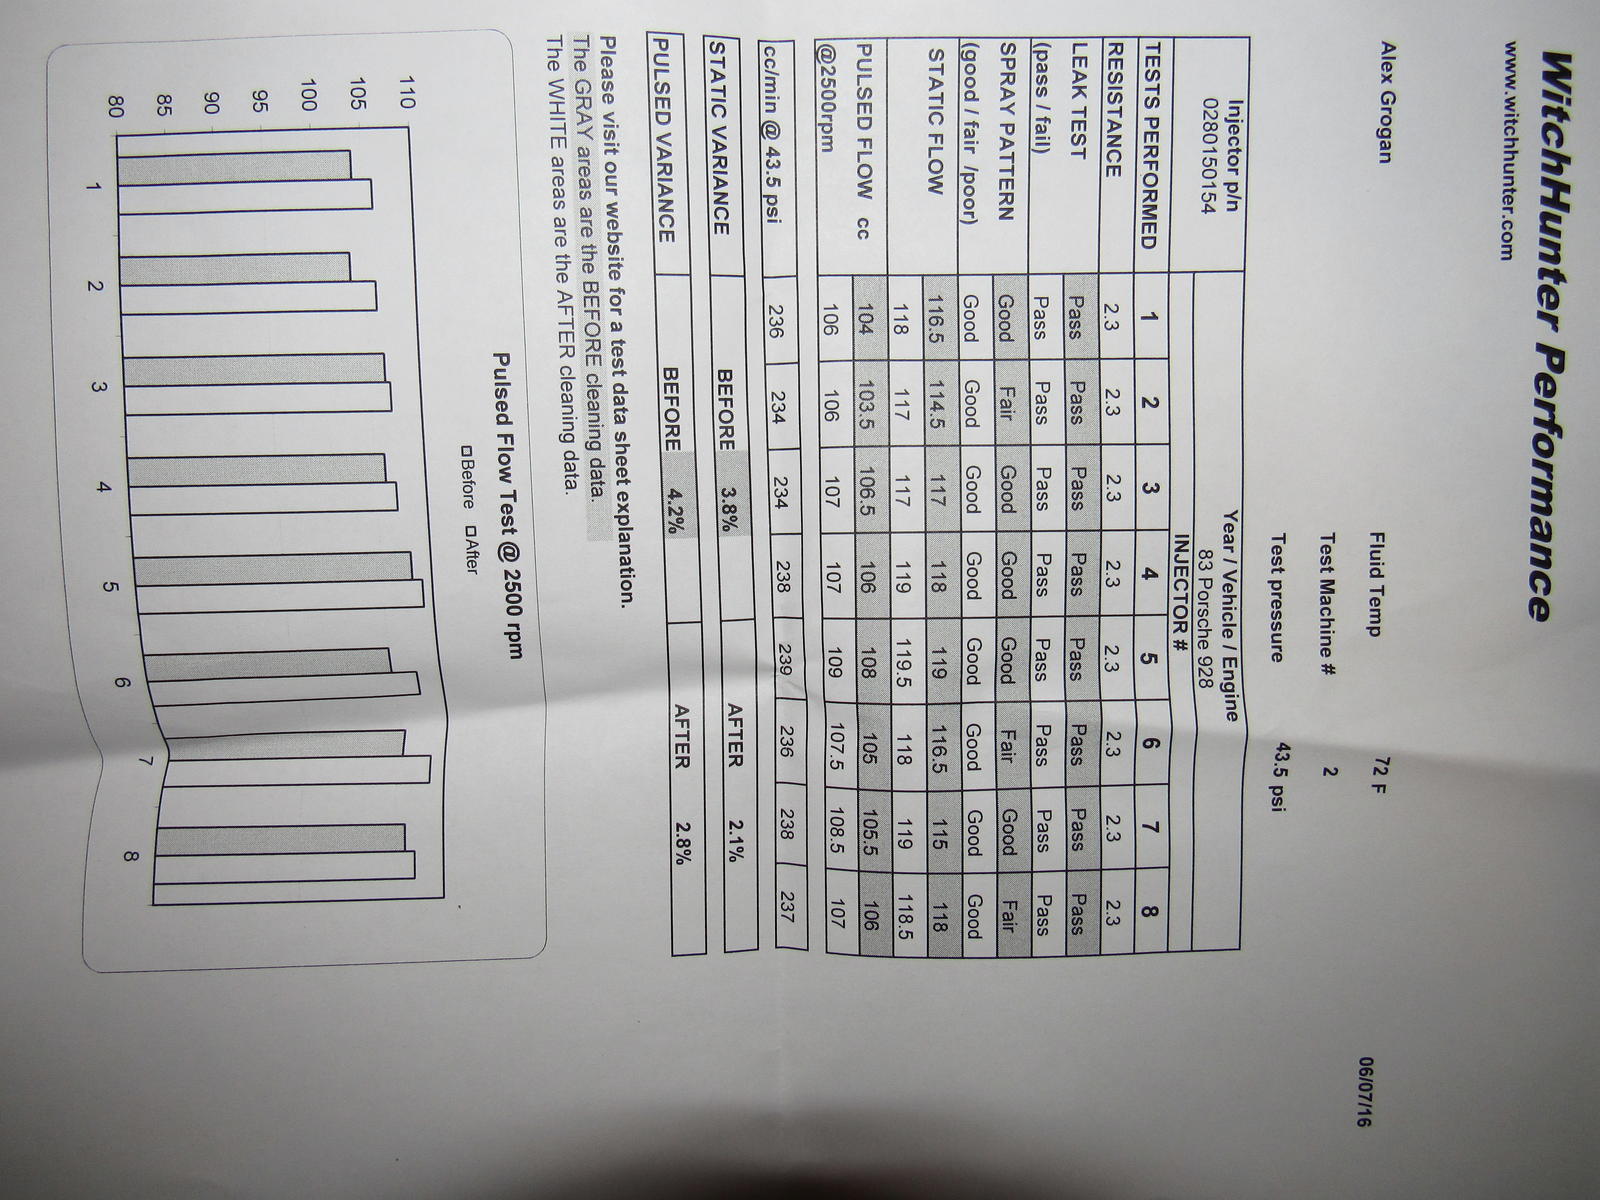
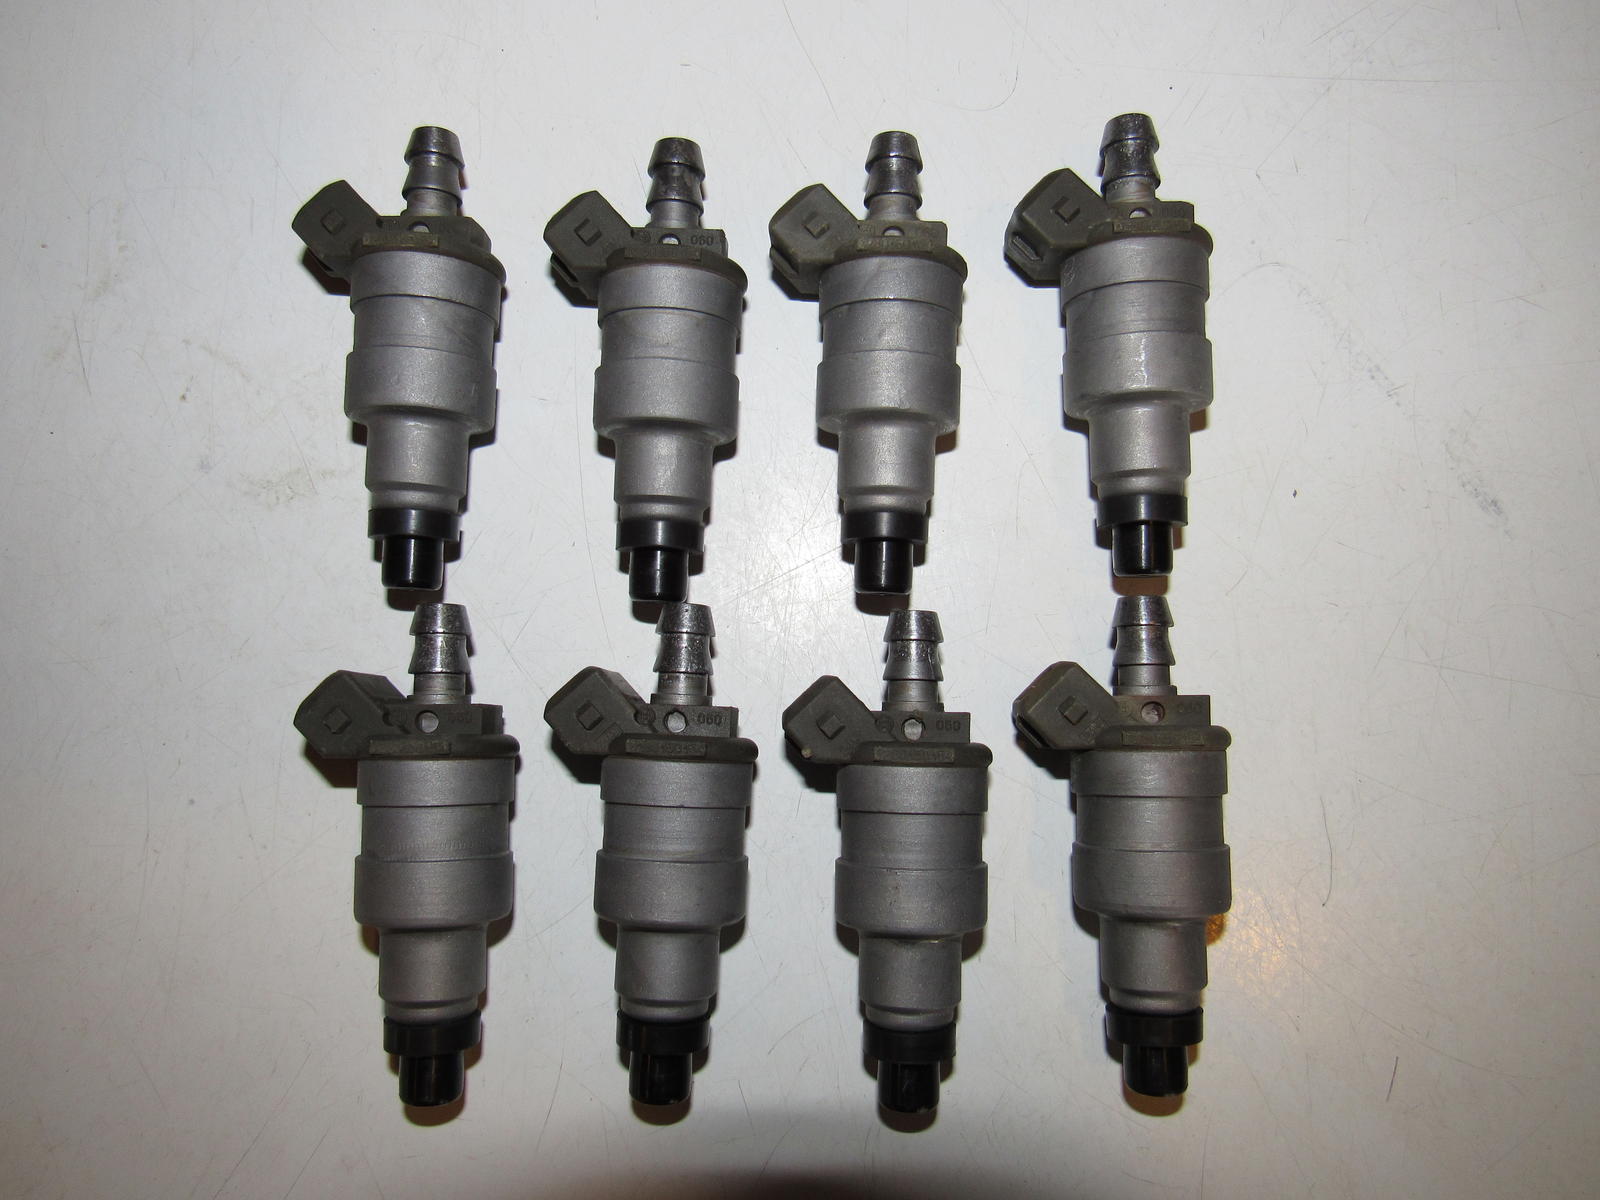
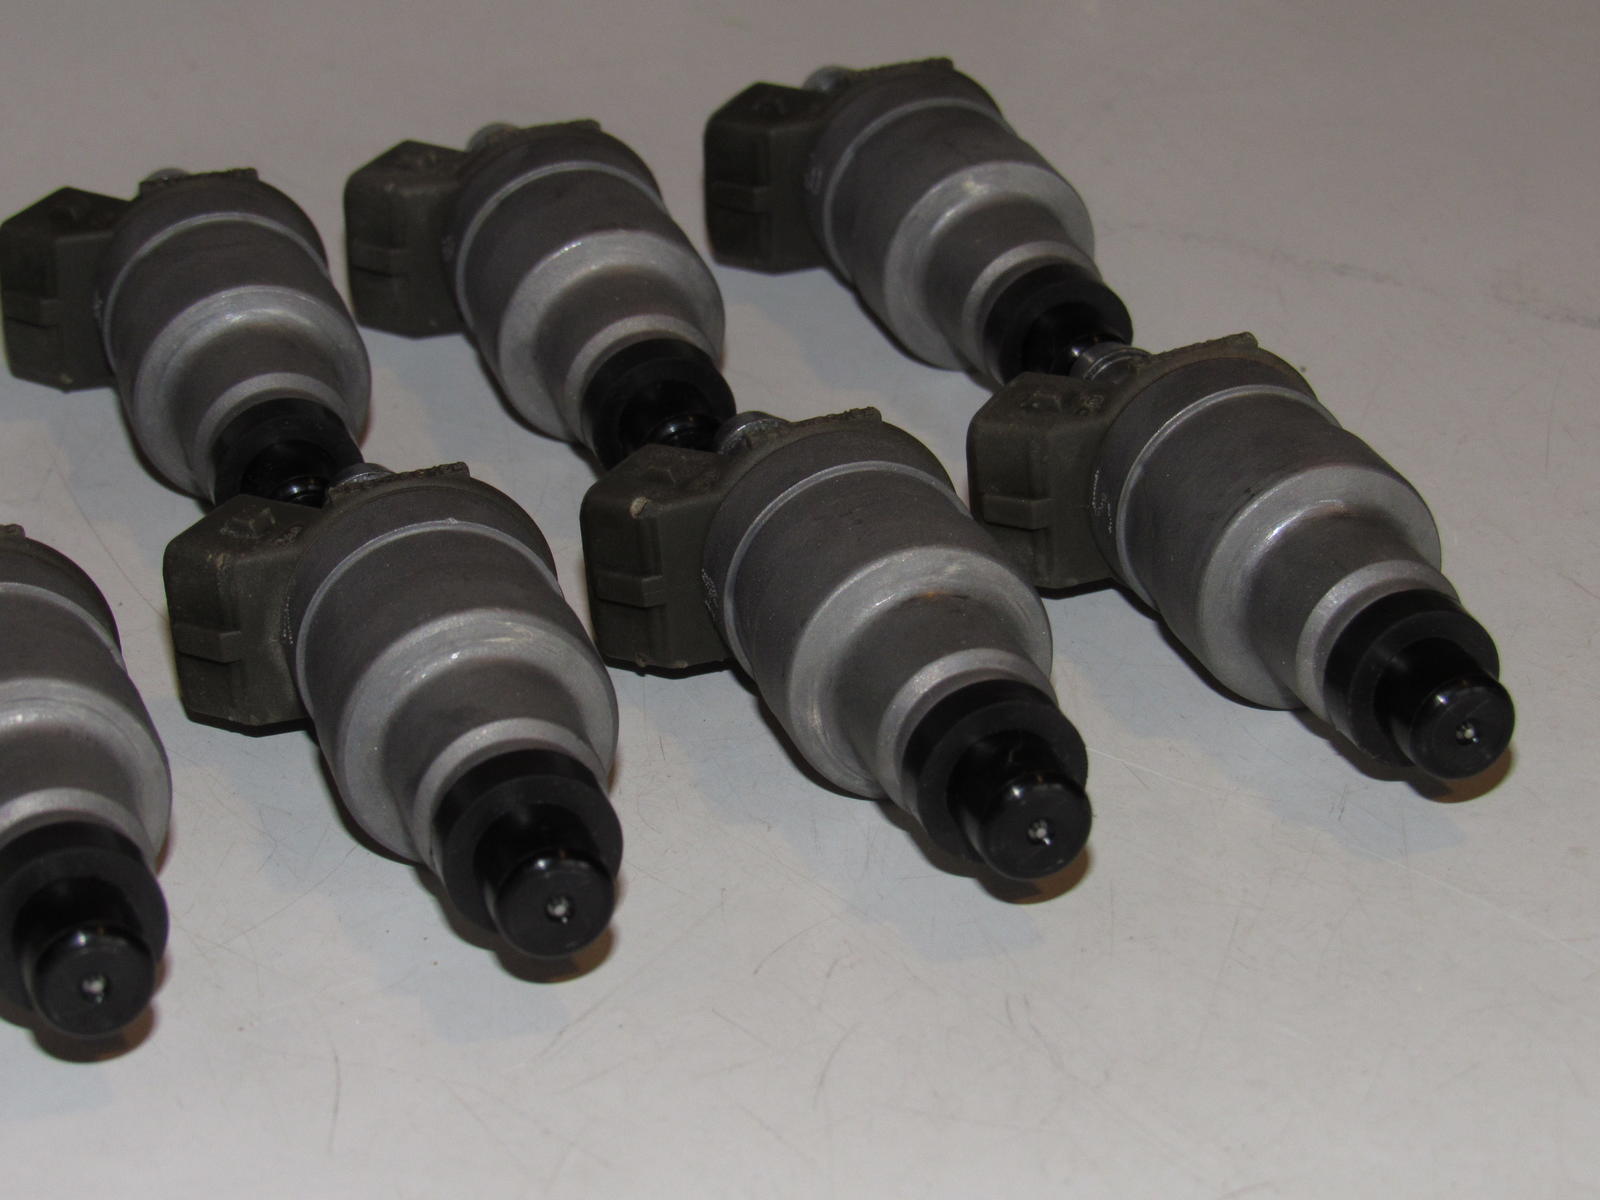
I also received my fuel injectors, they weren't too bad but three were rated with a fair spray pattern. Now that they are clean I see 1 through 8 numbers etched on them, was that done from the factory?
I've got to do some more cleaning but I'm pretty excited to flip the lever on my wrench to tighten bolts and reassemble.
My neighbor helped me pull the engine outdoors so I could power wash the caked on oil and more importantly the coolant passages. This worked out really well and took a while for the water to start coming out clear.
I've dropped the oil pan and am happy to find no sludge at all.
I also received my fuel injectors, they weren't too bad but three were rated with a fair spray pattern. Now that they are clean I see 1 through 8 numbers etched on them, was that done from the factory?
I've got to do some more cleaning but I'm pretty excited to flip the lever on my wrench to tighten bolts and reassemble.
Last edited by Majestic Moose; 07-08-2017 at 12:06 AM.
06-13-2016, 09:31 PM
#40
Burning Brakes
Thread Starter
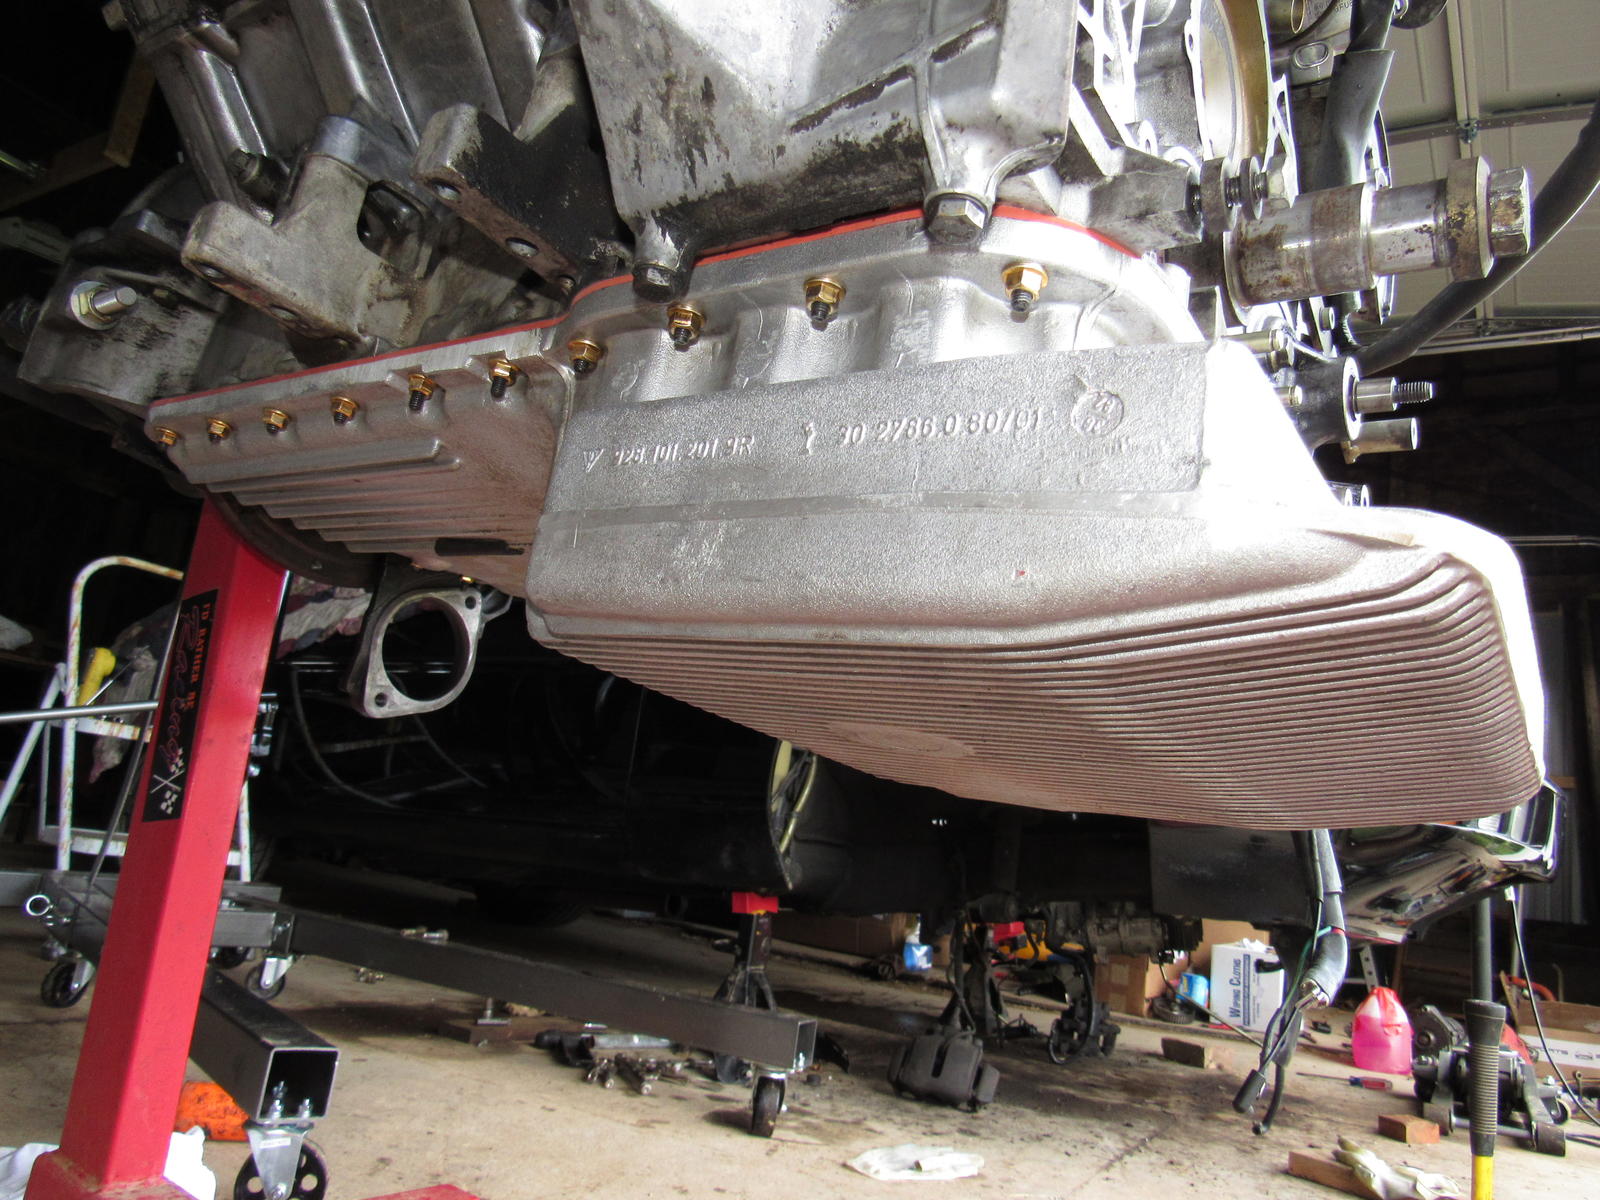
So yesterday started off well, I reinstalled the cleaned up oil pan.
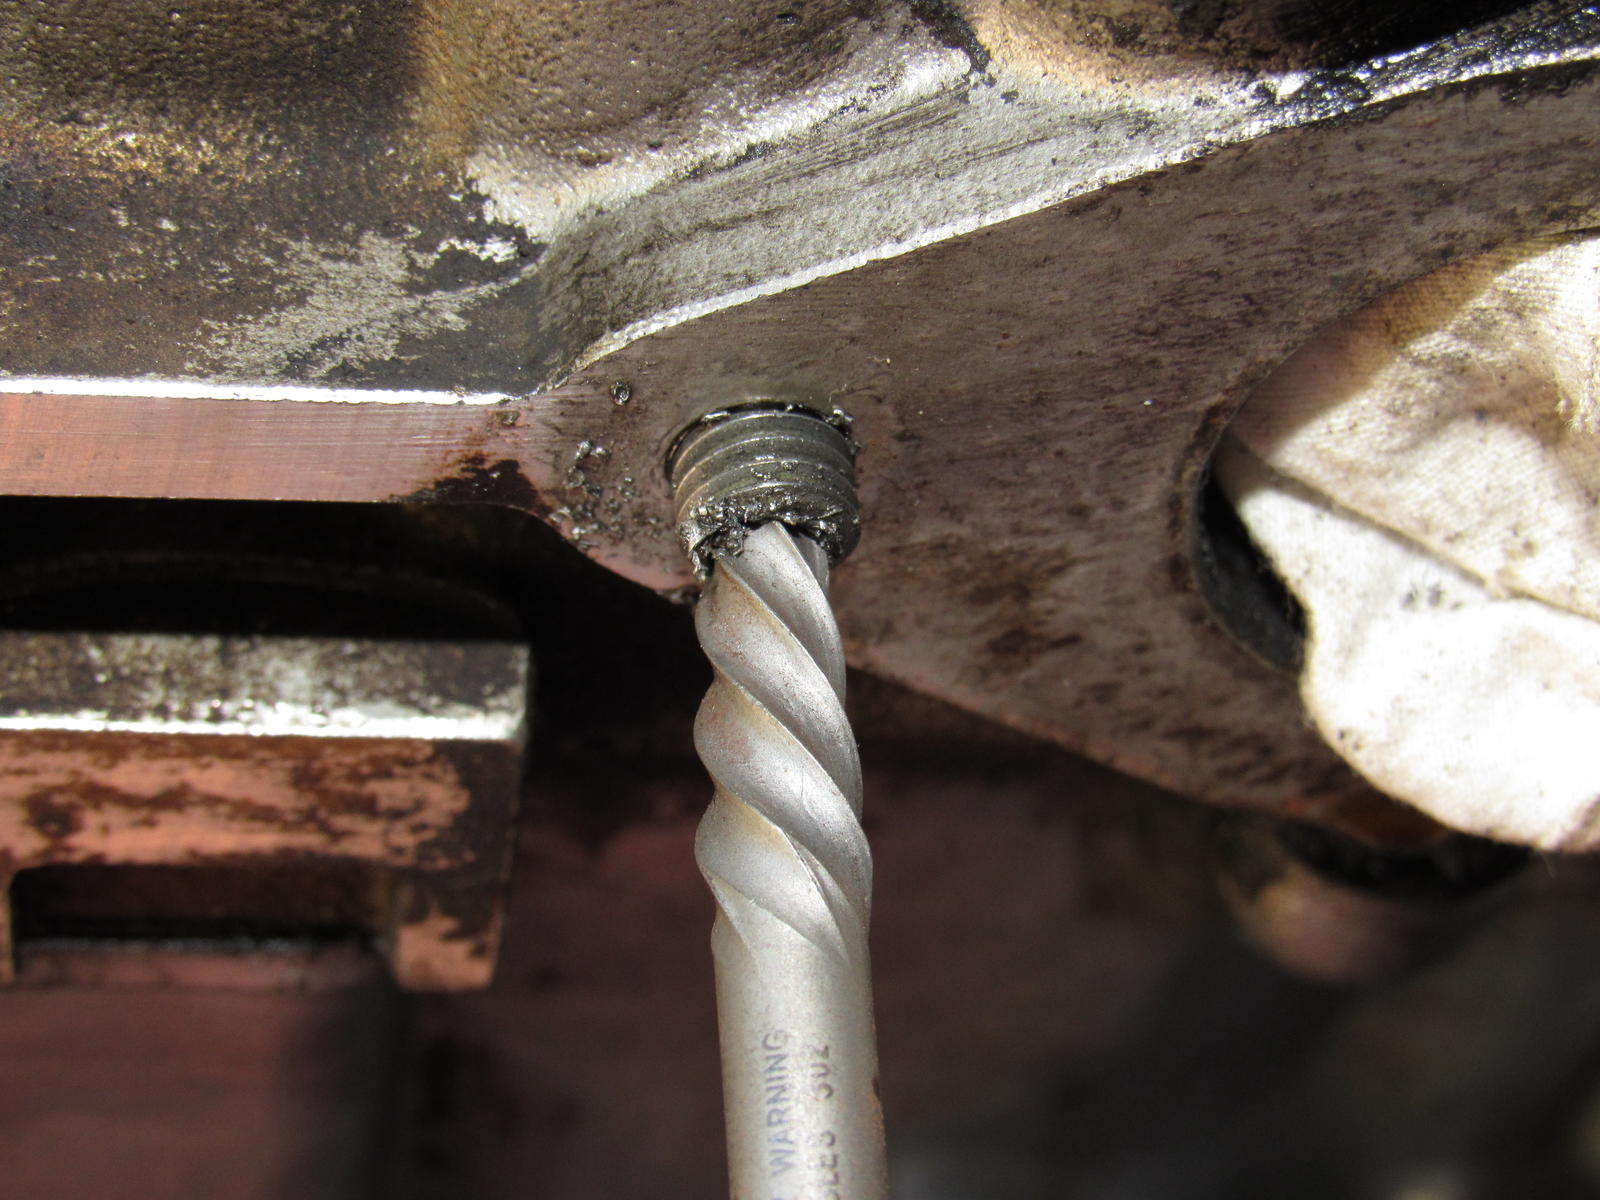
Then I attacked the broken exhaust studs. The only option was a bolt extractor and the first two came out alright but the extractor broke off in the third and my drill bit broke in the fourth. I was very careful since I knew the risks. I'm not going to worry about it, there was no exhaust leak before and now I will have two more new studs. If/when I rebuild the engine I will let professionals in a machine shop handle it.
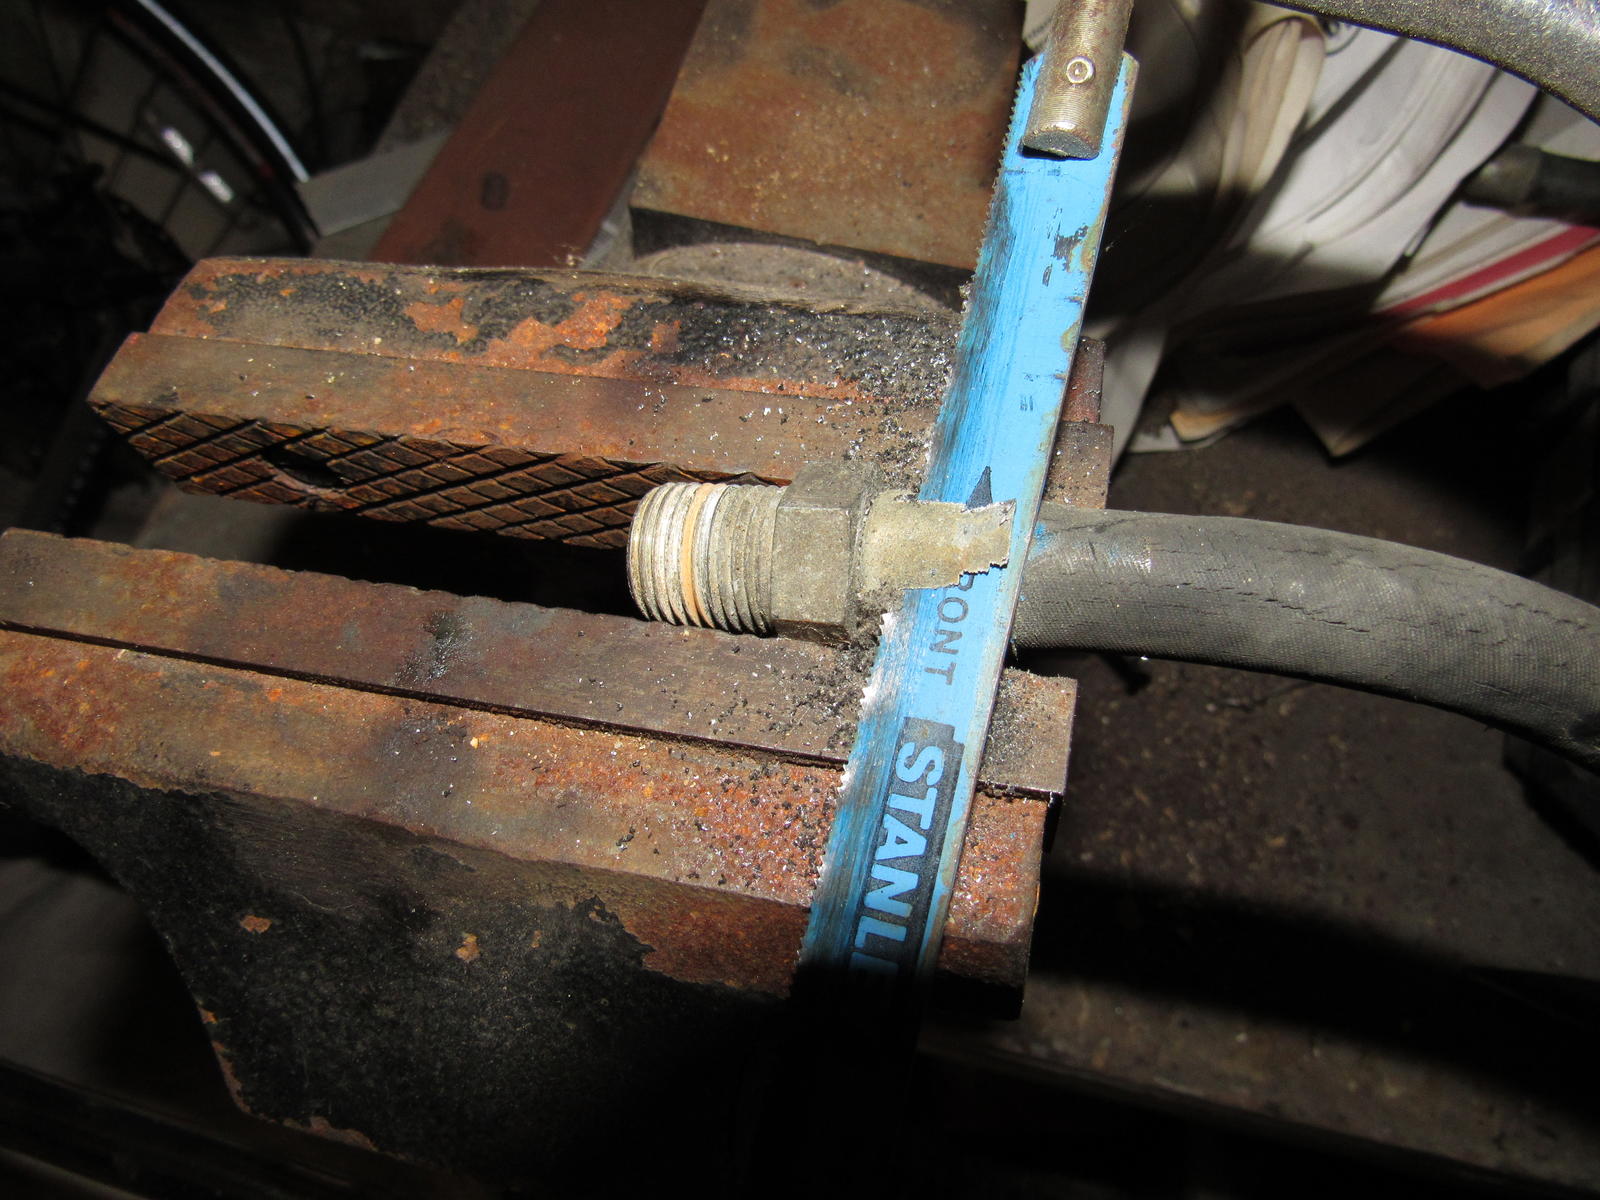
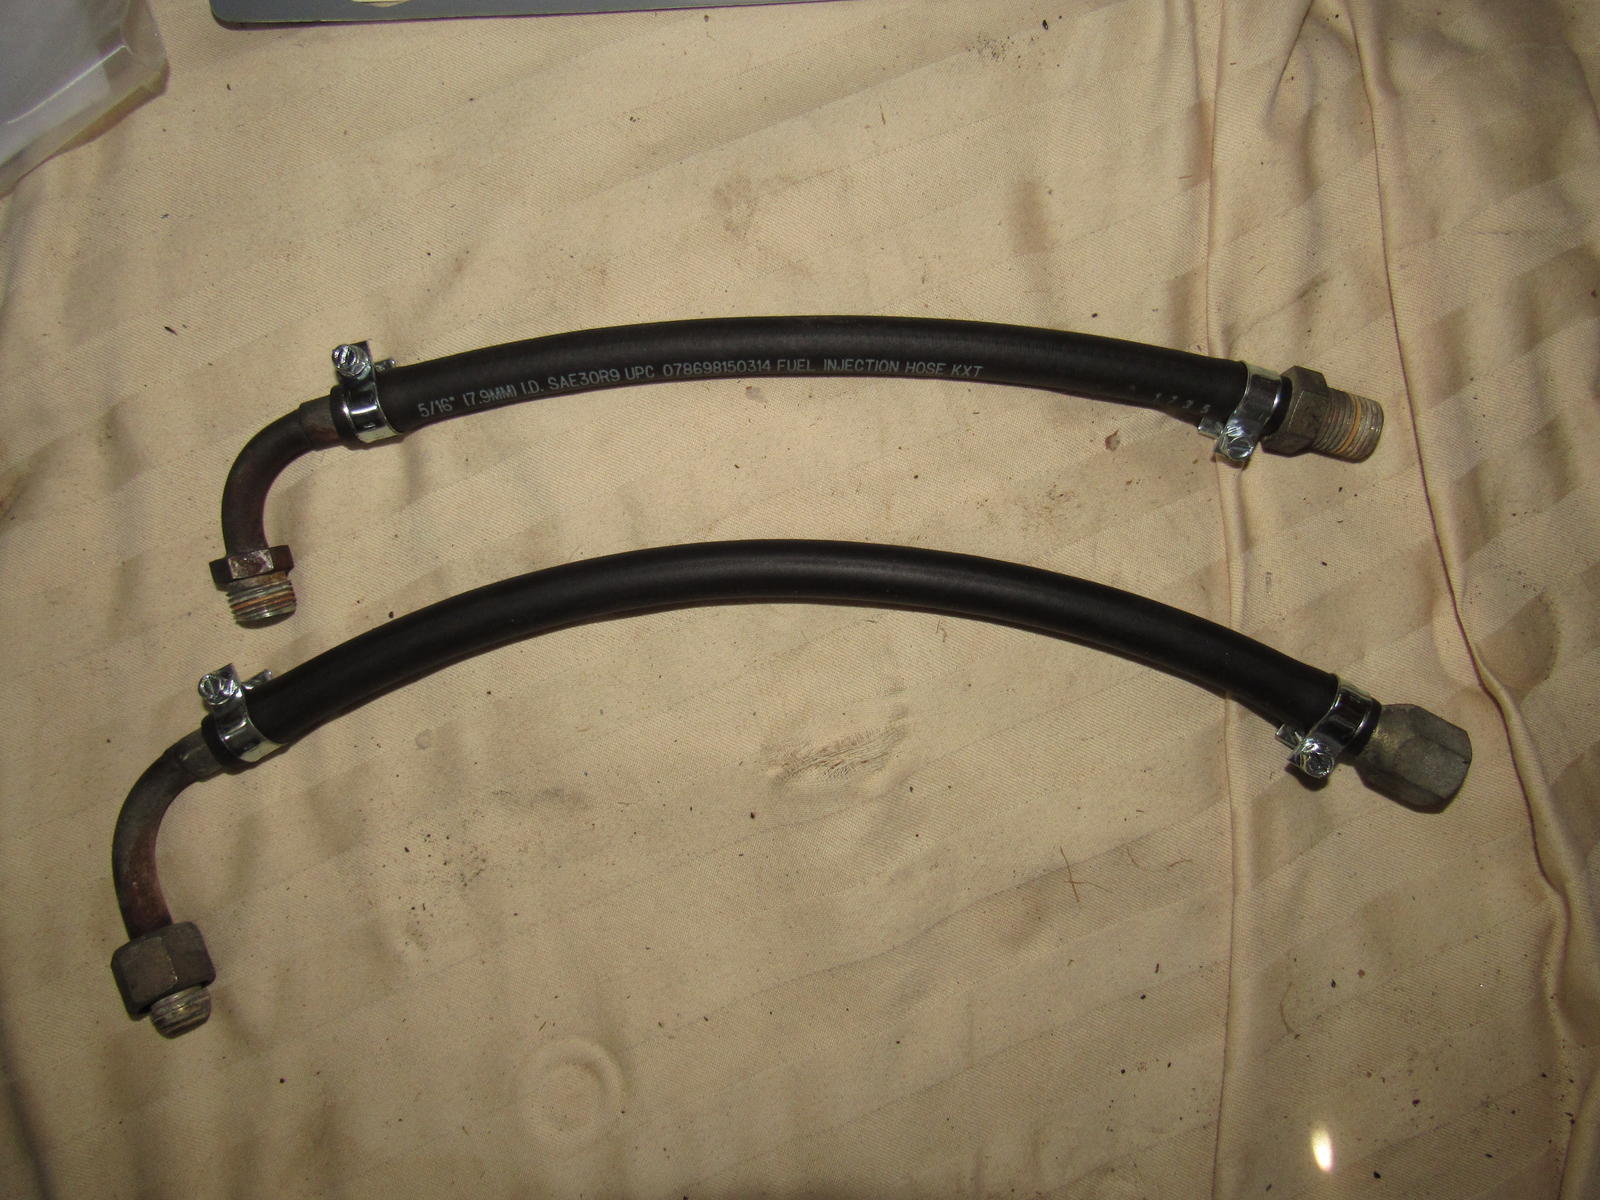
I replaced the main fuel hoses, this was the easiest task on the car so far. I used the hacksaw method to get the fittings off.
Then I took the opportunity to replace the shifter ball cup with the unit from 928 Motorsports. This was quite a frustrating task even with the torque tube left to hang down and me sitting in the engine bay. I wasn't able to get it adjusted as tight as I would like but it will have to do.
Then I attacked the broken exhaust studs. The only option was a bolt extractor and the first two came out alright but the extractor broke off in the third and my drill bit broke in the fourth. I was very careful since I knew the risks. I'm not going to worry about it, there was no exhaust leak before and now I will have two more new studs. If/when I rebuild the engine I will let professionals in a machine shop handle it.
I replaced the main fuel hoses, this was the easiest task on the car so far. I used the hacksaw method to get the fittings off.
Then I took the opportunity to replace the shifter ball cup with the unit from 928 Motorsports. This was quite a frustrating task even with the torque tube left to hang down and me sitting in the engine bay. I wasn't able to get it adjusted as tight as I would like but it will have to do.
Last edited by Majestic Moose; 07-08-2017 at 12:13 AM.
06-20-2016, 10:32 PM
#43
Burning Brakes
Thread Starter
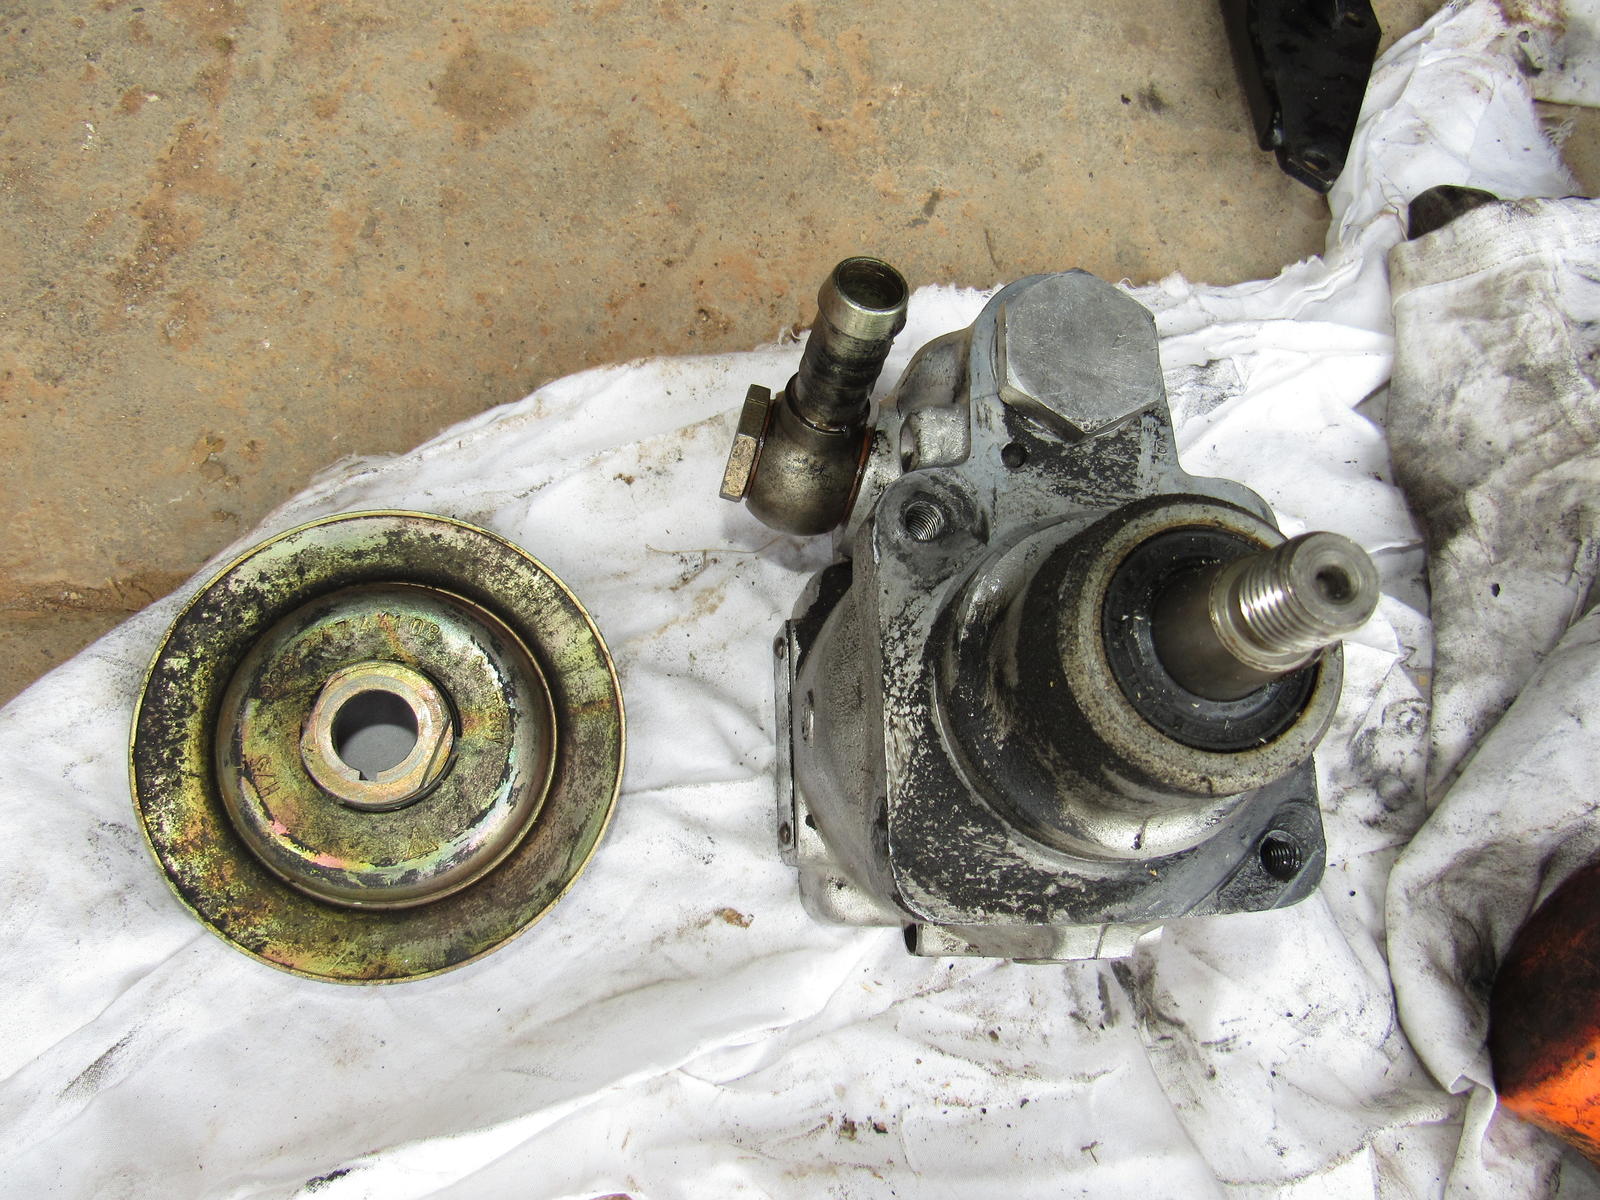
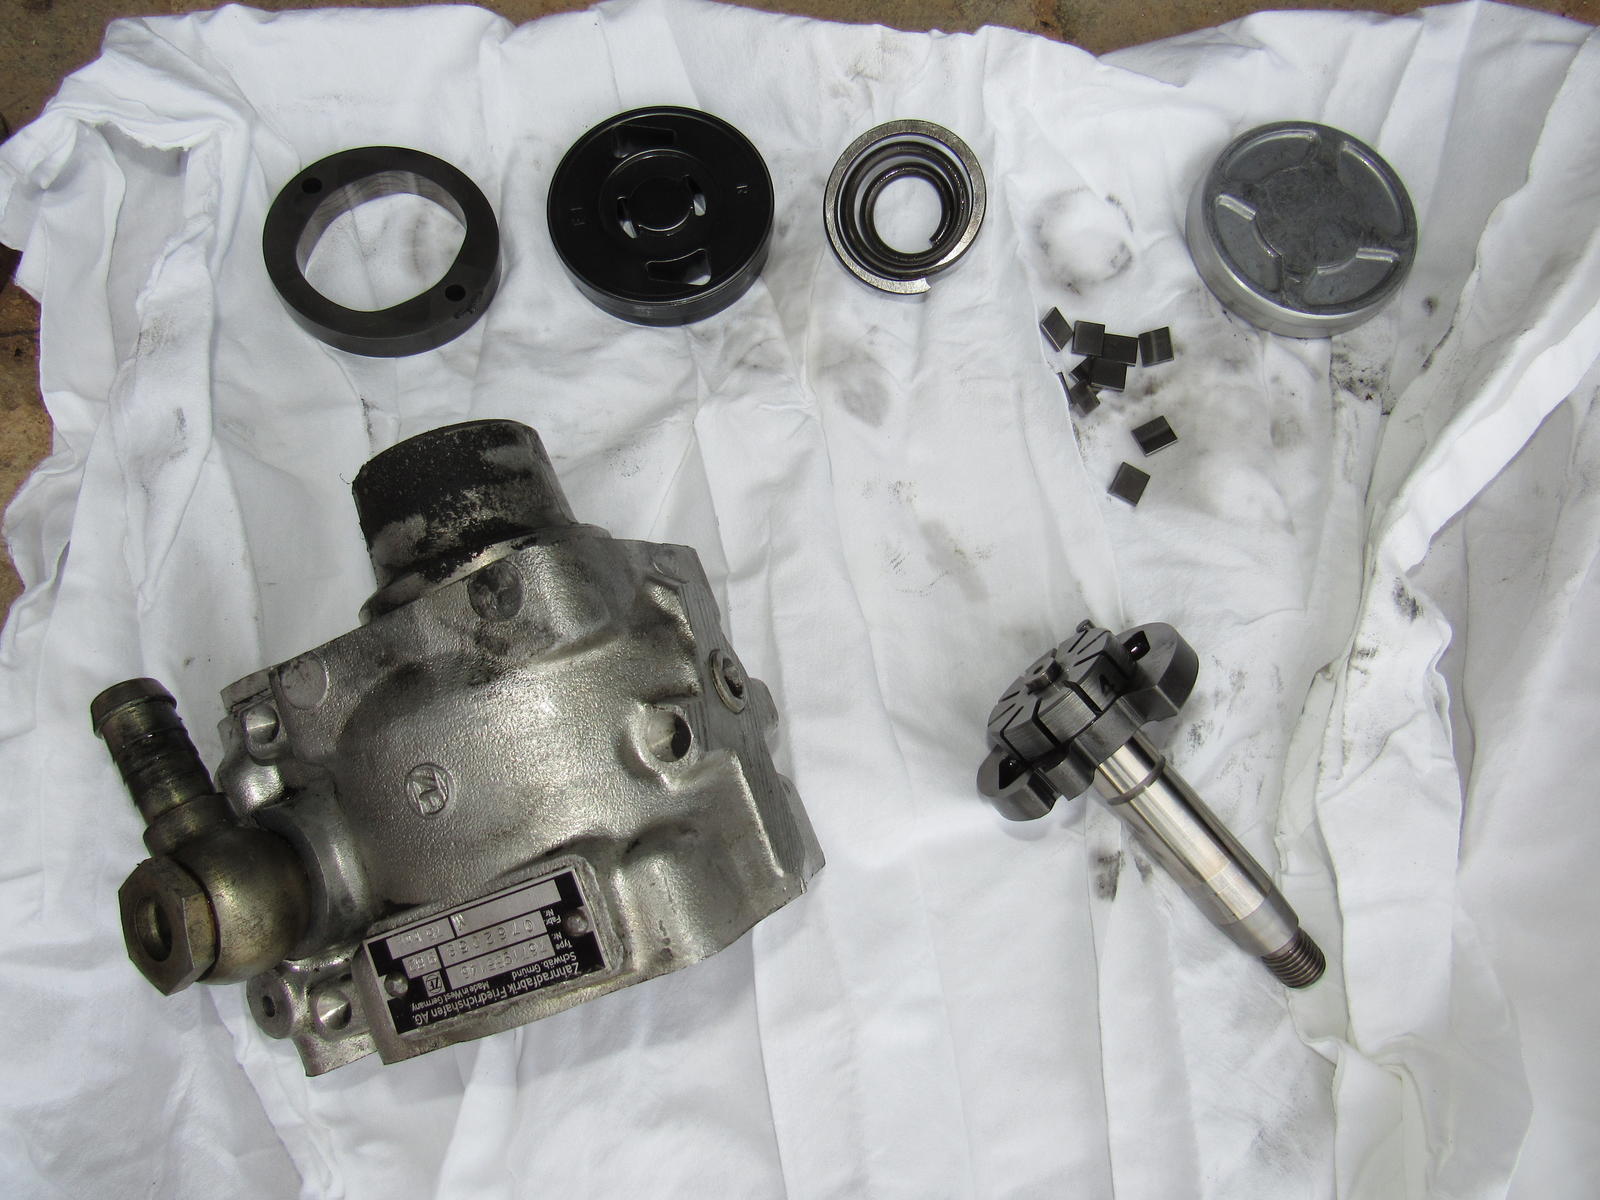
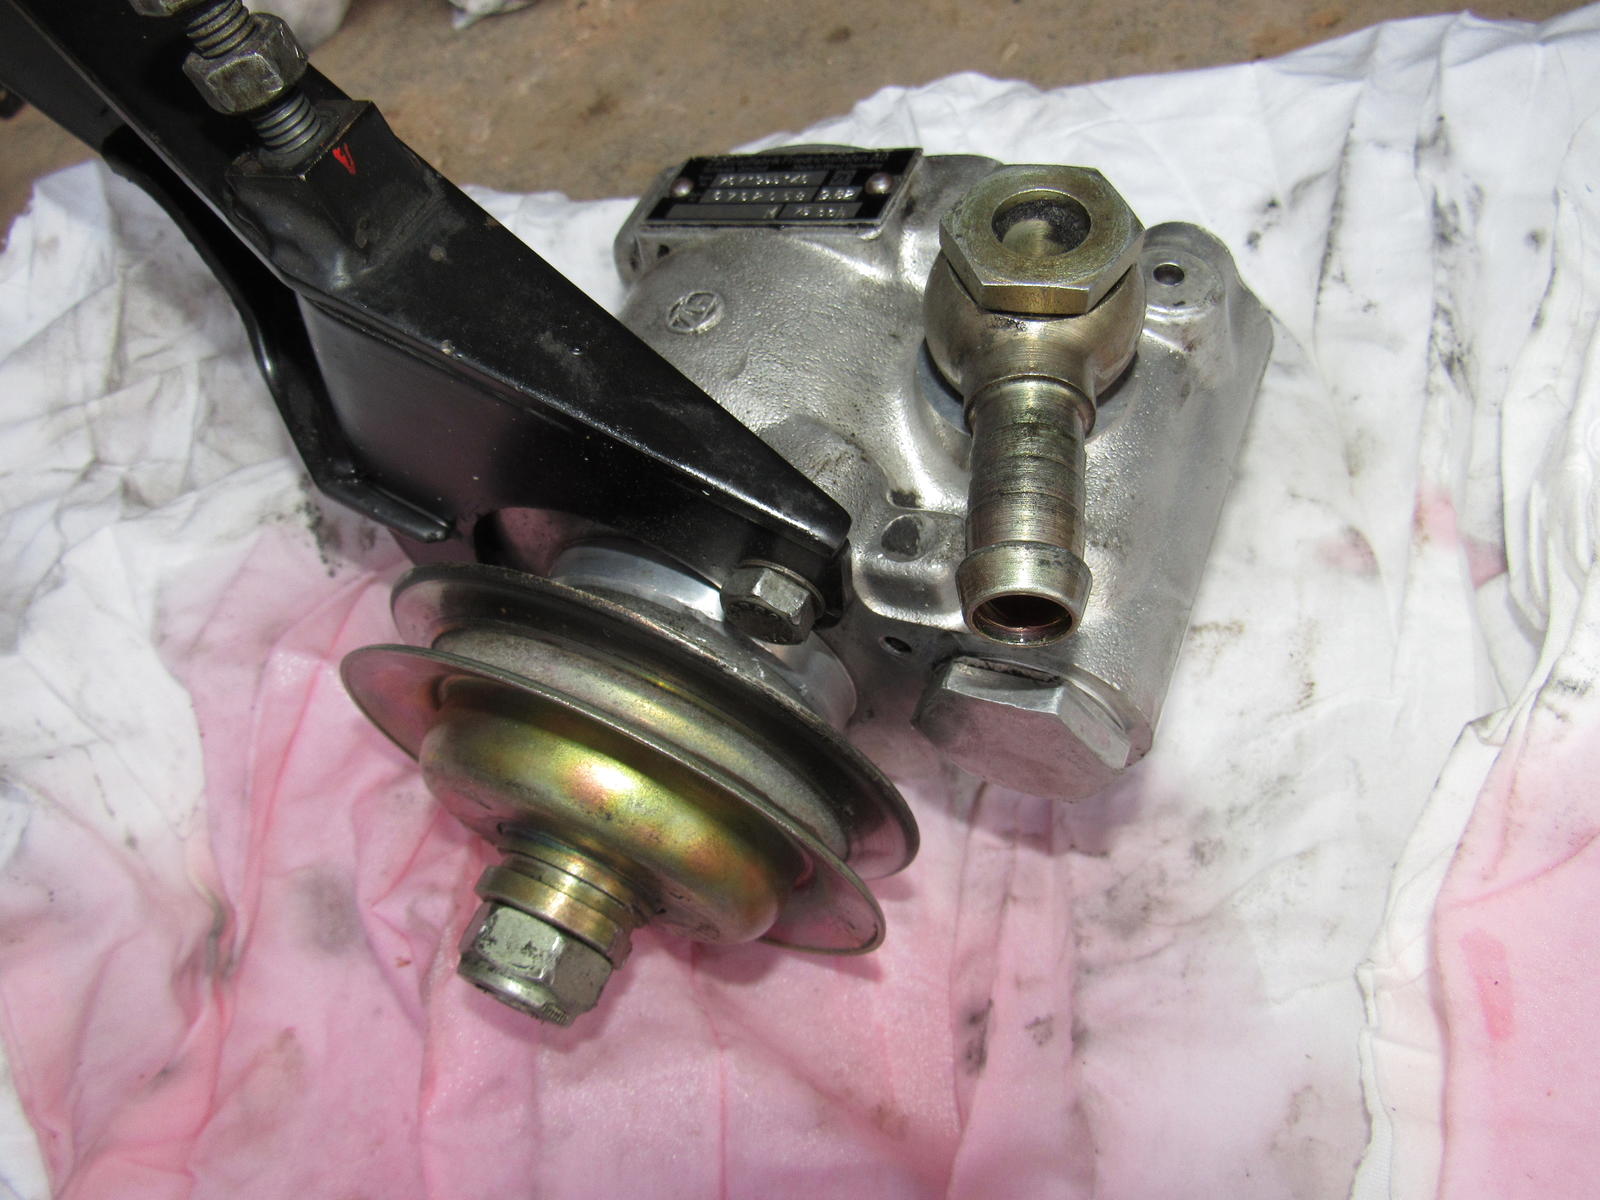
So I was away to visit family but I'm back and rebuilt the power steering pump. The outer O-ring was trashed so this should solve the leak.
Last edited by Majestic Moose; 07-08-2017 at 12:17 AM.
06-20-2016, 11:23 PM
#44
Burning Brakes
You jumped right in . Very impressed . You need a Temp 2 sensor for your idle most likely when cold .
06-22-2016, 09:23 PM
#45
Burning Brakes
Thread Starter
I do need to take readings from the temp sensor and thermo time switch and see if they are in spec.
I tinkered a bit today and my perfectionism kicked in and I revisited the front shifter ball cup. This really has me stumped. I reluctantly removed the shifter and destroyed a couple of the plastic bushings I had just replaced to try and spin the rod but with the shape at the end being off axis to the rod it is not possible to turn it more than about 45 degrees to each side from center till it hits the foam insulation thing. Even if that was removed I think the torque tube would be in the way. There is the alternative of using the stock cup with a new bushing.
Looking ahead I think it would be easier to install the center cross member then dropping the engine on it.
Can anyone recommend a shop for alignment around the Easton PA area? I am willing to drive about 50 miles, the suspension will have to settle anyway and I have new front tires to be replaced.