Warped trim, can it be fixed?
#1
Racer
Thread Starter
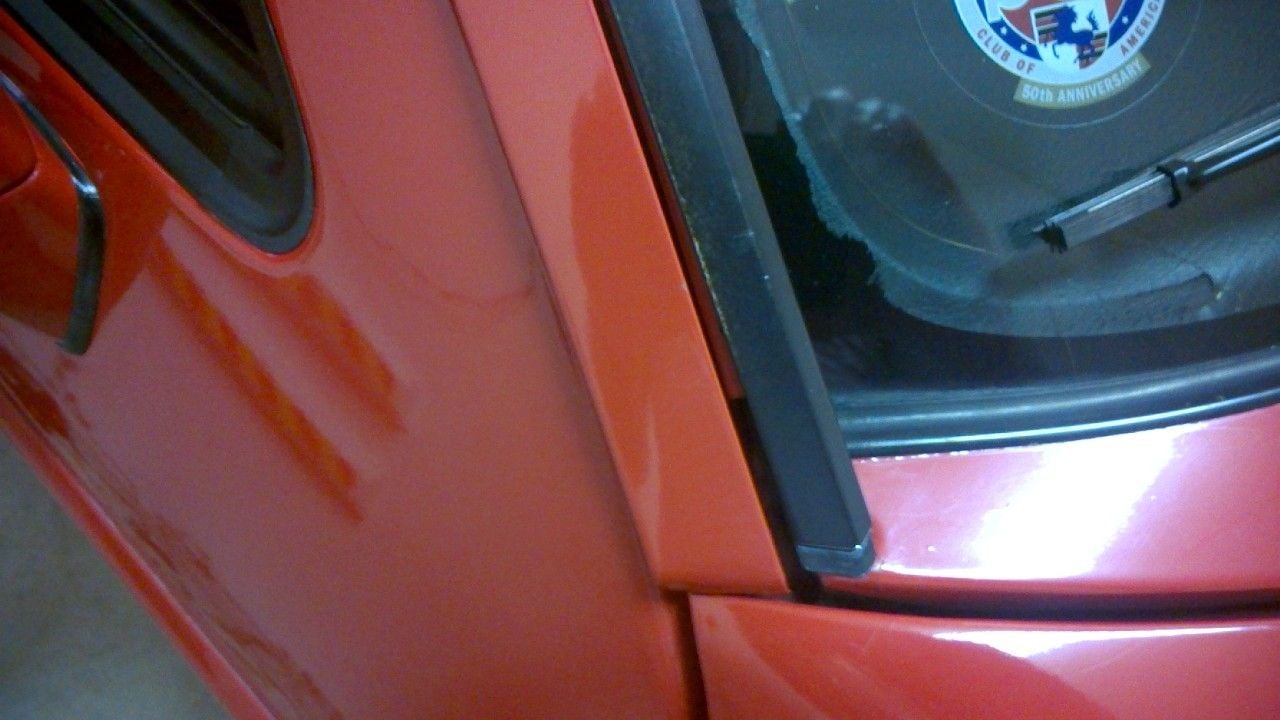
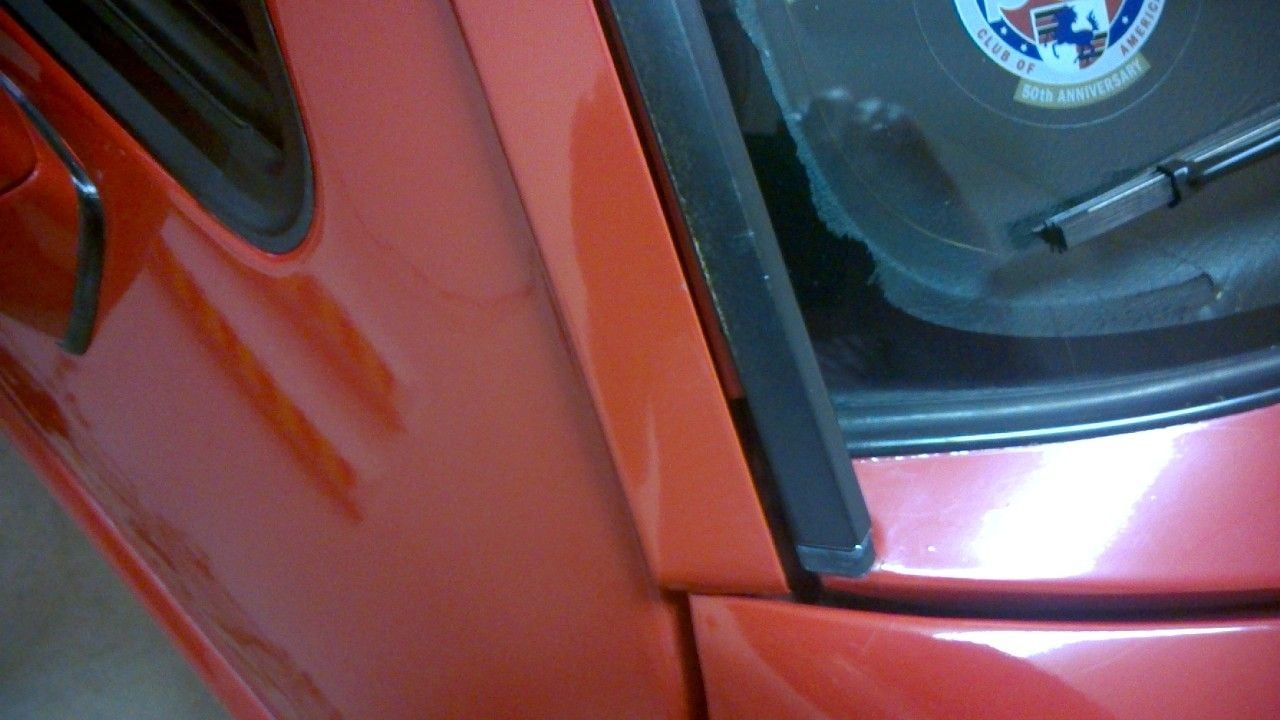
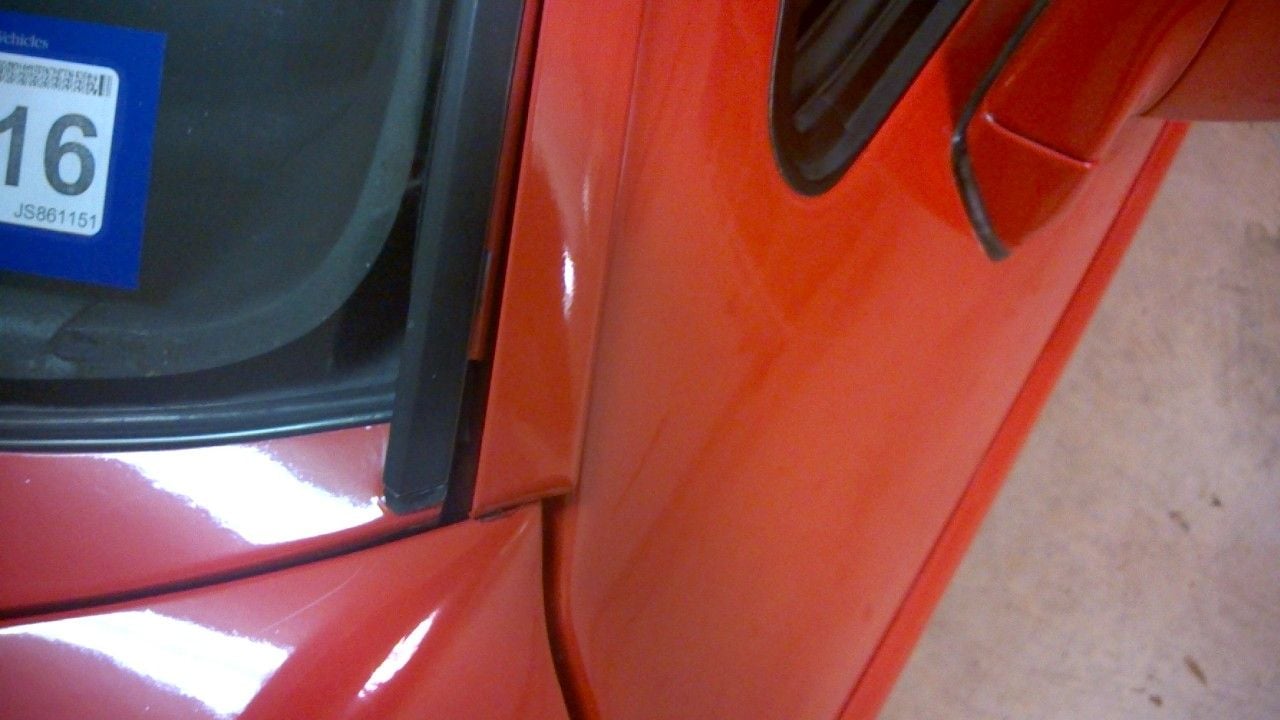
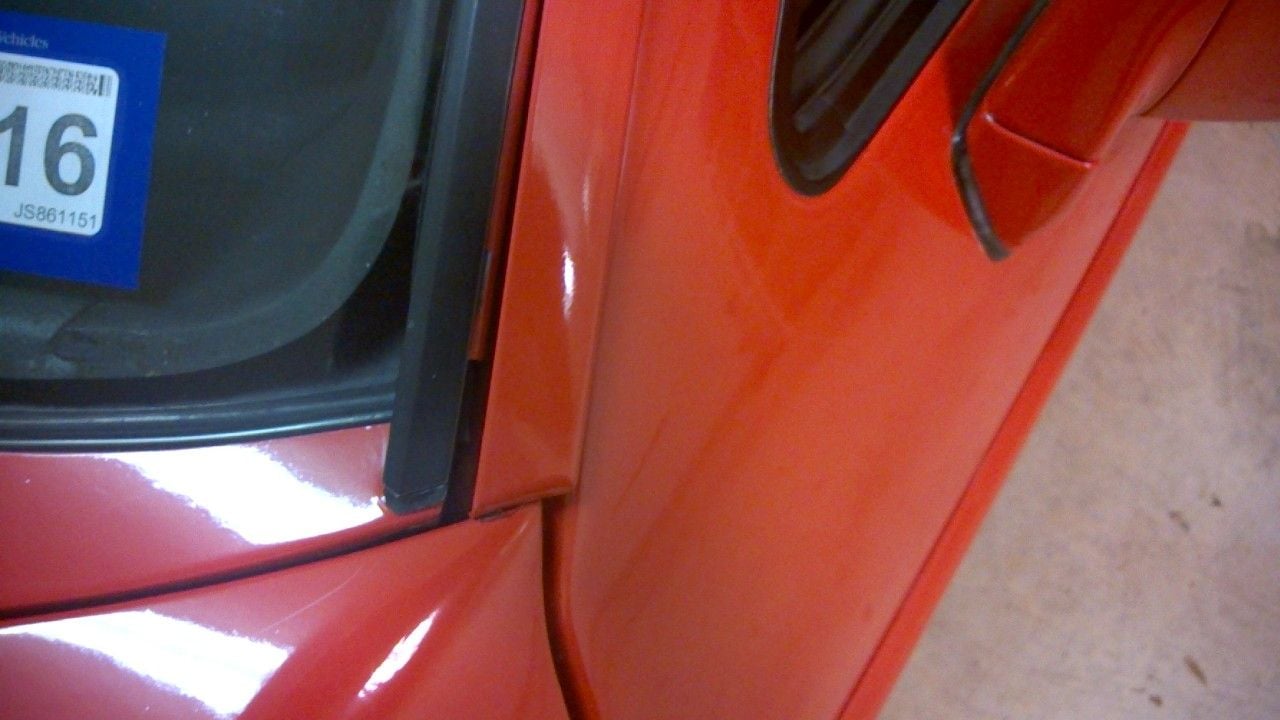
My window trim (as well as the trim around both windows) is warped and does not set flush. Can anything be done by a repair shop or do I have to try and find replacement pieces?
#6
Chronic Tool Dropper
Lifetime Rennlist
Member
Lifetime Rennlist
Member
That black windshield molding snaps sideways on to the A-pillar. Have you tried a few taps with a plastic mallette and a piece of wood in between? Might want to remove it completely, refinish with Wurth or SEM trim paint, then reinstall.
This is 1970's windshield mounting stuff.
This is 1970's windshield mounting stuff.
Trending Topics
#8
Racer
Thread Starter
I have issues with both the black windshield trim and the red window trim. Both are not flush. The windshield trim might be bendable, but I don't think the window trim is.
#9
Rennlist Member
The flat black trim in your pictures is probably correctly called the side windshield trim. Dr Bob is correct in that it fits sideways (inboard to outboard in respect to the car) over the flange provided for it there. Your's look like they might be fully fit where they are. The other "trim" you are calling the window trim, is more likely the door trim and is in fact the rain gutter cover, at least where it passes over the top of the doors. It is made of extruded aluminum, and it also fits outboard to inboard over a flange provided for it there on the car body. Or wait--I might have to go look, but I think the painted "trim" has a single flange fitting into a small channel on the car body.
The first thing I would do, as kind of suggested above, is try to tap the black trim outboard to be sure it is fully seated. If it is not and it will not stay seated I would remove it or them and tighten the slots underneath so they will grip better then reinstall. If there is still a gap between them and the body color "trims" outboard, then try the same method to tap the painted "trim" inboard. Their channel also works sideways--outboard to inboard. If they will not stay you are going to have a fairly big job of removing them completely from next to the windshield and over the doors and then carefully bend them to the correct shape so they will fit.
I recently removed these body color trims from the S4 that I am going to begin my radical custom with and found that they had been installed with some kind of adhesive, maybe even at the factory. I'm not sure that I would recommend using any adhesive since I think they too can be massaged, (or the body can be massaged), so that their gripped flange is held firmly by their gripping channel on the body. Then carefully tap them back on using the kind of protection for the paint as you find necessary. You don't want to need to repaint them.
Note: the tail end of each of the painted "trims" is held in place (or simply finished) with a little aluminum end piece that is held in place with one screw. Remove that first. Then, when reinstalling these, start there so that the trim fits exactly where the end pieces will fit in snugly and then screw in place.
Actually, the first thing I would do now is simply, with my hands, try to squeeze the two "trims" in question together and see if they will move, which ones move and if they will stay together. It they wont stay together then proceed as above suggested.
#10
Rennlist Member
Ok, I went out a looked and took some pictures for you. It is a channel in the "trim" and a bulb flange on the car. You can see that the "trim' I have removed is deformed some, but it can and will be reshaped before I put it back on. In fact, since the top is going to be chopped, these "trim" pieces will both be reshaped and lengthened by welding some more on to them in order to refit the top when it is customized.
#11
Racer
Thread Starter
Jerry: thanks for all the photos. I went back out to the car and it appears than it is the rain gutter trim that is the culprit. When I push it towards the windshield the black trim is flush in place. I will try a little "love tap" with a rubber mallet to see if it will seat better.
#12
Rennlist Member
In order to bend aluminum you need to over bend it since it has a strong tendency to spring back. Since you can push it into place with your hand and it springs back and since you cannot push it any farther, even with a mallet, You are likely going to need to pull it out a bit further above where it is out now and then try to over bend it at the lower ends.
If that doesn't work I suspect you are faced with an open gripping channel like shown on the under side of mine. In that case you are going to need to remove the whole thing and straighten it then work the gripping channel closed, then reinstall it as described before. If you are not up to it you will need to find a professional to do it for you.
If that doesn't work I suspect you are faced with an open gripping channel like shown on the under side of mine. In that case you are going to need to remove the whole thing and straighten it then work the gripping channel closed, then reinstall it as described before. If you are not up to it you will need to find a professional to do it for you.
#13
Racer
Thread Starter
Jerry. thanks for all the suggestions. In all honesty, it bugs me, but not so much I want to spend a lot of money either screwing it up on my own or having a body shop do it.


