When you click on links to various merchants on this site and make a purchase, this can result in this site earning a commission. Affiliate programs and affiliations include, but are not limited to, the eBay Partner Network.
A great way to start the new year! And keep busy during the long, dark, cold winter.
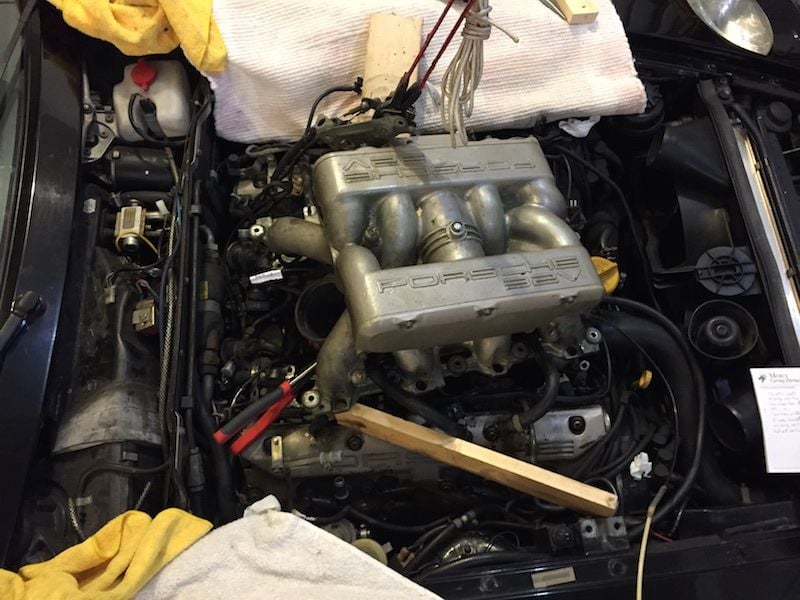
I'm just going to talk about things that come up that I find surprising or significant as I go through Dwayne's write-up. Not surprising is that this is/will be a daunting job involving many, many wires, tubes, and other doodads - some very mysterious. There will be dirt.
First thing was to check the operation the flappy valve. Result was good vacuum, no motion of the flappy valve. That was surprising because I perceived a sudden boost at around 3500 rpm, where it is supposed to open. The purpose of the test is to know in advance that something is awry, so ... good.
The pressure testing device Dwayne devised must have used a different 2" to 3" reducer than the one I procured - mine is way too small to fit on the MAF. I'm going skip the testing at this stage, but I'm going to test every subsystem as I go, to the extent I can. Dwayne says he had to go back in twice to chase vacuum leaks. *This will not happen to me.*
Dwayne must have strong hands and arms. I could not pull out the injectors with mine. I couldn't even unplug them. I very cautiously used pliers on the plugs. Less cautiously, I used a cats paw nail puller on the injectors. Pulling up the injector rails wasn't easy, either, even though I unclipped the injectors so they would come out of the rails.
I studied those clips carefully. Mis-clipping the injectors is a leading cause of fires.
Oops - didn't number the injectors, so they'll go back in random order. What's the deal with that? Does the injection computer collect data on them? I'll probably send them out for cleaning. Incidentally, I have no interest in any performance upgrades. I do want to find any missing ponies (e.g., the flappy valve).
Yes, set the new O rings for the injector(s) and those clips with the rail off the manifold. More efficient to do this way. That union has to be perfect - no leeway here. Install into the manifold as a unit with new lower O rings.
did you verify the correct placement of the vacuum lines?
the outlet that wont hold vacuum at the switch is the one that goes to the flappy
FWIW to remove the old injectors,
I would suggest to first cover any intake openings,
then use compressed air to blow away any sand / dirt from the intake manifold mating area and the injector seats.
then spray some WD 40 on the injector lower O rings and let sit for a few mins,
a set of bent needle nose curved jaws work great for leveraging the injectors out of the manifold.
put a rag under the tool so you dont damage the cam covers.
I suggest to use Dow Corning 111 on all of the O rings.
As suggested install the new injectors into the fuel rail ,
then set the top clips ,
then fit the whole rail assembly to the intake after the intake has been installed.
NOTE fit check the injectors into the manifold to verify you have a tight seal its possible that you could have smaller O rings and thus a vacuum leak will occur
Dwayne's guide is not good on the cleaning one should do before pulling the injectors - I put a small snout on a vacuum hose, but compressed air would have been better. I'll be obsessively checking for crap in the intakes. Would it be silly to put the engine in a position where all the intake valves are closed? (Is there such a position?)
The WD40 and bent needle nose pliers - next time, for sure. Well, a little grinding on a cat's paw might make it the perfect tool....
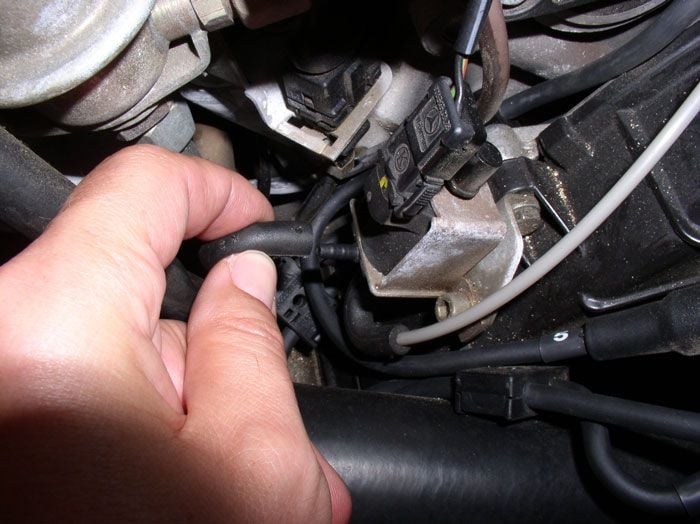
To test the flappy, I pumped on the line that Dwayne has his finger on:
The other line on the switch goes to the five-way in the back of the engine. Held vacuum (it's not supposed to?), flappy didn't move. I couldn't get it to move with a pair of pliers, either.
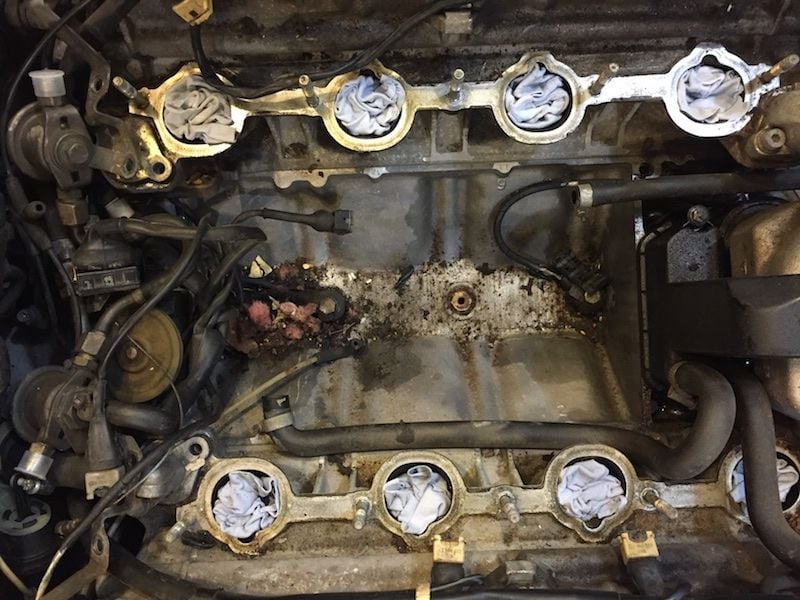
I found it easier to remove intake with injectors in place, then it was easy to get a good grip and pull them out from their ports. Stuffed rags down intake holes as soon as manifold lifted clear
NOTE no [crank] position will put all of the intake valves closed.
Interesting. Dwayne's pressure testing procedure has had me puzzled about this: he puts a few psi of pressure to the throttle body, and notes how long it takes to go down (up to four minutes, he says). But unless the throttle plate and ISV perfectly seal the manifold downstream, it would immediately leak out an intake valve, wouldn't it? Sure, the cylinder might be nominally sealed off, but they leak past the ring gaps. I would not guess the throttle plate/ISV would be designed to seal this well. Anyway, wouldn't it be easier to separately test the vacuum ports off the rubber elbow?
Underlying all of this is the fact that some types of seals will only work with either pressure or vacuum, not both.
I had you listen to my engine at Frenzy, Stan, which sounded like it had a substantial vacuum leak in the back of the engine. I really want to find it.
the things to look for are the plastic junctions that plug into the sides of the MAF boot these will crack and crumble, get new parts I like to press brass tubes into the new ones then super glue them into place (brass tubes come from the hobby shop) the hard lines that run between the vacuum ports get brittle.
The Flappy stop might be lying in the V
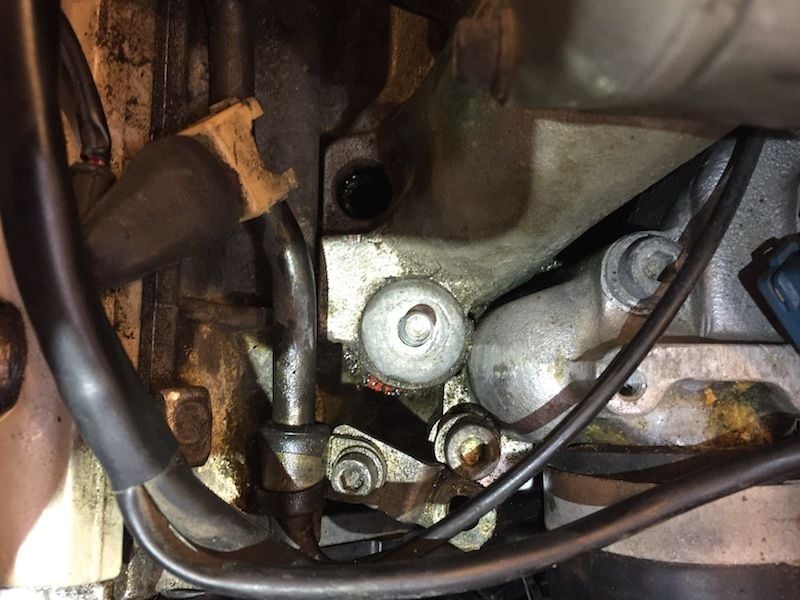
NOTE When refitting the intake pay close attention to the RF edge of the manifold,
if the water bridge is put too far back the intake can hit and catch on the water bridge. might be a goood idea to inspect yours before yo remove it
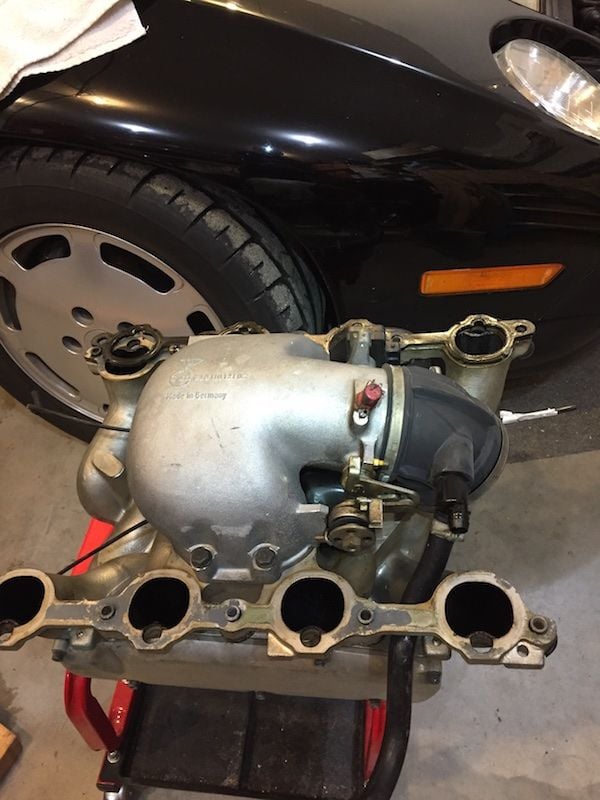
I have a few things to document, so stepping back: Stan mentions above an issue with installing the water bridge too far back, which would interfere with reinstalling the intake. Here's a photo that shows just how close they were in my engine:
Top of the photo is aft, showing the front stud of the starboard-side intake. The bridge is along the right bottom of the photo. (I'll only use right and left to describe directions in a photo; real things will be labeled port (left), starboard, forward and aft.)
To remove the hood by myself, I suspended the front of the hood from the ceiling. I used the same cord to suspend the bowden cable cluster f***, which would otherwise be a constant annoyance.
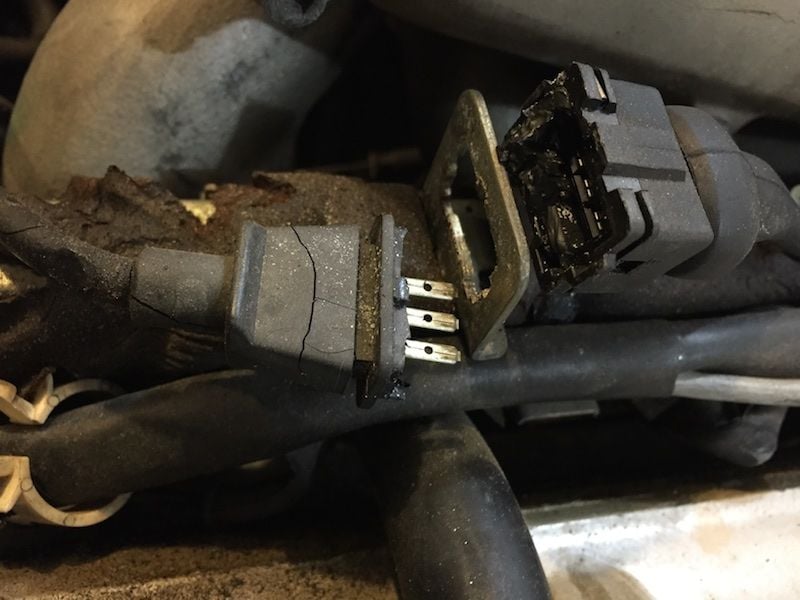
As for Dwayne's, my knock sensor cable connectors were in bad shape. There is no remaining orientation clues on the plug, it seems, so I marked them. I haven't looked ahead, so I'm not sure how this gets fixed. I recall reading about trouble getting them out, so they've already gotten their first squirt of penetrant.
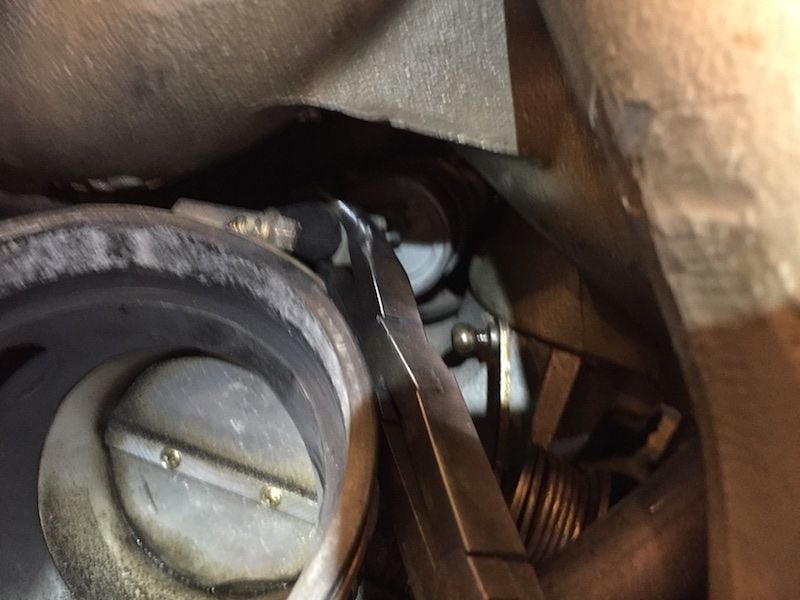
It was quite a challenge to get the under-intake items disconnected. I purchased some long double-articulating needle nose pliers (Sears, Crescent, straight and bent-nose) that were very helpful. Mechanic's forceps.
The plug on the ISV was a particular challenge, and I think I can improve upon Dwayne's instructions. Twist the intake CCW, and get it up on wood blocks. The resistance you feel at this point may be the ISV control cable, so be gentle. You'll need to use your left hand on the pliers (red), but it is now fairly easy to see and get the bent-nose pliers on the plug. Moderate force and some rocking up and down - oh, boy, it was out.
Here is the valley. I searched the house for some period-correct artifact to bury in the rubble. The closest I could come was an Apple Newton in my gadget museum, but it was too big. Why should Porsche engineers get all the laughs, hiding stuff under the intake?
That sure was tough on my back, leaning over those fenders. The next steps I can do sitting down. I still haven't found any signs of a vacuum leak. There sure is a lot of oily blackness here and there. Some intake valves have a carbon buildup, about 1mm.
^^and the crank position sensor and the Hall sensor for the cam, and the flappy pod, the ISV and the TPS and a new MAF boot and the vapor return lines and a oil fill tube block off plate from Greg Brown

 01-03-2016, 12:48 PM