When you click on links to various merchants on this site and make a purchase, this can result in this site earning a commission. Affiliate programs and affiliations include, but are not limited to, the eBay Partner Network.
its amazing how much can be packed into a small box,
PSSST.. dont tell anyone but Roger has the cutest little elves that do all of his packaging,
in the most perfect ways.
what Stan said ..........if you dont know Rogers Oompa Loompa you need to make it to 3rd Coast
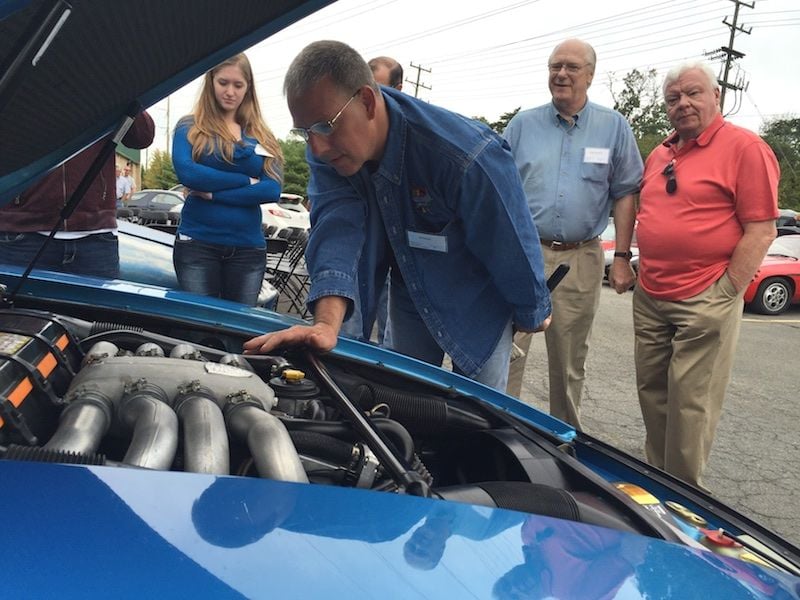
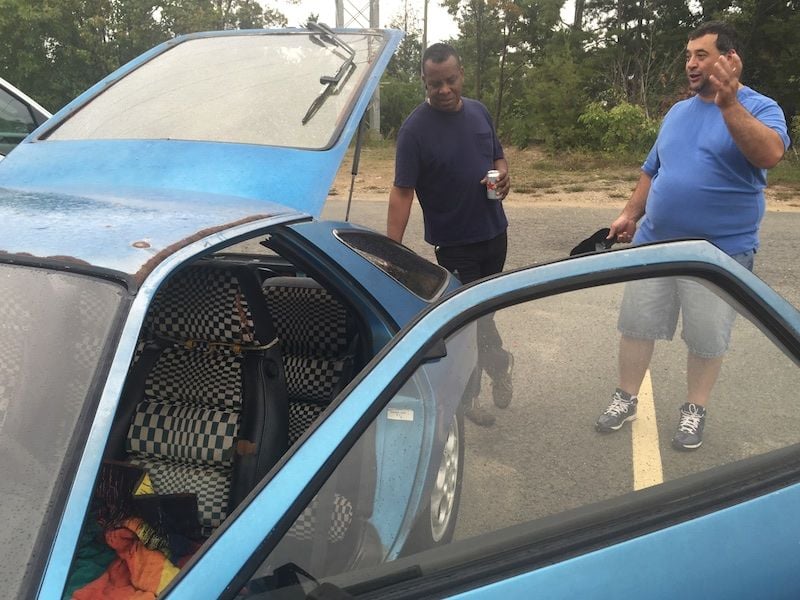
I have personally met only one participant in Roger's quest for the One O-Ring to Rule them All - a Princess. Seen here monitoring the blessing of a troubled engine by Mr. Merlin in the Eastern Lands, Elven wrench at the ready.
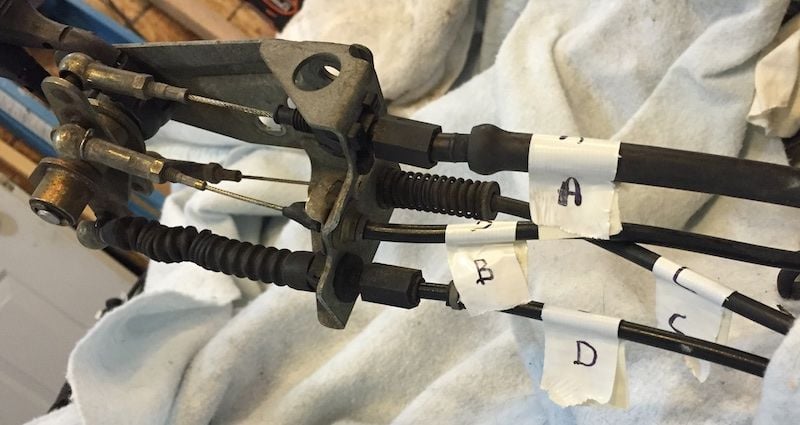
The big wort on an engine from a re-plating point of view is the cable mount, so I had to get it disconnected.
The cable that runs to the actual throttle plate is A. It came off its ball with an easy tug. The plastic item that holds its housing to the bracket has four tabs that must be pushed inwards, either simultaneously (how?) or with the one-at-a-time-and-hold-carefully method. I removed all the others first before I managed the delicate business of the latter method.
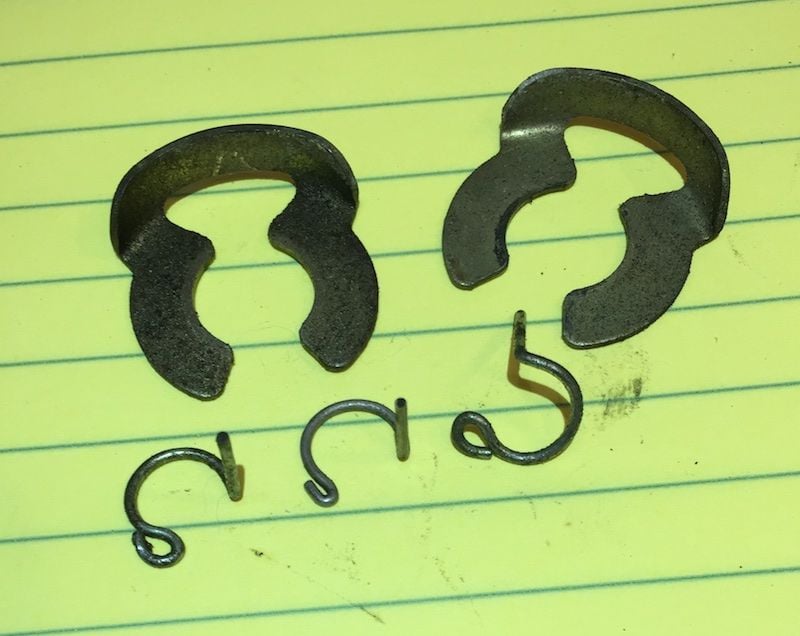
The other three cables have little clips that I needed to remove:
Obviously, these are just the sort of thing that you might as well write an obituary for in advance. I managed not to lose them. Two of the cables are attached to the bracket with those larger clips - easy. The fourth cable has just a two-tab locking system, but those tabs are real stiff.
Cable D is not actually a cable - it's a stiff wire. Do not bend!
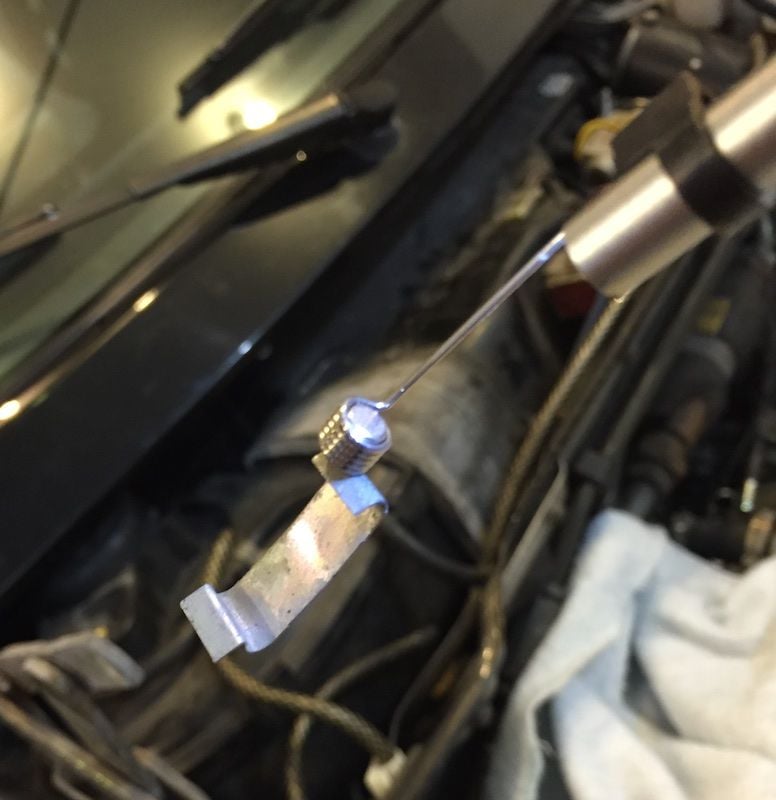
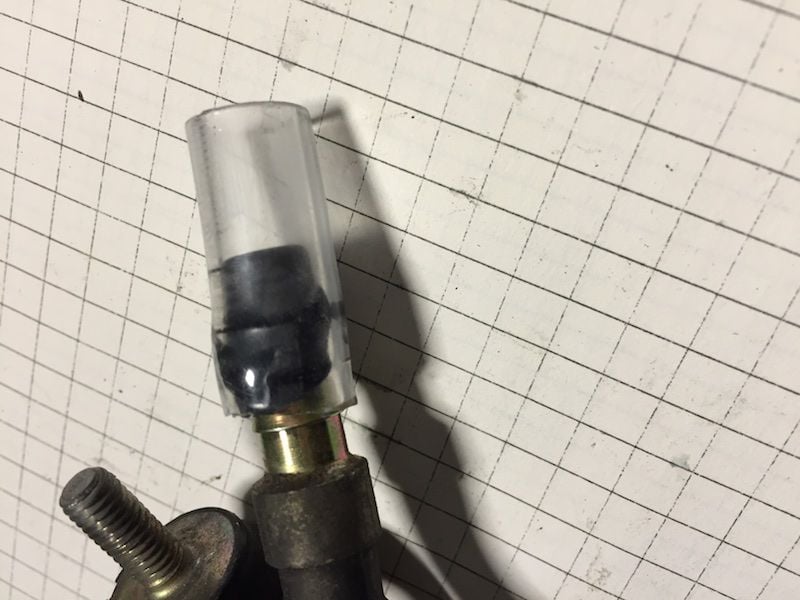
I believe I've read about the sealing nubs on the cables; look at them cross-eyed and they break. This is my only intact nub:
Even if I had new nubs, I probably would decline to undo the cable ends to slip them on. I might if I drove my car in the winter.
No. 2 on the list for re-plating bang for the buck are the hood hinges. One bolt on the starboard side is difficult to get a wrench on. I removed the clips for the fan housing to get a little room, but dropped one down into the dark recesses below. No problem! I attached the magnet accessory to my new endoscope and fished it right out.
By the way, I think the only reason to take the sedative for a colonoscopy is because the doctor is going to plead with you to do a lot of farting; depending on the assisting nurse, that can be embarrassing.
I removed the hood latch - easy - but the receiver for the latch appears to be riveted in place. I'll have to "retouch" it some other way.
I used a pair of (small) vise grip and regular pliers to remove that plastic part on your "A" cable.
Just gently put the vise grip on two tabs and use the other pliers on the other two and push it out.
I don't have those nubs either. They get very brittle with the time.
I didn't put new ones there as, like you, I didn't want to remove the cable.
Just drill the two rivets to get the receiver out.
You can't have a "new" hood latch with an old receiver.
Pop-Rivets do the job nicely for fixing the latch receiver. Having it out will cause you pain and suffereing if you don't carefully remove everything else that lives on that front apron, so you can clean and detail the apron itself.
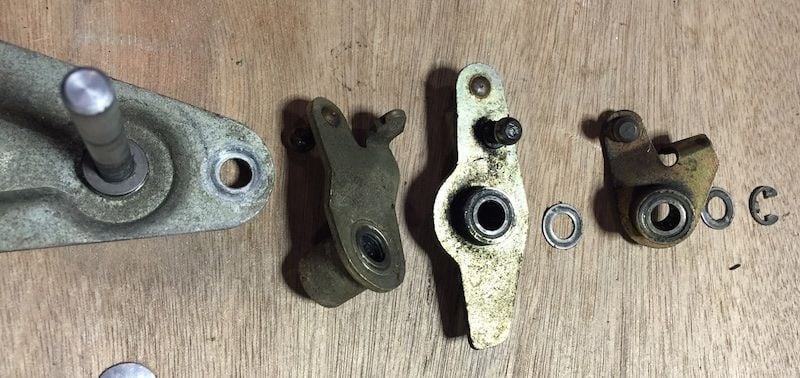
The relay/bellcrank/throttle quadrant assembly that lives on the manifold includes actual bearings for each arm that attaches there. Take plenty of pictures as you remove and disassemble each arm from the axle. I don't remember the bearing numbers offhand, but they are standard pieces. You MUST disassemble all this for plating, and then cuss the thickness of the plating as you reassemble. Fair warning given!
Those stamped clips get replated. The little wire bales that lock the ball end connectors need to stay with you rather than be plated. Just clean them up carefully with solvent, and maybe a brass detail brush if they are really cruddy; sent for plating they will get lost. If you must plate them, and I understand the need, find a 35mm metal film cannister (anybody remember that stuff?) or similar, something you can drill tiny holes in for the clean-strip-replate cycle. Your plater can give you better instructions I'm sure and maybe the right carrier/cannister to put them in. the adjusters on the threaded cable ends come off for plating, with the nuts. They will show up the ones you can't remove for plating.
This is a VERY SLIPPERY SLOPE. Hope your mental-health coverage is better than what a silver ACA policy normally offers.
---
Keep posting the pictures please. I'm reliving the project vicariously.
I'm casually in the hunt for replacement rubber bellows to protectthe ends of the cables on that
I was pondering those bearings last night while photographing the stack - all six of them - and reached the conclusion that it was time I assembled the hydraulic press I bought on speculation during my Harbor Freight shopping frenzy a few months ago.
I'm so glad I already have a pop riveter, purchased 20 years ago but never used. It's probably right over there, in the box labeled "miscellaneous 3", near the spray can of black paint ... hmm.
A perforated film can is a good idea for small parts. I don't have any of that vintage, despite photography being a lifelong hobby and a second career. I could perforate some old film cameras, which are less useful. I suppose some small items could be wired together into a bundle.
I'll be off my Silver ACA plan and on Medicare by the time of my next colonoscopy. I wrote but deleted some witty remarks about the overall US health care system, referencing the 928's electrical system and axle nuts. Seriously off-topic; must not go there. I will say that a 928 seems to involve a lot of mental and physical activity. Success, however, may lead to excessively youthful behavior.
I have completed my re-plating prep madness with no undue mental distress. I'm sure one of my medications helps out here; my doctor says I can take extra if needed, but I was OK. I did remove the hood release receiver and cable retainer, but didn't really find much else to obsess over.
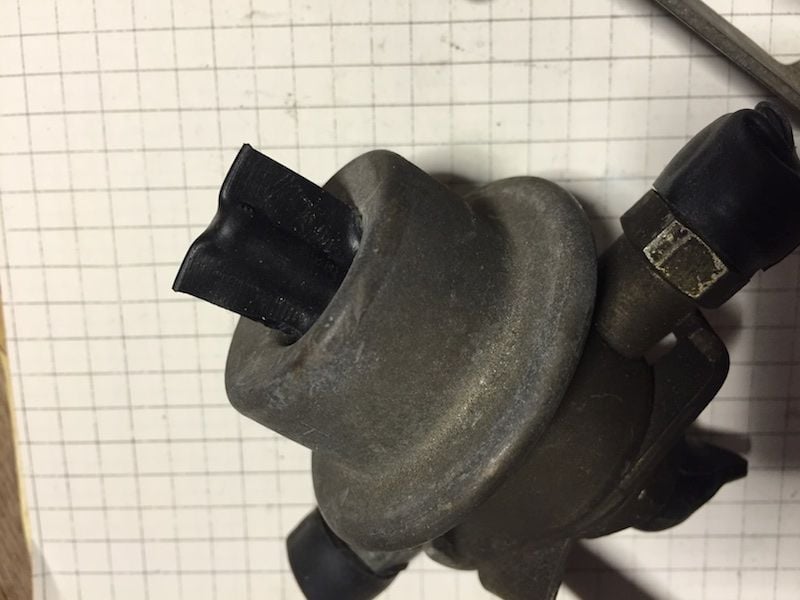
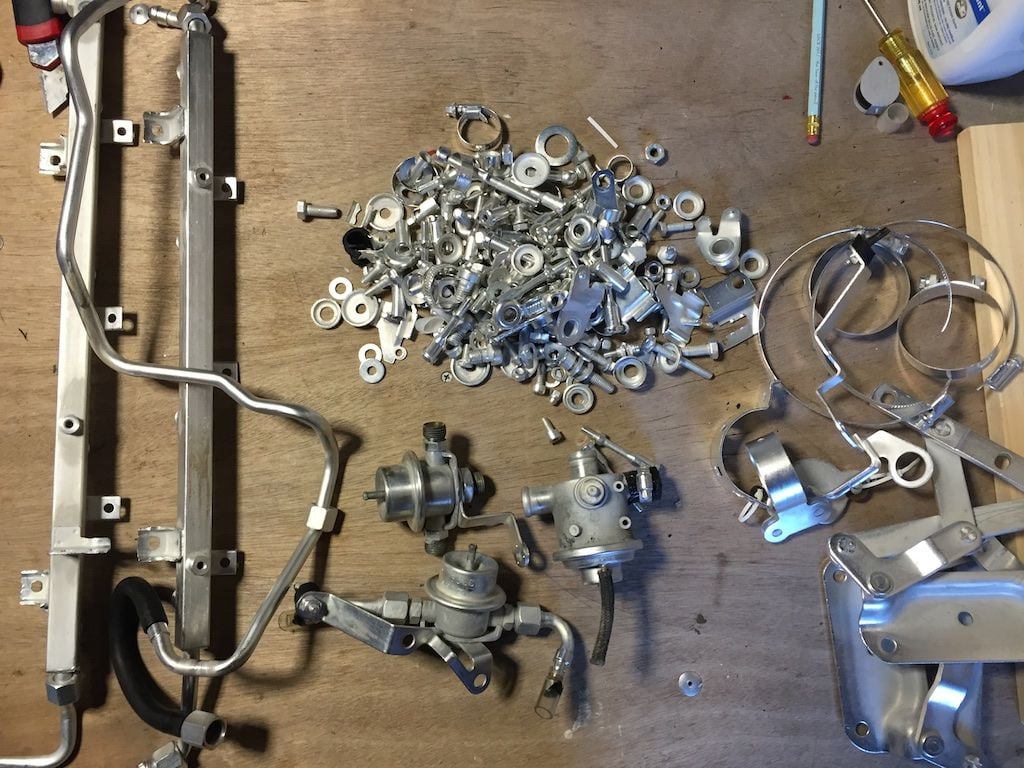
I'm replacing the FPR, but the two FPDs presented a question. Some have just thrown them in the bucket, but some have tried to seal their internals from the various plating solutions. I took the approach that I would try, for good luck, but nothing that would require a trip to the hardware store, which would raise questions I didn't want to answer.
I had a roll of special electrical tape - I think the kind called self-vulcanizing tape, but I'm not sure. Anyway, it sticks to itself without adhesive, through some more primal chemical urgings.
For the hose nipples, I stretched a circle of the same tape over the opening with a bit of tygon tubing. The tubing will protect the knife edges of the nipples from dents - those are critical features to a good seal.
Not an impressive effort, I know.
Burbank Plating may cut them off, but I strung many parts together with zip ties, as loosely as I could. Nuts, washers, together with parts they belong with. Obviously, this doesn't work for things without a suitable hole. I placed related parts together on graph paper, with a few words and sometimes a cartoon of bolt head markings, and shot a photo of each.
Having studied the legal details of shipping loss liability, I should "insure" (a misnomer; means declare a value) of several thousand dollars for this box of bits. And so should Burbank for the return. It's so easy to feel lucky instead. I'll probably split the difference.
Mixed results for plating FPR's and FPD's. The powder-coating folks use some pretty good tapered silicone plugs to keep internals intact, and they provide by far the best seal I've discovered so far. For the dampers there's really nothing inside that will suffer from the cleaning and plating process. There's always the possiblity of heat damage, but most plating solutions are no hotter than what the parts experience stuffed under the air cleaner housing on a warm day. The pressure regulator is another story of course. It includes a spring and the diaphragm OK, and no issues getting cleaning or plating solutions on the vacuum side. On the fuel side however, there's a fairly precision tapered needle and seat. With no fuel pressure on the diaphragm during cleaning and plating, there's a very large chance that the needle and the seat will be plated as one. The plating itself won't bother the needle or the seat as separate parts, as the tapered need and seat are pretty much self-regulating -- bypass flow increases until pressure is correct as determined by spring pressure, manifold pressure, and the pilot pressure applied from upstream fuel pressure. A slightly thicker needle just lifts a little higher. When plating joins the needle and the seat however, and that joint is broken when fuel pressure is later applied in service, action of the regulator may be erratic and non-linear, and the regulator may not seal tightly when closed. Bottom line to all this is to focus the fuel side of all the pieces, plugging the various fuel ports carefully so that there is no possible issue with plating stuff together that should be joined together. Talk to your plater, who may already have the right pieces to plug the ports. If he doesn't search out some of the silicone plugs and ship them along with guidance for the plater on what you need to keep plugged. The aircraft plating guys already know the drill on this stuff. Another option is to add some fuel rail pressure test port caps, with o-rings or ball bearings inside to seal the ports. Just make sure they stay assembled during the whole process.
The adventure is largely on hold while I wait for powder coating and re-plating. But my injectors are back, with a clean bill of health. They weren't too bad to start with. Let's see: 100,000 miles, 18mpg, 5555 gallons, 8 cylinders ... about 700 gallons passed through each injector. As noted, I'll replace the new o-rings with those obtained from an unimpeachable source.
Question: Greg Brown has a serious oil baffle, for serious money. 928motorsports has something less serious. I'm not thinking I need one badly; the intake was kinda oily, but 30 years and 100,000 miles is a serious exposure. On the other hand, I may be driving more enthusiastically than prior owners. My car has a plastic fill spout. Will I (or the next owner) be happy with the 928motorsports baffle?
its amazing how much can be packed into a small box,
PSSST.. dont tell anyone but Roger has the cutest little elves that do all of his packaging,
in the most perfect ways.
... and if you smile sweetly, that cute elf will even deliver the parcel to your hotel before you fly home to Australia.
White cadmium, not what I expected. I had inquired, and got a note back that I'd want "cadmium", common for old Porsches. I sent the note with my shipment. Nowhere did the note say "yellow" - I think we both assumed yellow, but not the guy who did the plating, who ignored the fact that the parts were originally yellow.
Or I am profoundly confused. I've sent an inquiry. I'm OK with white, except I think it does not last as long as yellow, if the zinc data is relevant.
I also went to see my powder coater. He had taken the intake to a car wash for cleaning the sand out, and was doing more work in a sink. Amazingly, there was still some fine grit inside. And he had covered the openings pretty well, too.
(His son was blasting on an old Allison V12 aircraft engine converted for marine use. There's a wood boat builder/restorer near us.)
OK this is concerning, I sent a batch out a couple of weeks ago and did say yellow cad in my note, I got a confirmation they received the order but that's it. I'll call in the morning to check.
Reading between the lines of a note I got back from Burbank Plating, the fellow may have believed white was correct for 928s (perhaps it's correct for older Porsches.)
He told me to send them back, and they'd reimburse me for the shipping.
Now I'll need another two or three weeks of winter.

 01-15-2016, 11:12 PM