When you click on links to various merchants on this site and make a purchase, this can result in this site earning a commission. Affiliate programs and affiliations include, but are not limited to, the eBay Partner Network.
Gosh, I'm slow. The simplest things become a trail of woe. I had to drain a bit of coolant out, so thought it was time to tighten up the hydraulic fittings on my lift. That meant extracting the cylinder, and iteratively wrapping with just the right amount of teflon tape, since there's a fitting that must end up pointing in certain direction. I failed, though; next time, I'll try joint compound of some sort.
Then the impossibility of draining just a little coolant. Normally, you yank the plug, retreat, and let a kiddy pool or some other receptacle catch the deluge. Three plugs, three chances for trying to do it slowly, and failing to keep coolant from running down past my elbow, or worse. It was going slowly and poorly, then I did something clumsy and knocked the bucket over. Finally, I just took the bridge off and let the rest pour out; I already had a big mess on my hands. (But beware: you don't want coolant falling into the crankcase, which is hugely exposed where the filler neck used to be.)
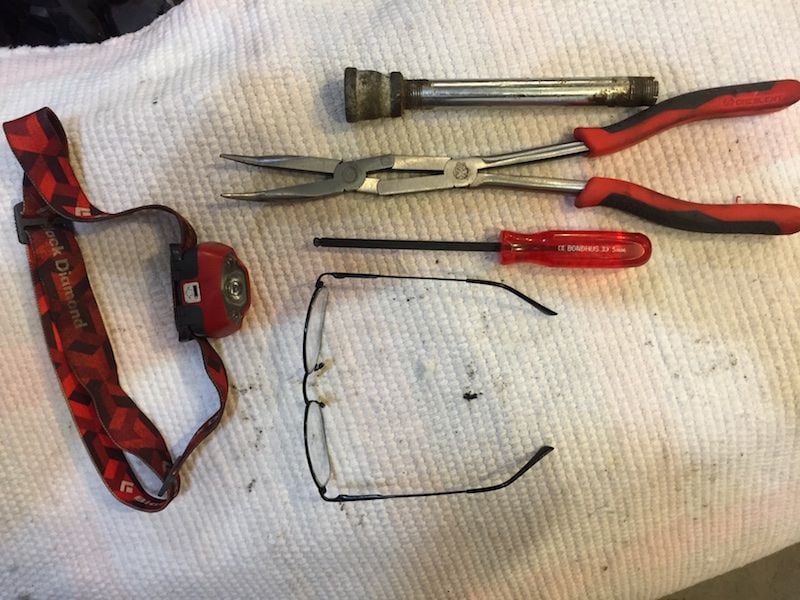
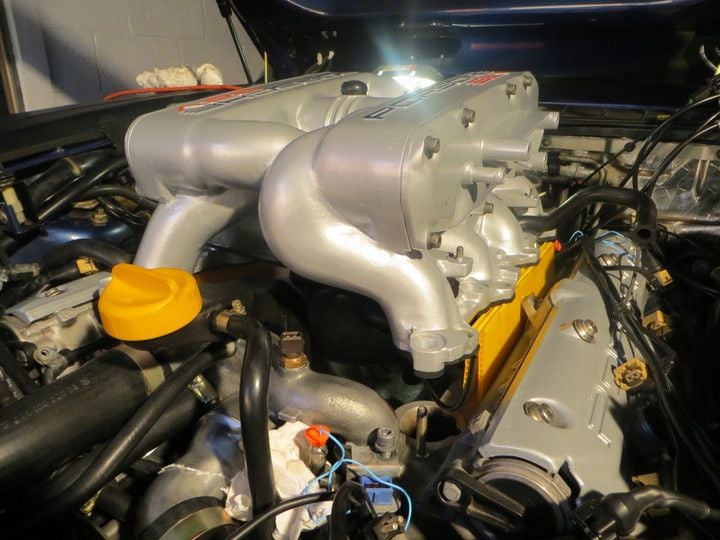
Finally, this morning, I'm onto the cam cover removal finger gymnastics. The port-side cover is off! One to go. Some useful tools:
Headlamp, double-articulating bent-nose pliers, ball-type 5mm Allen driver (had just enough approach angle to spin loosened cam cover bolts out), reading glasses, and scrap pipe to leverage a regular Allen wrench.
The tensioner pad is OK, right?
The plugs where the cam shafts used to go are present and intact. I have some vague sense that this is important.
Thanks for the weird science on the ISV, Stan. I have not taken a close look at mine yet, but you remind me of what regular engineers at GE thought of metallurgists: "A metallurgist is someone who, when you give them your watch to fix, will begin by cutting it up!"
When I got to the ISV I found the port full of a carbon like dry powder and the shuttle was sticking. Cleaned it all out until the thing moved freely and after refurbing several items stuck it all back together. I reused the inlet rubbery gasket and that ISV is still going strong today some 15 years later.
Same here. Cleaned it up, wd-40 and put it back. Still working.
Same here. Cleaned it [ISV] up, wd-40 and put it back. Still working.
Meanwhile, there is another thread where a fellow is having trouble getting his engine running smoothly at idle, after an intake refresh that included a new ISV. It's not necessarily the guilty party, but it adds to the headache of figuring things out.
If there were a kit to relocate the ISV to an accessible position, I'd buy it.
Anyway, an Update (the squeamish should avert their eyes):
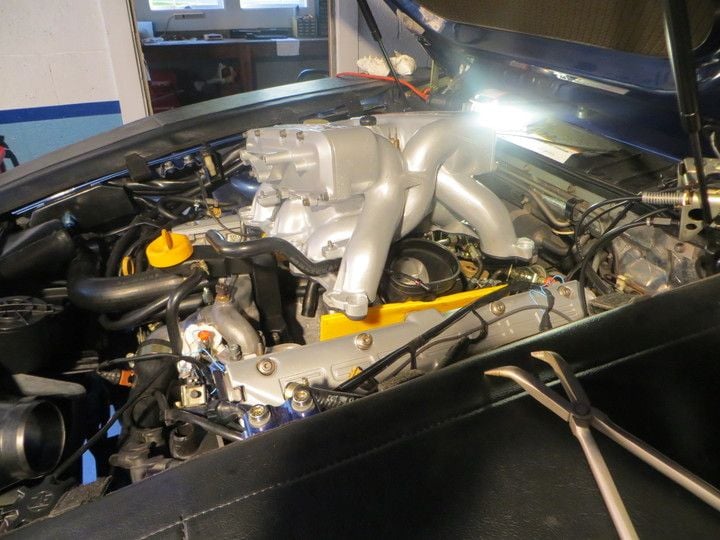
The starboard cam cover was difficult to maneuver past the engine lift hook at the front. Those exhaust sampling tubes must go; the air pump diverter valve and associated plumbing were not helpful, either, and may end up in the same box as my air pump. I'm sorry if this adds to the woes of Californians, along with earthquakes, drought, wildfires and mudslides.
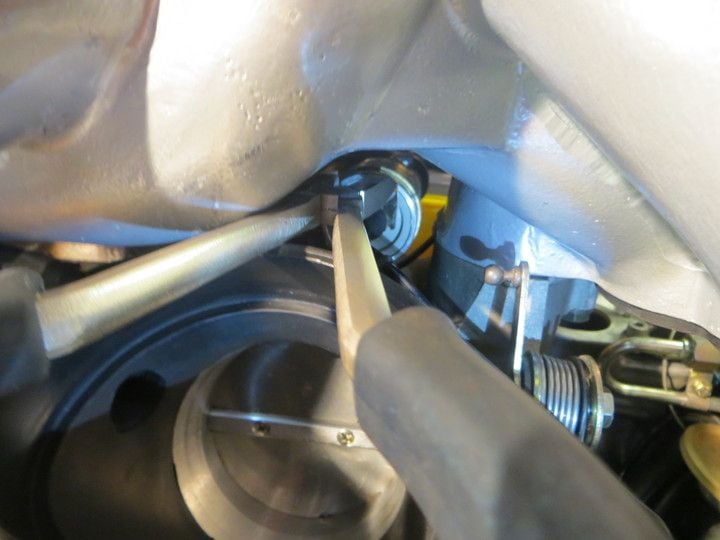
I put my new cordless impact wrench on the knock sensors and wham bam - they practically flew out. I'd hit them with penetrant several days ago.
Remaining tasks per Dwayne are to get the heater valve out to test both the actuator part and to see if the valve really closes. After that, re-assembly begins! Roger will be so happy.
Well, I must first do some cleaning and go visit my local powder coater. I need to look into a re-plating source - I'm recalling Bertrand's lovely parts at Frenzy ....
This would be the perfect time to change the heater valve and the short rubber hose there.
They're not expensive.
- You can clean the ISV with WD-40 and check it with any 12 v source.
Remove it and spray the inside with a lot of W-40. Activate it few times.
If it's moving freely all its cycle, it's fine. If not, time for a new one.
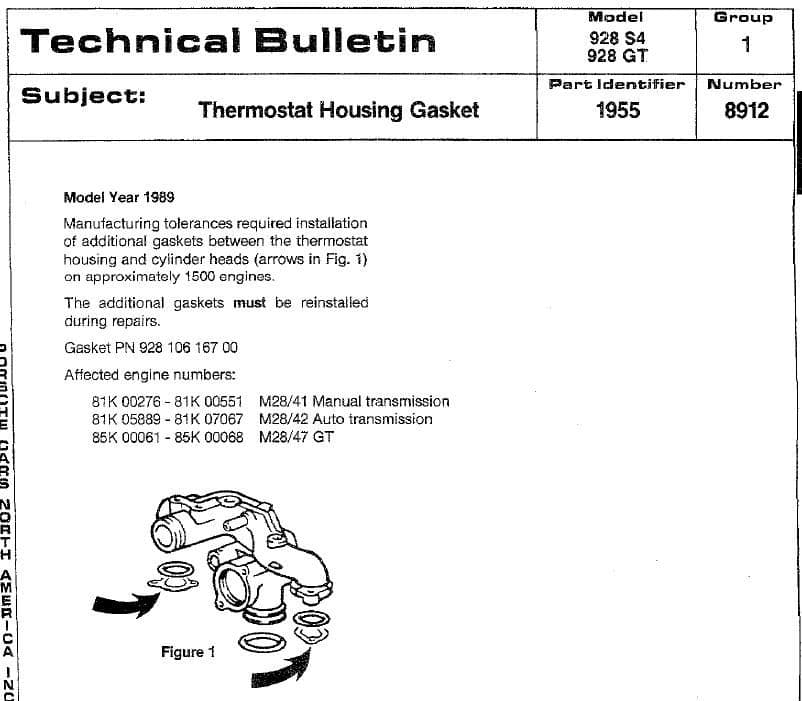
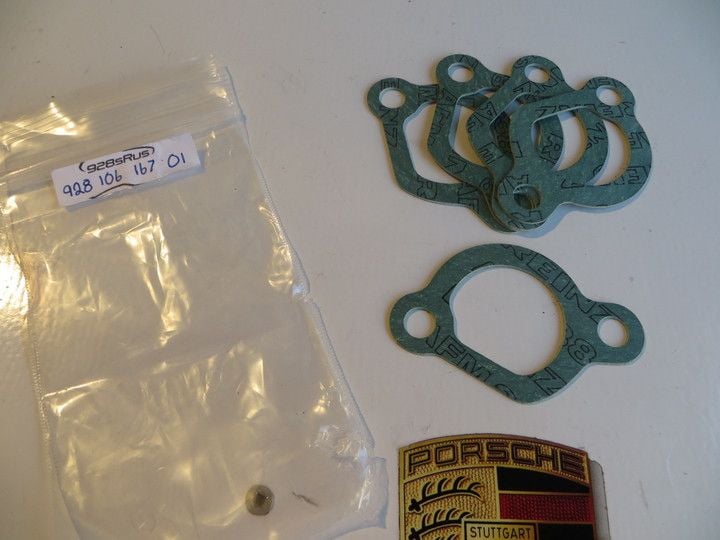
- When you will re-install the oil filler neck, use a new o-ring AND the paper gasket (used on the metal one). You can also use some Hondabond.
I used the three when I did mine. I did this after it was still leaking with a new o-ring.
- Use also the paper gaskets (with new o-ring) on the water bridge. They're cheap.
There was a Porsche bulletin on this.
Different part #. 00 and 01. I don't know the difference but I used 01 and everything's fine.
- When you will put back the intake, you can use some corrugated plastic to us as a stand. It is better than cardboard as it is stiffer. Just cut one side to bend it. Like this.
I also found it was easier to connect the famous ISV with the intake perpendicular to the engine.
...And turn it the right way...
Powder coating and plating give a real nice finishing touch to an engine bay.
And many other places too!
Great tips, Bertrand. It is encouraging to see the photos of your engine bay coming together all shiny and clean. I should have gotten my hands on a yard sign last election day. For the corrugated plastic.
Who did your re-plating?
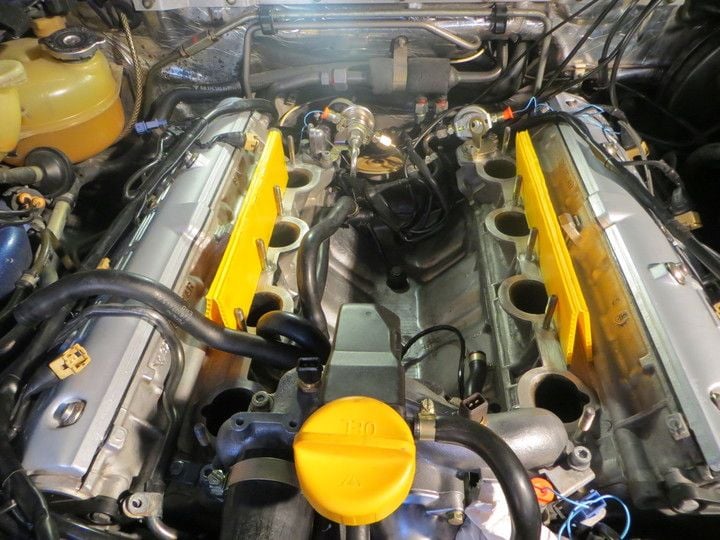
I was just taking the cam covers apart. I just happened to notice that the two vent fittings on the starboard covers are different, then remembered I'd read that this was Important. I'll soon have the water bridge apart, and I'll be ready to see my powder coater guy tomorrow.
But right now, lunch. Our Texas contingent will find this very disturbing: a Cincinnati-style chili dog. With my favorite cheap beer - a Yuengling Black and Tan. I said at the beginning of this thread that I would cover only surprises and items of significance.
A place in Ottawa called Zincon Metal Finishing did the plating.
I'm sure there is places in NY that do this.
As for the corrugated plastic, any sign shop will have scrap pieces to give you.
4 mm (or 1/8) will be good. You don't need anything thicker.
Let me know if you need the exact dimensions.
For the pads, here�s a couple sites I booked marked while doing mine that you might want to skim. I think it was the thought of turning brittle that got me off the fence and deciding to do them.
You mentioned the knock sensors. You�ll never have easier access to the hall sensor and crank position sensor too. If you have the original sensors, I�d be surprised if your wires hold up.
Other than Dwayne�s write-up, I found Ed Scherer�s excellent. Worth having a beer and skimming through it; at least the first couple pages until he gets into trying to find the cause for poor idle.
Ah, brittleness. The fear of brittleness dogged me for most of my career as a metallurgist, as I worked on new alloys that had what we called "limited ductility", or suffered from - gasp - embrittlement with exposure. When you put a big screwdriver into an engine lifting point to bend it out of the frickin' way to so you can get the damned cam cover out, ductility is very nice. Absent the ham-fisted mechanic, how much ductility do you need? Engine designers would reply "What parts are you planning to make out of this crap that will never be touched by a mechanic?" Damn.
I guess I'd better read those links. Thanks. Sensors are always suspect in my book, so new ones will be on the list.
Meanwhile, I'm pondering the question "Do I need to label my cam covers left and right (or port and starboard, as I prefer)? Someone had scrawled an "R" on one, the port-side cover (left, for most of us). But they have the same part number, so after stripping, they must be interchangeable. Right? It's interesting that they do not present the same shape to each head - they do not have mirror symmetry.
I removed the lifting brackets on my motor once it was installed. Hopefully I can still find them if and when I need them! I do not seem to have too much problem removing the cover.
I am sure you will have no problems working out how to get the covers back on. I was under the impression they are interchangeable albeit you have two breather connections on the starboard side and non on the port side assuming you have a stock breather system.
So, identical castings, with identical part numbers cast into them, but machined slightly differently. Good to know!
The two elbows for the starboard cover seem identical on the outside, different on the inside, and have different part numbers. Dwayne does not note this on disassembly, or in the assembly bit quoted above. Or are the two keyed to fit only the right way? I've read something about this issue somewhere. I should find out where, since I should not be too sure they were correct for my engine.
Thanks for looking up that information, Bertrand - something I should do myself, of course.
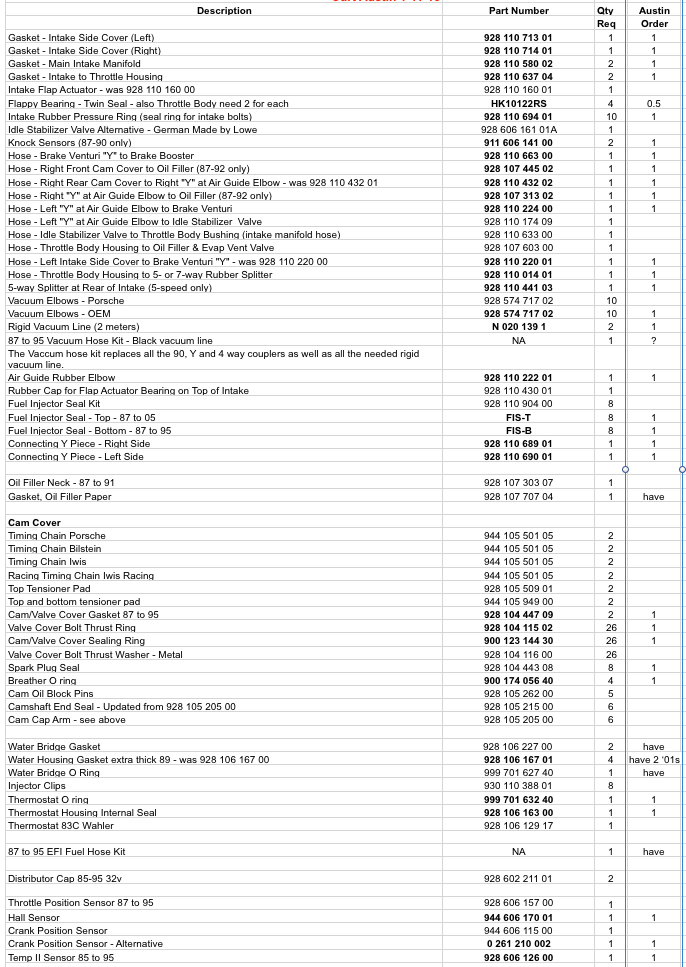
Time to order parts. I've gone over Roger's spreadsheet, and made my selections. The part most on my mind that I'm not ordering is the fancy $80 three-way vacuum hose that runs under the intake out to the oil filler and vent valve. Mine looks and feels fine, and is not subject to much stress. Sure, there's an argument that says I'll be sorry if it fails. The same argument applies to owning a 928 in the first place, which all of us adventurists ignore, to our credit. (But note that I have the deluxe tow package from Hagerty.)
If I'm ordering the part, I've put a "1" in the last column. The total works out to be about $900.
I'm curious about the presence of the cam cap end seals/arms on this list. At least for the fronts, don't you have to have the rear timing belt cover off, and hence the cam gears? Which would imply to me it should be done during a timing belt job (I'm likely going to do it during mine). I sure wouldn't want to have to do an entire timing belt job on top of the intake refresh just to take care of those caps. Or...the usual reason for my questions...what am I missing?

 01-09-2016, 12:02 PM