
86.5 Intake / Engine Harness / Timing Belt
 05-24-2015, 09:42 PM
#76
Rennlist Member
Thread Starter
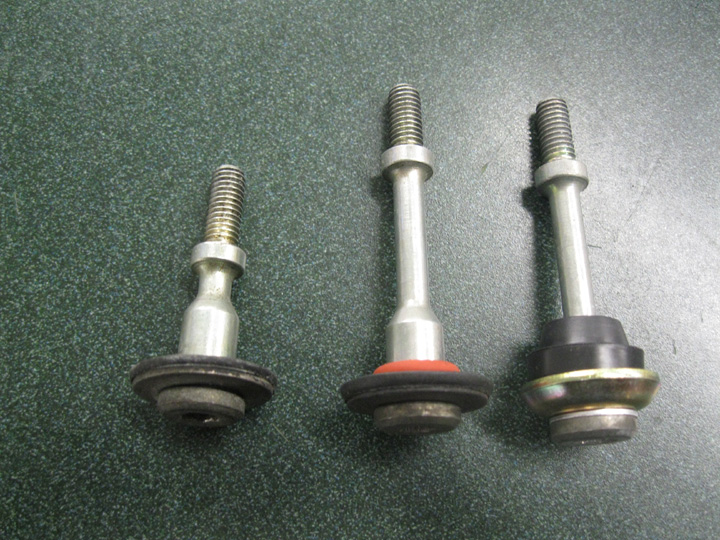
Is there any reason not to use the old washer seals? The compression seems much more reasonable than the new.

 05-24-2015, 11:19 PM
#77
Rennlist Member
Thread Starter
After further study, I have come to the conclusion that S4 cam cover bolt seals (the one on the right) are not compatible with S3 cam covers. I am using the original S3 washers and O-rings (the two on the left) along with the new "sealing rings" for a little extra compression.
Some one please correct me if I am wrong.
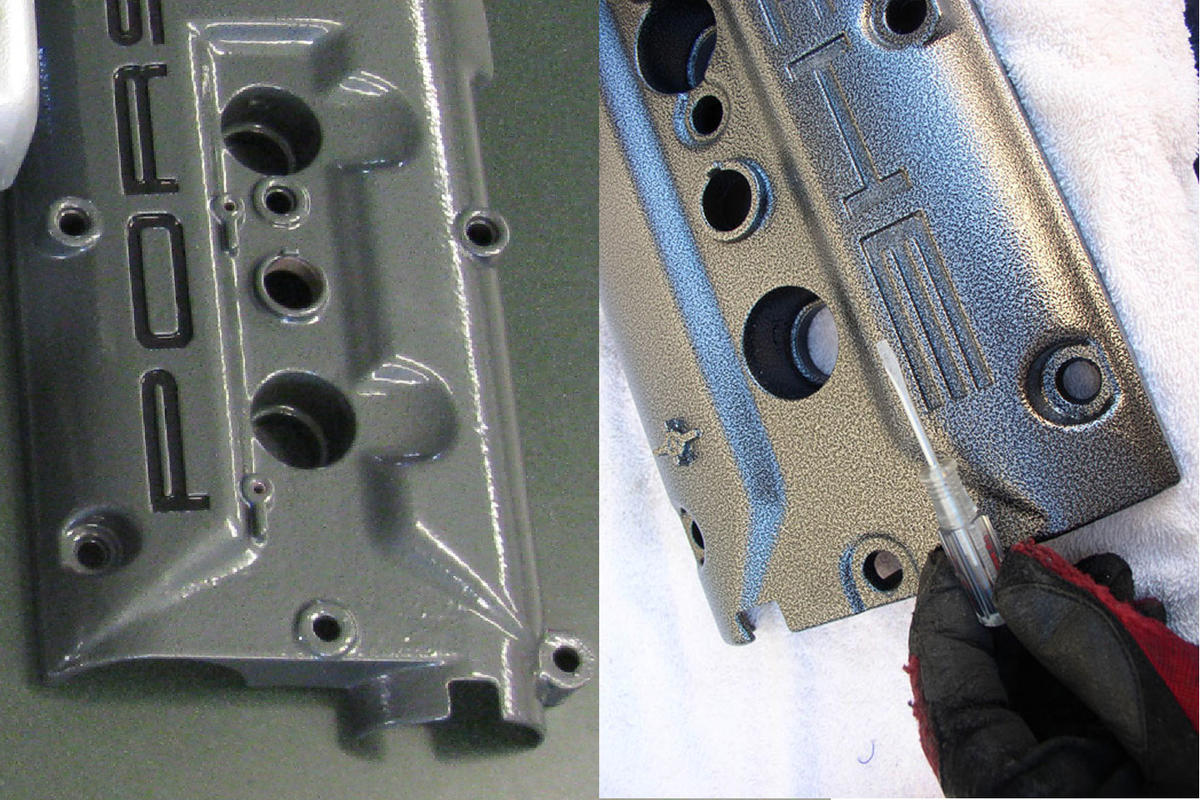
S3 cam cover on left, S4 on right.
Notice difference in bolt hole size. S3 has inadequate room for S4 seal.
PS:
I stole that S4 cover picture from dwaynesgarage.
Thanks Dwayne. You need to get an 86.5.
Some one please correct me if I am wrong.
S3 cam cover on left, S4 on right.
Notice difference in bolt hole size. S3 has inadequate room for S4 seal.
PS:
I stole that S4 cover picture from dwaynesgarage.
Thanks Dwayne. You need to get an 86.5.
Last edited by depami; 05-25-2015 at 10:35 AM.
 05-27-2015, 10:50 PM
#80
Rennlist Member
Thread Starter
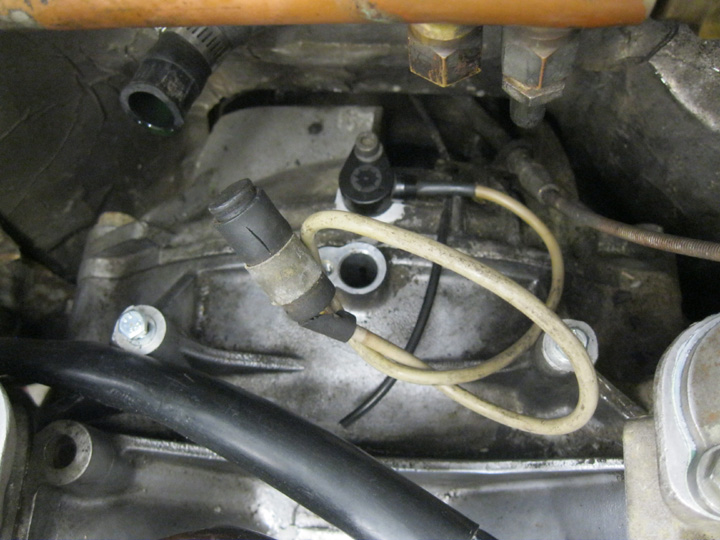
What purpose does the timing mark sender serve on my car and should I replace it?
New impulse sender (CPS). That was likely part of my problem at the beginning.
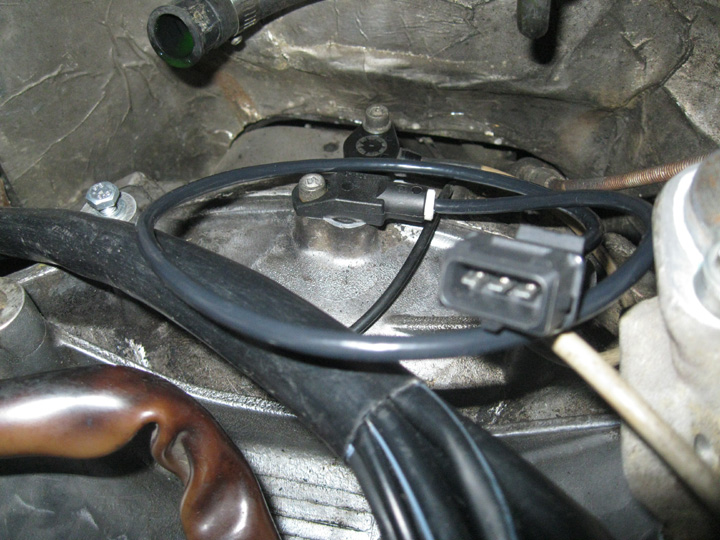
New impulse sender (CPS). That was likely part of my problem at the beginning.
 05-31-2015, 11:17 PM
#82
Rennlist Member
Thread Starter
Why three O-rings?
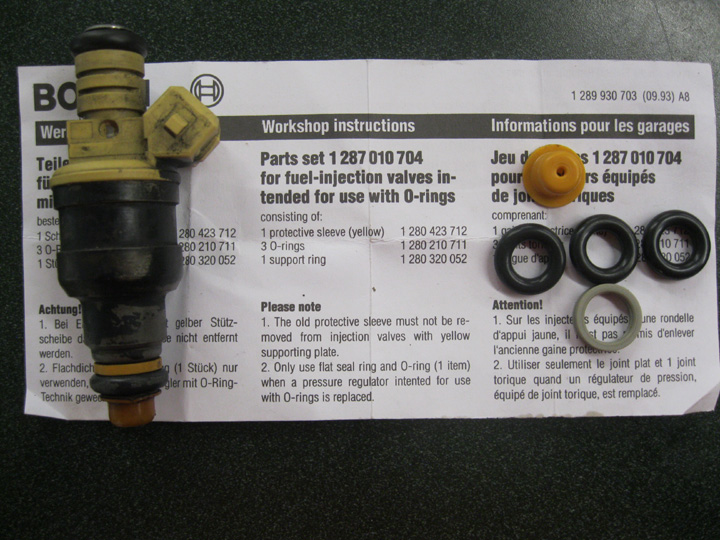
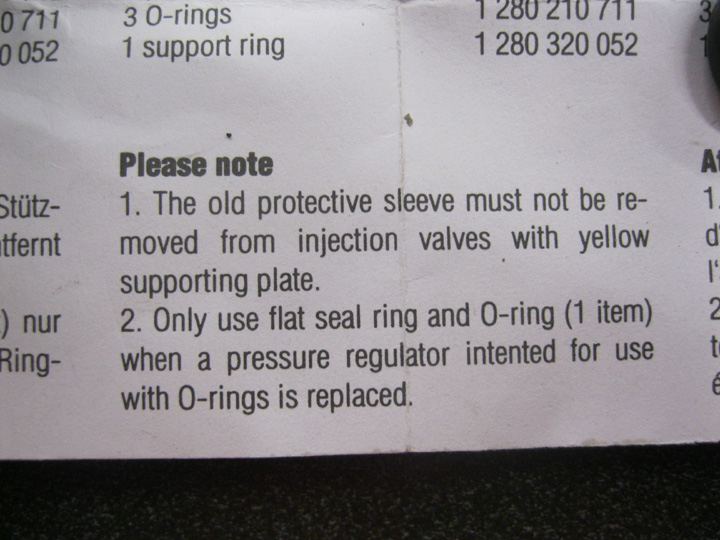
What does this note mean?
Is this injector one to which that note refers?
The cap doesn't want to come off.
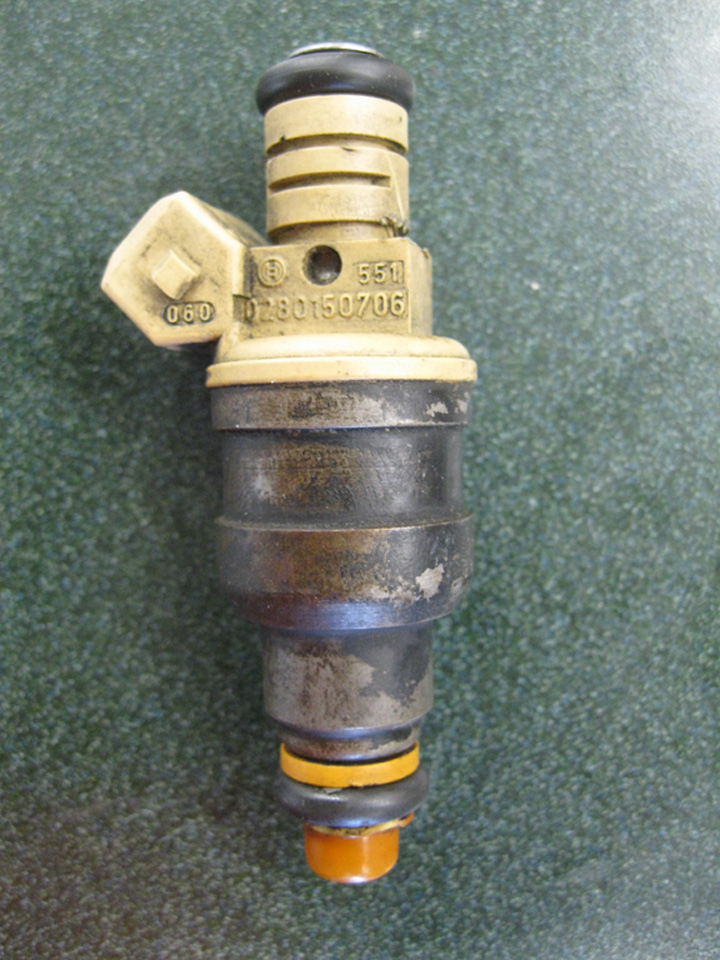
All advice welcome.
Thanks,
What does this note mean?
Is this injector one to which that note refers?
The cap doesn't want to come off.
All advice welcome.
Thanks,
06-01-2015, 12:45 AM
#83
Team Owner
Best solution is to buy a set of new style 4 hole injectors.
Next best is to send them to Witchunter,
they will come back cleaned, and with new O rings , filters and pintle caps already installed, and flow checked.
Otherwise, with a soldering iron carefully melt a slice in the side of the pintle cap,
then pry it off be careful of the end.
To install the new caps,
find a 12 point 8mm socket,
make sure the pintle cap fits into the socket and has a bit of play,
or use a 9mm socket.
put the spacer and the O ring onto the injector then put the pintle cap into the socket then press the injector into the pintle cap till it snaps into place.
NOTE if when installing the pintle cap it is very hard to push then you may need to get the next size bigger socket as the injector will swell the cap just a bit this is more noticable on the 4 hole injectors
NOTE I suggest to use Dow Corning 111 on the O rings this will keep them soft and make installation into the rail and manifold easy to do.
 06-01-2015, 09:34 AM
#84
Rennlist Member
Thread Starter
Thanks Stan.
I've considered sending them out for cleaning but the car ran really well before so I'm not sure if it's worth it. Does cleaning make that much difference?
I've considered sending them out for cleaning but the car ran really well before so I'm not sure if it's worth it. Does cleaning make that much difference?
Last edited by depami; 06-01-2015 at 10:27 PM.
06-01-2015, 10:26 PM
#85
Rennlist Member
Thread Starter
..... the injectors go. It appears the kits I have aren't right for these injectors so off the injectors go for cleaning and testing.
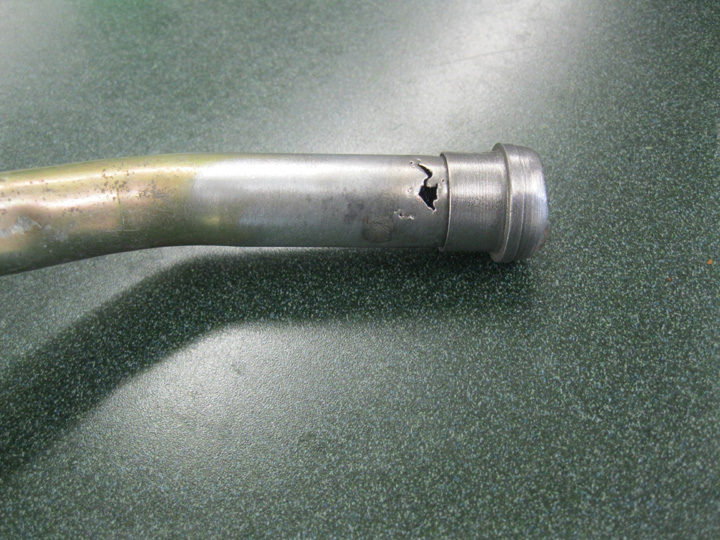
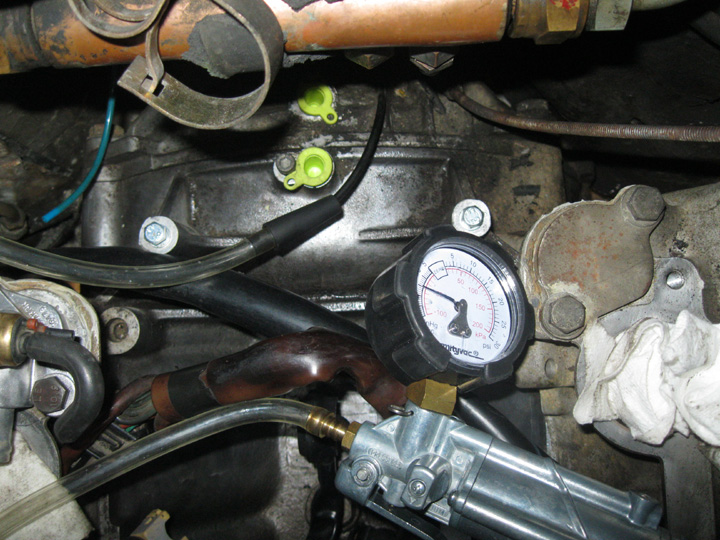
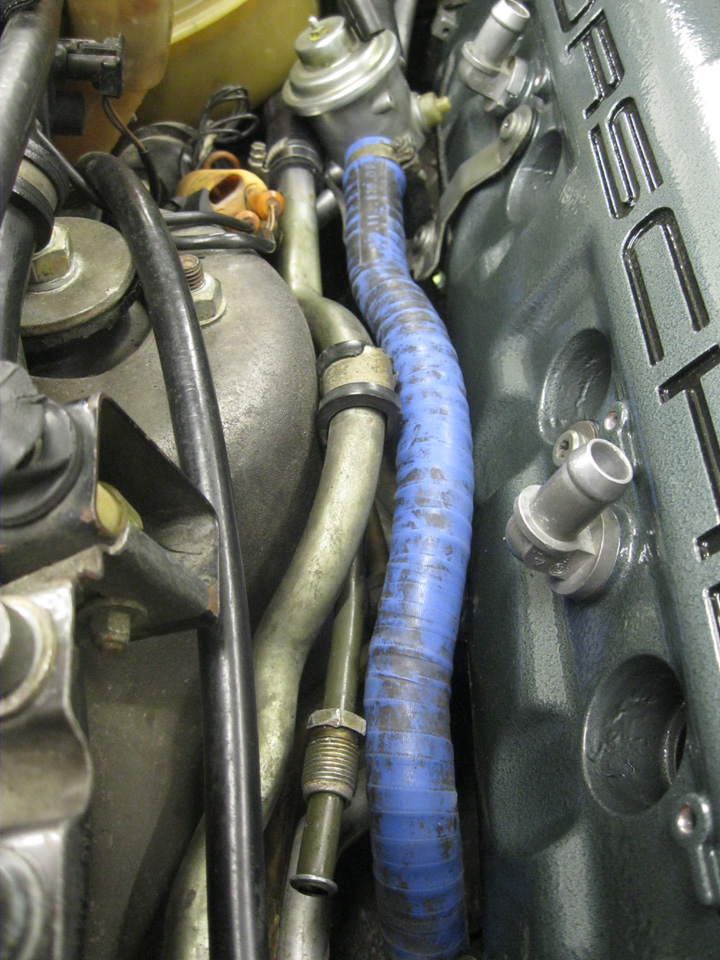
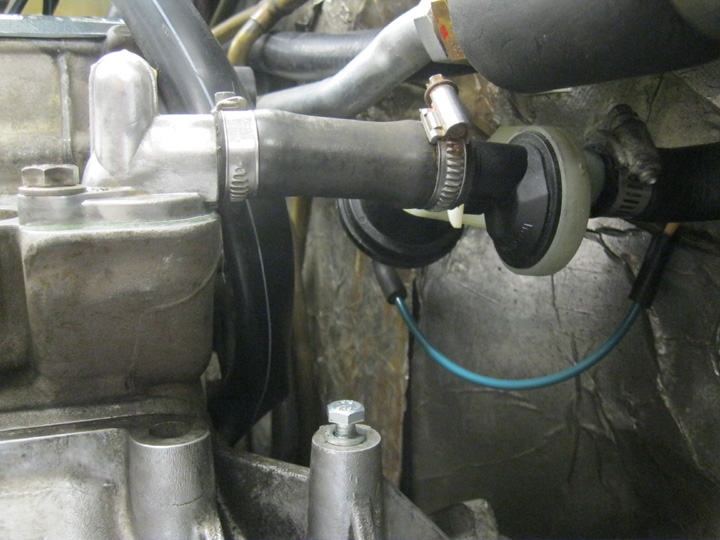
This vacuum valve does not hold vacuum. Does it need to be replaced or can I block the vacuum line and forget about it?
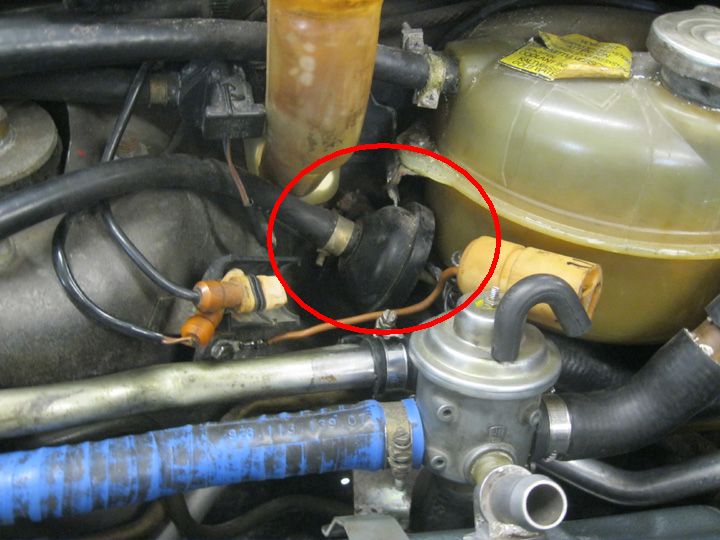
This vacuum valve does not hold vacuum. Does it need to be replaced or can I block the vacuum line and forget about it?
 06-05-2015, 08:41 AM
#87
Rennlist Member
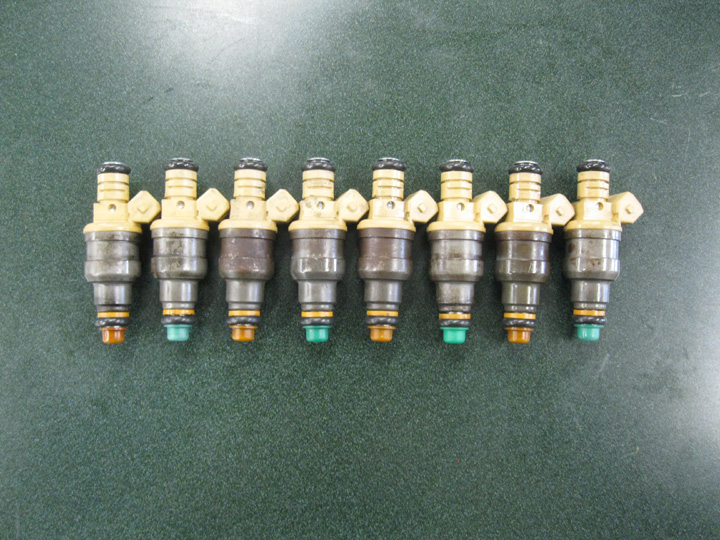
..... this is how they came back:
Attachment 942625
Dropped them off Tuesday night and got a call Thursday morning. $15 each.
Attachment 942625
Dropped them off Tuesday night and got a call Thursday morning. $15 each.
 06-14-2015, 10:55 PM
#89
Rennlist Member
Thread Starter
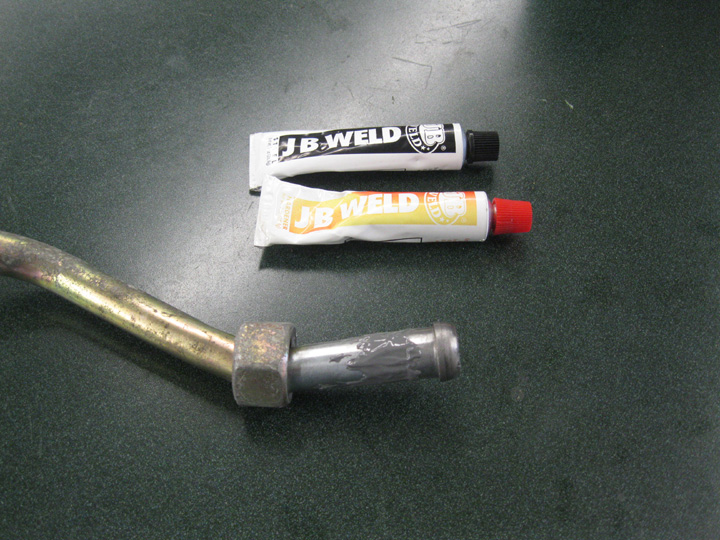
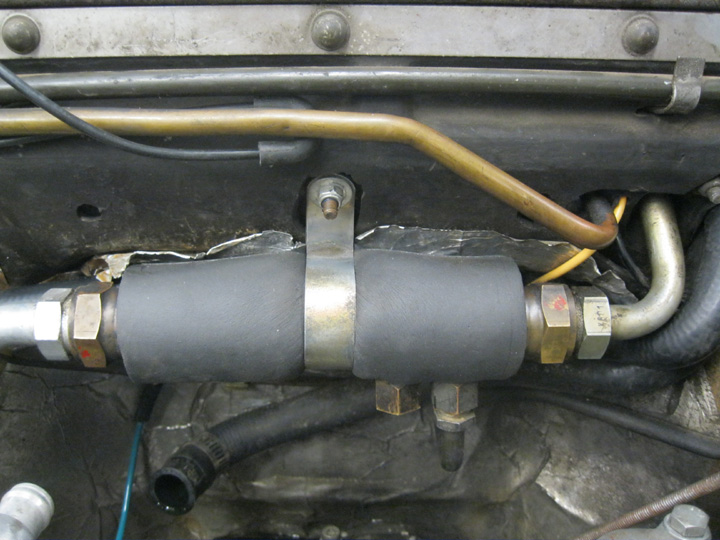
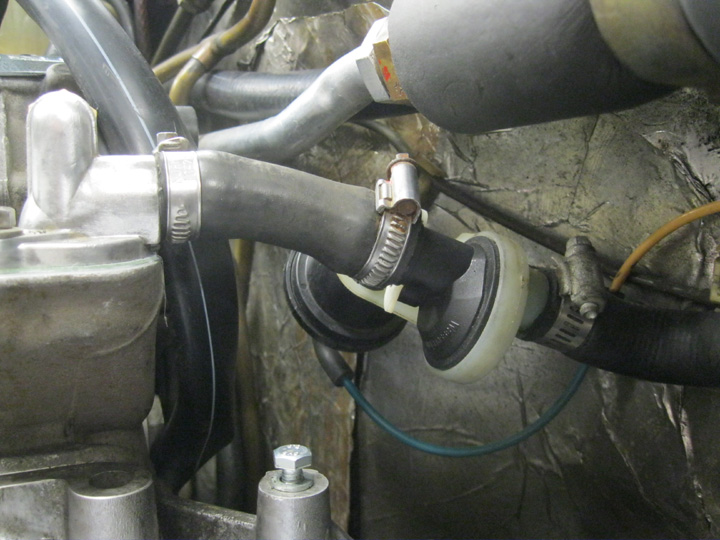
The surgery:
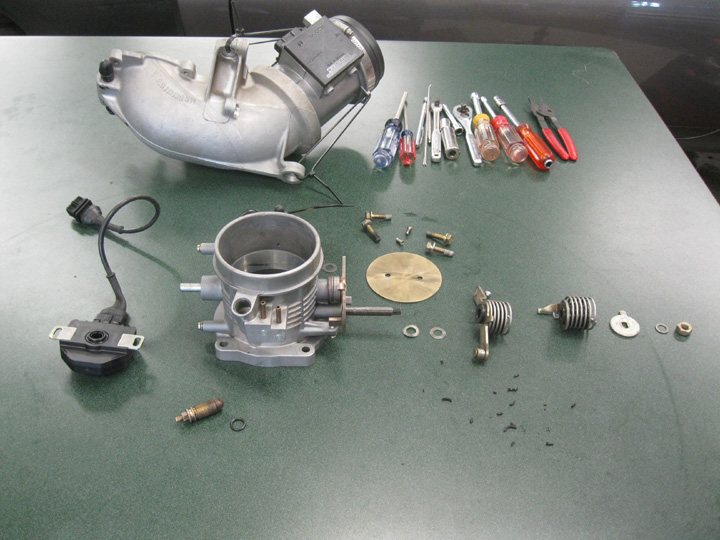
The bits are the old seal which was part of the bearing. The 14-10-2 O-rings fit perfectly. (Thanks guys.) The shaft edge was a little sharp and didn't want to start so I chucked it up and gave it a slight bevel. Bevel allowed it to slide right together.
Before O-rings = Leaked like a sieve. Wouldn't hold pressure at all.
After O-rings = Took about a minute for 5 lbs to leak down. Was able to turn shaft without accelerating loss.
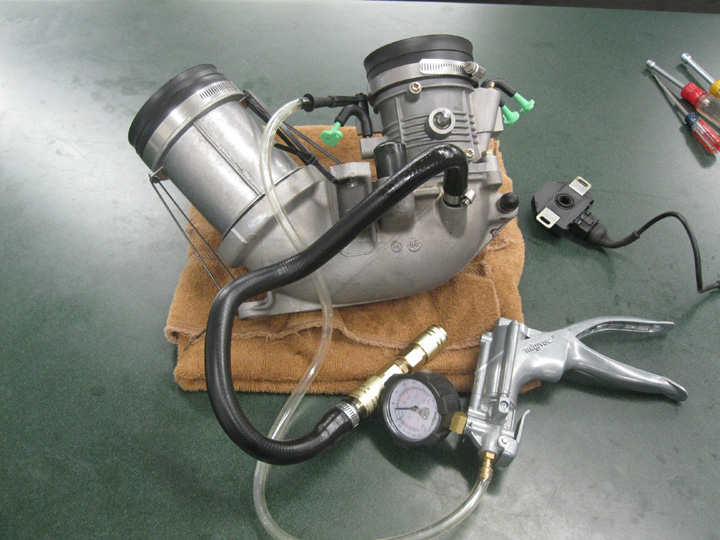
Cleaned and ready for runners. Just waiting on a hose that should go on first.
The bits are the old seal which was part of the bearing. The 14-10-2 O-rings fit perfectly. (Thanks guys.) The shaft edge was a little sharp and didn't want to start so I chucked it up and gave it a slight bevel. Bevel allowed it to slide right together.
Before O-rings = Leaked like a sieve. Wouldn't hold pressure at all.
After O-rings = Took about a minute for 5 lbs to leak down. Was able to turn shaft without accelerating loss.
Cleaned and ready for runners. Just waiting on a hose that should go on first.
Last edited by depami; 06-15-2015 at 09:08 AM.