When you click on links to various merchants on this site and make a purchase, this can result in this site earning a commission. Affiliate programs and affiliations include, but are not limited to, the eBay Partner Network.
This post is to detail my swap from the stock Bosch AL109X 75amp alternator to a 140amp CS144 from a 1998 Chevy Tahoe V-8, 5.7L. I purchased the alternator from Autozone for $124 along with the 3 wire pigtail for $9.99.
A few things to consider when trying to make fit are physical space constraints and belt alignment. After verifying it would physically fit into the car with some adjustment capability I needed to make sure the belt would properly align. In the picture below I have attempted to line up the backside edge of the mounting pivot points to be in the same plane for both units, which is shown by the red line. I then overlay a piece of aluminum on the inner most pulley groove and confirmed they are in the same plane. Simply put, as long as I slide the alternator towards the rear of the car and use the "RED LINE" as a mounting surface the belt should align like stock. The other thing I have detailed is the width of the mounting point with the stock Bosch AL109X being ~2.210" and the CS144 being ~2.000". This is not an issue as long as you use a couple of washers that provide a total spacing of ~0.210", which should be added to the mounting side towards the front of the car.
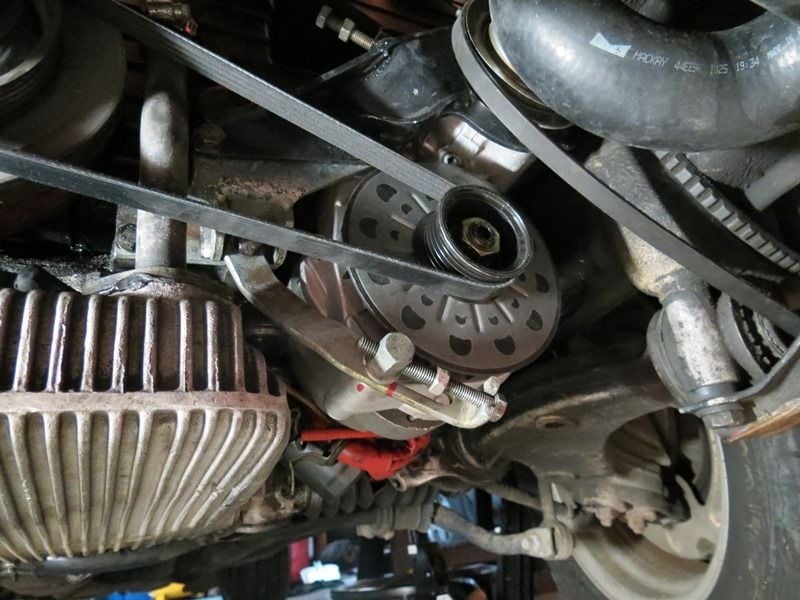
The next challenge I had was the pulley differences. Most people just swap over the stock pulley onto the CS130/CS144 and you are good to go, but my stock alternator (Bosch AL109X) is an oddball and has a 14mm shaft as opposed to the more common 17mm shaft was used by the CS144 and other 928S alternators. If you are one of the unlucky ones like me that should not be an issue. In the picture below you can see the CS144 comes with a 6-groove pulley and the stock belt is 4-groove. It is ok to run a 4-groove belt on a 6-groove pulley. The only potential downside is the stock Porsche pulley is smaller, which will create higher alternator rpm's giving higher amperage at idle. If this does create an issue you can purchase smaller pulleys for ~$22 online. I am going to keep the pulley that came on the unit for now.
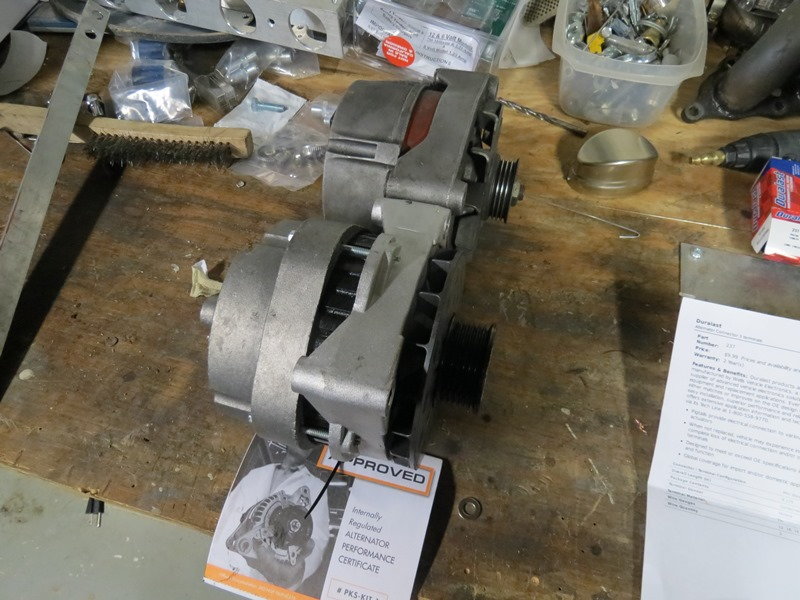
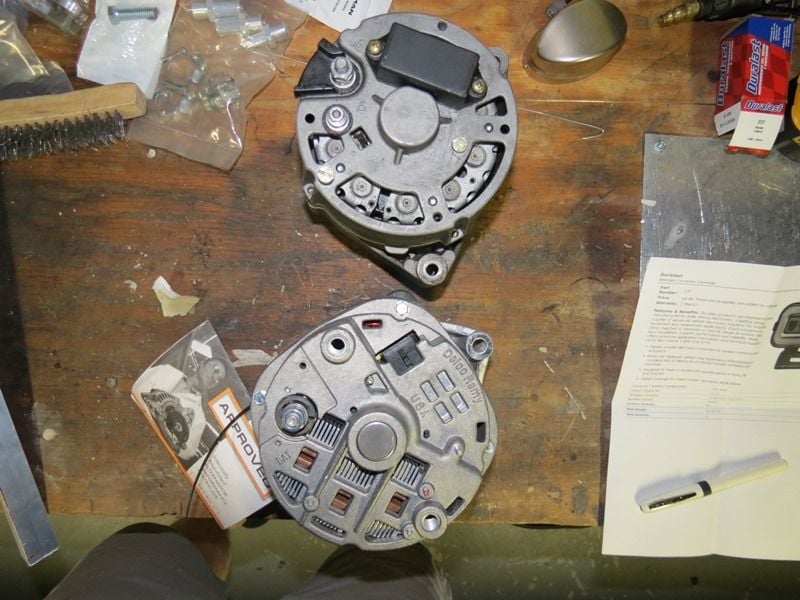
The next pictures gives you an idea of the size difference, which is minimal. The other thing I like about the CS144 is that it is a closed unit like the Bosch and because it sits so low to the ground it relatively sealed from dirt and debris from the road, unlike the CS130 and other high output options.
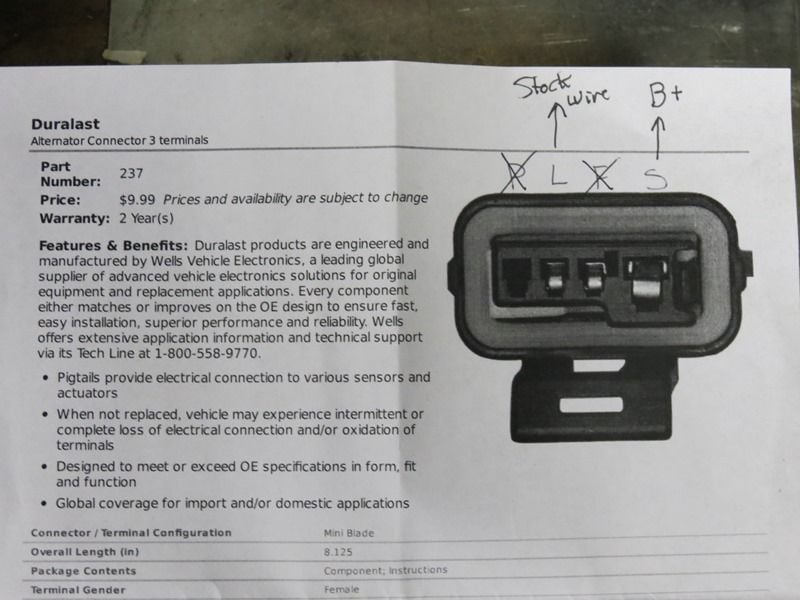
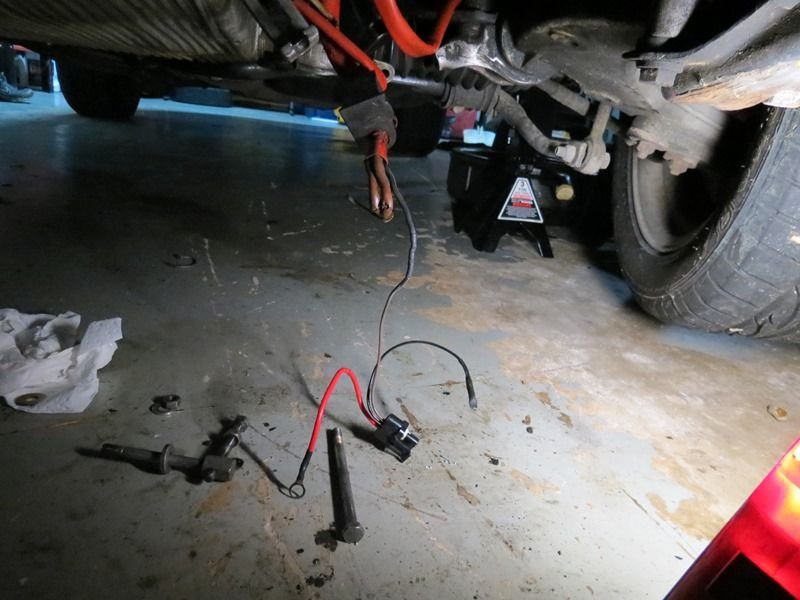
The next thing to detail is the wiring. This is a very simple step and I have provided a diagram and pictures of the actual wiring. As previously mentioned I purchased a 3 pigtail connector for $9.99 from Autozone and only 2 of the wires are used. In the diagram below you need to connect wire long enough to reach to rear of the car to the red wire that is designated 'S' in the image below. This is then attached to the B+ terminal on Battery.
(Thanks to DOCMIRROR for detailing why this needs to go the battery and not the B+ post on the alternator)
You then tie in the brown wire, which is designated as 'L' in the image below. This is soldered directly to green/blue wire coming from the factory harness.
The image below is the wiring harness connected to the car. You can see I soldered the 'L' pigtail to the factory wire. I currently have the 'S' terminal running to the B+ post on the alternator, but I will run it to the B+ on the battery this weekend. In case you are wondering about the third black wire, which is designated 'F' in the image above, I decided to just tape the end and apply heat shrink tubing instead of removing the wire. However, I can assure you it is not being used.
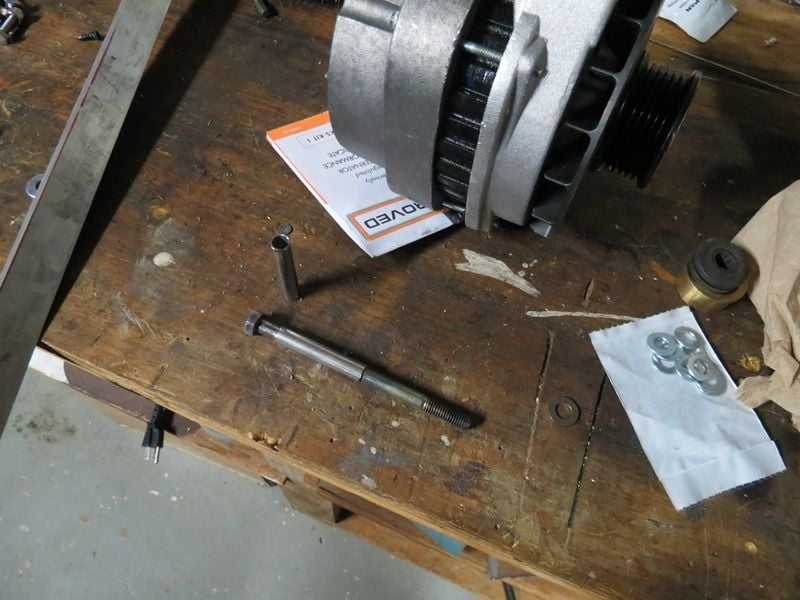
I used stainless tubing to make the stock metric bolt resemble a 3/8" bolt. I ordered 1ft of 304L stainless tubing from McMaster Carr that is 3/8" OD with an 0.28" wall, which fits the stock bolt perfectly. I cut two 2.0" pieces for the two mounting points on the alternator. The picture below is the tubing placed over the bolt. Make sure you put three metric washers on the front of the alternator mount to make up the ~0.210" difference. My washers actually measured ~0.190" so good enough for government work.
McMaster Carr Part # 8457K55 (~$7.00)
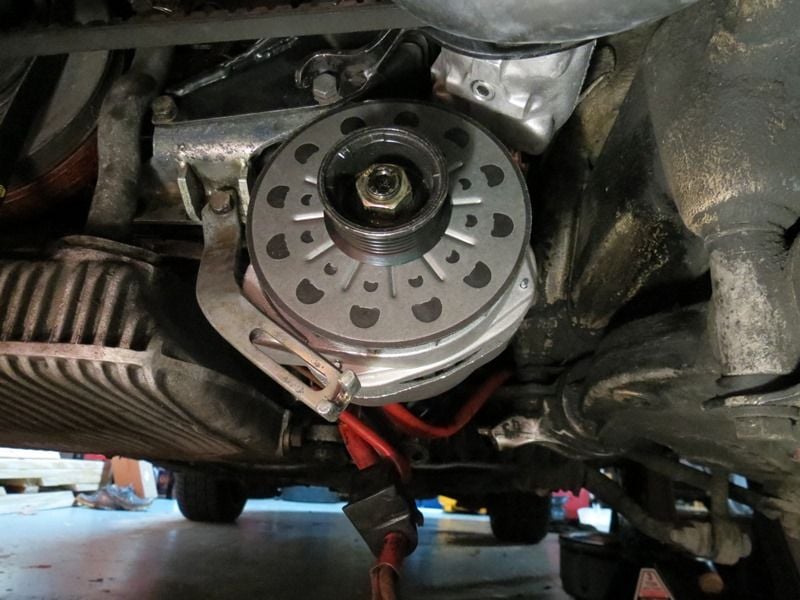
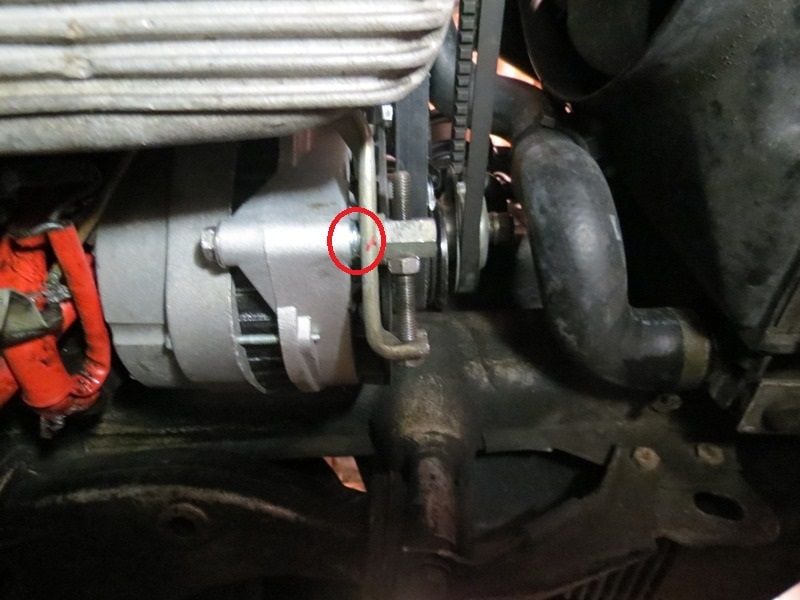
I then installed the alternator to show the two different extremes of mounting, one pushed against the engine and one pushed against the power steering pump. Prior to taking the pictures I made sure the power steering pump was in the as used position with belt tightened. In the fully up position I put a red mark to make sure I did not exceed this mark with the alternator tightened, which would mean the alternator was hitting the power steering pump.
In order to get the belt on I completely removed the adjustment mechanism. I then installed the adjustment mechanism after the belt was placed on the pulley. Make sure you place another set of three metric washers on the front to maintain proper spacing. I have detailed this in the picture below.
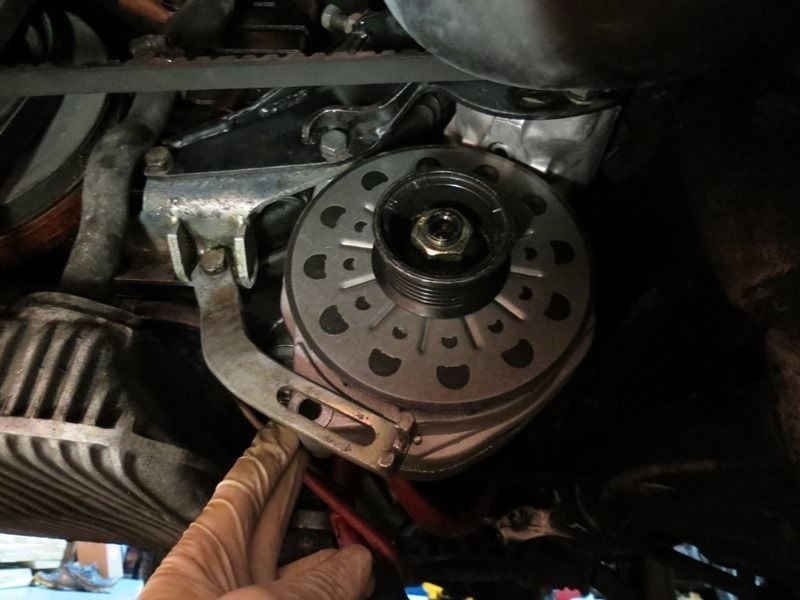
You can see in the picture below the red marks I made to make sure the alternator did not hit the power steering pump. I ended up using a belt that was ~0.500" longer than the stock belt. With the adjuster installed I ended up not having to tighten the adjuster as the belt was snug enough. I had to use a pry bar to install the adjustment mechanism. If you feel the belt is too tight you need to increase the slot on the mounting arm for more negative travel. I tried a belt that was ~0.500" longer than the belt in the picture below, but when tightened it was almost touching the power steering pump.
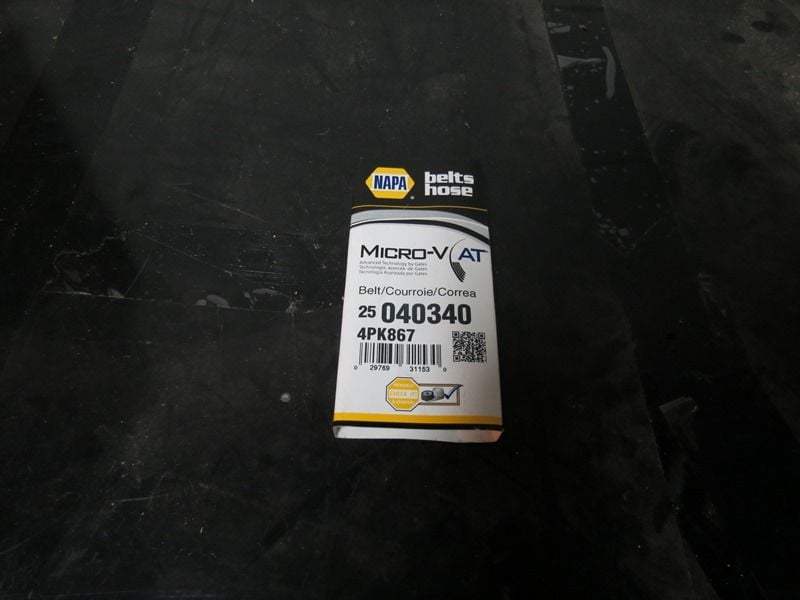
Below is the belt I used that is 0.500" longer than stock.
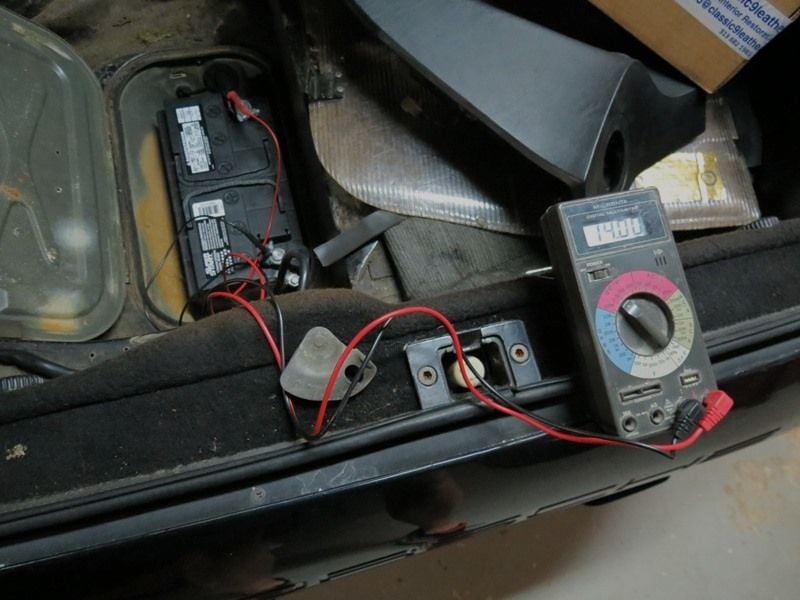
Measuring voltage at the battery with the car started and idling at ~700rpm I am seeing ~14.0V.
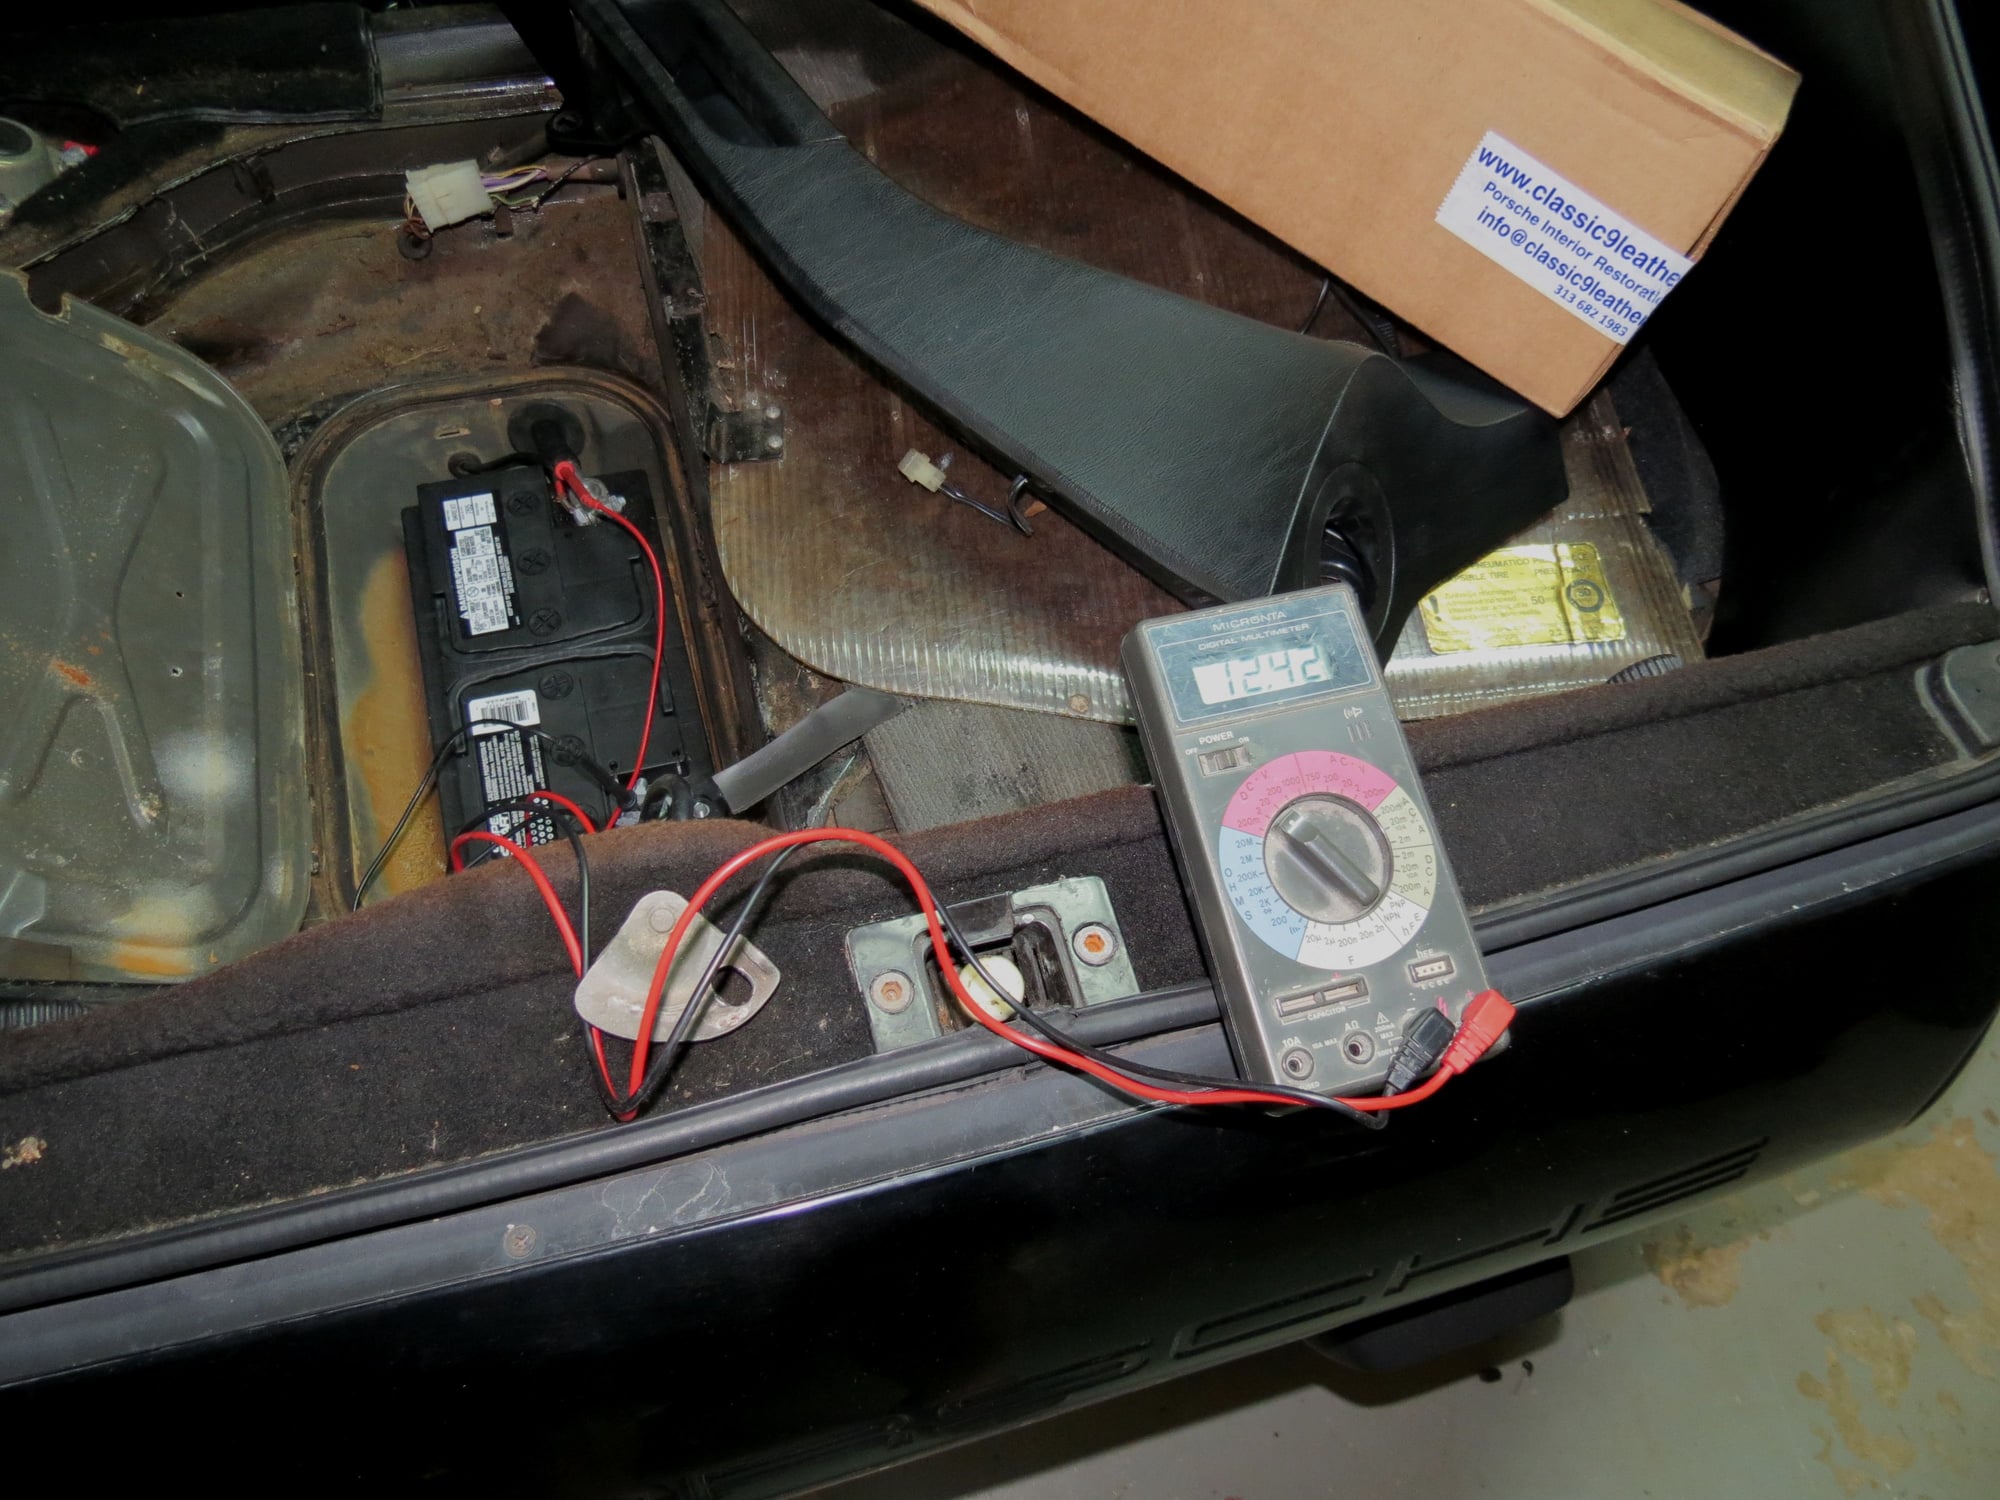
If I turn on the headlights and blower on high I am seeing ~12.4V idling at ~700rpm.
I had my wife give the car a little throttle and with the headlights on and blower on high the battery voltage is 14.0V. The alternator appears to only need a slight increase in speed to maintain 14.0V at idle with lights on and blower on high. This can likely be achieved by sourcing the slightly smaller pulley.
I just got this running tonight and not for very long, but I am encouraged by the initial results obtained and I will continue to update this thread as I get more data.
Last edited by 240Z TwinTurbo; 01-08-2015 at 10:43 PM.
I like your ingenuity. The first alternator you show, the AL109X is not stock. It is from an older Audi if I recall. I have used that alternator and a commercially available upgraded Motorcraft alternator on my 84. I have found that neither hold up well in that location, due to exhaust heat. The cooling fan for those and your alternator receives hot air while the alternator body receive radiant heat from the exhaust manifold. Once the alternator heats up, its output will drop dramatically. Also they have a relatively short lifetime. The Porsche designers came up with a cold air intake system to cool their stock alternator via a cooling shroud. It is pretty clever and rarely used solution which works pretty well. Their alternator is also pretty good at charging at low RPM's.
Nonetheless, I wish you the best of luck and hope that you can solve the problems where I was not able to.
Good luck,
Dave
Thank you for the input and I think you bring up some good points. It is my intention to fabricate a heat shield to isolate the radiant heat from the exhaust manifold. Due to the proximity to the exhaust manifold this is definitely an issue.
Regarding the cold air intake, I am unsure how that setup actually cools. From what I see you have a tube that runs to a cup on the back of the alternator, which is completely sealed. Without some type of vent on the cup how is air actually flowing. In order to remove heat the cold air has to go somewhere. I think of it like putting a piece of plywood on the entire backside of the radiator. You have air hitting the front of the radiator, but it can't go anywhere so no heat is removed.
The fan on the alternator pulley sucks air in through the back and spits it out sideways, acting like a centrifugal blower....
jp 83 Euro S AT 56k
That makes sense and thank you for the explanation. I am not sure if the CS144 has the potential to work in a similar fashion. My approach will be to make a heat shield for the CS144 and see how this affects performance. Thank you again for the explanation and I wondered where the air went once it entered the tube.
12.42V at idle means the alternator is not actually generating all the power you need at that time and the battery is discharging. It is likely the pulley ratio is a little too low for the CS144 at your 700RPM idle. You can verify by slightly raising idle rate and see at what point you have at least 12.8v under those conditions.
Smaller alt pulley? larger crank pulley, faster idle rate...
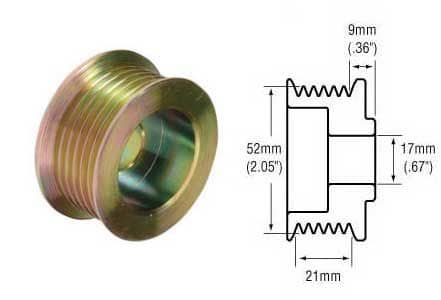
I was able to remove the 57mm pulley that came on the CS144 so that I could get the dimensions for ordering a smaller 52mm pulley. The bore size on the CS144 is 17mm and you need to get at least a 4-groove pulley. The other critical dimension is the distance from the mounting surface to the middle of the first groove, which measured ~9mm. I then found a pulley online that matched those dimensions and was only $6.00. Unfortunately, because there was a $10 minimum I ordered two of them. Whomever wants to do this swap I will send you two of the 2" stainless spacers and the 52mm pulley for $20 shipped in the cont. US. Below is the dimension for the pulley I ordered along with the company.
After I ordered the pulley I was wondering why the battery was showing 12.1V with the car off and then I realized that I have been working on the car for the past several weeks with just the battery power. Therefore, I put the car on the ground and drove it for 15minutes to put some charge on the battery. What I am now seeing is ~12.4V with the car off and the car holds ~13.2V at idle with everything I can throw at it (high beams, fog lights, blower on high with doors open). Below is a short video I made showing voltage at the battery at idle with everything on. The only issue is the dash shows low voltage and it triggers the red warning light. I made not need the pulley after all, but it was only $21 shipped for the pair.
12.4v steady state with everything off suggests the battery is not well charged. Might try a medium rate charger off the car overnight and see if it will maintain 12.6v or better - if not it might be time for a new battery soon - esp. if you have some warranty left.
Note there is a huge difference in alternator generation between cold idle and hot idle - so do the test after the car is fully warmed up since that is more like typical driving conditions.
Alan
Well, it was at 12.1V and went to 12.4V in 15minutes and the battery is fairly new. I will put my battery tender on it for a few days, but I am not worried about the battery condition.
Unfortunately a new battery doesn't count for much - if abused a new battery can be trashed in a matter of a few days when left seriously discharged... You never ever recover the lost charging potential. Best way is to fully charge then see how it holds up.
12.1v implies about a 50% state of charge, 12.4 v suggests a 75% state of charge, fully charged is above 12.7v
This is actually an awesome thread. You include pics and everything needed for someone else to follow.
My alt is running fine and I don't need a swap or anything but if I did you made this DIY quite easy to follow.
This is actually an awesome thread. You include pics and everything needed for someone else to follow.
My alt is running fine and I don't need a swap or anything but if I did you made this DIY quite easy to follow.
Kudos!
I agree. I was able to find a 1-7/8" pulley for my system. It helped with charging at low rpm's.
The OP makes this idea look pretty easy.
Good job,
Dave
This is actually an awesome thread. You include pics and everything needed for someone else to follow.
My alt is running fine and I don't need a swap or anything but if I did you made this DIY quite easy to follow.
Kudos!
I appreciate the feedback and kind words. I will provide an update in a few days when the pulley arrives and I run the B+ wire to the battery terminal. I placed the battery on a tender and it was showing 12.71V this morning when I unplugged it from the tender and car off so the battery seems to be fine.

 01-08-2015, 10:07 PM


 I think of it like putting a piece of plywood on the entire backside of the radiator. You have air hitting the front of the radiator, but it can't go anywhere so no heat is removed.