When you click on links to various merchants on this site and make a purchase, this can result in this site earning a commission. Affiliate programs and affiliations include, but are not limited to, the eBay Partner Network.
A few 928 owners have gone to the trouble and considerable expense to remove the sunroof and fit a none sunroof roof skin and headliner to gain the extra headroom. A factory none sunroof car especially an S-4 is probably more valuable since they are so rare !! And any one over 6 feet 3 inches knows why
But looks like you are starting at the top and working your way down ! Enjoy the journey. An old 928 makes a great hobby as there is always something to fix.
I just completed another project getting the switches in the center console to work properly. I was having to push down very hard on the Rear Wiper Switch to get it to activate as well as the Driver's side window switch to get the window to roll down. Essentially, the buttons were very hard to make click so I decided to take them apart. There was a good article explaining how to remove the switches, which I used to get them out and apart.
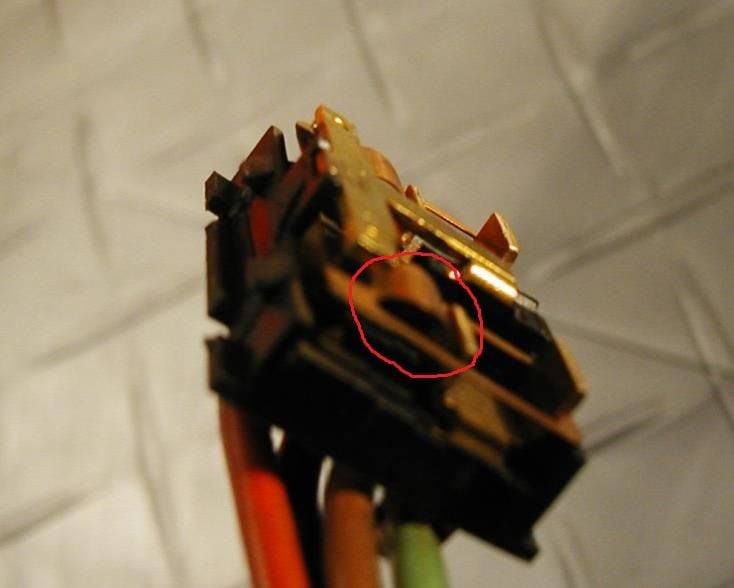
I did not agree with the article as to why the switch was not working so I took a different approach. I first used some 800grit sandpaper and lightly cleaned the contacts. I then took a small flat head screw driver and positioned it under the arch in the switch and across both sides. I then slightly turned the flat head screwdriver, which slightly raised the engagement point of the switch and made it more sensitive. I did not take any pictures, but show below a picture from the article previously referenced. You can see in the picture the arched portion of the metal switch. Anyway, switches work perfect and it only took 45minutes to fix.
DO THIS AT YOUR OWN RISK. If you turn the screwdriver too much it can overbend and the switch will want to stay in the other position.
I assume this is sarcasm. I did one last fix and lubed the underside of the track as this is where the wing tab rides when the sunroof is being closed. I wondered why it was slower to close than to open and it is because the wing tab is being pushed up against the underside of the track as it closes. The sunroof now completely closes with the car off.
More an illustration of variation in ability, I gave up trying to remove the hard lines from my parts car, now going to give it a second shot to see if I can learn enough to fix the one on my other car.
OTOH my electrics work equally badly with motor running or not, so you may have some ground point or battery negative strap issues.
The switches were ok for a new car, but aged grease etc puts more of load on all the motors and that kills the switches, this and similar for the other motors may be a fix for that.
3M strip calk sounds like interesting stuff, I haven't seen it before.
3M strip calk sounds like interesting stuff, I haven't seen it before.
I purchased it when I had my 91 NSX and was reworking the power windows. If you've ever taken a door panel off and it has the clear plastic underneath, the strip caulk is used around the edges to hold the plastic to the door. I am not sure it is the ideal sealant for the sunroof, but I had it laying around. I saw an article and the stuff below was recommended.
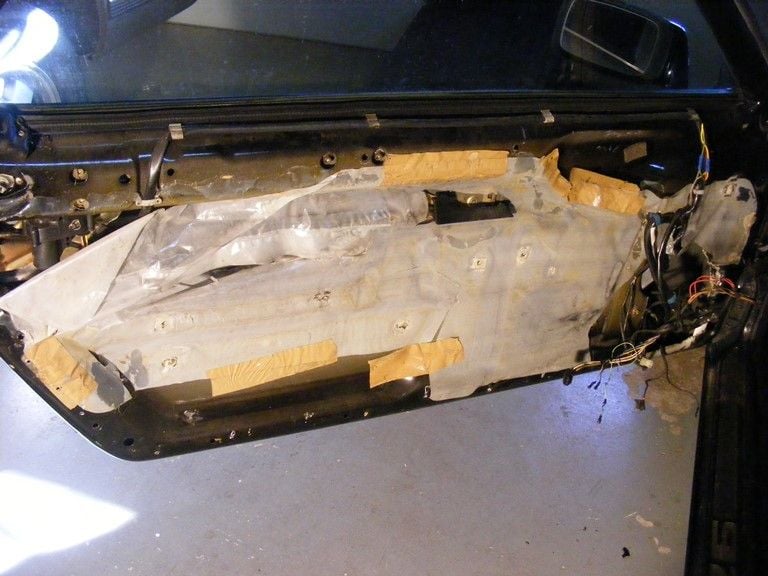
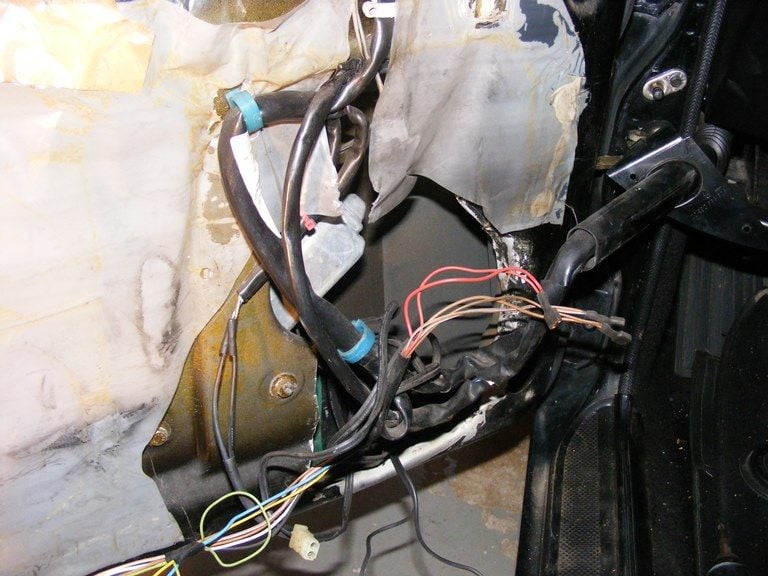
Although the windows are operational I notice they open and close slowly. I decided to start with the driver's side door and take out the window regulator. After removing the door panel I noticed it was in bad shape with a bunch of the plastic mounting points broken from previous removals. I am going to have to somehow repair the door panel before it is reinstalled. I also found use for that strip caulk as you can see below. It also appears a previous owner allowed a large hole to be cut into the door, which I assumed was used to remove the window regulator.
After removing the regulator I cleaned off the old grease and applied fresh white lithium grease. The actual mechanism seemed in good operation so I focused on the motor and gear. After unbolting the motor from the gear I noticed the gear was difficult to turn. I sprayed a bunch of brake cleaner in the gear and turned it for a few minutes until it spun freely. I then used a spray lithium grease to lube the assembly and then applied lithium grease to the worm gear and reassembled.
After putting it back together the window works great so time to move on to the passenger side...tomorrow. Being an FSU grad I have to watch the game.
The 10 different little sheets of plastic taped onto the door are a poor substitute for a real vapor barrier & drip panels.
The difference between "scraps" and a decent vapor barrier are pretty significant. The "Bank Vault Door Slam" is noticeably better.
MrMerlin suggests a plastic shower curtain, I just used a sheet of fairly heavy plastic. Thick garbage bags could probably be used in a pinch.
Lucky daughter! I bought mine a '96 Ford Bronco, I figured a tank on ice was better than a shark on ice WRT survival probabilities
Good work on the sunroof, I just did mine last year after 20 years of neglect. Mine had some broken parts so I'll have to say I think you got lucky just cleaning! One piece of advice I was given was to be careful to mask the top of the sunroof with plastic film (I used overhead projector film) to keep from scratching paint while you're adjusting it, but it seems you made it past that part without mishap. If you ever need to replace the runners, I highly recommend the plastic.
You probably know already, but if not I'll mention the SS brake lines are great for reducing high temperature fade but they aren't necessary for street use and they do require frequent inspection. If your daughter won't be using the car for DE/TT events you may want to just check (and possibly replace) the existing rubber lines, they have a much longer service life than SS and they work just fine if you aren't tracking the car.
After putting it back together the window works great so time to move on to the passenger side...tomorrow.
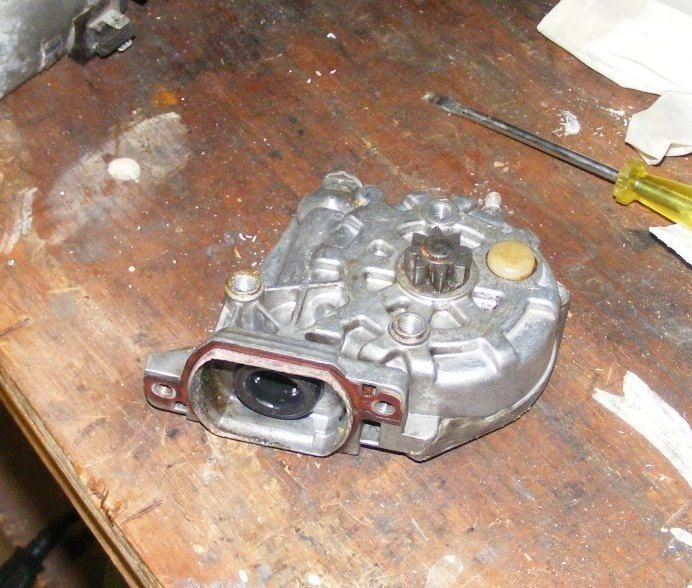
Since you didn’t mention doing anything to the motor itself and you are doing the other side. I’d pull the plastic portion out of the motor, it’s the portion on top that holds the brushes. The brushes on these motors wear out prematurely from the issues you found with the worm-gear mechanism, old cruddy lubricant. The brushes should ride at least about mid-way in the guide, if they are any lower than that, you will have issues later on. Plus, while you have it apart…you can pull the armature/rotor out and clean the commutator (which the brushes ride on) with fine sandpaper and add a bit of fresh lubricant to the shaft end that sits down in the bushing of the housing.
It’s pretty basic to reassemble, by just sliding the armature back in, then hold the plastic housing above the motor housing and slide it in, while holding the brushes back with a small screwdriver, then reassemble the worm-gear.
Reference picture...not your exact motor.
Just another added step to help the life of the motor.
You probably know already, but if not I'll mention the SS brake lines are great for reducing high temperature fade but they aren't necessary for street use and they do require frequent inspection. If your daughter won't be using the car for DE/TT events you may want to just check (and possibly replace) the existing rubber lines, they have a much longer service life than SS and they work just fine if you aren't tracking the car.
Thank you for the input and SS brake lines are already on the list.
Since you didn�t mention doing anything to the motor itself and you are doing the other side. I�d pull the plastic portion out of the motor, it�s the portion on top that holds the brushes. The brushes on these motors wear out prematurely from the issues you found with the worm-gear mechanism, old cruddy lubricant. The brushes should ride at least about mid-way in the guide, if they are any lower than that, you will have issues later on. Plus, while you have it apart�you can pull the armature/rotor out and clean the commutator (which the brushes ride on) with fine sandpaper and add a bit of fresh lubricant to the shaft end that sits down in the bushing of the housing.
It�s pretty basic to reassemble, by just sliding the armature back in, then hold the plastic housing above the motor housing and slide it in, while holding the brushes back with a small screwdriver, then reassemble the worm-gear.
Just another added step to help the life of the motor.
Thank you for the input. I was unable to pull the armature/rotor out for inspection so I will try again tomorrow since the door panel is still off. If I look at the pics should I assume I have to push the brushes in on both sides to pull the rotor out?
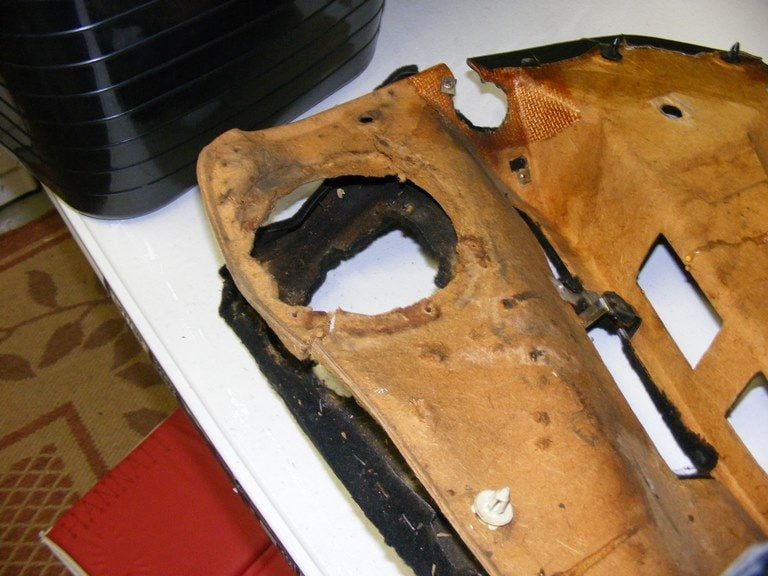
After removing the door panels I noticed they were in bad shape. With the recommendation of another member I ordered the stamped metal support for the armrest today so it should arrive next Wednesday. I also realized the hole cut into the bottom of my door was for the aftermarket speakers. Someone had modified the top portion of the door panel where the factory speakers used to be and recovered it so I assumed the factory location was on the bottom. Since I am reworking the stereo so something more modern I purchased some 4" Kenwood two-way speakers so I could install them in the door while I had it apart. Upon inspection that area of the factory door panel was toast.
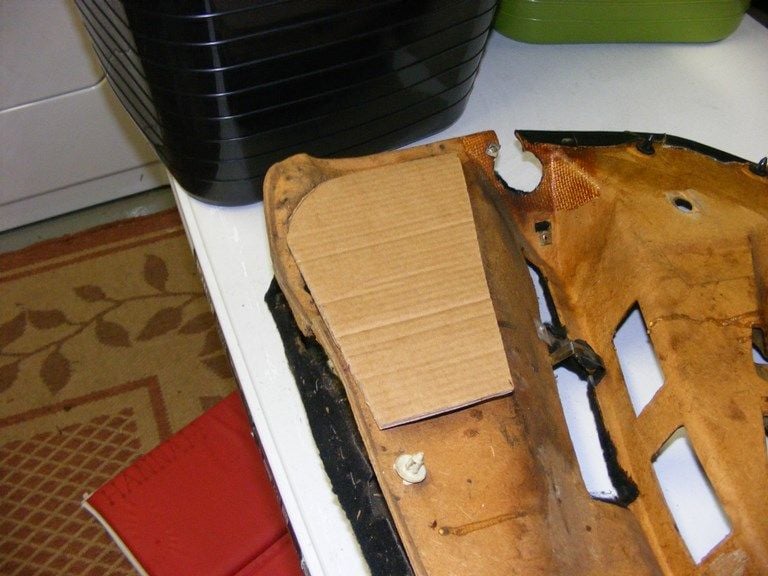
I took some cardboard and made a template for the destroyed area and then transferred the template to some thin oak plywood I had laying around and then verified fitment.
I used the template with the speakers to create the cutout in the plywood and then used construction adhesive to bond the plywood to the door panel. It will sit overnight to make sure it is completely dry.
The carpet on the bottom of the door was in bad shape and barely adhered to the door panel so I pulled it off and will purchase some new material and recover. I also need to firm up the plastic tray so I plan to bond it with adhesive and small nuts/bolts. More to come on the door panels later.
Thank you for the input and SS brake lines are already on the list.
In that case, let me warn you about the fittings you may get from Goodridge, the outfit I went with. To their credit I was able to fit them to my '85 but the fittings at the hardline weren't compatible with the holding brackets.
The stock brackets on my car were formed to accept a "flat" on one side, the Goodridge fittings are round. To correct the fitment on those lines requires you to use a dremel (or similar) grinder to cut away the flat part of the retainer, allowing it to accept a fully circular fitting on the inboard end of the SS line. The retainer clips are also unusable, so be careful when removing the stock clips, you'll need to re-use them.
In all, I wasn't completely happy with the Goodridge lines. They definitely corrected my problem with high temperature brake fade, but I'm not entirely comfortable with the fitment. The company advertises 100% correct fitment, but when I called them to describe the problem they asked for photos, which I provided, then told me they would need an indefinite period of time to find the correct fittings. That was over a year ago and I've yet to hear back from them.

 12-31-2014, 02:21 PM