When you click on links to various merchants on this site and make a purchase, this can result in this site earning a commission. Affiliate programs and affiliations include, but are not limited to, the eBay Partner Network.
The factory jumper for the starter relay is different from what you need for the fuel pump. The starter relay jumper takes the trigger for the coil (86) and sends current directly to the contact output (87). For the fuel pump, jumper from the supply contact (30) to output (87).
The fuel pump relay has one side of the coil powered by bus 15 (ignition switch in run or start position), and the other side is pulled towards ground by the LH FI brain. Jumpering incorrectly can easily apply full current to the LH switch, which is too often fatal to that module; there is no fuse in that LH trigger circuit. The contacts of the relay see battery voltage via a dedicated feeder from the battery to relay pin 30, unfused. The output contact (87) goes to the fuel pumps and the auxiliary air valve via fuse 42. It's also shared with the oxygen sensor heater (unfused), and supplies the fuel injectors (unfused).
That dedicated feeder from the battery is a red wire that attaches to the battery positive terminal clamp. It needs to be clean and the nut needs to be securely attached. This connection often gets disturbed when the battery is serviced, and often get ignored when doing annual electrical maintenance. Take the time to disassemble ALL the connections at the battery and the ground connection in the spare wheel well, clean carefully, and reassemble. I coat all those connections with a film of Vaseline after thay are reassembled to protect them from corrosive vapors in the battery well. I also add to the battery vent line so it extends out of the battery well with the positive cable, routing those corrosive/explosive fumes safely clear. More than a few mysterious electrical gremlins have just as mysteriously disappeared after cleaning and securing all the power supply and ground connections.
I thought that didn't sound right about using the reverse light jumper at the fuel pump. I've never heard that before. I was going to question that to the OP but I couldn't find with a search, if the 87 and 30 were jumped at the reverse light. Thanks DR Bob!
OK you guys are confusing me now. I haven't done anything with the starter relay, it's a different type and my starter seems to be working just fine. The reverse lights "relay" in my car is just a jumper...from what I've been told, it came from the factory that way (presumably that's why Alan's diagram has it in green dashed lines, indicating compatibility with the other 53 relays, but in this case, it's just a jumper between 30 and 87). When I jump the fuel pump relay, I remove it and take the factory jumper from the reverse lights and use that in the fuel pump relay spot. I'll go back and re-read what I wrote, maybe I said something unclear or incorrect.
OK you guys are confusing me now. I haven't done anything with the starter relay, it's a different type and my starter seems to be working just fine. The reverse lights "relay" in my car is just a jumper...from what I've been told, it came from the factory that way (presumably that's why Alan's diagram has it in green dashed lines, indicating compatibility with the other 53 relays, but in this case, it's just a jumper between 30 and 87). When I jump the fuel pump relay, I remove it and take the factory jumper from the reverse lights and use that in the fuel pump relay spot. I'll go back and re-read what I wrote, maybe I said something unclear or incorrect.
Maybe I misunderstood (or didn't read correctly) what Dr Bob stated. My question is this. Does the 5 speed reverse light jumper, when moved to the fuel pump relay socket, jump ports 87 and 30 to continually power the fuel pump? It may, I just never heard anyone say this and I don't have access to my car right now to verify.
Yes, it does...it's the same relay that goes there for autos isn't it? That's what I gathered from the chart I've been using. In any case, the pinout seems to be the same.
your car wont start without the jumper installed in the in XXII socket.
NOTE this is in addition to all of the other relays you should have installed,
you need 4 new 53 relays,
and to verify that,
your plugging the relays into the correct slots,
that your plugging the relays into the correct slots,
that your plugging the relays into the correct slots.
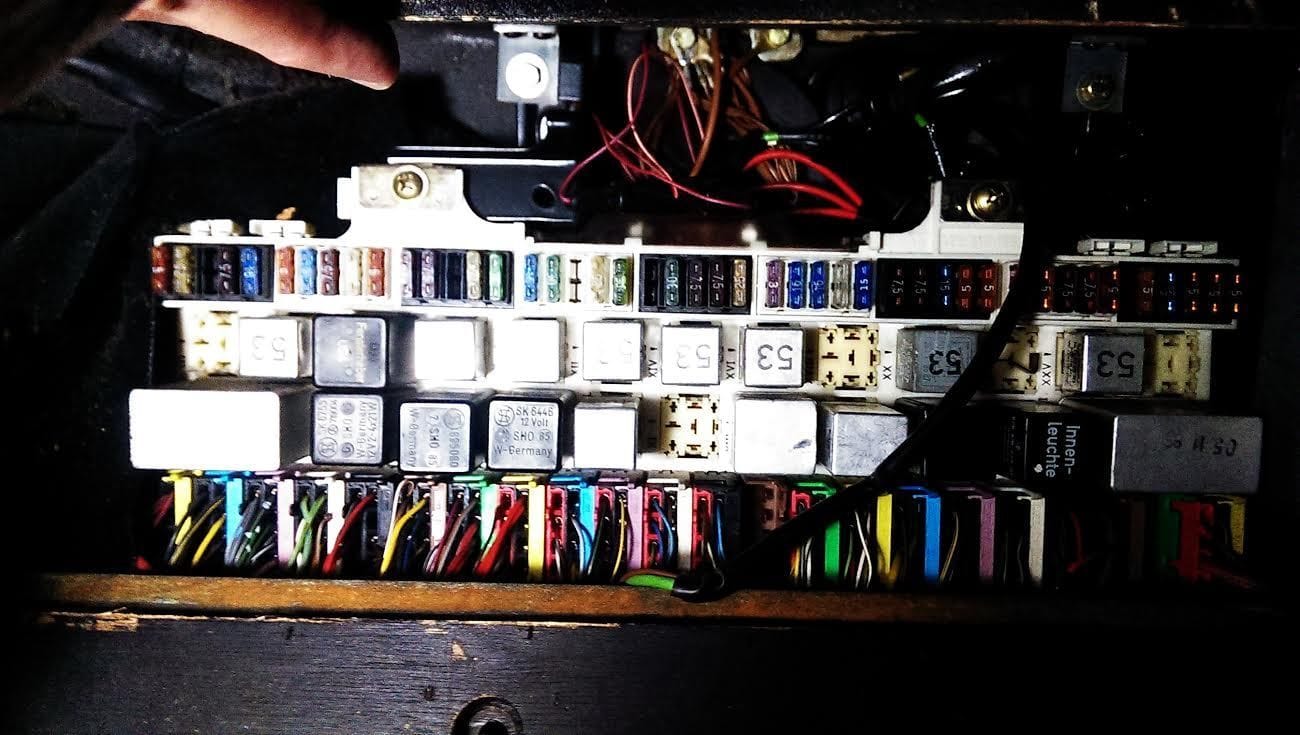
Posting a few pictures of your CE panel now would make it easier for others to diagnose what your doing.
NOTE leave the bent metal jumper in its slot the car wont run without it.
You need to put new 53 relays into these slots
XVI -EZF,
XX- fuel pump O2 sensor,
XXV- LH
IV Ignition.
XXII is the reverse light jumper leave it alone
after all of this try to start the car.
NOTE if the pump isnt running then drop the CE panel and then check that you have power coming out both of the wires that connect to the fuel pump fuse.
NOTE its possible for the slide on connectors on the back of the CE panel to corrode and the fuse will show good but the corrosion prevents the power from going into the wire that goes to the fuel pump .
NOTE the power comes into the fuse along the top row,
and exits to the device along the lower edge of the connectors
NOTE deoxit should make these connections return to full function, it could take up to 24 hours for the stuff to work
Seriously, the car won't start without the jumper for the reverse lights??? That makes no logical sense but of course that's not a reason for it not to be true lol. The thing is, I could absolutely swear that on Saturday, it started when I jumpered the fuel pump relay, and I did that with the reverse light jumper. I know it did, although now I'm doubting myself. I should be writing all of this down.
I have no doubt that I'm plugging the relays into the correct slots. I'm being very careful about that. The other things I will definitely do. I thought I was onto something with the jumpered fuel pump not running...and maybe I am. I want to check the voltage at the fuel pump in that non-running scenario, but I will do the stuff you recommend, for sure.
I'm completely baffled how the reverse light jumper is an issue for starting. I guess I need to be looking at the schematics...
weird symptoms that could be a lot of things and come and go = grounds
spend a day with an emery sponge (handy little buggers at home depot) or your other terminal cleaner of choice and just do it. you will be better off than when you started and may just kill the gremlin in the process.
I was not a believer until I did mine out of desperation.
Not Sitting at my desk with wiring diagrams so take this with a grain of salt. On manual cars there is a jumper in the starter relay socket. Automatic cars use that relay to support the neutral safety switch, something manual cars don't have. I'll have to bone up on the reverse lights relay jumper.
Pay extra close attention to the relay socket designators on the ce panel. Socket numbers have little arrows pointing to the socket they apply to.
I'm of the opinion that a switched and fused jumper is an essential part of the troubleshooter's toolkit. Fuel pressure gauge is not far behind.
I posted a pic of the CE panel in the previous thread... On my phone and in training so I can't get to that pic at the moment. BTW I don't have a jumper in the starter spot... there's a relay there. For what it's worth...
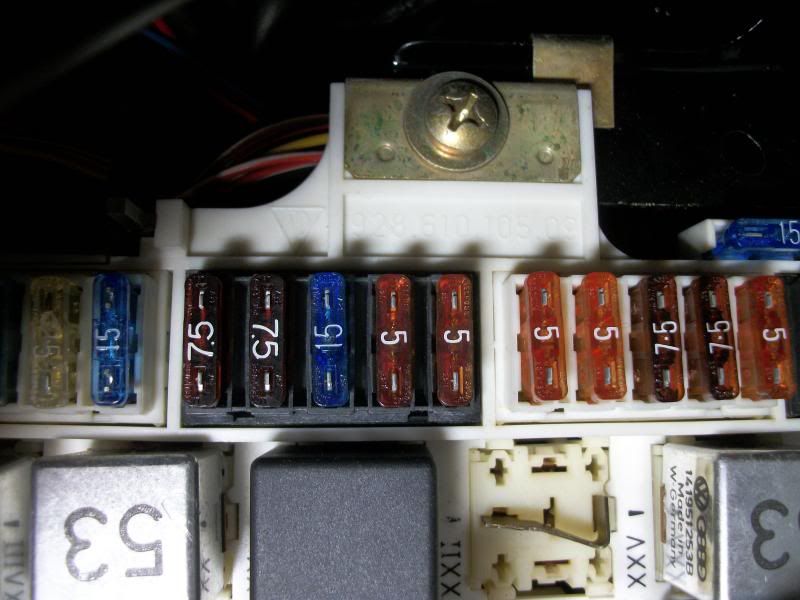
OK, here is the CE panel pic from the other thread. It's a little washed out from camera phone flash. The only visible difference now is that there is a fog light fuse, and two of the 53 relays (EZF and LH) have been replaced with new relays (more on order).
Btw it's too dark to attack grounds when I get home from work, but I couldn't resist re-checking some voltages. I was getting some really odd readings on the relay socket connections 30 and 87 and almost ran in here to post about it. Fortunately I realized before I did that I had my DMM set to AC voltage. Doh! Corrected that and got a nice 12ish volts. With the fuel pump relay jumpered I was getting nothing at the fuel pump connections however. Makes me think the ground in question might be the fuel pump ground after all...or some other issue with the wiring between relay and pump I guess. Dammit I wish I could stay home from work tomorrow and dig into this...
if you jumper the FP relay do you have 12V at the pump?
do you also have a good ground?
to test attach the test lamp to the positive on the battery terminal then touch the ground wire at the pump, the light should come on .
NOTE remove the ground wire from the pump for this test.
be careful with the nuts the studs are aluminum and are easily sheared off
The ground wires in the hatch area are also for the fuel pump ground so clean the bundle in the spare tire well and the bundle behind the RR quarter liner
The picture shows that you have a 53 relay in the 4th spot from the right on the top row (the fuel pump relay) I recommend that you keep a jumper with an on/off switch in that spot until you figure out what is causing your grief. By using the switched jumper, you effectively remove the relay as a possible cause of your problem and it's one less thing you have to worry about as you are troubleshooting.
One other thing, if you didn't have the fuel pump relay jumpered, after the key was turned on for 3 seconds(?), the power to the fuel pump would be turned off if the engine wasn't running (the safety factor built in to prevent the fuel pump from continuing to run in the event of a crash) so you wouldn't see 12 volts at the fuel pump.
Last edited by soontobered84; 11-20-2014 at 01:14 PM.
Reason: addition

 11-18-2014, 12:20 PM