
The restoration story of 78 euro shark #533
 03-25-2014, 07:54 AM
#16
Instructor
Thread Starter

During january of 2014 I keep going with the electricity. I even took out the color pencils and colored my plan. Identifying is a lot easier this way although my back isn’t quite happy with this. There’s a few forward steps and a few backwards. The CWS print has a break in one of the circuits and in the car there’s various unconnected stuff and some connections are definitely questionable. The cut wires in the center console serving as the pi�ce the r�sistance.


After cleaning the switches I decide to take out the center console completely. I discover that the HVAC unit is broken along with some other parts. At least I know why I didn’t get any cold air but the anger I feel towards the PO/ Resto guy is peaking. Study of the HVAC is the next step and the funny thing is that this study takes me another step further. I wind up at the air filter housing again. There’s a build up of oil in this housing again and I notice that a certain part is missing from the ventilation tube. Could this be the cause of smoke when I rev the car up? Lot’s of questions pop up and I’m glad to get the help of Jim Doerr. This leads me to draw my HVAC and raises another question. Why isn’t my central door lock working. What started as a a project for the cleaning of the ground points has taken me a long way round. In the mean time the HVAC unit is glued and after a visit for inspiration to Techno classica this friday (03/29) I hope to dig in on the car again during easter holiday. A fortnight of wrenching and solving problems awaits. (incl.finding out why I can’t get the car into reverse anymore) Getting a fresh crate of beer is first on the to do list.

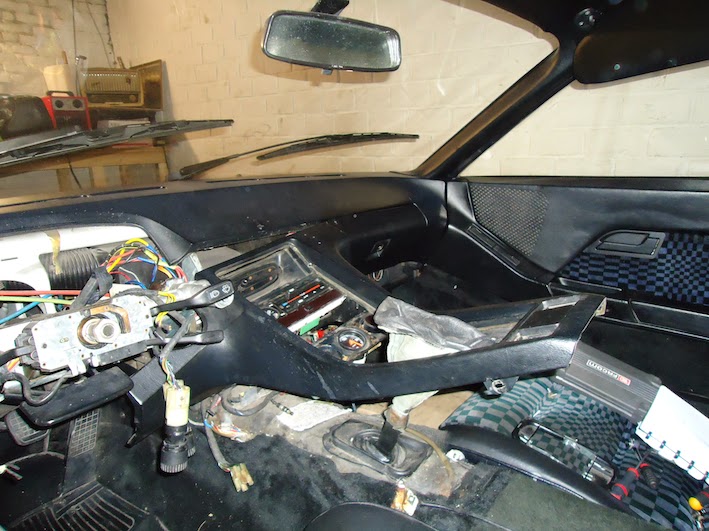

After cleaning the switches I decide to take out the center console completely. I discover that the HVAC unit is broken along with some other parts. At least I know why I didn’t get any cold air but the anger I feel towards the PO/ Resto guy is peaking. Study of the HVAC is the next step and the funny thing is that this study takes me another step further. I wind up at the air filter housing again. There’s a build up of oil in this housing again and I notice that a certain part is missing from the ventilation tube. Could this be the cause of smoke when I rev the car up? Lot’s of questions pop up and I’m glad to get the help of Jim Doerr. This leads me to draw my HVAC and raises another question. Why isn’t my central door lock working. What started as a a project for the cleaning of the ground points has taken me a long way round. In the mean time the HVAC unit is glued and after a visit for inspiration to Techno classica this friday (03/29) I hope to dig in on the car again during easter holiday. A fortnight of wrenching and solving problems awaits. (incl.finding out why I can’t get the car into reverse anymore) Getting a fresh crate of beer is first on the to do list.
Last edited by Igordiver; 05-28-2014 at 04:28 AM.
 04-07-2014, 10:39 AM
#17
Instructor
Thread Starter
Easter holiday presents itself as an opportunity for some intense wrenching.
Finishing the HVAC, electricity and putting the instrument cluster back are scheduled this week but today my attention is directed elsewhere.
In the past few weeks intensive research might have shown the reason for loosing reverse gear. Most Internet topics mention the nylon bushing of the rear coupler as the main suspect for loosing gears so I wind up on my back in order to inspect the coupler. Even the blind can see the problem. I’m greeted by a broken dust boot and touching the bushing with just a fingertip is enough to have it come apart. None of the “specialist companies” that I’d contacted about the loss of reverse mentioned this problem , convinced that I needed a transmission rebuild. Cheapest offer for opening an closing the gear box was about 1600$ while an 8$ bushing will solve my problem most likely. Needless to say that my blacklist is vertically expanded. I get some horizontal help on draining the coolant. I want to check it for signs of oil because the car smokes quite heavily when I rev it up. No oil is found so the smoke question remains unanswered.
Last edited by Igordiver; 06-05-2014 at 06:52 AM.
04-10-2014, 06:26 AM
#18
Instructor
Thread Starter
It is commonly known that using the right lubricants is essential in a car. Therefore the day starts with buying a fresh supply of my favorite lubricant.

I can use this lubricant during my search for various items. The first search is an easy one; a sticker under the glovebox containing production date info. A small part of the HVAC takes a bit more of searching but is found between the seat and center console but a small copper plate from the window switch refuses to show itself. I’d like to make some progress today so I give up.

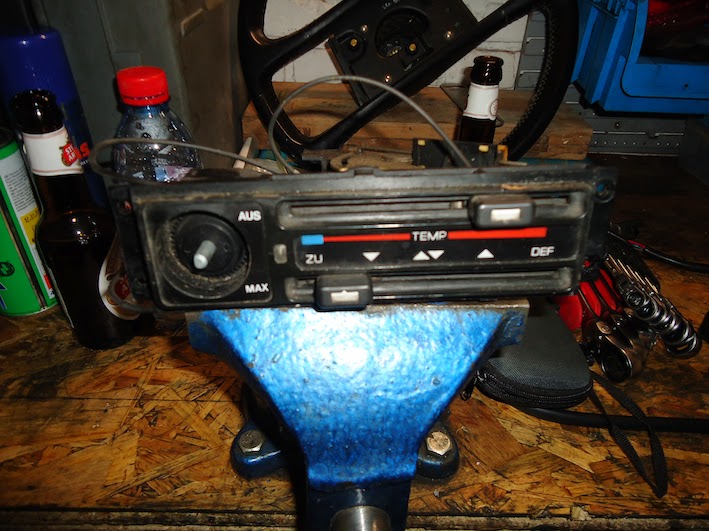
Armed with my colored plan and multimeter I can finally come to the conclusion that the loose wires in the center console belong to the radio and speaker. For whatever reason the PO cut every wire about 3 times. @&���!�!!!! I cut the wires in a manner that they can not make any contact and tape them for isolation. They’s re out of the way for now.
Another search starts as I’ve seemed to have lost the screws that keep the center console into place. After an hour of searching I give up concluding that I can kick myself.


I can use this lubricant during my search for various items. The first search is an easy one; a sticker under the glovebox containing production date info. A small part of the HVAC takes a bit more of searching but is found between the seat and center console but a small copper plate from the window switch refuses to show itself. I’d like to make some progress today so I give up.
Armed with my colored plan and multimeter I can finally come to the conclusion that the loose wires in the center console belong to the radio and speaker. For whatever reason the PO cut every wire about 3 times. @&���!�!!!! I cut the wires in a manner that they can not make any contact and tape them for isolation. They’s re out of the way for now.
Another search starts as I’ve seemed to have lost the screws that keep the center console into place. After an hour of searching I give up concluding that I can kick myself.
Last edited by Igordiver; 06-13-2014 at 10:42 AM.
06-13-2014, 10:48 AM
#19
Instructor
Thread Starter
Finally time to update on the progress. Al pictures were removed so I had to replace them all. Some porgress has been made during the last 2 months.
April 14th will be one of those days long remembered. Despite delivery of new parts no progress is made, on the contrary, we go backwards. A slip when trying to get my head underneath the center console causes me to kick the door open. It slams against the wall. Results are obvious. I walk away from the project for the weekend.


April 14th will be one of those days long remembered. Despite delivery of new parts no progress is made, on the contrary, we go backwards. A slip when trying to get my head underneath the center console causes me to kick the door open. It slams against the wall. Results are obvious. I walk away from the project for the weekend.
06-13-2014, 10:53 AM
#20
Instructor
Thread Starter
After a few days of rest the disappointment numbs a bit. The internet again proves a valuable source of data as I can find a way to make the job of putting the center console back in place easier. Rerouting the wires of the POD makes sure it fits into place on a second attempt. Putting the steering wheel back in place ends the “dash trash” .
As I reconnect the battery I’m sure that the print is fixed but the problems with the light switch and rear fog light still exist. I’ll worry about that later.
Before ending the day I inspect and take photographs of the door. At least I get an idea of the amount of car putty that’s been used. It seems to be not too much but nonetheless I’m greeted by some putty that has the shape of a sperm cell.
06-13-2014, 10:57 AM
#21
Instructor
Thread Starter
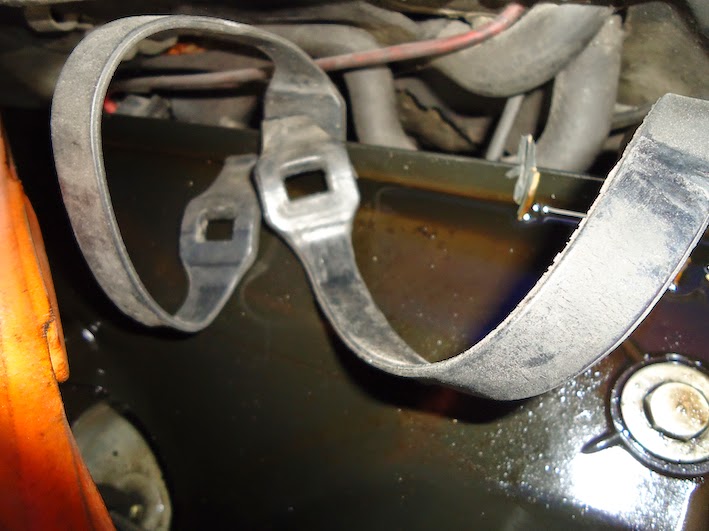
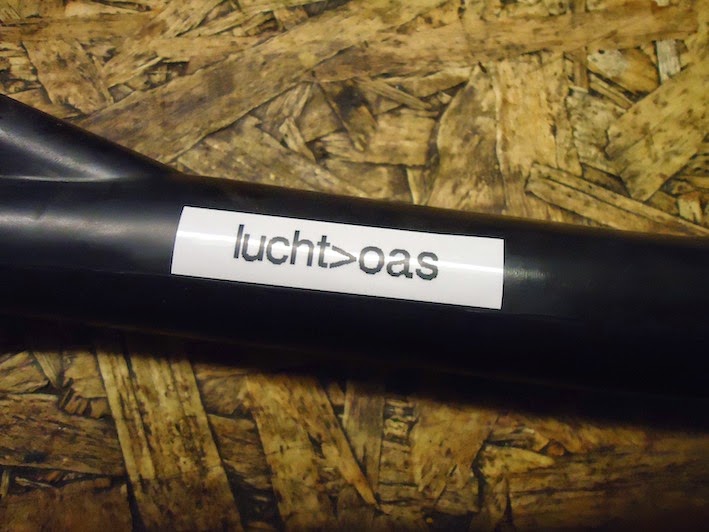
A torn gasket underneath the Oil separator could be the cause of excessive smoke when revving the engine. I’d like to fix that before starting the engine again. It’s a pretty straight forward job but in the crowded engine compartment there’s always something in the way. Taking lots of pictures and using a labeler (I’ve stolen the idea from an episode of wheeler dealers) should be of great help when reconnecting all the tubes. All goes well until I make it to the last four bolts of the disassembly process.
The 4 allen bolts of the regulator housing are stuck after 37 years of service and the heads are rounded off. After 5 hours of wrenching I decide that it’s a problem I’ll deal with tomorrow. The water bridge stays put for now.


The 4 allen bolts of the regulator housing are stuck after 37 years of service and the heads are rounded off. After 5 hours of wrenching I decide that it’s a problem I’ll deal with tomorrow. The water bridge stays put for now.
06-13-2014, 11:01 AM
#22
Instructor
Thread Starter
Someone suggested hammering a torx in the allen bolts to get them loose. Indeed I get enough grip to turn the bolts or at least the heads of the bolts. The first one breaks and when the second does come out, all hope getting them out fades. It’s a chunk of rust not a bolt. Strangely enough there’s no swearing when bolt 3 and 4 break too. Somehow I expected it. Problems exist to be solved.


06-13-2014, 11:16 AM
#23
Instructor
Thread Starter
A few days later we�re back in the garage armed with a few drill�s and screw extractors. The 3 bolts have been soaking in a mixture of acetone/ATF. Unfortunately the don�t move a tiny bit. The OAS and water bridge can�t be moved either so drilling isn�t easy with limited movement. After a bit of a struggle we manage to get the gasket from underneath the water bridge. It�s still not moving but we have enough space to squeeze a saw blade into it. With a lot of sweat and small movements the 3 bolts are cut short and the water bridge can be moved. Finally we have space to work.
3 short parts of bolt are still stuck in the valve housing but even now they don�t move.
Drilling them out is the only option but when the drill breaks in the first bolt we quit. We�ve been busy for 7 hours. (The day after at the WEC in Spa Francorchamps the Porsche 919 get�s a new front suspension in 16 minutes!)
06-13-2014, 11:34 AM
#24
Instructor
Thread Starter
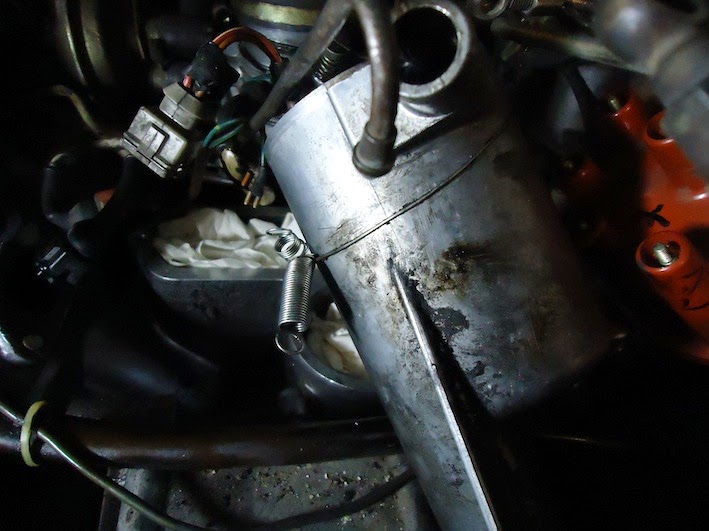
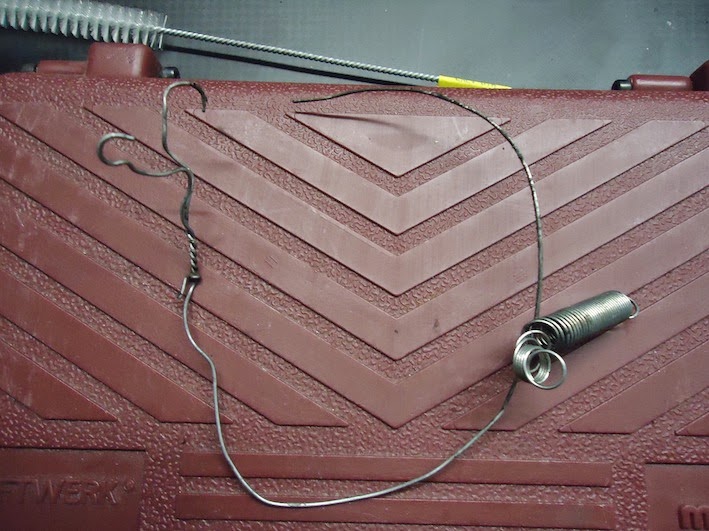
Before drilling out the remaining bolts, I remove the OAS. It�s dangling in my way, held there by a strange construction of Iron wire and a spring. The spring is attached to the throttle so I think when I restart the car the throttle might stay open, but I�ll deal with that when it happens. This construction is not to be found in the WSM so it�s probably an invention by the PO or another F.ck Up.
With the capable help of bolt terminator Jos� and his assistant, Tom, the bolts are removed in a professional fashion and the holes get new screw thread. It�s a day with a lot of progress, probably because I didn�t do too much , and at the end of the day deconstruction is over. Rebuild will start soon but first I have to order some parts.


With the capable help of bolt terminator Jos� and his assistant, Tom, the bolts are removed in a professional fashion and the holes get new screw thread. It�s a day with a lot of progress, probably because I didn�t do too much
, and at the end of the day deconstruction is over. Rebuild will start soon but first I have to order some parts.
 06-14-2014, 08:48 AM
#28
Instructor
Thread Starter
Today came the opportunity to put the car on a trailer and take it to a befriended old timer owner. I gladly take the chance to put the car on his grease pit and fix the rear coupler problem. The parts have been in my possession for a while and on paper it seems an easy job but then again, the water bridge fix seemed easy to. Getting the shark on the trailer takes a 50m, fatiguing push.
Fortunately the bolts let go easily this time and apart from the fact that it�s hard to reach, we�re done quickly. (Again, I didn�t do too much). It seems to be shifting (at feel) but I can�t start the since the parts for the water bridge haven�t arrived yet.


Fortunately the bolts let go easily this time and apart from the fact that it�s hard to reach, we�re done quickly. (Again, I didn�t do too much). It seems to be shifting (at feel) but I can�t start the since the parts for the water bridge haven�t arrived yet.
06-14-2014, 08:54 AM
#29
Instructor
Thread Starter
It seemed like Santa missed the right season this week. A big order of parts and gadgets from the Porsche classic line found it�s way to my doorstep and I didn�t even hang a christmas stocking. Unfortunately Santa doesn�t work so I head into garage armed with a Dremel, brake cleaner, refined petrol and acetone to do some cleaning.
The OAS, water bridge and parts of the CIS get a good treatment.


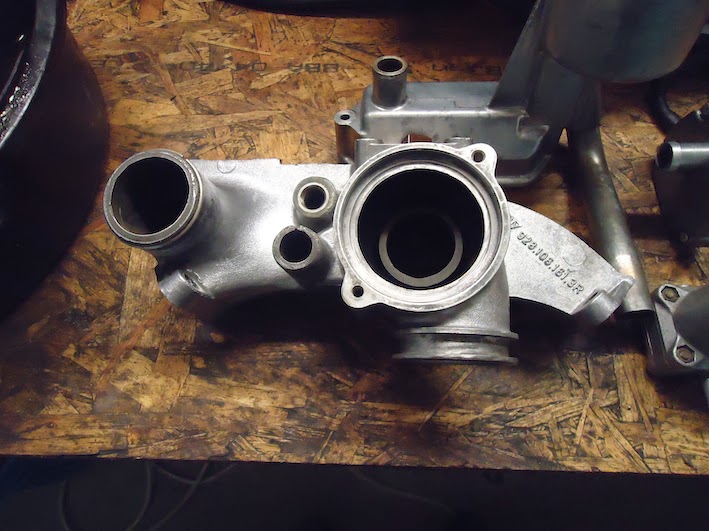
The OAS, water bridge and parts of the CIS get a good treatment.
