
So what did you do to your 928 Today......
 04-21-2011, 12:40 PM
#811
Chronic Tool Dropper
Lifetime Rennlist
Member
Lifetime Rennlist
Member

I used plastic packing tape for the masking. Using a very sharp razor knife (small one you use for window tint, for instance) I trimmed around the bezel, and pressed the the tape tight onto the rubber gasket. Then peeled out the middle piece. Another small piece of tape in the middle, then trim around the lock cylinder end. A cheap plastic painters tarp over the car, tear a hole and tape it around the plastic masking. Wipe with cleaner (brake-clean works, wax/silicone remover best) than a couple thin coats of paint. Wurth is the probably the best match, but there is a Dupli-Color trim black that's very good too, available locally from POLAPS.
 04-21-2011, 01:25 PM
#812
Rennlist Member
Checked mine today for TB endplay.
Factory specs for a new bearing are .11-.31 mm and a wear limit of .40 mm. Happily mine showed at only .22 mm.
Not bad for 200+k miles! I feel blessed!
Installed the PKlamp (thanks Roger!) anyway since I don't want to tempt fate!

Factory specs for a new bearing are .11-.31 mm and a wear limit of .40 mm. Happily mine showed at only .22 mm.
Not bad for 200+k miles! I feel blessed!
Installed the PKlamp (thanks Roger!) anyway since I don't want to tempt fate!
Last edited by White Lightnin'; 04-25-2011 at 08:33 PM.
04-21-2011, 03:25 PM
#813
Rennlist Member
Drove It! First time since surgery. Plan on doing Kickdown Bypass Switch next.
04-21-2011, 08:07 PM
#814
Chronic Tool Dropper
Lifetime Rennlist
Member
Lifetime Rennlist
Member
Cleaned it.
Installed my new luggage area cover. One of the ladies in K's church group decided that she needed to do us a favor, so she rebuilt the very tired original luggage cover. She sourced some black polyester fabric that stretches in one direction, and rebuilt the cover with that and otherwise most of the original parts and fittings. She was not able to reuse the original zipper since it was glued to the original fabric before it was sewn, but everything else is as-shipped. The new fabric is a tiny bit shinier than the original torn stuff, but it's blacker for sure. She says it won't fade or deteriorate from sun exposure.
The original came to me in the original factory shipping tube from the PO. He'd had it in storage someplace and found it about a year after I bought the car, and forwarded it to me. It had never been in the car, but storage had not been at all kind to it even in the tube. It had a few small stress tears that grew and multiplied. I had it in the car folded, but was embarrassed to open it anytime it might be seen by another enthusiast.
She bought the remainder of the bolt of fabric as a local specialty shop was selling off odd bits. I should have the rest of the roll sometime this next week, and will have an idea how much is there. If anyone has a need for some fabric to make their own, it will be available at cost. There was recently a pattern shared here for a cutting guide, so a little sewing machine work and some edging might be all that you need to have a new one.
Pictures when I have some more garage time. Right now I'm playing catch-up on client project stuff, paybacks for the five days of hooky last week.
04-21-2011, 09:46 PM
#815
Burning Brakes
Finally time for the 1.5KM TB tension check after the WP replacement... (it had failed 1.5KM after the previous TB/WP replacement and immediately after the last TB tension check)...
Should I feel disappointed that the belt didn't need to be adjusted after all that work to get in there? It was perfect!
Should I feel disappointed that the belt didn't need to be adjusted after all that work to get in there? It was perfect!
04-21-2011, 10:06 PM
#816
Re-assembled a 944 that had a Crank-case seal replaced so as to free up the bay my 928 needs to go in. Unbelievable how much stuff has to be dis-assembled and then re-assembled to replace a $29 seal. Several track mods and customer headers added to the pleasure. Overall a great learning experience under guidance of Ray Master.
04-23-2011, 12:43 AM
#819
Archive Gatekeeper
Rennlist Member
Rennlist Member
My option sticker was trashed by a rogue stereo installer but I had a clean copy in the warranty booklet, so I figured out which Avery template to use (5164), did a little scanning, some scaling to see which is closest to the right size, and voila- reproductions:

04-23-2011, 01:41 AM
#820
Drifting
What I did today
I lifted the intake and installed the spacers flare side down to hold the gasket in place.
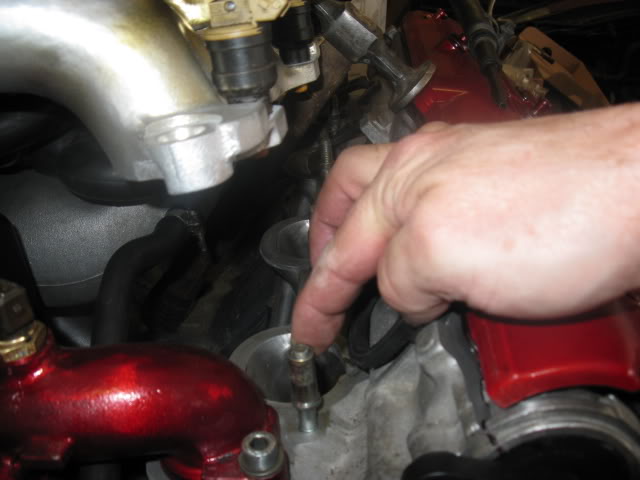
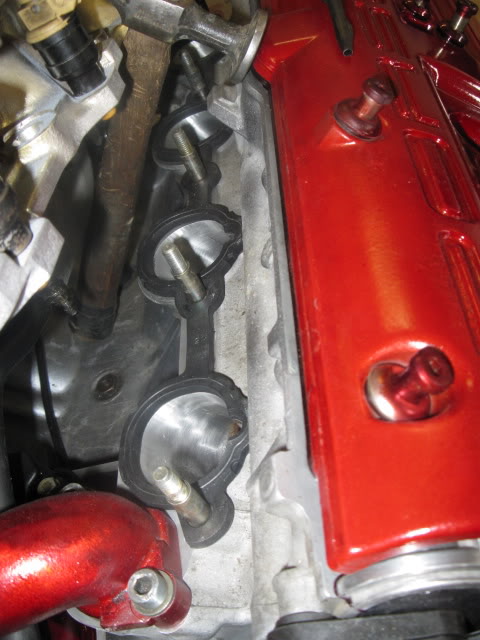
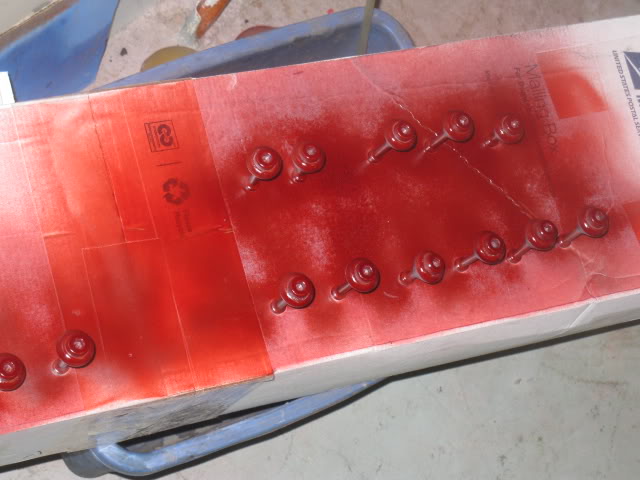
I painted the TB covers and polished the inside part you see
I see I forgot to polish these bolts
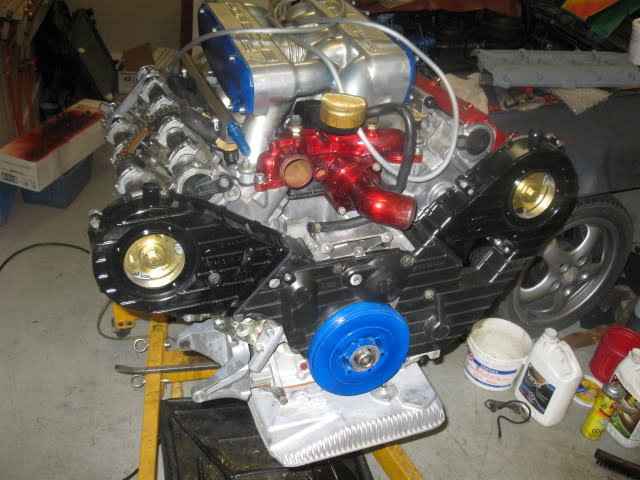
I attached the silver vacuum lines
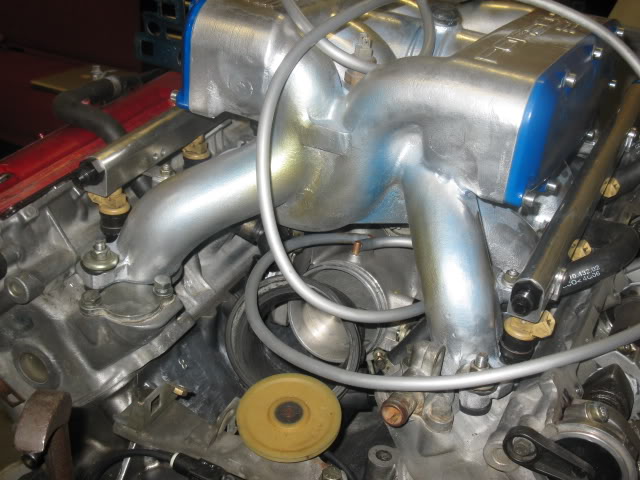
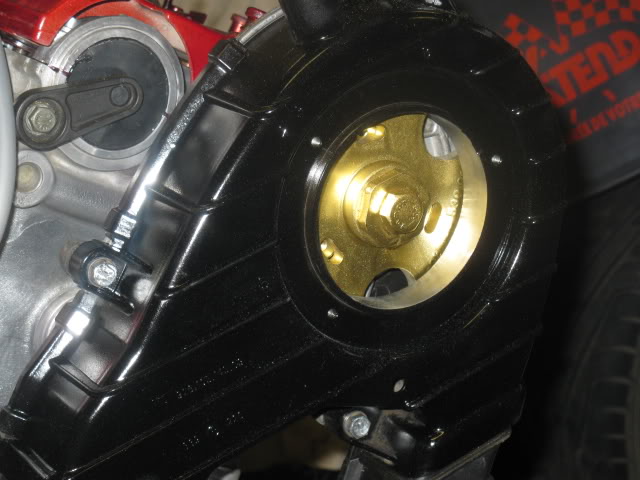
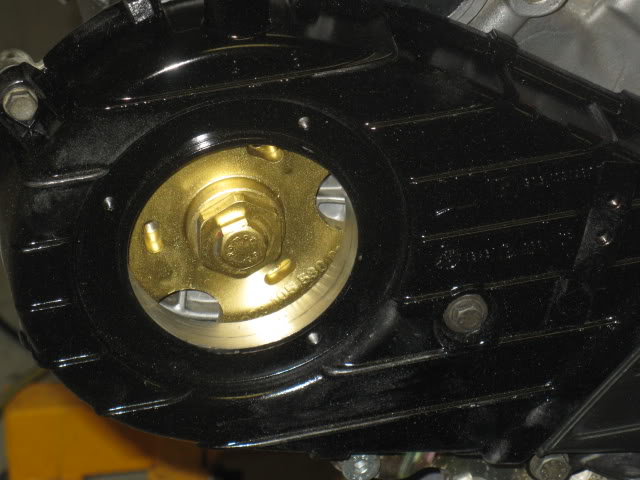
I stripped and primed this cover sanded and primed 3 coats

The bolts for the cover are painted
I lifted the intake and installed the spacers flare side down to hold the gasket in place.
I painted the TB covers and polished the inside part you see
I see I forgot to polish these bolts
I attached the silver vacuum lines
I stripped and primed this cover sanded and primed 3 coats
The bolts for the cover are painted
04-23-2011, 02:37 PM
#821
Three Wheelin'
Finally found the Testors Candy Apple Red 1605 paint.. bought both cans along with clear gloss... Removed and painted tails and front side markers. Came out very well other than a small bit of paint run on right rear though not noticieable except from 3 feet or so. Will probably sand down and respray clear
Pretty happy with the results..
Pretty happy with the results..
04-23-2011, 03:38 PM
#822
Rennlist Member
Replaced door stays, door lock gaskets, refinished door lock cylinders and replaced the felt on the window guides. Next I'll have the scratched tint replaced.
Thanks for the tip, dr bob - the dupli-color trim paint looks pretty darned good on the door locks. It goes on a bit blotchy, but smooths out nicely as it dries. Three thin coats and a new gasket and they look like new.
Thanks for the tip, dr bob - the dupli-color trim paint looks pretty darned good on the door locks. It goes on a bit blotchy, but smooths out nicely as it dries. Three thin coats and a new gasket and they look like new.
04-23-2011, 03:42 PM
#823
Rennlist Member
Nothing.....parts are stuck in customs despite the system saying they were released....
No I'm not displeased.....Im f***in pissed off..............maybe by aug it'll be on the road
No I'm not displeased.....Im f***in pissed off..............maybe by aug it'll be on the road
 04-23-2011, 04:45 PM
#825
Rennlist Member
Installed my new right front upper control arm. 3.5 hours wheels up to wheels down. Should make a big difference.
For those needing a tough chemical and scratch resistant matte black for metal trim there is a product called Aluma-Hyde II made specifically for refinishing aluminum gun parts once the anodizing has worn off. It is an air cured epoxy that dries to the touch in 30 minutes but takes 3-4 days to fully cure. It is resistant to most solvents including trichloroethylene. I did both my door lock surrounds a year ago after the local powder coater could not get a decent powder coat on them. They still look flawless today with nary a scratch. Aluma-Hyde II is sold by Brownells, a major gunsmith supply house. Hope this helps.
Mike