
How to: Oil Pump removal, Rehab & Install with pics
 01-17-2010, 06:01 PM
#1
Three Wheelin'
Thread Starter
As part of the annual winter preventative maintenance, this year I am also replacing all the seals including the ones for the oil pump.
I researched all the previous posts on this and so some of what I included was already discovered by others. This is therefore a compilation of those experiences and mine put together on one thread.
PS: There are 26 pictures and I am not sure how to post the pictures within the text. Therefore I numbered the pictures to match these steps to make it easier to follow.
These steps start from the point after the T/B and oil pump gear are removed (covered in other posts)
Steps #1 (Pics 1)
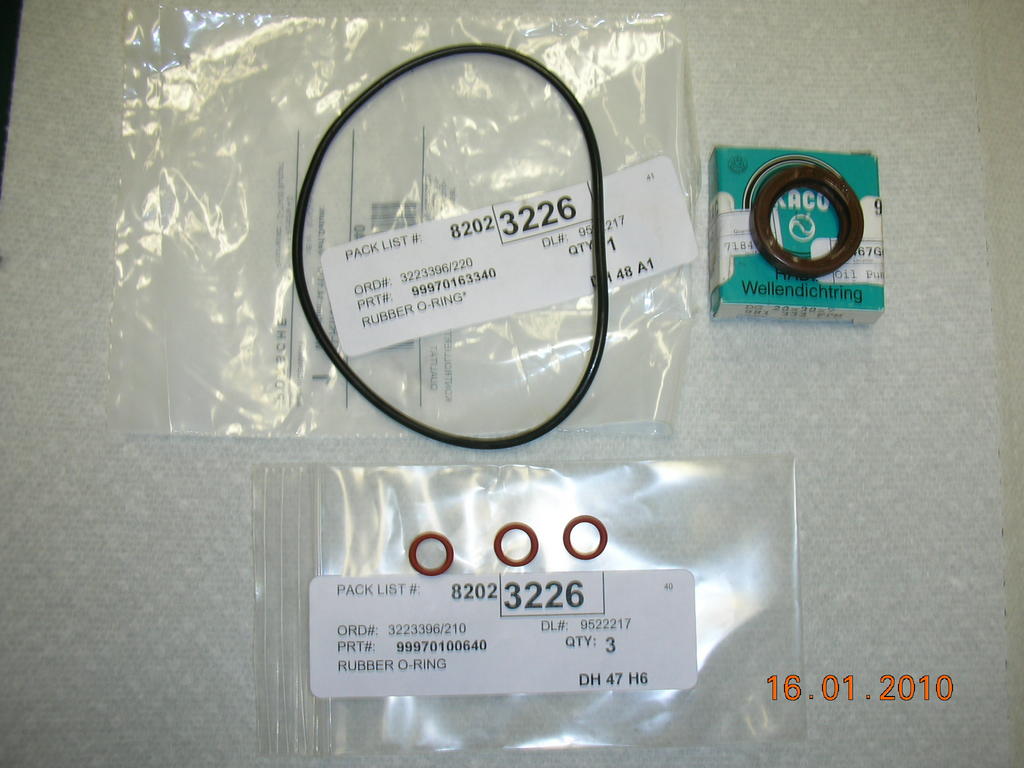
Before even starting this project you need the Porsche parts (Large O-Ring, Shaft seal and small O-Ring (x3) for the bolts).
Step #2
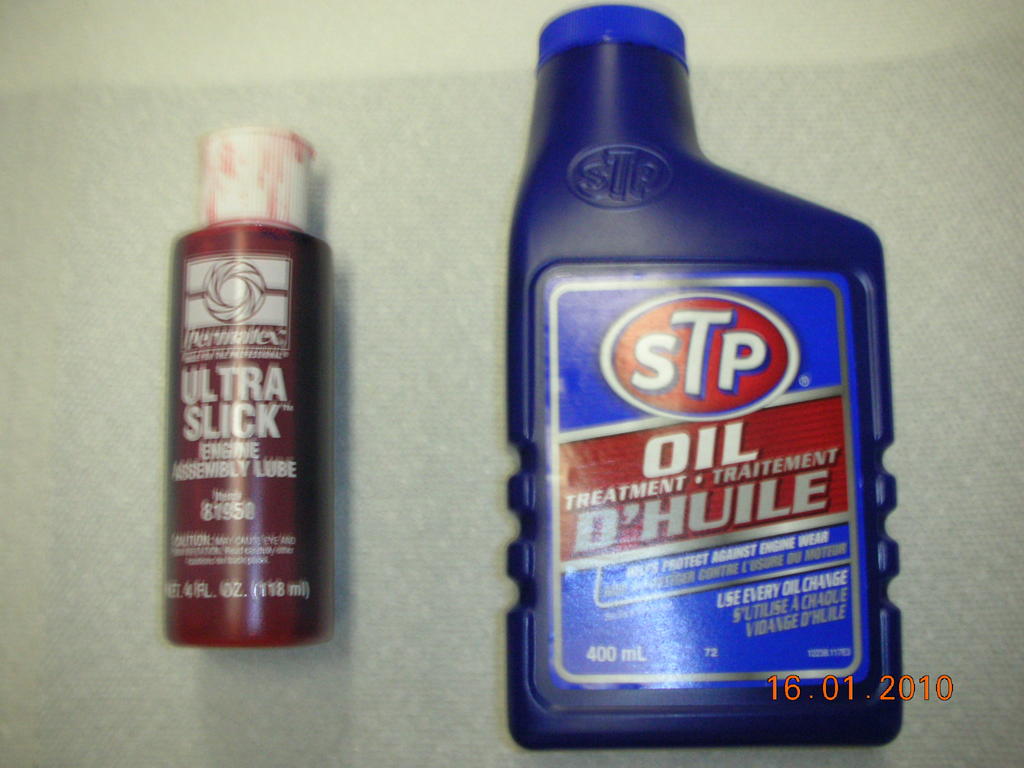
Comparable alternatives for the STP Oil Treatment or the Engine Assembly Lube can also be used.
Step #3
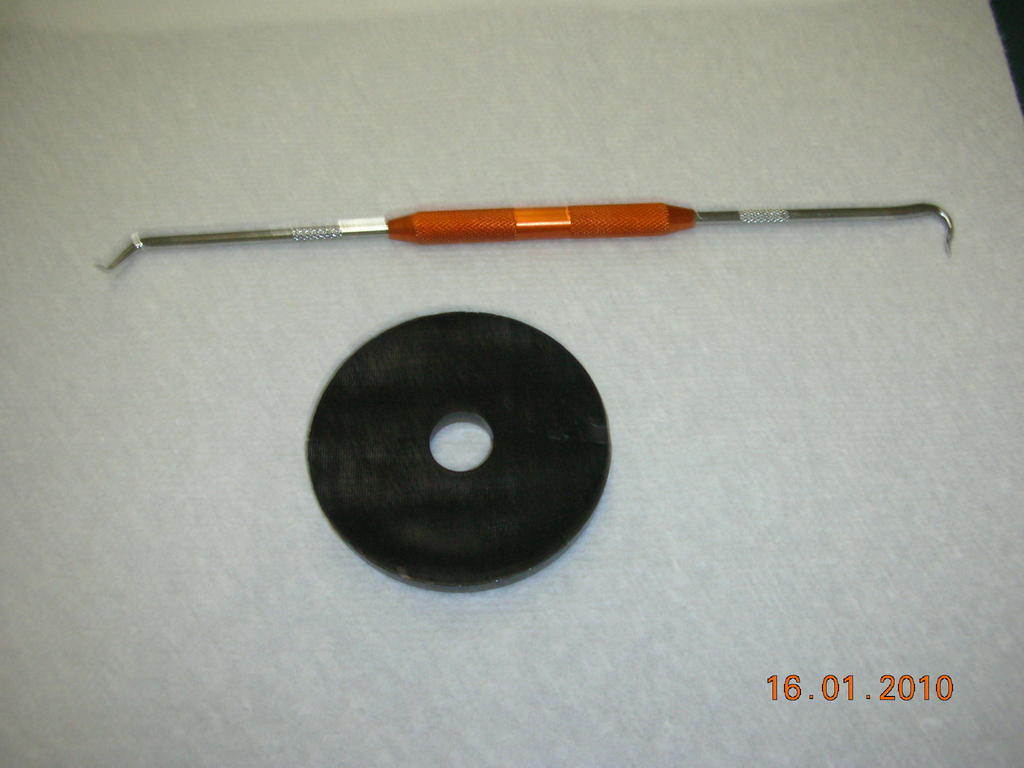
The seal pick must be used carefully so as not to score any of the surfaces. The flat black plastic disc is part of a seal installation set..
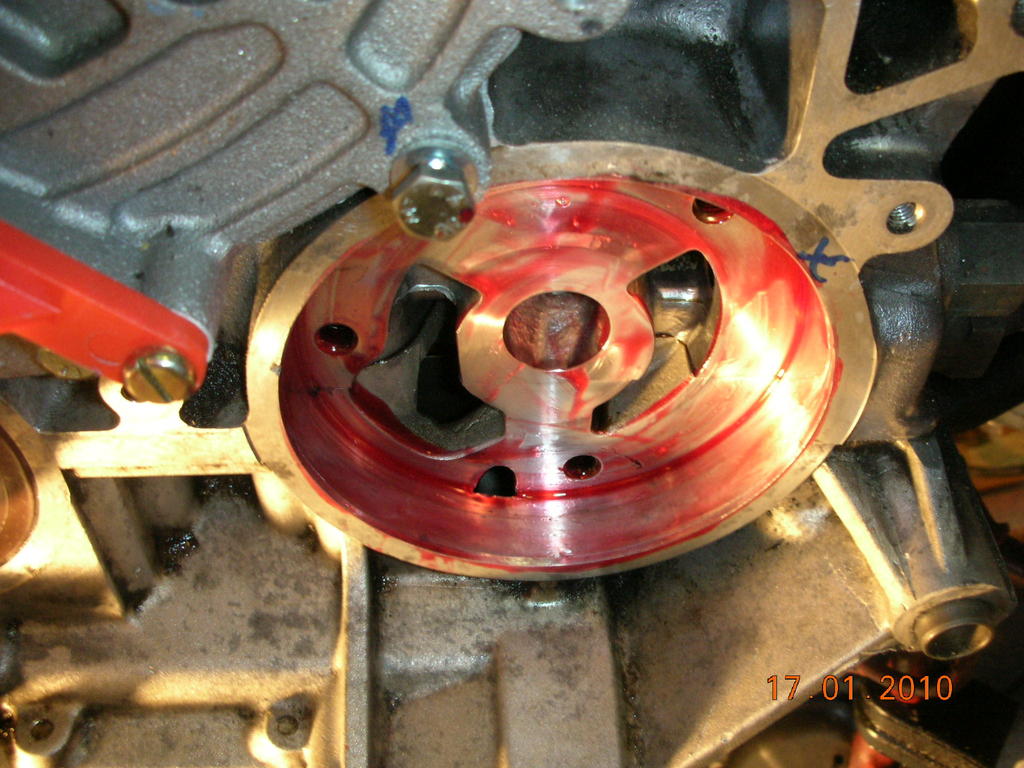
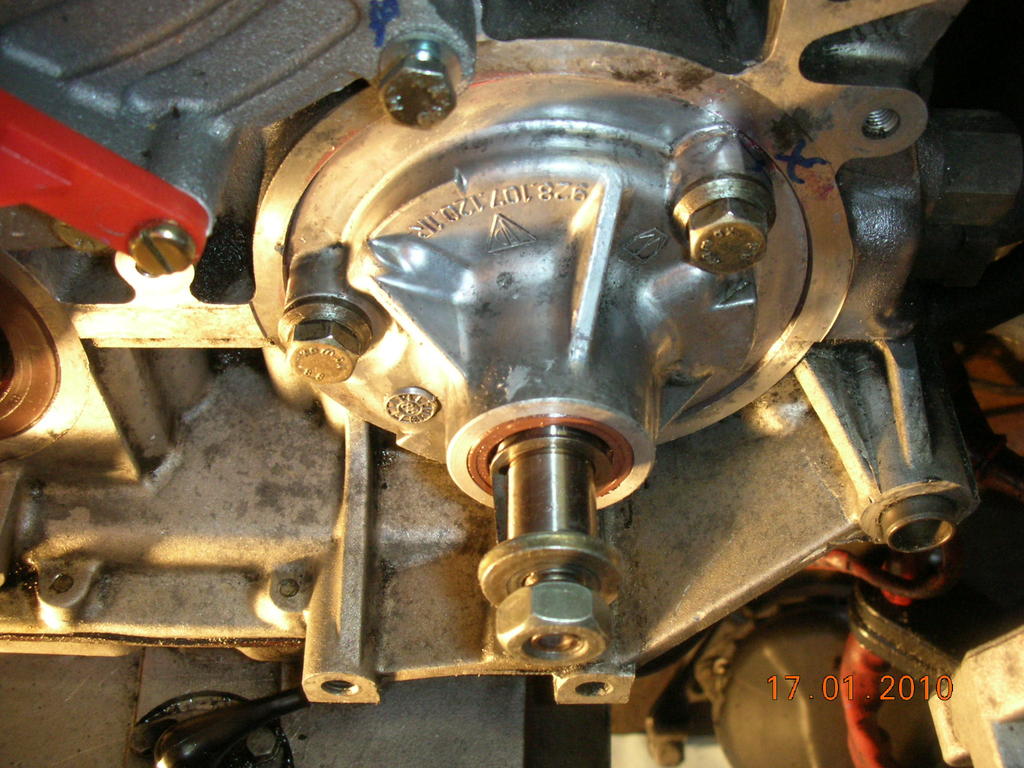
Step #4
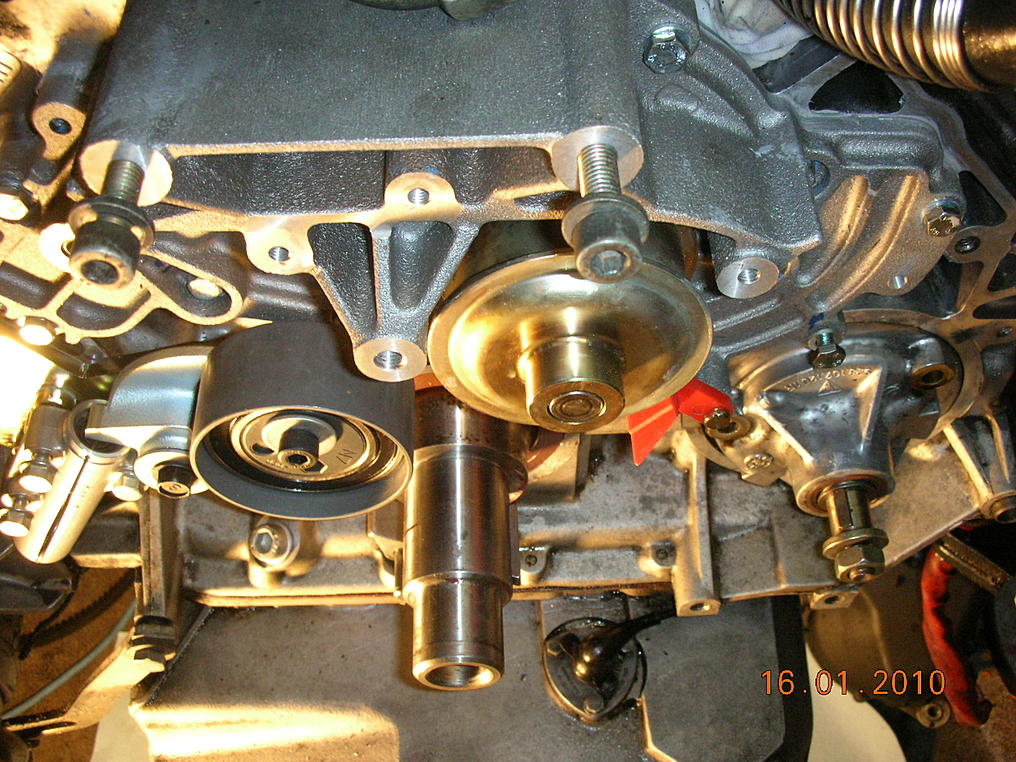
This is what you should have in front of you i.e. take the time to clean 'er up.
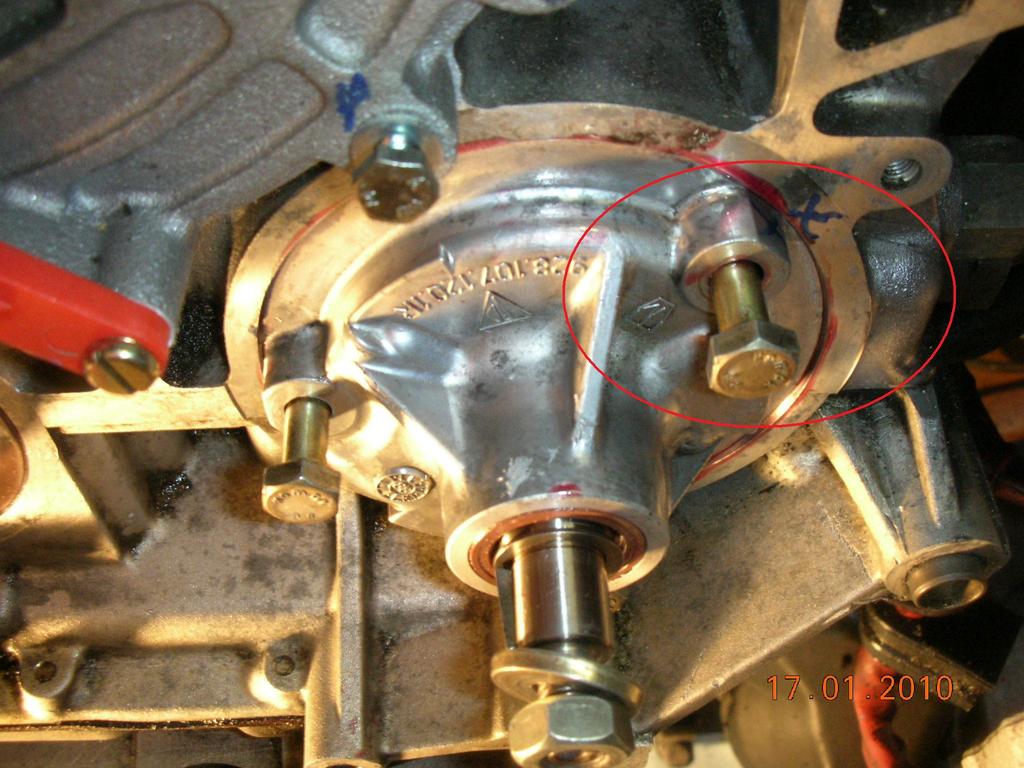
Step #5
During Dwayne's water pump write up he mentioned to leave one of the bolts out because it will be needed later on. I used this bolt as an anchor point to brace a crowbar to aid in removing the pump (step #9). If you're not touching the w/P, then I would still unbolt it about 1" because it worked perfectly.
I researched all the previous posts on this and so some of what I included was already discovered by others. This is therefore a compilation of those experiences and mine put together on one thread.
PS: There are 26 pictures and I am not sure how to post the pictures within the text. Therefore I numbered the pictures to match these steps to make it easier to follow.
These steps start from the point after the T/B and oil pump gear are removed (covered in other posts)
Steps #1 (Pics 1)
Before even starting this project you need the Porsche parts (Large O-Ring, Shaft seal and small O-Ring (x3) for the bolts).
Step #2
Comparable alternatives for the STP Oil Treatment or the Engine Assembly Lube can also be used.
Step #3
The seal pick must be used carefully so as not to score any of the surfaces. The flat black plastic disc is part of a seal installation set..
Step #4
This is what you should have in front of you i.e. take the time to clean 'er up.
Step #5
During Dwayne's water pump write up he mentioned to leave one of the bolts out because it will be needed later on. I used this bolt as an anchor point to brace a crowbar to aid in removing the pump (step #9). If you're not touching the w/P, then I would still unbolt it about 1" because it worked perfectly.
 01-17-2010, 06:10 PM
#2
Three Wheelin'
Thread Starter
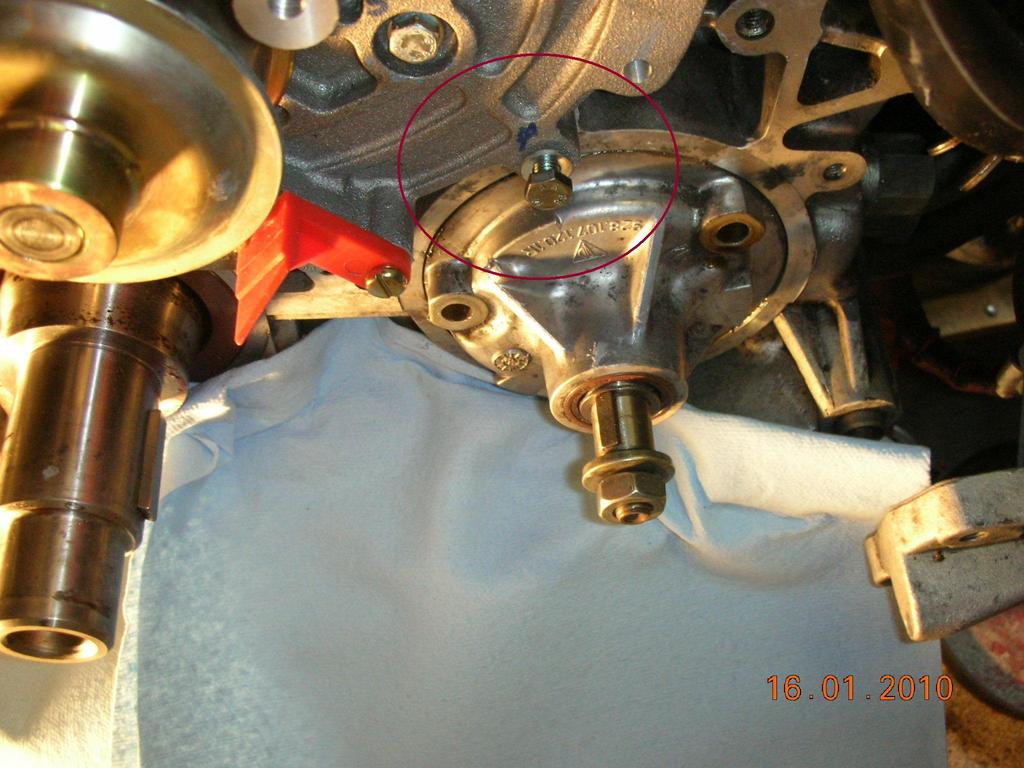
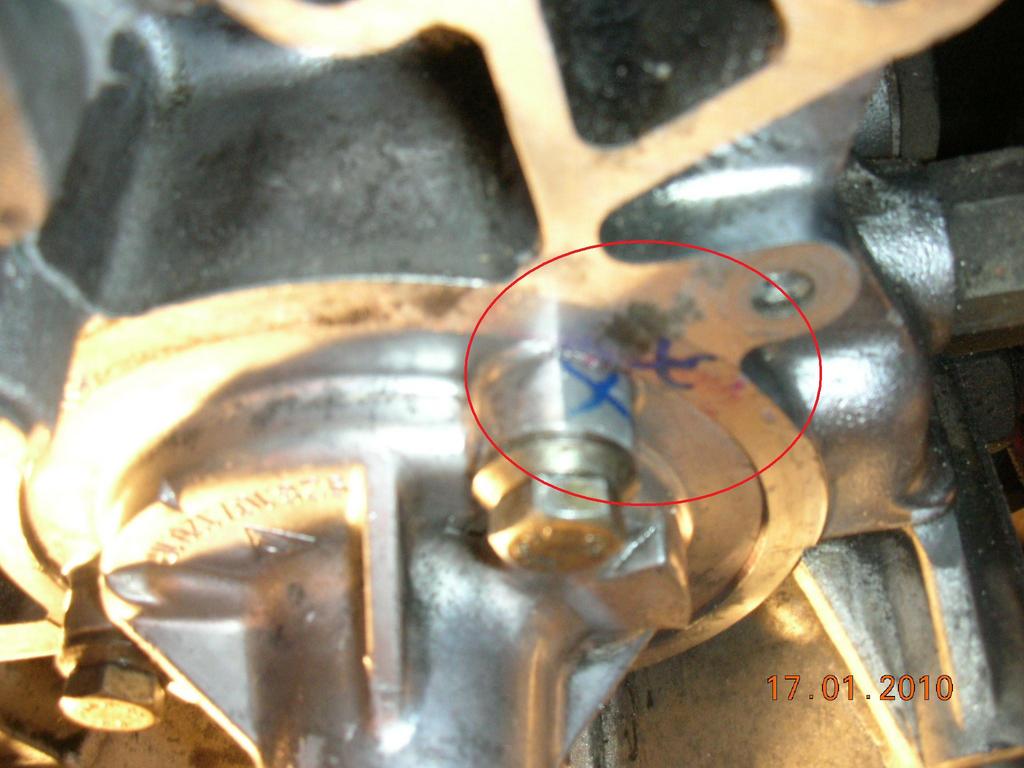
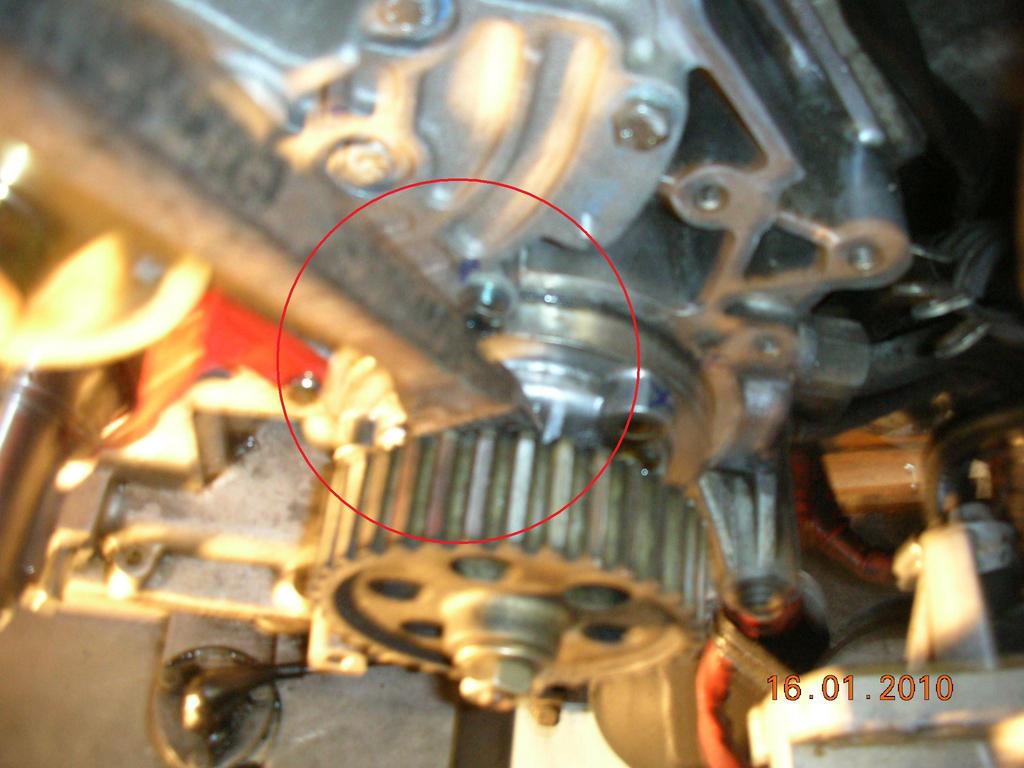
Step #6
Use a permanent marker to place marks on the block and pump to aid in the re-install later on. While this step is not necessary for the pros because the pump can only be installed in one way only due to the bolt pattern these marks allowed me to align it immediate with no fuss.
Step #7
As mentioned in other posts as well, a few soft taps with a rubber mallet will loosen up the pump. That's all, do not try to hit it out of the block. The next two steps will remove it in less than 5 minutes.
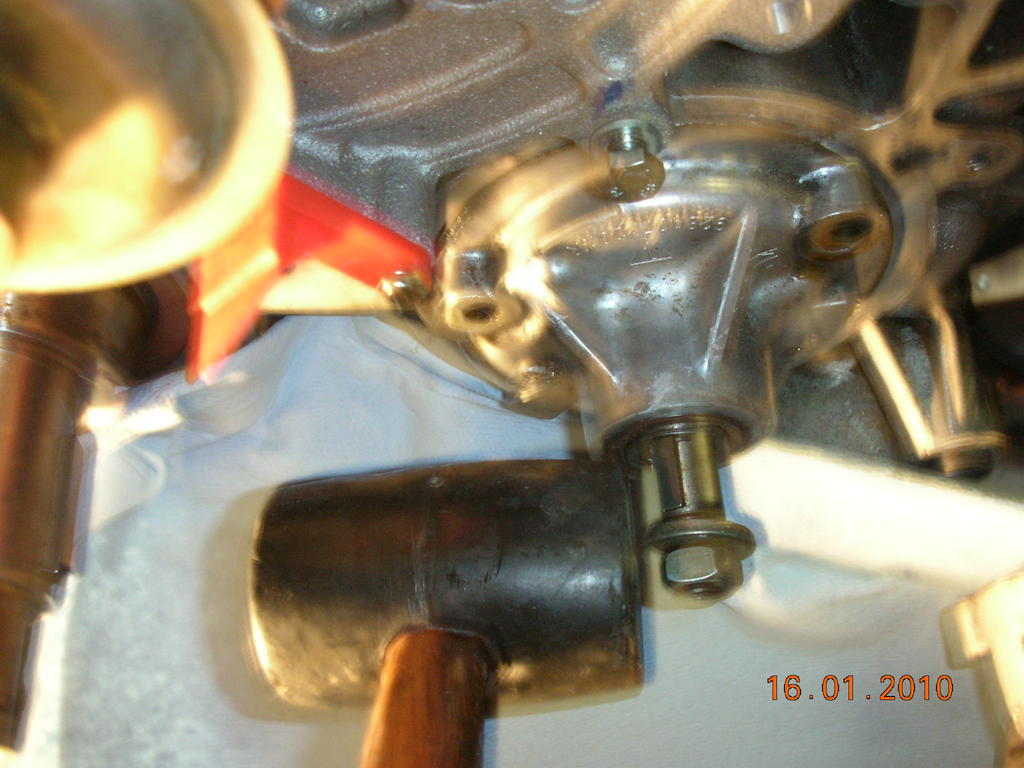
Step #8
Re-install the gear and hand tighten the bolt only
Step #9
Use a long crowbar and while standing from above, place the crowbar against the gear and W/P bolt (step #5) and with a very gentle push (yes, very gentle, that's all that's required) the pump will pop right out. Be prepared to prevent it from falling out and hitting the floor beneath. I had my son as a helper.
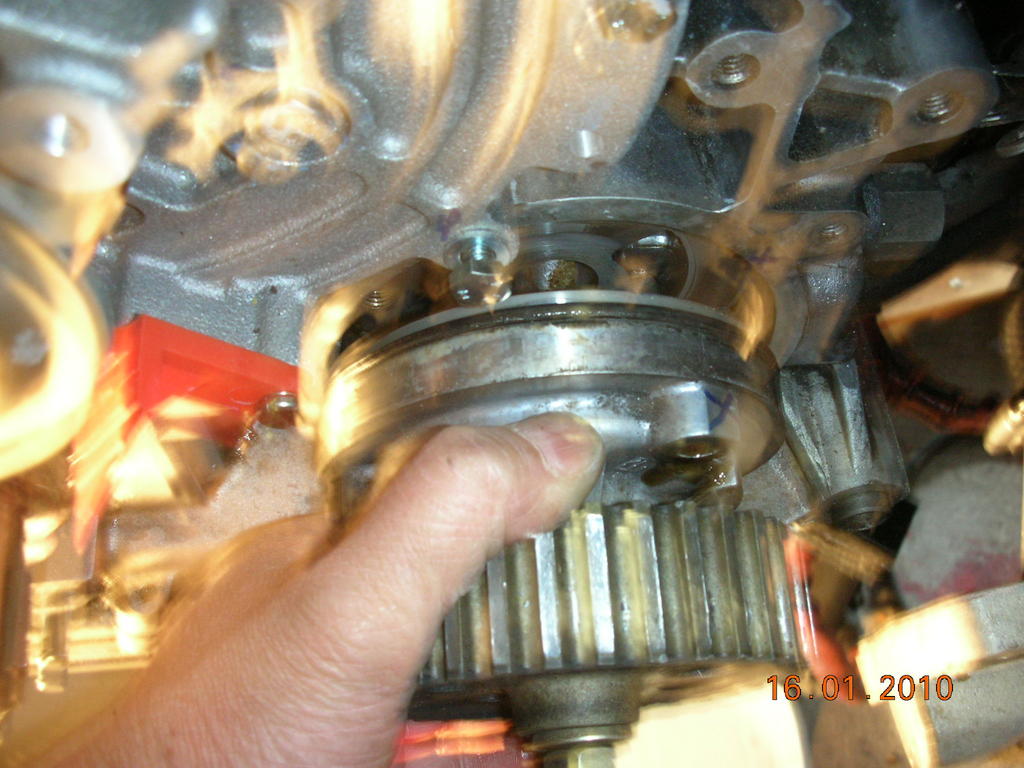
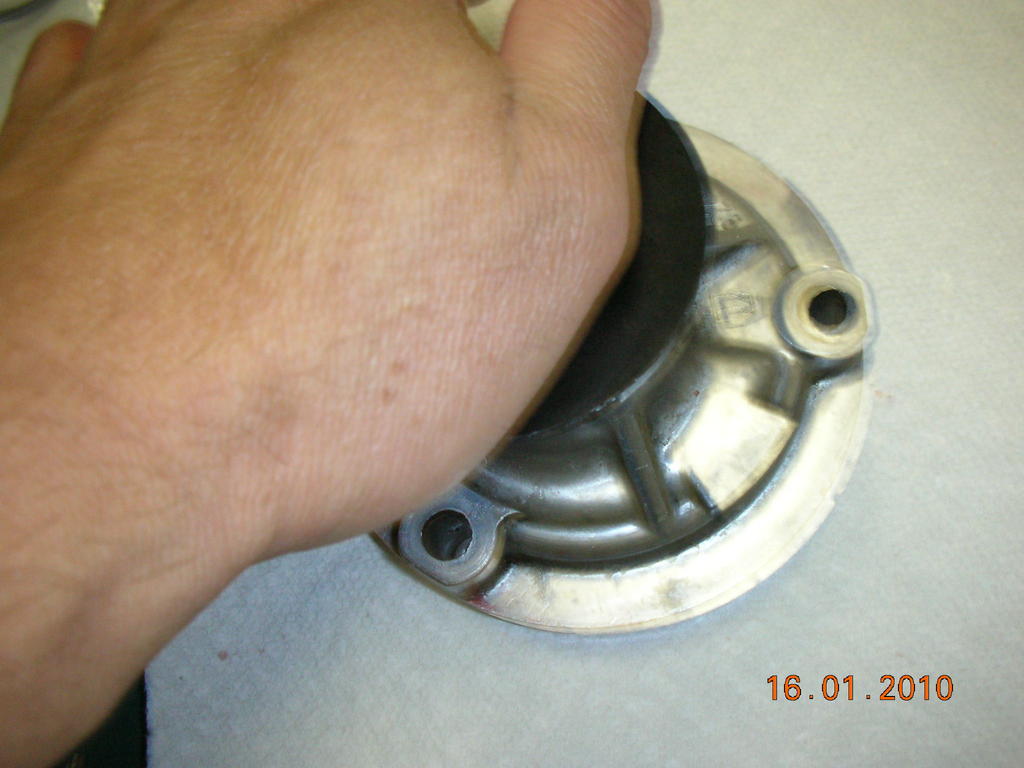
Step #10
"Deliver" your pump; makes you feel like a mid-wife.
Transport the pump carefully (so as not to allow the internal gears to fall off) to a clean workbench where the rehab is to occur.
Stop, go and have a brew. You're halfway there.
Use a permanent marker to place marks on the block and pump to aid in the re-install later on. While this step is not necessary for the pros because the pump can only be installed in one way only due to the bolt pattern these marks allowed me to align it immediate with no fuss.
Step #7
As mentioned in other posts as well, a few soft taps with a rubber mallet will loosen up the pump. That's all, do not try to hit it out of the block. The next two steps will remove it in less than 5 minutes.
Step #8
Re-install the gear and hand tighten the bolt only
Step #9
Use a long crowbar and while standing from above, place the crowbar against the gear and W/P bolt (step #5) and with a very gentle push (yes, very gentle, that's all that's required) the pump will pop right out. Be prepared to prevent it from falling out and hitting the floor beneath. I had my son as a helper.
Step #10
"Deliver" your pump; makes you feel like a mid-wife.
Transport the pump carefully (so as not to allow the internal gears to fall off) to a clean workbench where the rehab is to occur.
Stop, go and have a brew. You're halfway there.
01-17-2010, 06:29 PM
#3
Team Owner
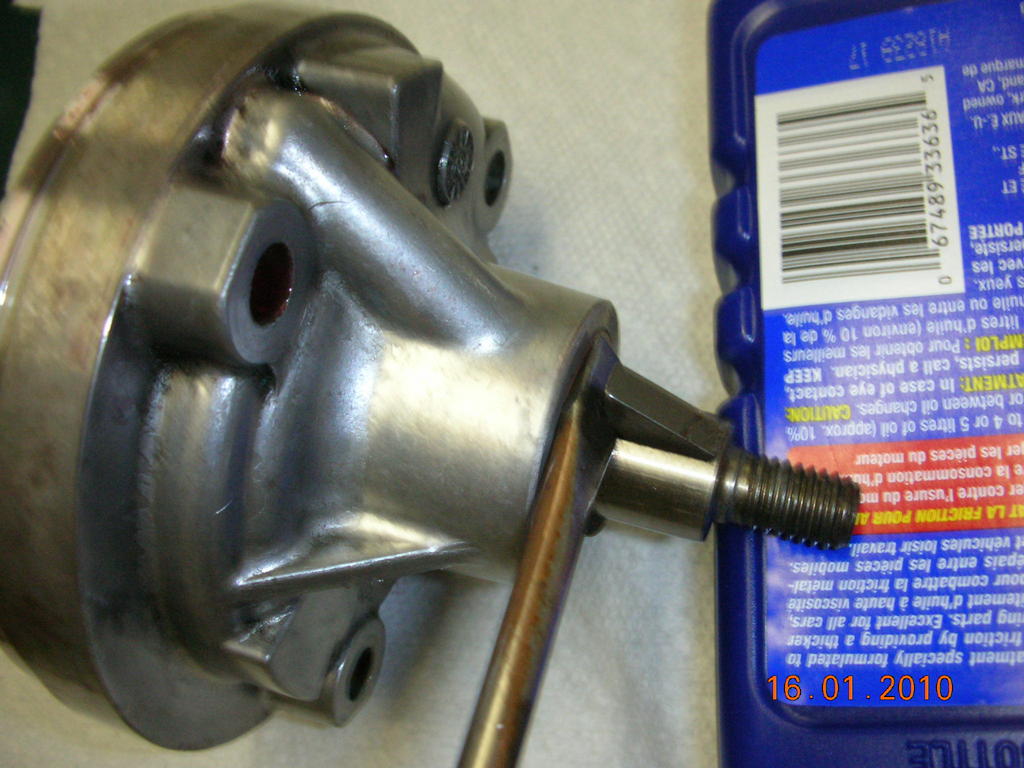
Nice pictures now an important bit of info .
Looking at the pump shaft you will notice behind the woodruf key is a spacer its 1mm thick and is removed from the final assembly if a new steel gear is fitted.
The spacer is only used when using an aluminum gear Per the WSM
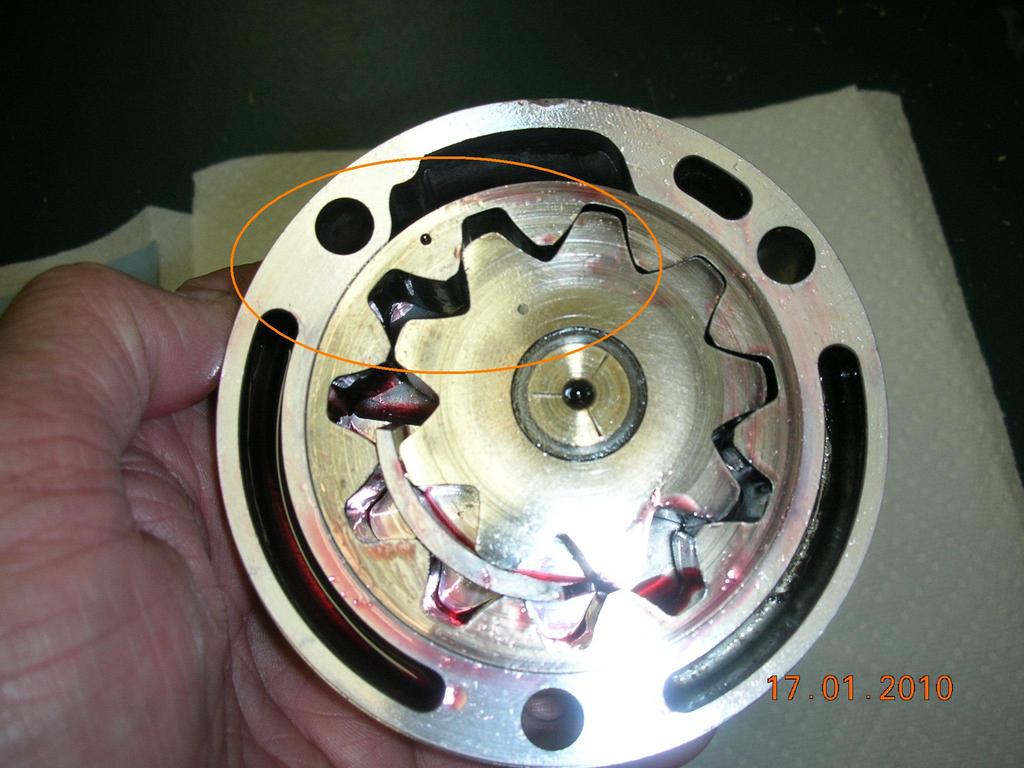
Also pay careful attention to how the outer gear is positioned inside the pump.
There is a bevel on one side of the outer edge and this must face to the front of the car or away from the block.
There should also be a dot stamped into the side of each gear these must both be facing towards the block
Looking at the pump shaft you will notice behind the woodruf key is a spacer its 1mm thick and is removed from the final assembly if a new steel gear is fitted.
The spacer is only used when using an aluminum gear Per the WSM
Also pay careful attention to how the outer gear is positioned inside the pump.
There is a bevel on one side of the outer edge and this must face to the front of the car or away from the block.
There should also be a dot stamped into the side of each gear these must both be facing towards the block
01-17-2010, 06:58 PM
#4
Three Wheelin'
Thread Starter
Step #11
Now that the pump is on the bench the rest is simple. Use the flat blade of a screwdriver to dis-lodge the woodruf key and then remove the washer.
Steps #12
Remove the old seals, dis-mantle and clean the pump thoroughly. I coated the parts with the engine assembly lube before re-installation.
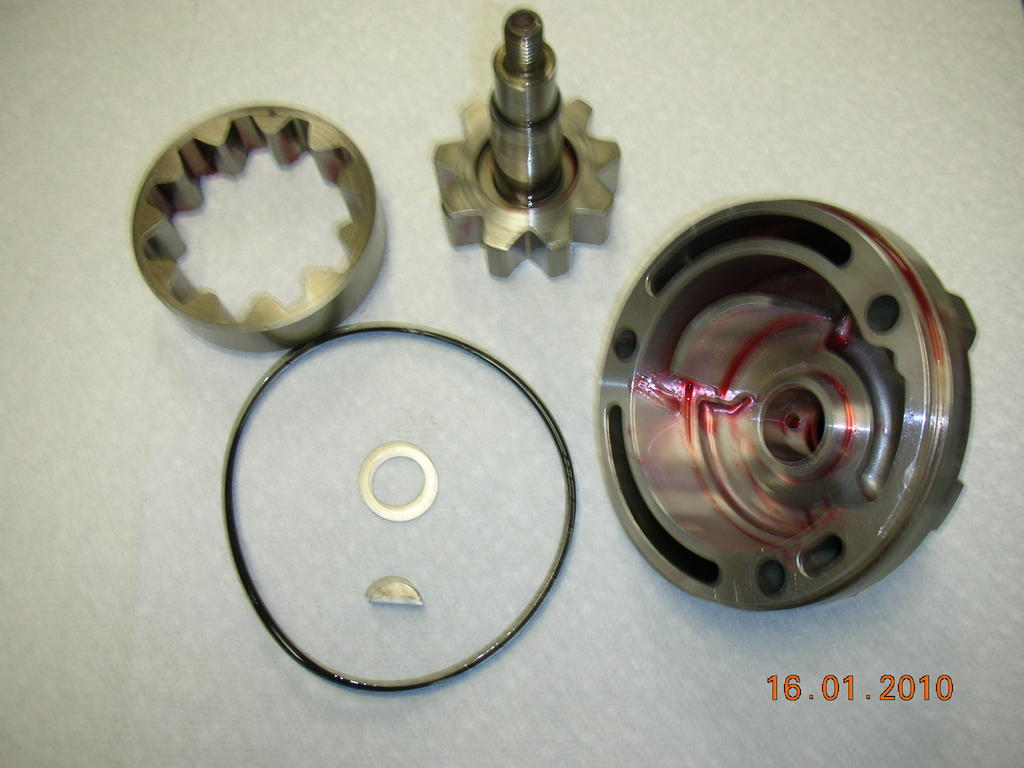
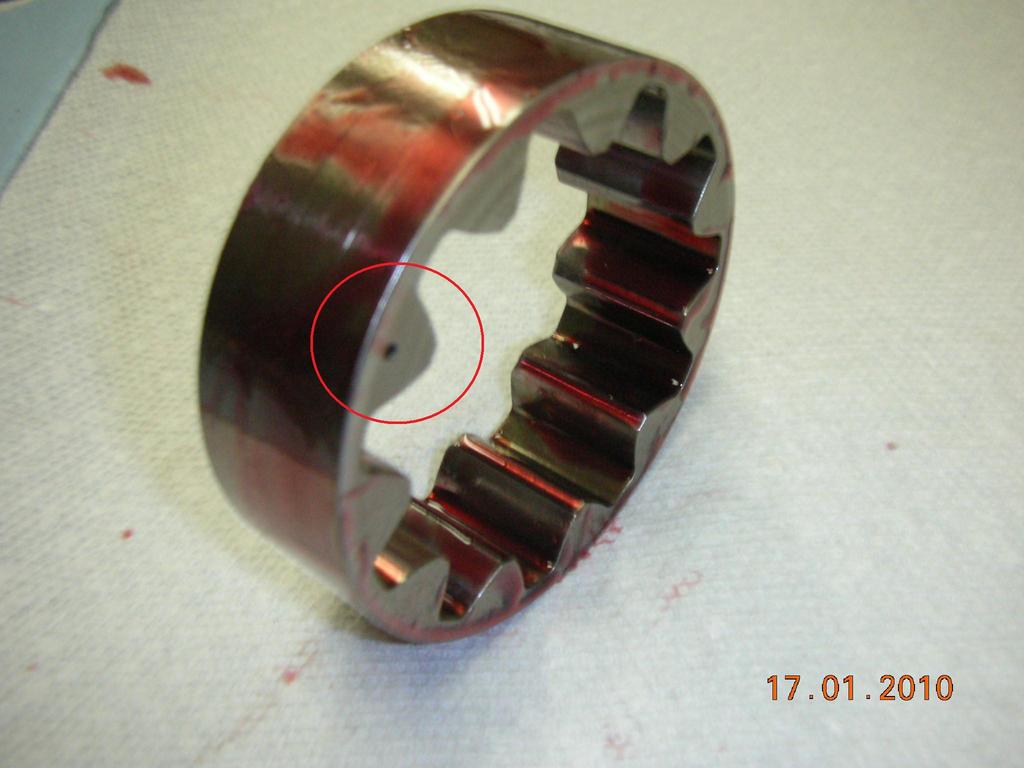
Note the different edges of the ring gear.
This is the side with the bevelled edge

The straight edge side has the dimple as a marker because if the ring gear is installed backwards the pump will seize. This dimple must be installed facing the block (see pic #19) same as the oil pump gear.
Now that the pump is on the bench the rest is simple. Use the flat blade of a screwdriver to dis-lodge the woodruf key and then remove the washer.
Steps #12
Remove the old seals, dis-mantle and clean the pump thoroughly. I coated the parts with the engine assembly lube before re-installation.
Note the different edges of the ring gear.
This is the side with the bevelled edge
The straight edge side has the dimple as a marker because if the ring gear is installed backwards the pump will seize. This dimple must be installed facing the block (see pic #19) same as the oil pump gear.
01-17-2010, 07:14 PM
#5
Three Wheelin'
Thread Starter
Steps 15
Coat the new shaft seal with lube and press into the cover with your fingers.
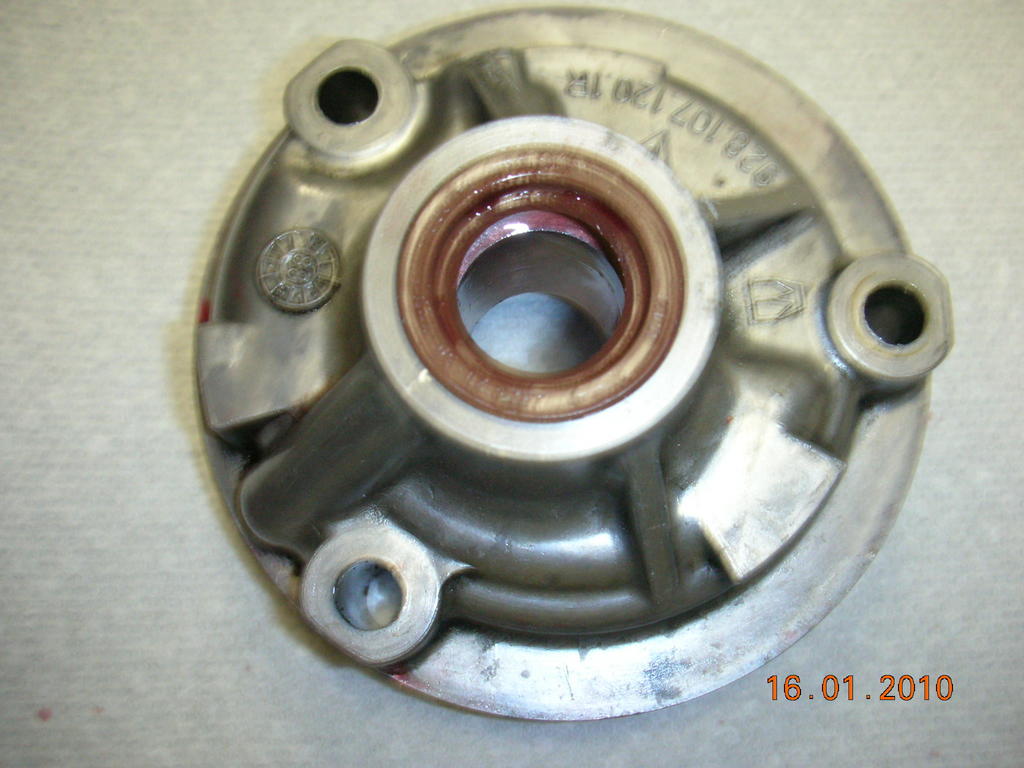
Step #16
Then use something flat to ensure that it seats flush with the cover.
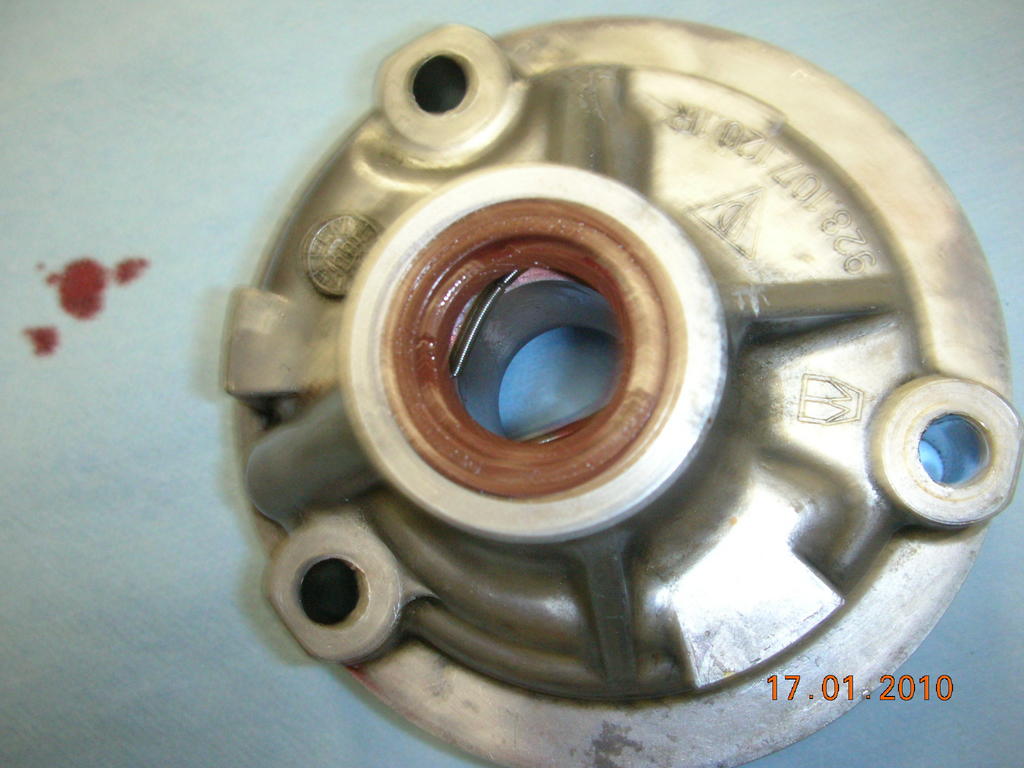
Step #17
I did not have a problem but I used the opportunity to show you that it is important that the spring on the seal did not become dis-lodged. Just check before you insert the shaft.

Step #18
Check the other side too. If the spring was dis-lodged the pump would have a massive oil leak when the oil got hot.
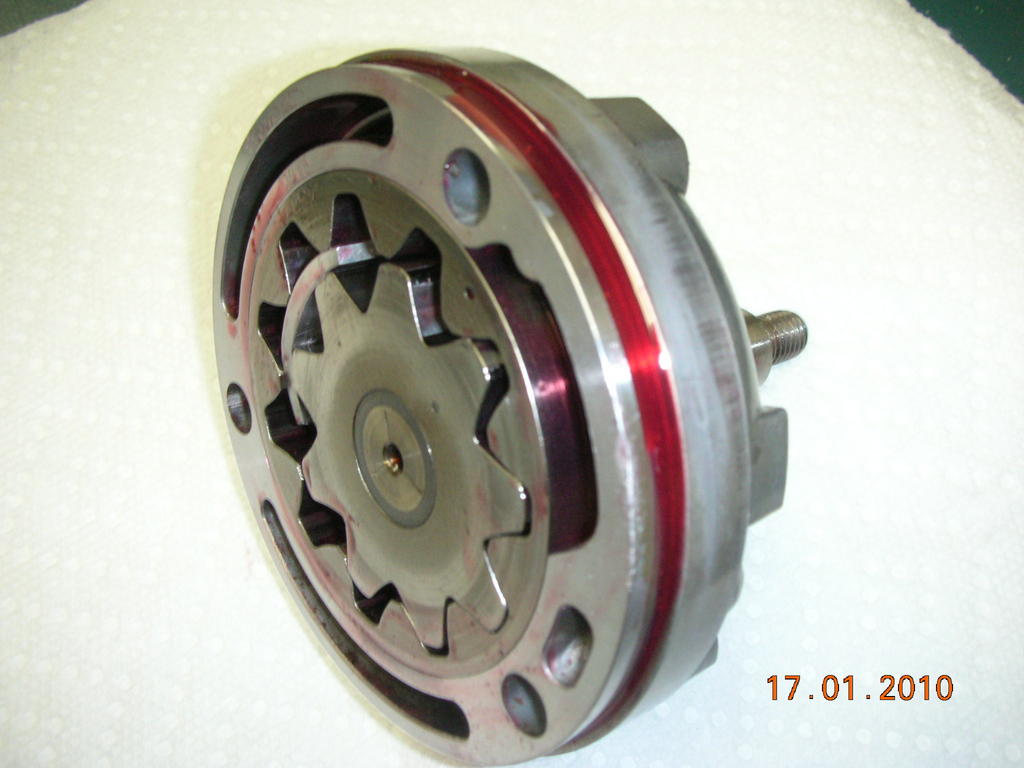
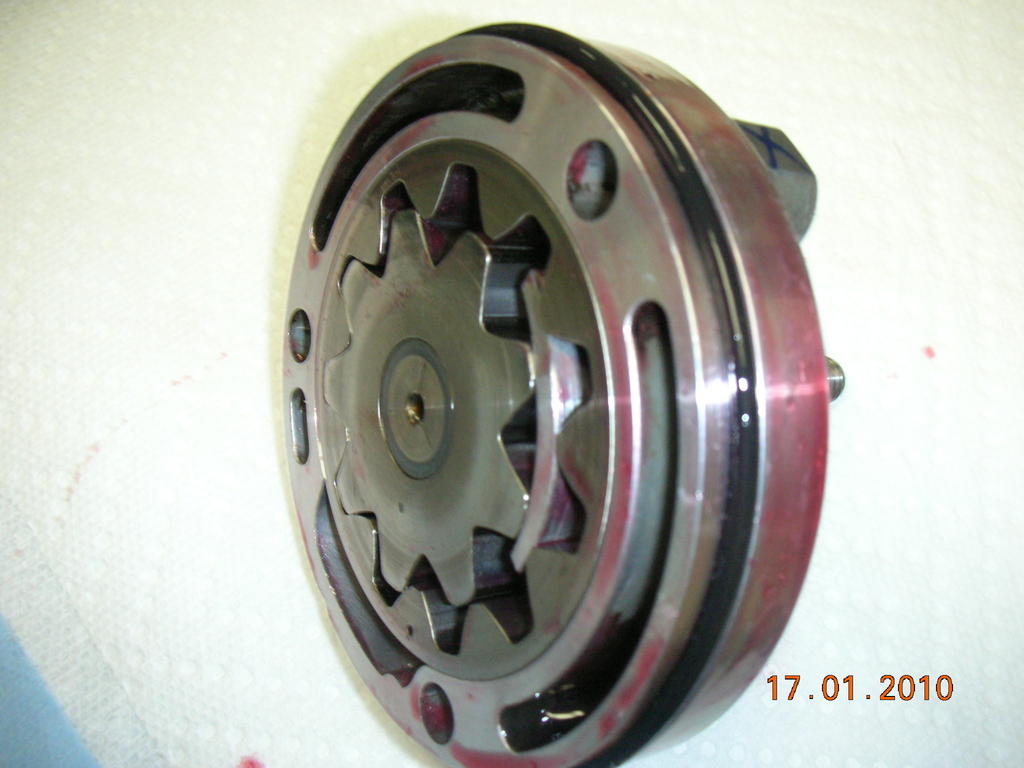
Steps #19
Pump re-assembled showing proper alignment of the ring gear and the pump gear.
Step #20
Lube the groove and the new O-Ring before install
Step #21
Install the washer and woodruf key. Do a final rub down with the lube on the entire outside of the pump.

Do a final check by turning the pump by hand a few times to ensure it turns smoothly and there is no noticeable play between the shaft and the seal. Once satisfied with the movement proceed.
Coat the new shaft seal with lube and press into the cover with your fingers.
Step #16
Then use something flat to ensure that it seats flush with the cover.
Step #17
I did not have a problem but I used the opportunity to show you that it is important that the spring on the seal did not become dis-lodged. Just check before you insert the shaft.
Step #18
Check the other side too. If the spring was dis-lodged the pump would have a massive oil leak when the oil got hot.
Steps #19
Pump re-assembled showing proper alignment of the ring gear and the pump gear.
Step #20
Lube the groove and the new O-Ring before install
Step #21
Install the washer and woodruf key. Do a final rub down with the lube on the entire outside of the pump.
Do a final check by turning the pump by hand a few times to ensure it turns smoothly and there is no noticeable play between the shaft and the seal. Once satisfied with the movement proceed.
01-17-2010, 07:37 PM
#6
Three Wheelin'
Thread Starter
Step #21
Install the washer and woodruf key.
Step #22
Pump is now completely rehabilitated and ready for installation into the block
Do a final rub down with the lube on the entire outside of the pump.
Do a final check by turning the pump by hand a few times to ensure it turns smoothly and there is no noticeable play between the shaft and the seal. Once satisfied with the movement proceed.
Steps #23
Prepare the block for the pump. Clean it carefully and apply the lube liberally if the car will still not be driven for a while. I still have the M/M and oil pan after this, plus I am not even sure how much longer for this friggin winter will last.
Step #24
Remove the old o-rings and washers from the bolts that hold the pump into the block. The extra length will allow the pump to be positioned properly in the block.
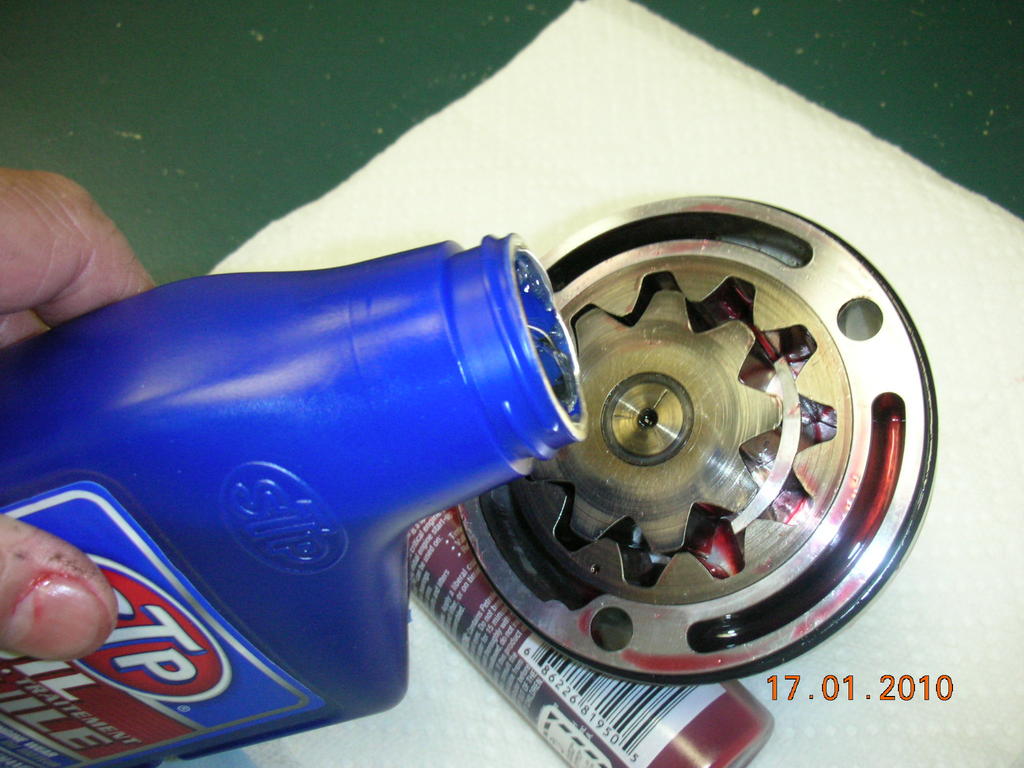
Steps # 25
This is the final step before pushing it back in. Prime the pump with the STP Oil Treatment filling all the cavities with oil.
Step #26
Align the marks made in step #6 and push the pump into the block with one steady push. Mine went right in with no fuss. Install the 3 bolts sans o-rings and washers.
Step #27
Turn the pump by hand and ensure smooth operation. If satisfied, proceed..
Carefully remove the bolts one at a time from previous step, install the small o-ring (lube it first) and washer and re-install (x3). Torque to spec. That�s' it. You're done.
Once again, turn the pump by hand and ensure smooth operation.
I did not turn the pump with a drill at this time to prime it because as stated earlier I have lots more work to do. However, before I fire up the engine for the first time I will do just that to prime the pump first.
Obviously there is no way to know if the large o-Ring moved out of it's grove but I prefer to be optimistic
Clean up and have another brew.
Install the washer and woodruf key.
Step #22
Pump is now completely rehabilitated and ready for installation into the block
Do a final rub down with the lube on the entire outside of the pump.
Do a final check by turning the pump by hand a few times to ensure it turns smoothly and there is no noticeable play between the shaft and the seal. Once satisfied with the movement proceed.
Steps #23
Prepare the block for the pump. Clean it carefully and apply the lube liberally if the car will still not be driven for a while. I still have the M/M and oil pan after this, plus I am not even sure how much longer for this friggin winter will last.
Step #24
Remove the old o-rings and washers from the bolts that hold the pump into the block. The extra length will allow the pump to be positioned properly in the block.
Steps # 25
This is the final step before pushing it back in. Prime the pump with the STP Oil Treatment filling all the cavities with oil.
Step #26
Align the marks made in step #6 and push the pump into the block with one steady push. Mine went right in with no fuss. Install the 3 bolts sans o-rings and washers.
Step #27
Turn the pump by hand and ensure smooth operation. If satisfied, proceed..
Carefully remove the bolts one at a time from previous step, install the small o-ring (lube it first) and washer and re-install (x3). Torque to spec. That�s' it. You're done.
Once again, turn the pump by hand and ensure smooth operation.
I did not turn the pump with a drill at this time to prime it because as stated earlier I have lots more work to do. However, before I fire up the engine for the first time I will do just that to prime the pump first.
Obviously there is no way to know if the large o-Ring moved out of it's grove but I prefer to be optimistic
Clean up and have another brew.
Trending Topics
01-17-2010, 07:42 PM
#8
Three Wheelin'
Thread Starter
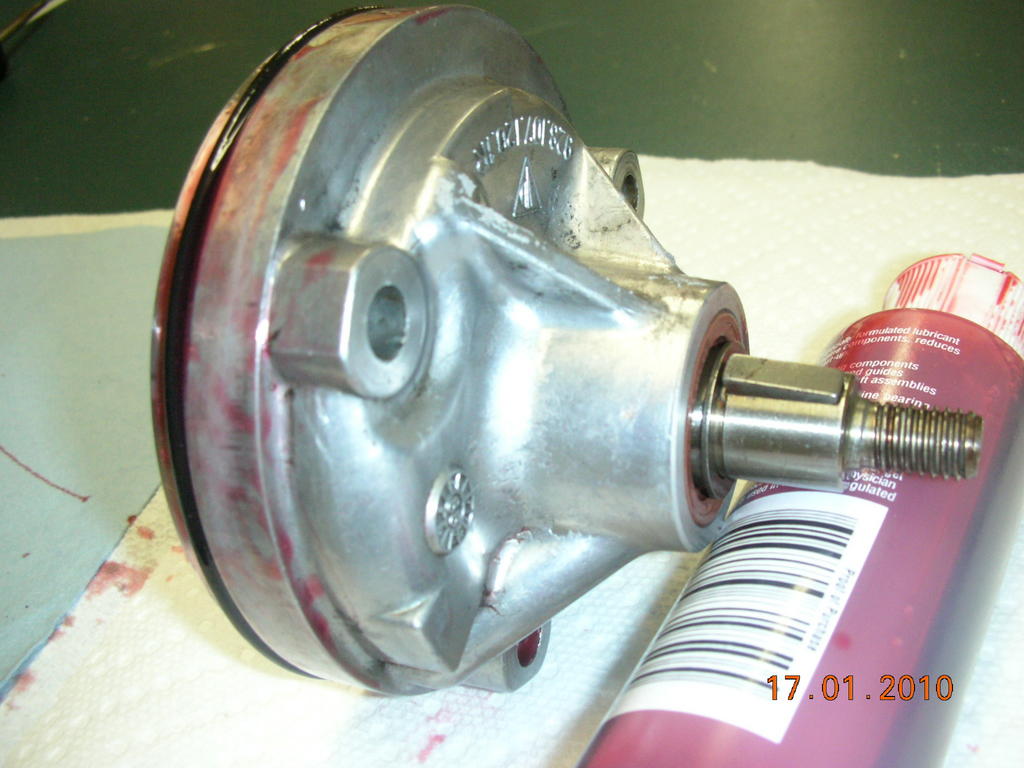
Picture in step #23
No, I checked with a magnifying glass, it is not a crack in the pump housing(block). It is, however, a deep gouge that shouldn't present any problems (hasn't done so far)
No, I checked with a magnifying glass, it is not a crack in the pump housing(block). It is, however, a deep gouge that shouldn't present any problems (hasn't done so far)
01-17-2010, 07:53 PM
#9
Three Wheelin'
Thread Starter
Thanks Landseer. Sorry I missed your post Mr.M, I was too busy trying to upload the information. I am too busy during the week and the info was fresh in my head. Now only if I can find a similar post for the cam seals.
01-18-2010, 02:15 AM
#11
Nordschleife Master
A couple of things to note on this.
As Stan pointed out, if you are using a new oil pump gear it will be steel. Do not reuse the 1mm washer before putting in the woodruff key.
The other thing is that many people have had the large o-ring become cut from where the block halves meet. so do not be overly shocked if you need to go back in there and replace it again. Esp if you need to turn the oil pump at all.
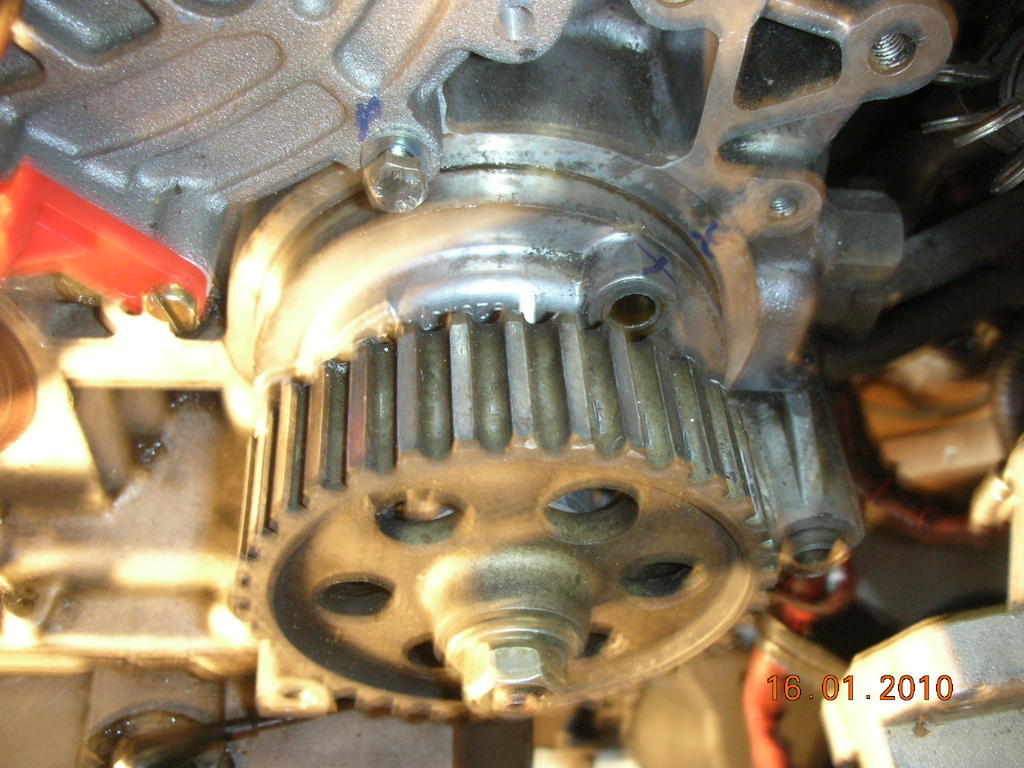
As well Hessank, your oil pump gear is pretty worn, I would strongly recommend replacement of it.
As Stan pointed out, if you are using a new oil pump gear it will be steel. Do not reuse the 1mm washer before putting in the woodruff key.
The other thing is that many people have had the large o-ring become cut from where the block halves meet. so do not be overly shocked if you need to go back in there and replace it again. Esp if you need to turn the oil pump at all.
As well Hessank, your oil pump gear is pretty worn, I would strongly recommend replacement of it.
01-18-2010, 08:05 AM
#12
Three Wheelin'
Thread Starter
Thanks for the comments. Of interest is the one from Colin about the pump gear being worn. Of course I have never been this deep into the engine so some tutoring is necessary for me and others. How could you tell that the gear is worn, by the space between the pump gear and the ring gear? I have never seen what a new fit looked like so I had no reference. It would be less than a 1/2 hr job to swap in a new one. I have already called the dealer and ordered a new one. Will be here in 3 days.
Also about what Stan said about the washer on a new steel gear. Are the new ones all steel? Thanks again for the insight.
Thanks again.
Also about what Stan said about the washer on a new steel gear. Are the new ones all steel? Thanks again for the insight.
Thanks again.
01-18-2010, 12:27 PM
#13
Nordschleife Master
Hessank,
All new gears should be steel yes.
When looking at
you can see aluminum, when on the inner and outter edges you see a dull beige/brown colour. The factory gear should have had that colour all the way across. The moment you see aluminum on the gears they will begine to wear much faster.
All new gears should be steel yes.
When looking at
you can see aluminum, when on the inner and outter edges you see a dull beige/brown colour. The factory gear should have had that colour all the way across. The moment you see aluminum on the gears they will begine to wear much faster.