
Bumper shock replacement: with pics (Does this make my car's butt look big?:)
 06-14-2008, 10:25 PM
#1
Craic Head
Lifetime Rennlist
Member
Lifetime Rennlist
Member
Thread Starter
I don't know if this is a common problem, but I did see another '85 recently who had the same issue, so I thought I'd post my fix.
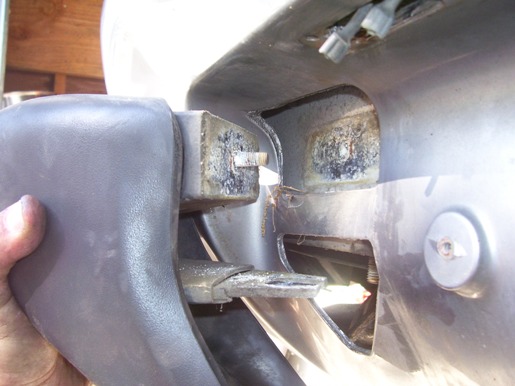
The issue, as you can see, is that someone tested out my bumper shocks before I got the car, and apparently they're one-time use shocks, so the rear end had this pucker:
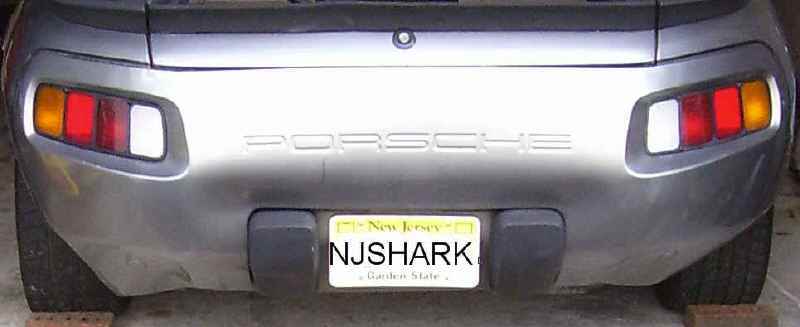
Kevin (The Guy) from up north hooked me up with some replacement bumper shocks before the winter, but I just got to replacing them.
I removed the tail lights, but it turns out this isn't necessary, since you can just unplug the wiring when you get the cover off, and leave the lenses on the cover.
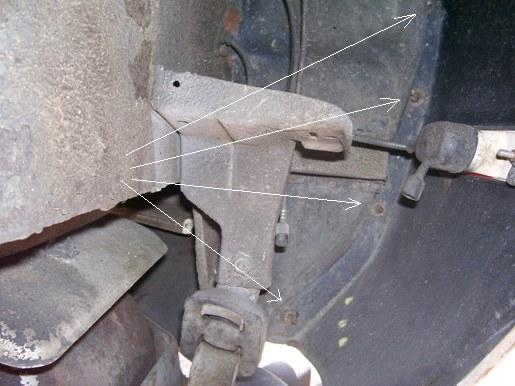
The bolts that connect the cover to the fenders are attached with 8mm nuts that you can reach from inside the fender. You'll have to remove the wheels to get in there. Here's where they are:
Next remove the four phillips-head screws in the plate along the top of the bumper cover that runs along the rear of the hatch and pull that trim piece out.
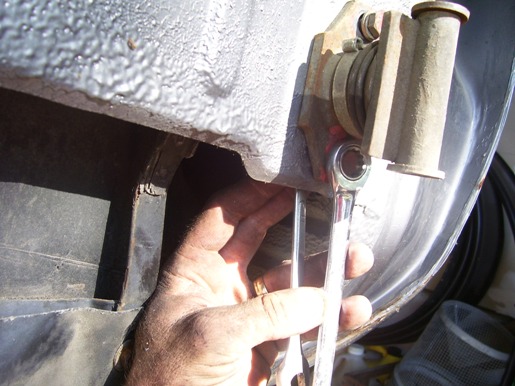
Then you'll have to take off the bumperettes. There's a 19mm nut under the bumper, and a 13mm nut on the stud that comes through the bumper horizontally:
Next unscrew the license plate lights and unplug them. Remove the license plate frame.
Next you can pull the bumper back and unplug the wiring harnesses and remove the bumper cover.
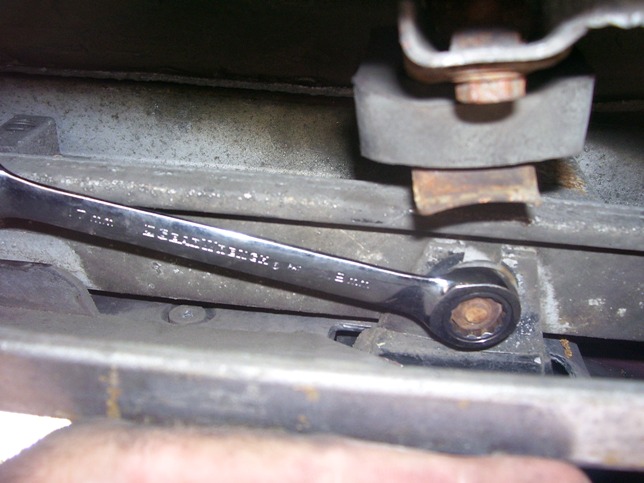
Now you have to get up under each bumper shock with a 10mm allen head socket. Remove the bolt from each side and then slide the bumper back off the shocks.
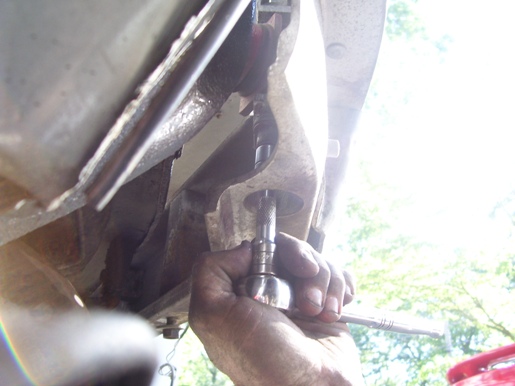
Finally, there is a 13mm bolt at the top of each bumper shock that threads into the frame, the bottom has a 13mm nut on the inside of the frame you'll have to counterhold.
Once the shock is out, you can just slide the new one back in.
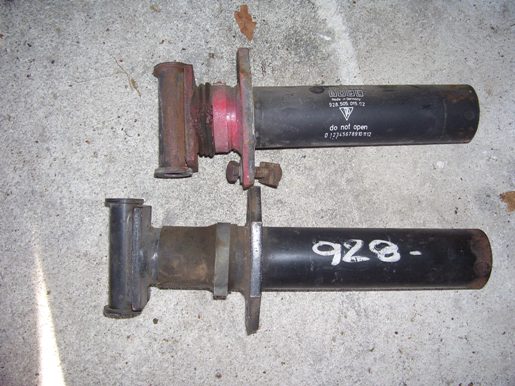
Here's a shot of a collapsed bumper shock and a good one:
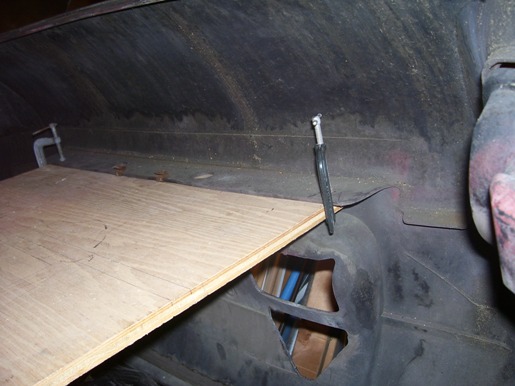
For the bumper cover, I got a piece of wood that was the same width as the center section as the bumper cover, clamped it to the ridge inside the cover, and used a heat gun (carefully) to heat up the cover and push it back into shape. I just held it straight with a leather gloved hand until it cooled in the right shape. Here's the setup I used:
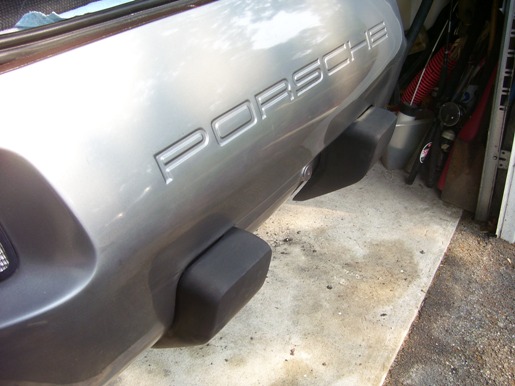
Here's how it came out:
Hope this helps someone. I was a little intimidated about removing the bumper cover but it turned out to be not so hard at all.
The issue, as you can see, is that someone tested out my bumper shocks before I got the car, and apparently they're one-time use shocks, so the rear end had this pucker:
Kevin (The Guy) from up north hooked me up with some replacement bumper shocks before the winter, but I just got to replacing them.
I removed the tail lights, but it turns out this isn't necessary, since you can just unplug the wiring when you get the cover off, and leave the lenses on the cover.
The bolts that connect the cover to the fenders are attached with 8mm nuts that you can reach from inside the fender. You'll have to remove the wheels to get in there. Here's where they are:
Next remove the four phillips-head screws in the plate along the top of the bumper cover that runs along the rear of the hatch and pull that trim piece out.
Then you'll have to take off the bumperettes. There's a 19mm nut under the bumper, and a 13mm nut on the stud that comes through the bumper horizontally:
Next unscrew the license plate lights and unplug them. Remove the license plate frame.
Next you can pull the bumper back and unplug the wiring harnesses and remove the bumper cover.
Now you have to get up under each bumper shock with a 10mm allen head socket. Remove the bolt from each side and then slide the bumper back off the shocks.
Finally, there is a 13mm bolt at the top of each bumper shock that threads into the frame, the bottom has a 13mm nut on the inside of the frame you'll have to counterhold.
Once the shock is out, you can just slide the new one back in.
Here's a shot of a collapsed bumper shock and a good one:
For the bumper cover, I got a piece of wood that was the same width as the center section as the bumper cover, clamped it to the ridge inside the cover, and used a heat gun (carefully) to heat up the cover and push it back into shape. I just held it straight with a leather gloved hand until it cooled in the right shape. Here's the setup I used:
Here's how it came out:
Hope this helps someone. I was a little intimidated about removing the bumper cover but it turned out to be not so hard at all.
 06-14-2008, 10:42 PM
#3
Nordschleife Master

Join Date: Sep 2004
Location: Not close enough to VIR.
Posts: 9,429
Likes: 0
Received 2 Likes
on
2 Posts
You could've just pulled out the old ones....
...or build your own that weigh several pounds less and protect more. Just two plates and some exhaust pipe.
...or build your own that weigh several pounds less and protect more. Just two plates and some exhaust pipe.
06-15-2008, 12:45 AM
#7
I have to do this job on the front end of my car. The PO never replaced the smashed in shocks when he bumped someone at a stop sign. They reused them and it made the fog lights sit to far back in the openings. When I got the car I pulled them out of the car and extended the shocks and put them back in. That fixed the light problem but still had ruined shocks. I got a good used set from another lister and now need to tear the front of the car apart again to put them in. Not looking forward to doing this again. I really wish I hadn't been in such a rush last time and done it right then.
Trending Topics
06-15-2008, 12:54 AM
#8

I really need to do this on my '88 but when I start one project, another always creeps in there and the car is down for a week. I really not lazy.
Great write up, thanks for the details.
Great write up, thanks for the details.
06-15-2008, 12:57 PM
#10
Craic Head
Lifetime Rennlist
Member
Lifetime Rennlist
Member
Thread Starter
 . Just kidding, I guess I could have possibly salvaged the old ones (anyone want mine?) but Kevin hooked me up with these so I just used them. I don't think the cover would have returned to shape without removing and reshaping it, so the amount of work would have been the same, the only difference would have been to reuse the old ones or make lighter rigid ones as you mention. This was the easiest way to go once I got the replacements, and it's back to stock.
The plywood was to hold the weight of the bumper cover and make the weight of the cover help me straighten the 'pucker'. If it were set on a bench, the tendency would have been for the middle to sag when it was heated, instead of pushing the middle back out when I applied heat and a little pressure to the ends.
06-15-2008, 08:47 PM
#13
Craic Head
Lifetime Rennlist
Member
Lifetime Rennlist
Member
Thread Starter
I can always count on you for an upbeat response. Thanks J

Avalon, I think that's way down south. I'm in Point Pleasant, right about the east end of 195. Check out our Dyno day thread. If you can make it that would be great. It's going to be on 7/12/08.
Avalon, I think that's way down south. I'm in Point Pleasant, right about the east end of 195. Check out our Dyno day thread. If you can make it that would be great. It's going to be on 7/12/08.