
Rear interior quarter panel removal (pic intensive)
 05-08-2007, 03:52 AM
#1
Rennlist Member
Thread Starter
Probably not necessary, but I'd pull the speakers out to start.
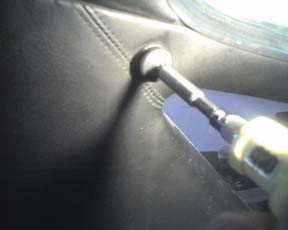
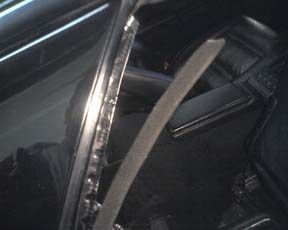
Rear seat belt cover comes off first, with two screws and
unbolting the seat belt anchor from the C-pillar.
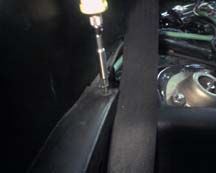
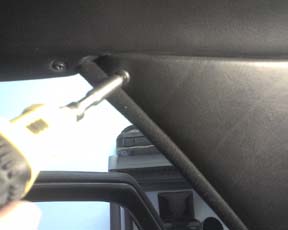
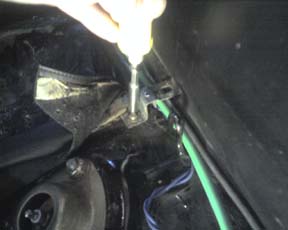
Front belt escutcheon is next, note it has two screws.

There are two screws above the front seat belt anchor
on the B pillar.
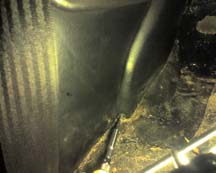
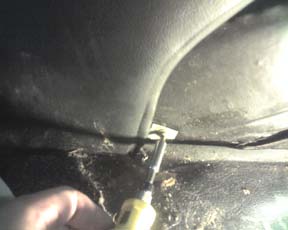
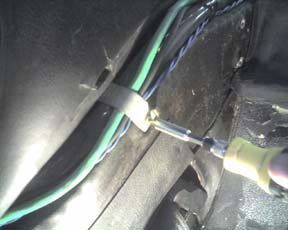
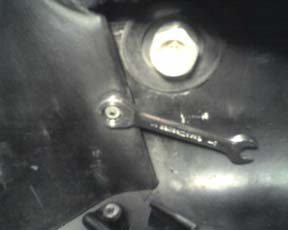
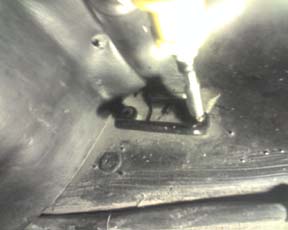
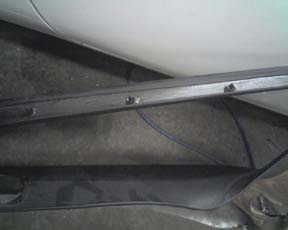
There are four screws that anchor the bottom of
the panel and a 8mm nut at the end:
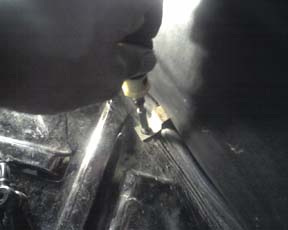
Then the weather stripping on the rear of the
door opening comes off. Just give it a good tug,
it'll pull right off:
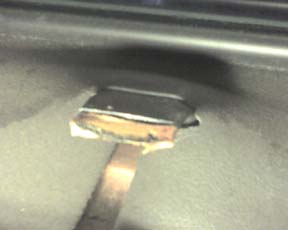
The tool kit tray stay gets in the way when trying
to remove the panel, and should be removed:
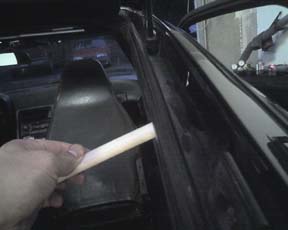
Now that all the screws are out, it's time to pop
out the pegs. There are three that hold the panel
to the C pillar. I inserted a bone tool between the
top of the panel and the C-pillar, holding the tool
horizontal and then pulling down on the end.
The pegs make a firm pop as they let go:
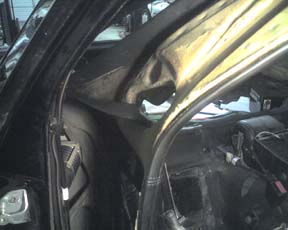
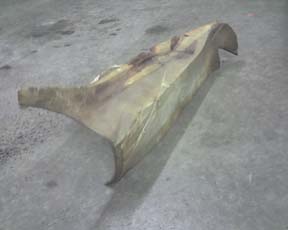
With the top of the panel separated from the car,
I pulled rear of the panel forward from the tool kit area.
I then pulled the lower part of the panel away from
the fender well. There is some glue holding the
panel to the foam here, so pull firmly. The panel
doesn't come out this way, so just pull firmly enough
to separate the panel from the foam.
Once the panel is separated from the foam,
pull the front of the panel away from the fender well
and forward. It should come off the car:
Unless you forgot to unbolt the lower anchor for the seat belt first:
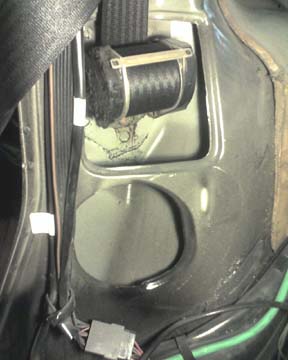
With the panel out, we can see what holds it
in besides the screws. Here's a close up of the C-pillar pegs:
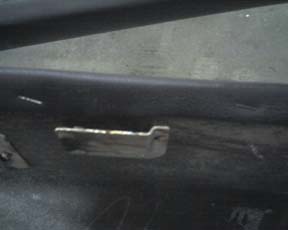
Here is the metal tab that protrudes from the fender well:
And the slot in the panel it slides into:
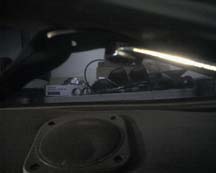
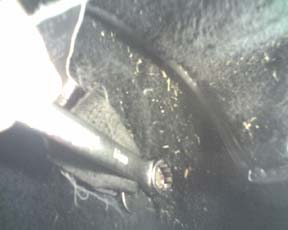
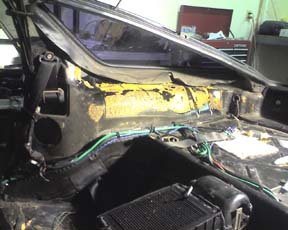
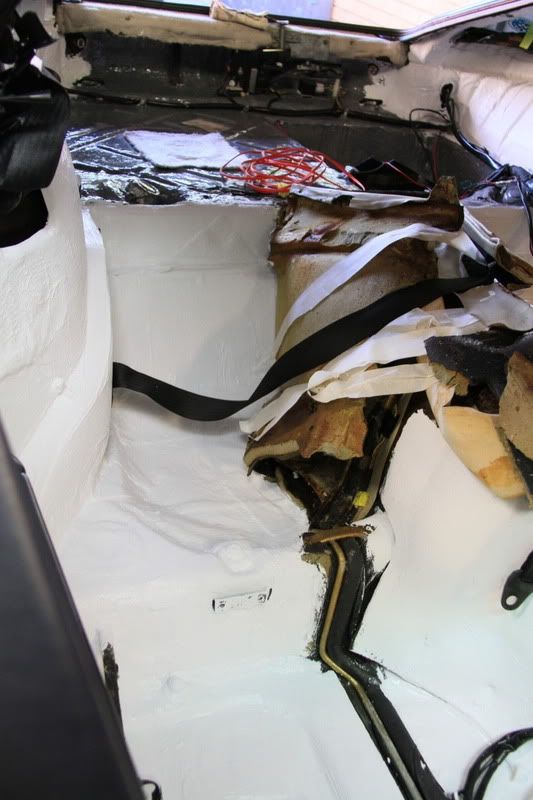
So, what do we find underneath? Lots of foam:
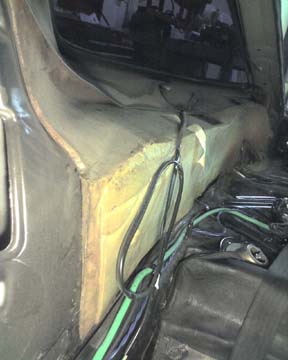
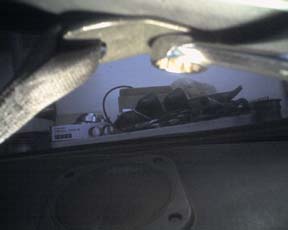
No sound deadening in the wheel well area behind
the speaker, pretty suprising:
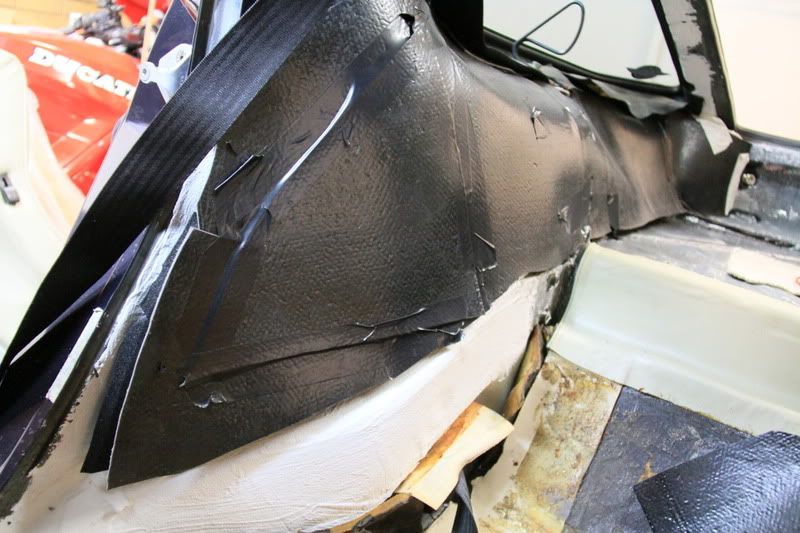
And at last, bare (almost) metal:
Rear seat belt cover comes off first, with two screws and
unbolting the seat belt anchor from the C-pillar.
Front belt escutcheon is next, note it has two screws.
There are two screws above the front seat belt anchor
on the B pillar.
There are four screws that anchor the bottom of
the panel and a 8mm nut at the end:
Then the weather stripping on the rear of the
door opening comes off. Just give it a good tug,
it'll pull right off:
The tool kit tray stay gets in the way when trying
to remove the panel, and should be removed:
Now that all the screws are out, it's time to pop
out the pegs. There are three that hold the panel
to the C pillar. I inserted a bone tool between the
top of the panel and the C-pillar, holding the tool
horizontal and then pulling down on the end.
The pegs make a firm pop as they let go:
With the top of the panel separated from the car,
I pulled rear of the panel forward from the tool kit area.
I then pulled the lower part of the panel away from
the fender well. There is some glue holding the
panel to the foam here, so pull firmly. The panel
doesn't come out this way, so just pull firmly enough
to separate the panel from the foam.
Once the panel is separated from the foam,
pull the front of the panel away from the fender well
and forward. It should come off the car:
Unless you forgot to unbolt the lower anchor for the seat belt first:
With the panel out, we can see what holds it
in besides the screws. Here's a close up of the C-pillar pegs:
Here is the metal tab that protrudes from the fender well:
And the slot in the panel it slides into:
So, what do we find underneath? Lots of foam:
No sound deadening in the wheel well area behind
the speaker, pretty suprising:
And at last, bare (almost) metal:
Last edited by atb; 05-08-2007 at 04:46 AM.
 05-08-2007, 05:00 AM
#3
Cottage Industry Sponsor
Lifetime Rennlist
Member
Lifetime Rennlist
Member

Hi Adam:
Thank you very much for this detailed write-up! It's awesome to have this as a reference, should the need to do this ever arise!
Thank you very much for this detailed write-up! It's awesome to have this as a reference, should the need to do this ever arise!
05-08-2007, 01:19 PM
#6
Rennlist Member
Thread Starter
Nicole wrote:
I was a little frustrated that I couldn't find a detailed procedure (maybe I didn't look in the right places) for this when it seemed that so many have done it. I do hope it makes it easier for those who choose to take it on in the future.
Ryan wrote:
I think having the pics before going in helps considerably. It took a long time for me to get the first one off, but once I saw how if fit together, the second came out in about 30 minutes. Removing the seats is a bigger pain (I'll do a post on that when I put it all back together), but the quarter panel is pretty cut and dried. The only tricky part is reaching under the lower edge of the panel after all the screws are out and separating the foam from the panel. It's not too bad though, the glue isn't that strong and it separates from the panel just by wedging your fingers up there while pulling the panel away from the fender well.
Harvey wrote:
Rings true on any job involving a 928. 
Thank you very much for this detailed write-up! It's awesome to have this as a reference, should the need to do this ever arise!
Ryan wrote:
I was going to attempt this but it looked like a real pain in the *** so i have put it off.
Harvey wrote:
However, this is a job to be done carefully or one can do more damage than good.
05-08-2007, 01:33 PM
#7
Instructor

Join Date: Mar 2006
Location: Hattiesburg, MS
Posts: 205
Likes: 0
Received 0 Likes
on
0 Posts
This is for a 90 S4. I imagine it's pretty much the same on all models.
http://www.928s4.info/interior/quarter_panel_removal/
http://www.928s4.info/interior/quarter_panel_removal/
Trending Topics
05-08-2007, 04:42 PM
#9
Addict
Rennlist Member
Rennlist Member
Originally Posted by low miler
Looks like fun! Mine are perfect, but I think I'll do it anyway with so much spare time on my hands! Good times! 
Todd Johnson
Todd Johnson
Harvey
05-08-2007, 07:33 PM
#10
Banned

Join Date: Jan 2004
Location: Indianapolis
Posts: 847
Likes: 0
Received 0 Likes
on
0 Posts
Originally Posted by H2
Miler...if yours are perfect I'd leave well enough alone. Some of the bolt down flanges can rip your leather. It's not a job I like doing. Plus the fiber backing is probably brittle with age.
Harvey
Harvey
Hey my man, I was totally just kidding! I have absolutely NO mechanical knowledge whatsoever, nor am I interested in learning either. Everytime I try and fix something myself on my car, not only do I make it worse, I also ruin something else along the way that was just fine beforehand.

And regardless, I certainly wouldn't try and fix something that's not broken anyway.
You did do a great job though. I'm sure many others will benefit from your informative thread.
Todd Johnson
10-18-2012, 09:34 PM
#11
Instructor
Join Date: Jul 2012
Location: Philadelphia
Posts: 174
Likes: 0
Received 0 Likes
on
0 Posts
I was trying to remove the interior right rear quarter just enough to get to the ground connection and clean it. I took out the 2 obvious screws that are in the back, and a bolt that is further up (missing). But there is something holding on to it in the very back, another bolt not visible ?
How to pull this back enough to get to those grounds, thanks !
How to pull this back enough to get to those grounds, thanks !
10-19-2012, 02:58 AM
#12
Rennlist Member
no sound deadening huh!
the whole car has;
4 layers
Second Skin Audio's damplifier pro
5 coats, about 4mm thick 'Spectrum' the white paint
1cm layer of luxury liner; closed cell foam
layer of MLV
sound deadening paint inside wheel arches
hopefully its enough....


all rear speakers have been deleted due to being crap
the whole car has;
4 layers
Second Skin Audio's damplifier pro
5 coats, about 4mm thick 'Spectrum' the white paint
1cm layer of luxury liner; closed cell foam
layer of MLV
sound deadening paint inside wheel arches
hopefully its enough....
all rear speakers have been deleted due to being crap
10-19-2012, 11:12 AM
#15
Not the sharpest tool in the shed
Rennlist Member
Rennlist Member

Great job on the sound deadening efforts. How did you ever get the interior panels to fit again? I have Dynamat with some closed cell foam in places and it is very difficulty getting the rear quarter panels to fit properly without causing rubbing of the seats against them when folding the seats down and up. Same sorts of challenges refitting the headliner. The Dynamat is preventing it from fitting snugly up against the interior roof.