When you click on links to various merchants on this site and make a purchase, this can result in this site earning a commission. Affiliate programs and affiliations include, but are not limited to, the eBay Partner Network.
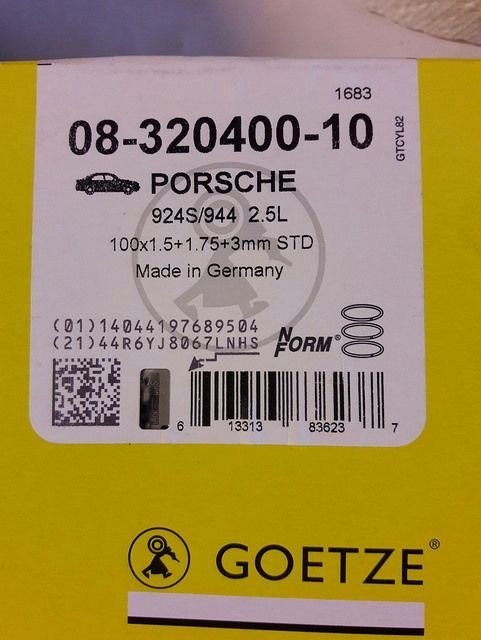
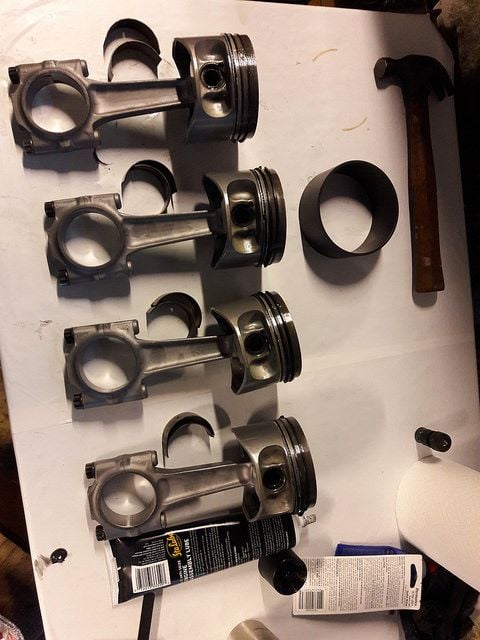
I'm rebuilding my 1988 944 NA with about 110k miles on it, bores simply cleaned up. #2 piston tolerance group.
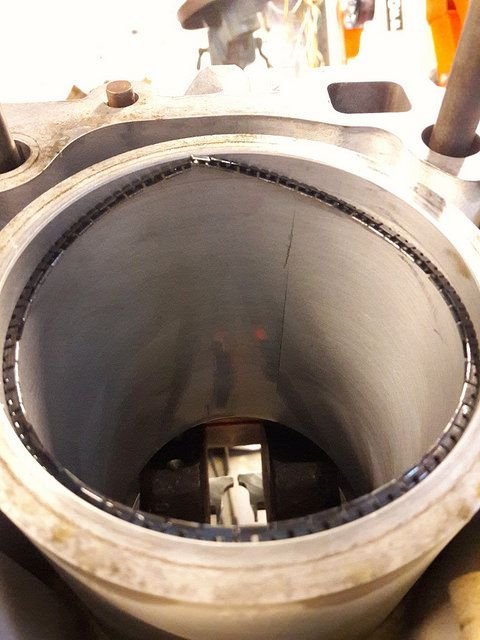
These rings all gap within tolerances, except: the first oiling ring I pulled out wants to overlap itself. So I took it out and put it in the bore and it is too big.
Is this normal? Am I supposed to cut a chunk off? Or... Is it supposed to crush smaller on installation? If so, how am I going to keep it from overlapping itself? Did I buy the right rings?
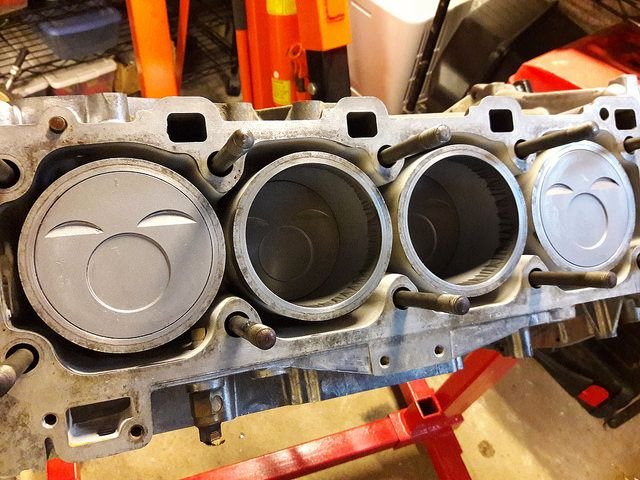
They tapped right into the cylinders without a hitch! The pistons move really smoothly before and after the rod big-ends have all been torqued down. This engine WANTS to spin!
There were a few tricks I learned as I went along:
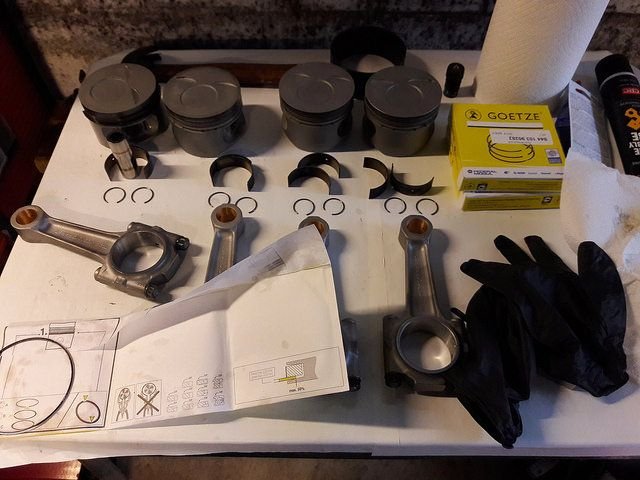
1) Remove the connecting rod nuts before doing anything. mine were really on there because that's how it came from the machinist. Not everyone will have rods that are cranked down like that, but if you do, get them off early on.
2) My crankshaft was already installed. So I turned the crank so the rod journal was away from the cylinder, and protected the cylinder walls with a strip of paper that was easily removed from the bottom later.
3) Put the bearing on the rod side before tapping it in. With some assembly lube, it will stay there, and it's easier than putting it on with the crankshaft and crank scraper in the way.
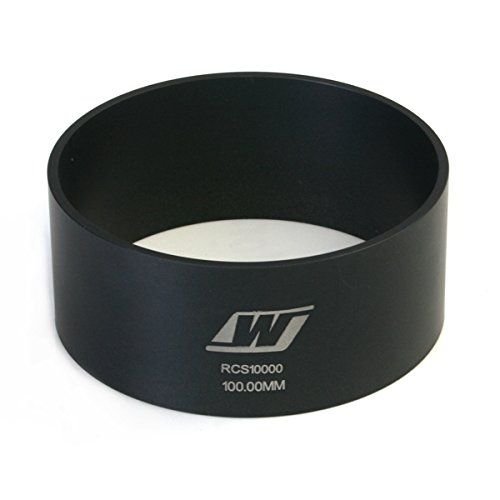
4) I used a fancy tapered Wiseco 100mm ring compressor. After you have the top side of the bearing installed, and everything ready to put in, get the piston far enough into the compressor that all the rings are contained by it. (at least flush). Only then should you present the piston to the cylinder.
I'm really happy about this part of the job. Thanks for reading, and I hope this helps someone else down the road.
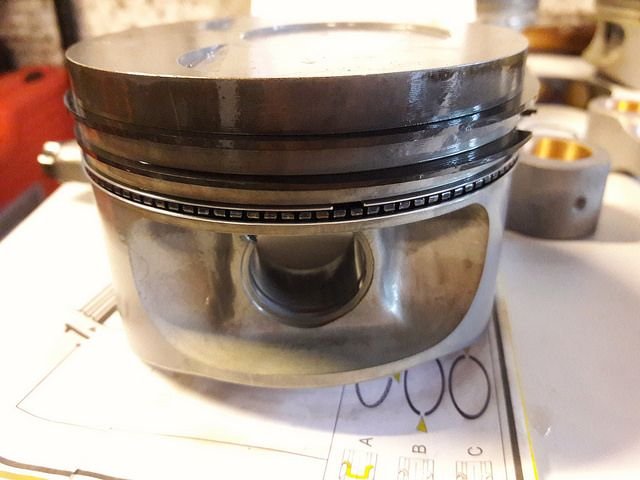
It's simply a tapered cylinder that's wide enough at the top to take in the oiling rings, and with a bit of a squeeze, the other two rings. Tap on the top of the piston as you would with any other kind of ring compressor, and by the time the piston rings make it to the top of the cylinder, the width is 100mm and it just slides right in.
I got a ARP 100mm ring compressor and honestly I wasn't blown away. I had a lot of similar issues installing the pistons. When you say you put lube on the bearings to hold them in, surely you didn't mean between the back side of the bearing and rod right? I was always told that was a recipe for a spun bearing, and to keep that interface as clean and dry as possible.
The pistons are clean because I paid Michael Mount to soda blast the skirts. I guess he just hit the faces too, while he was at it.
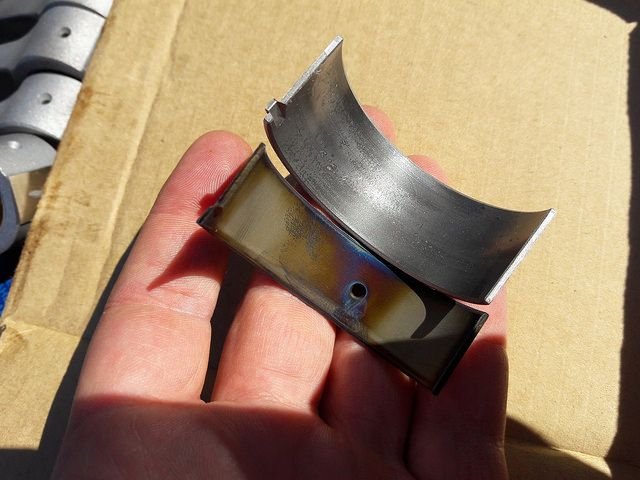
Re: lube on the back side: I did put some there. Funny thing about these particular bearings, though.. there's an oiling hole in each half of the bearing. Seems to me that some will get back there no matter how hard I try to keep it clean, considering oil will be constantly pressurized into those holes by the oiling holes in the cross drilled journals.
But I am no expert, obviously.
Also, none of my issues were related to the compressor. It worked fine.
If a person wanted to pop them out and apply acetone or brakeclean to the backs of the bearings & insides of the bores then I suspect a reuse wouldn't be a problem. Apply some loctite to the rod fasteners if must re-use the nuts (is how I'd handle it).
The first engine I rebuilt at work I did the same thing on a diesel engine... never heard from the customer again. I suspect after paying us $10,000 to rebuild his engine that we would have heard about any problems... but in the back of my mind I always wondered...
My technique nowadays is to install the bearings in the rods with everything (crank included) dry as a bone. Then once the bearings are seated & flush in the rods I then apply assembly lube.
It won't matter how dry it is since those bearings he is using have a hole. That means system oil pressure will be applied to that hole 100% of the time engine has oil pressure.
Here's one of the new bearings with that sizeable hole alongside a normal bearing. Both halves of the new bearings have the hole.
I didn't really lube it up on the outside of the bearing (inside of the connecting rod)... I only put a light shmear on the back of the one that goes in the rod itself to give it enough surface tension to hold onto it while I tapped the piston into the cylinder.
The other one (bottom half) went on dry on all four.
I guess I'd prefer to not have to "re-use" those nice new nuts and have THAT on my conscience.
My experience is building Chevy small blocks putting out 500 hp. The rod bearing surfaces and the rods side of the bearings were cleaned with lacquer thinner to prevent the spinning of the bearing. The picture of you bearing is similar to a Chevy small block.
The "spring" of the bearing holds the bearing in the connecting rod and the bearing does not fall out when you place the piston and connecting rod into the cylinder .
IMO, I would contact Michael Mount if the believes it is wise to put a thinner layer of grease between the bearing and the connecting rod. This thin film affects the bearing to crankshaft clearance and I believe the grease film could help a bearing to spin.
If a rod bearing doesn't slip into place with enough tension to hold it in, then it's a good indication the big-end needs to be examined to make sure it's not out of round.
 03-26-2017, 10:47 AM