When you click on links to various merchants on this site and make a purchase, this can result in this site earning a commission. Affiliate programs and affiliations include, but are not limited to, the eBay Partner Network.
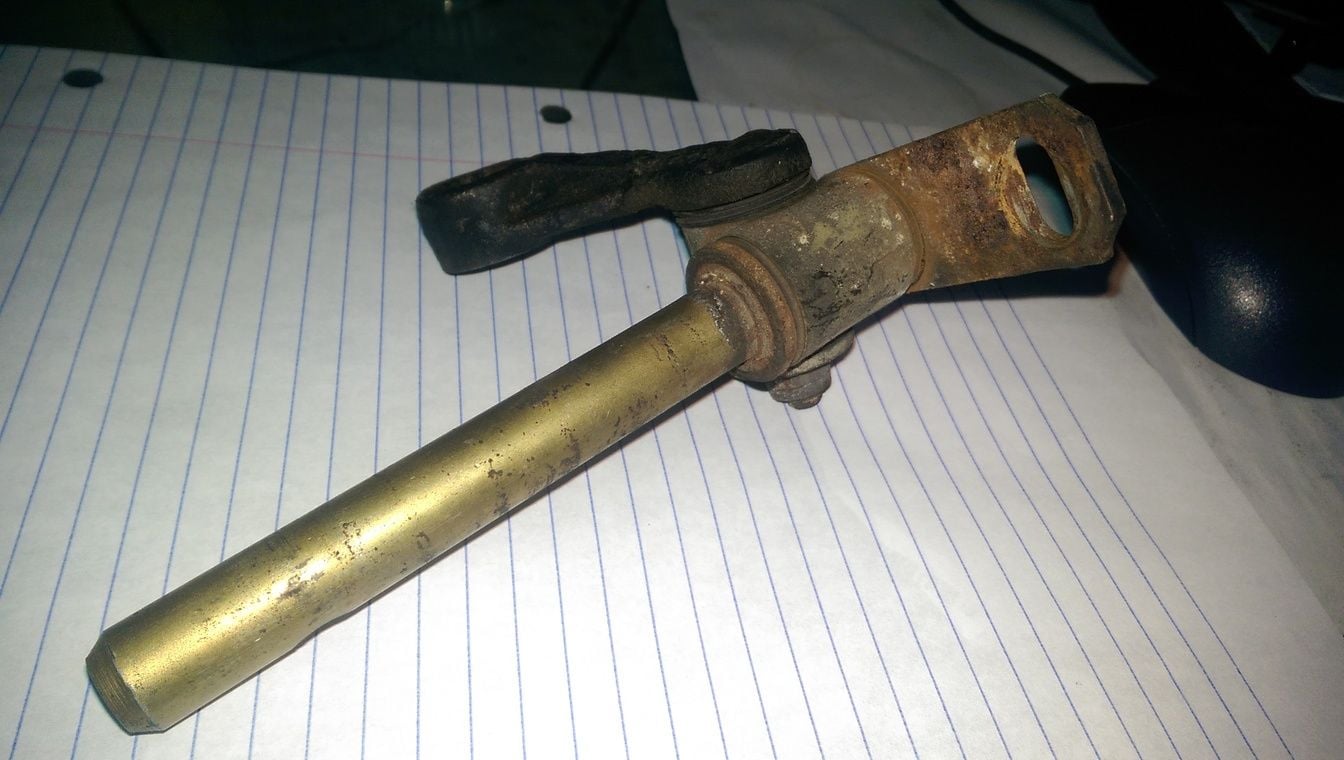
I've been working on this for a little bit and am looking for good ideas... I hate all the play in the shifting (already rebuilt in-cabin shifter) and a new linkage isn't in my budget right now. Plus, rebuilding OEM parts is cooler
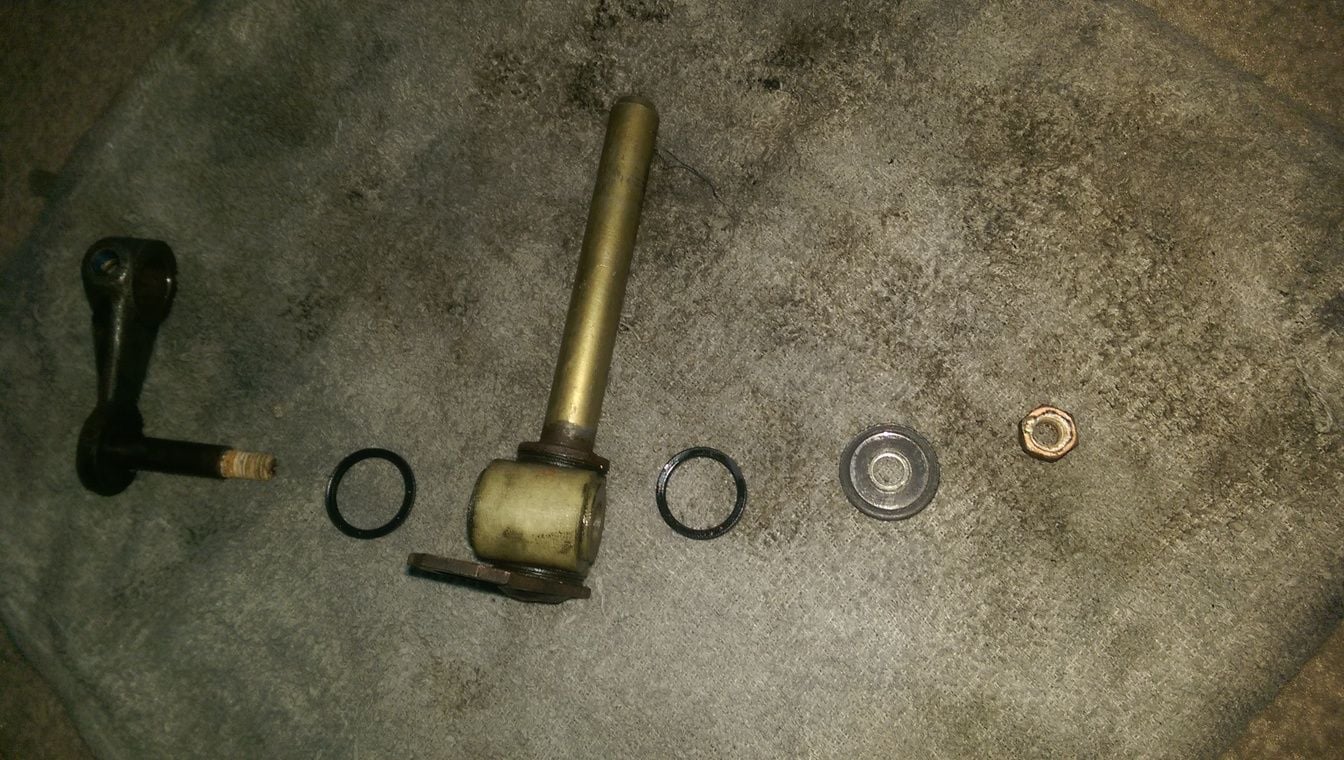
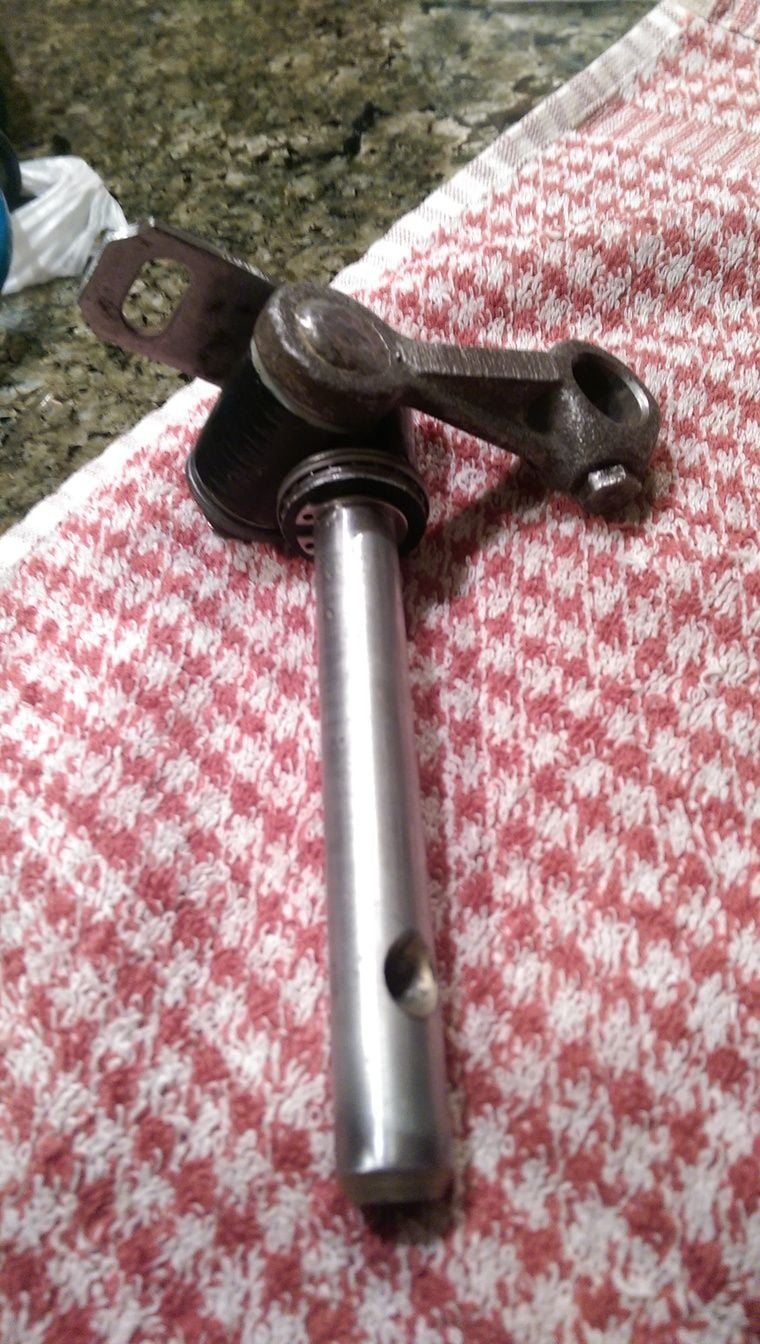
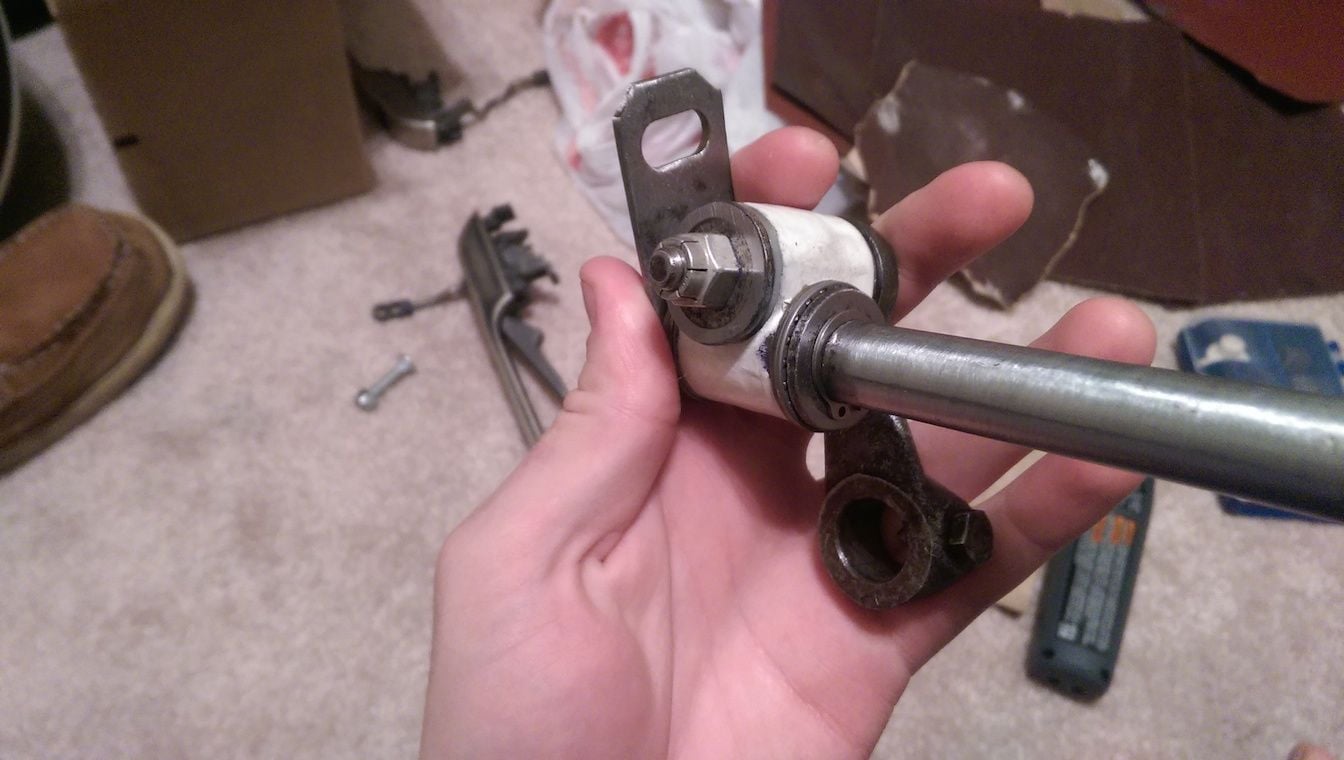
I grabbed my spare linkage and tore it apart, cleaning as I went:
Couple of observations:
That snap ring fell apart as soon as I tried removing it. We've been trusting that thing during every shift.
Most of the play is due to the plastic wallowing out ("footballing") over the shafts.
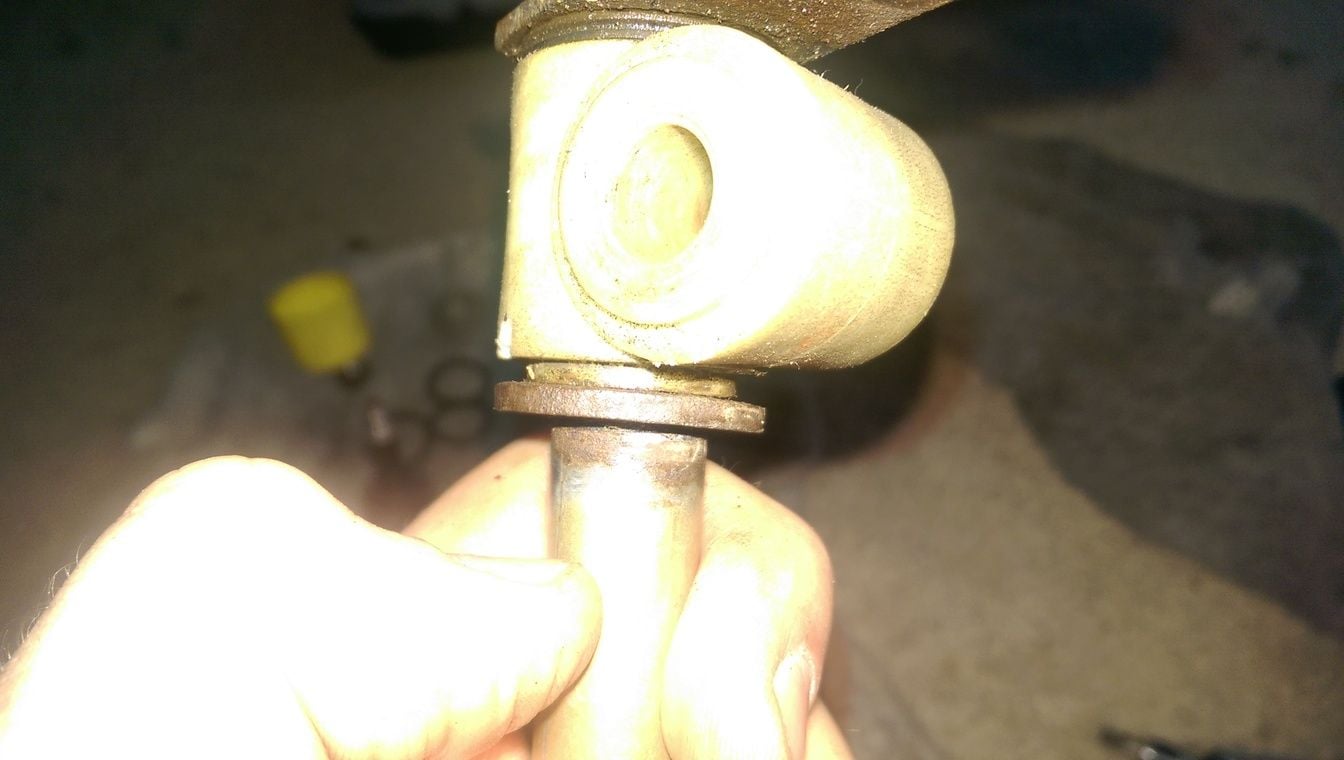
The rubber rings sit on shoulders on the 4 sides of the plastic coupler. These shoulders protrude 2.25mm each.
The rubber rings compress when there is a torque applied to the plastic coupler (in a direction perpendicular to the shaft on which it sits).
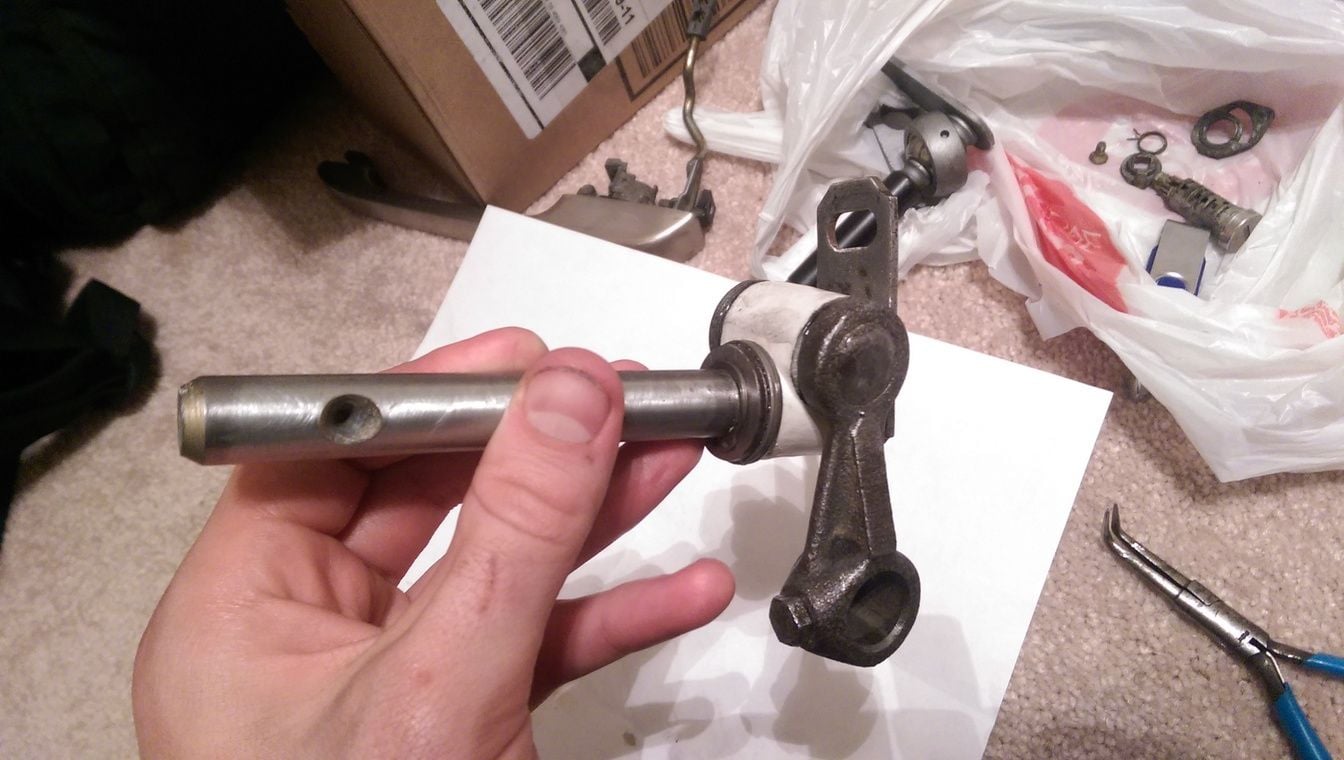
Also, wire-wheeling the crap out of this thing made a big difference. I tapped and died all fittings:
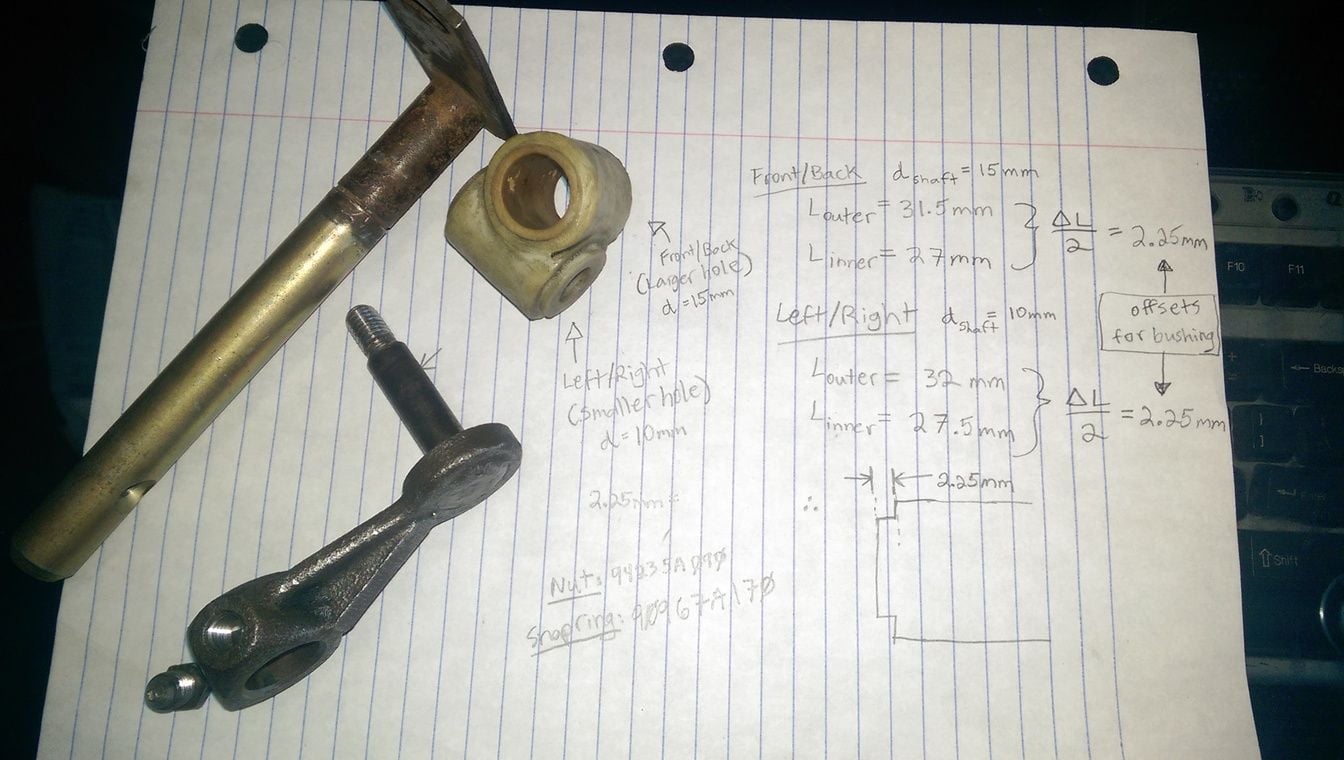
...and made measurements of all relevant dimensions:
The rebuild involves installing thrust bearings where the rubber rings were, allowing free rotation without allowing the coupler to succumb to the torques mentioned in observation #4. I did some research and chose McMaster Carr needle roller thrust bearings, similar/same as the ones V2Rocket used in his write up for the in-cabin shifter rebuild (which I recommend).
In order for these to seamlessly install, I milled off the shoulders on which the rubber rings sat. This allows the retaining ring groove to be re-used (with a new ring of course). Washers 1mm thick were chosen to sandwich the plastic coupler on the shafts, so the bearings aren't touching the plastic. I reused as many OEM parts as possible. The nut that holds the plastic coupler on the 10mm shaft is discarded in favor of a flex-top locknut.
2x washers sandwiching plastic coupler on 10mm shaft - 5909K71
2x washers sandwiching plastic coupler on 15mm shaft - 5909K73
Retaining ring for 15mm shaft (14.3mm groove) - 90967A180
(total: ~$27 before shipping)
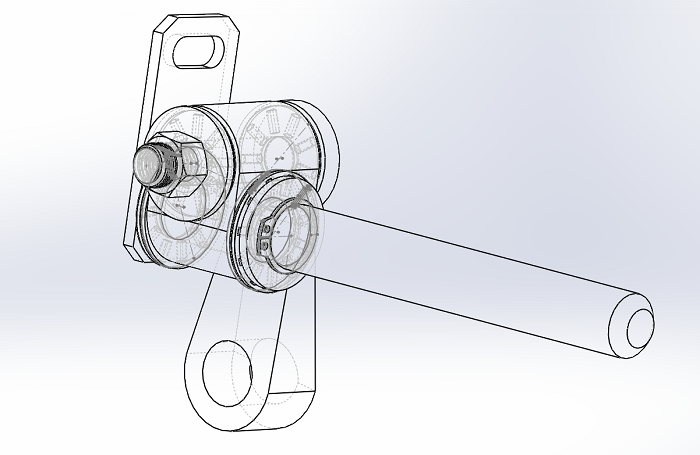
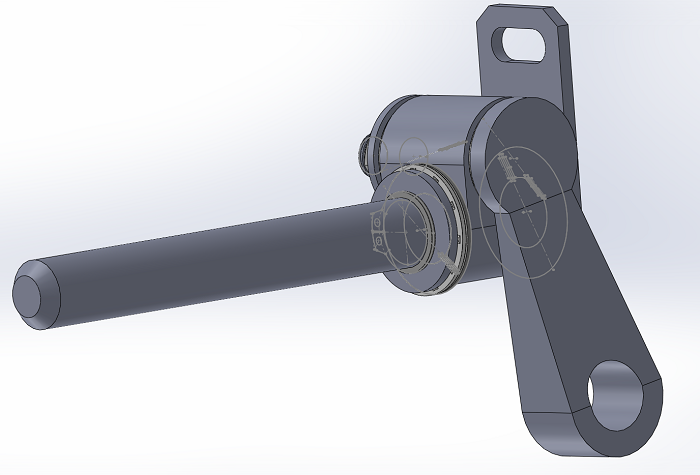
I made a 3D model of this rebuild using Solidworks - it all fits together very snugly. If anyone wants to play with the file, PM me and I can email it, it's too large of an attachment to upload here.
Finally put together:
Results: there is ZERO play in this thing! I'll upload a video of it installed (before and after from the cockpit) when I have the time.
looks like a lot of work when you can spend 50 dollars for a new one.
From where? It's $200+ from Porsche. 3rd party ones are usually SSK. I actually really like the stock throw (idk, I'm weird) and from what I've read online the only 3rd party ones worth getting are already at $90+ anyway. (I actually already have a Schnell SSK, just not installed)
In my mind, this is getting (what I consider personally) the best of both worlds. The stock throw feel, with a low price tag. People who prefer the short throw feel will probably see this as a waste of time.
The problem with the only944 shifter is that the set screw into the transmission shaft will back out. I have 2 of them and they both backed out pretty quickly. The aluminium is soft and strips pretty easily, so I would suggest helicoiling it right away and using locktite before even putting it in. When it slips off, you lose all your gears and have to crawl under the car on the side of the road to hook it back up. The throw on this shifter is really close to stock if you use the long throw setting.
The problem with the only944 shifter is that the set screw into the transmission shaft will back out. I have 2 of them and they both backed out pretty quickly. The aluminium is soft and strips pretty easily, so I would suggest helicoiling it right away and using locktite before even putting it in. When it slips off, you lose all your gears and have to crawl under the car on the side of the road to hook it back up. The throw on this shifter is really close to stock if you use the long throw setting.
exactly. i hate to bash a good vendor but my honest opinion is that the only944 ssk is a piece of garbage for exactky the reason you stated. mine backed out twice and cost me two tows home because i didnt have my tools. the aluminum quality is a joke and when i brought that to kyle's attention he basically told me I wa crazy and must have installed it wrong.
i'll definitely be using one of Michael's rebuilt units when he gets them out.
On another note, for improvement in feel, how about replacing the link shaft, from the cabin shifter to the trans with an aluminium piece.
The stock parts are so heavy, I recently replace the gear ****, and was amazed at the the weight of the stock item, it must be made of some heavy die cast alloy like toy cars.
The shift felt a good deal better, but is still heavy feeling when shifting back and forward, the oem shaft appears to be steel, and an aluminium one would hopefully improve the feel further?
exactly. i hate to bash a good vendor but my honest opinion is that the only944 ssk is a piece of garbage for exactky the reason you stated. mine backed out twice and cost me two tows home because i didnt have my tools. the aluminum quality is a joke and when i brought that to kyle's attention he basically told me I wa crazy and must have installed it wrong.
i'll definitely be using one of Michael's rebuilt units when he gets them out.
Strange! I have maybe 5-6000 miles on my Only 944. Not a hint of trouble so far! Mind you I tend to loc-tite the snot out of things. It's been solid and improved the shifting.
Sorry SausageHacker for getting slightly off the path. Please continue to keep us posted!
Strange! I have maybe 5-6000 miles on my Only 944. Not a hint of trouble so far! Mind you I tend to loc-tite the snot out of things. It's been solid and improved the shifting.
Sorry SausageHacker for getting slightly off the path. Please continue to keep us posted!
I'm going to try my only944 shifter when I get a chance to install it.
After reading this thread I might try safety wiring the bolt along with loctite.
Small suggestion: I would recommend cleaning the threads with a thread chaser (also called a restorer or reformer) rather than a die. Taps and dies are designed to cut metal rather than clean and reshape it. The chaser will not cut, and it will not remove any remaining plating on the threads. A good set of chasers is dirt cheap from Snap-on and many other sources. They are also real useful at removing old thread locker from bolts, etc.
I'm a little confused about which bolt is the one that backs out.
It's the aluminium block on the right side of the image. It slides over the shifter shaft on the transmission and then the cone shaped tip of the screw engages with the divot in that shaft. It just backs out and strips when you get frustrated and put too much torque on it. Helicoiling that hole solves that problem.
i'll definitely be using one of Michael's rebuilt units when he gets them out.
Ship me a core, I'll only charge for the cost of parts if you want to test it on your car.
Originally Posted by willrobinson
On another note, for improvement in feel, how about replacing the link shaft, from the cabin shifter to the trans with an aluminium piece.
Interesting idea, although it's a weird shape and has precise fittings on it. If you're really handy I guess you could make one.
Originally Posted by V2Rocket_aka944
i just pulled up my shift boot and saw that one of the needle bearings from the "stiffer shifter lever mod" was completely missing (!)
ill be watching this thread.
Wait what? Like it got worn down and crumbled off the M10 bolt? Mine are still there... as of last week when I was in there...
Originally Posted by KevinGross
Small suggestion: I would recommend cleaning the threads with a thread chaser (also called a restorer or reformer) rather than a die. Taps and dies are designed to cut metal rather than clean and reshape it. The chaser will not cut, and it will not remove any remaining plating on the threads. A good set of chasers is dirt cheap from Snap-on and many other sources. They are also real useful at removing old thread locker from bolts, etc.
 03-03-2015, 05:44 PM