Head Job Went Horribly Wrong
 09-15-2014, 09:20 PM
#16
Rennlist Member
Thread Starter
I took out all four plugs and cylinder #4 was full of coolant...
 09-15-2014, 10:16 PM
#17
09-15-2014, 10:52 PM
#18
Rennlist Member
Yes, that's right. I do three distinct, separate sequences. First at 15 ft/lbs. Then I put my socket on a breaker bar, and starting the torque sequence over again, do each one 90 degrees. Then, by now I'm starting to work up a sweat, so I might rest a few minutes, drink some beer, and then do another torque sequence where each nut gets another 90 degrees.
09-16-2014, 12:02 AM
#19
In later parts of the FSM (e.g. turbo section) the head gasket torque was updated to 20 Nm (15 ft/lbs) then 90 degrees and 90 degrees.
That's actually a more accurate way to do it. Because the thread pitch is a known quantity - M12x1.5mm - a half turn on the nuts after snug (initial torque) will put 0.75mm of stretch in the head studs. If all head studs are the same material and same diameter, the same stretch will make for a very uniform force. This eliminates any friction drag between the nut and washer or washer and head from the equation.
Another thing to mention, when you take a head off, you want to do it in the reverse torque pattern.
I ask all the questions because I'm about to drop a rebuilt head on my '83. I don't want to do it more than once.
09-16-2014, 06:38 AM
#20
Rennlist Member
Thread Starter
I went with the 66 ft/lbs value as my final torque spec and I believe this is where I went wrong. With cylinder 4 full of coolant it leads me to believe that there may be a sealing issue somewhere in that area and that it is isolated to that cylinder. It gives me more of a specific area to inspect, though I plan to inspect the entire surface area on all cylinders. I plan to take the head back to the machine shop so that they can inspect it and ensure that the sealing surface is 100% flat.
09-16-2014, 02:15 PM
#21
Rennlist Member
Hey Van, I agree the 90 degree method is more accurate, but I was wondering what the equivalent torque value you applied on that last pull. I wonder if it's close to the 90Nm.
Mazdaverx7, I don't know if this was mentioned earlier, but have the machine shop pressure test the head. Hopefully, if there's a crack, they will catch it.
Mazdaverx7, I don't know if this was mentioned earlier, but have the machine shop pressure test the head. Hopefully, if there's a crack, they will catch it.
09-16-2014, 09:19 PM
#22
Rennlist Member
Thread Starter
I spoke with the machine shop today and they said that I can bring the head up and that they will look it over at no cost. So, while this does suck that I have to get into the engine again, at least I believe that I know its my fault (if no parts are cracked) and I know how to remedy the situation. I also ordered a new head gasket and cam tower gasket today. Things will be easier this time around.
09-16-2014, 09:25 PM
#23
Sorry you are having to deal with all this frustration.
I have had similar experiences with DIY and I know how discouraging this kind of stuff is!
I have had similar experiences with DIY and I know how discouraging this kind of stuff is!
09-18-2014, 12:37 AM
#24
Rennlist Member
Thread Starter
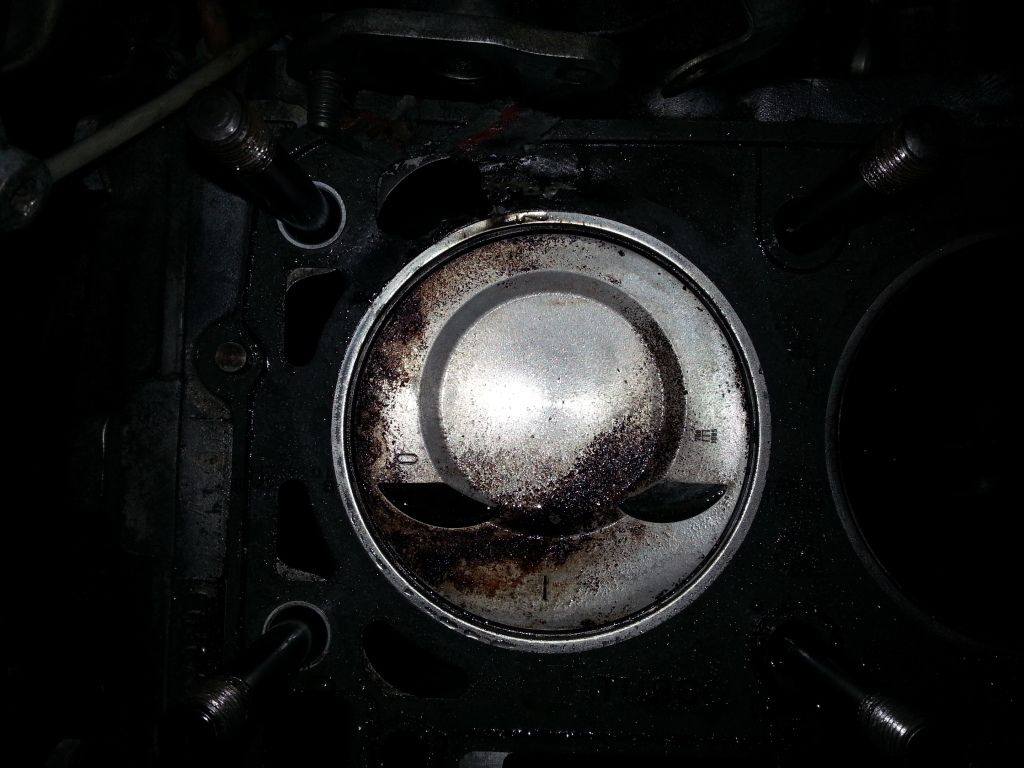
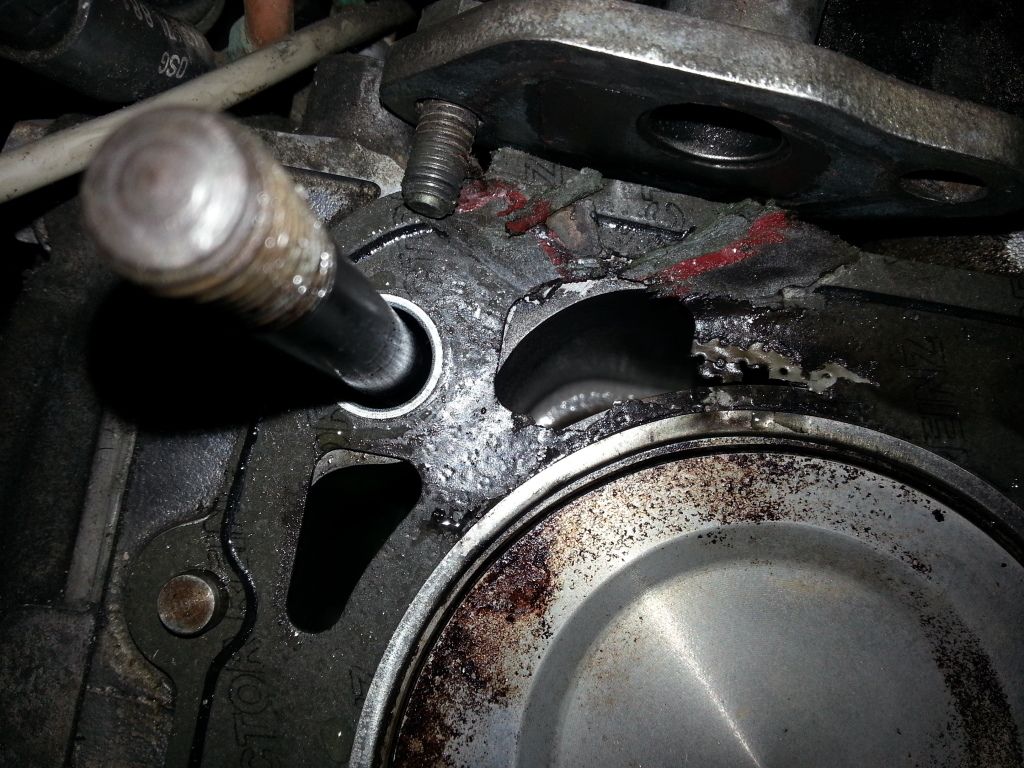
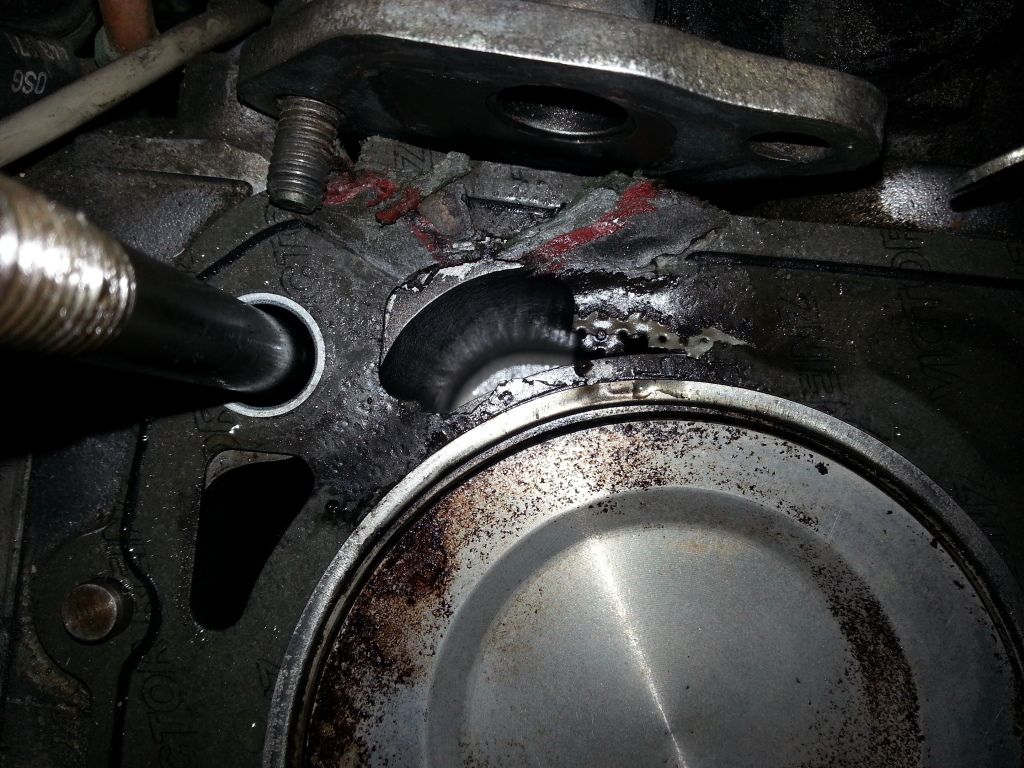
I believe I found my problem today. It appears that I failed to properly torque the last three of the top nuts that secure the head to the block. Seems that the compression blew the gasket apart on the left rear. I take full responsibility for the oversight and I am still unsure how I missed those three nuts. Seems they were only torqued twice instead of three times. So, the new gasket should be here in a couple days and tomorrow the head goes to the machine shop to be thoroughly tested and resurfaced if necessary. The good news is that I did not see any cracks in the block. Here are a couple pics of the gasket. Will post more of the head and block tomorrow morning:


 09-18-2014, 02:16 AM
#25
Basic Sponsor
Rennlist
Site Sponsor
Rennlist
Site Sponsor
That looks like detonation
09-18-2014, 02:36 AM
#26
Burning Brakes
Join Date: Mar 2004
Location: Calif
Posts: 1,151
Likes: 0
Received 0 Likes
on
0 Posts
when you reassemble, check the cleanliness of the gasket area carefully - it may NOT be the actual torque that got you but either a flaw in the gasket or a piece of something pinched under or above the gasket.
09-18-2014, 08:36 AM
#27
Rennlist Member
Thread Starter
The plan is to clean the head a little and run it out to the machine shop this morning for a recheck and surface prep is necessary. Then I am going to reclean the block's mating surface and get it prepped for the head to be reinstalled. Waiting on new gaskets to come anyways so I can take my time with the prep work.
09-18-2014, 03:20 PM
#28
Addict
Rennlist Member
Rennlist Member

I had something similar happen on a different kind of vehicle. The engine ran, but I found coolant in the cylinders. It turns out the machine shop had milled the surface with too rough of a finish. I bought a cheap hand-held surface roughness gauge that allowed me to do a very loose eye-ball comparison of the head's roughness. I was told that some machine shops don't have much experience with heads made from more modern materials. They just assume that something that works for a Chevy will work for a Porsche. More info at:
http://www.enginebuildermag.com/2007...-heads-blocks/
http://www.enginebuildermag.com/2007...-heads-blocks/
09-18-2014, 09:07 PM
#29
Drifting
You guys have me worried now ... lol
I just finished reinstalling everything after replacing broken rings on three cylinders and i haven't attempted to start the car yet,going to pressure test the cooling system tonight to see if there's any water leaks and fire it up tomorrow !
I torqued everything according to the Porsche workshop manual ...
Cheers
Phil
09-18-2014, 10:16 PM
#30
Race Car
Maxdavex7, Well that didn't take you long buddy. Maybe this will help: use a paint pen or sharpy & mark the stud one way for first turn, then another for the second (my marks look like and X when I am done).