When you click on links to various merchants on this site and make a purchase, this can result in this site earning a commission. Affiliate programs and affiliations include, but are not limited to, the eBay Partner Network.
That's a great question because parts for the manual rack are nearly impossible to come by, unless you find someone who is parting one. Basically, if one part has gone bad, the rack is totaled and its best to source someone else's used one.
That's what I figured. When I replace my rack I'll see about making some measurements and perhaps CNC'ing the rack (which I'm guessing would be possible - the pinion not so much).
In the process of rebuilding a manual rack I purchased locally (thanks for the write up). So for looks good, everything appears to be in great shape.
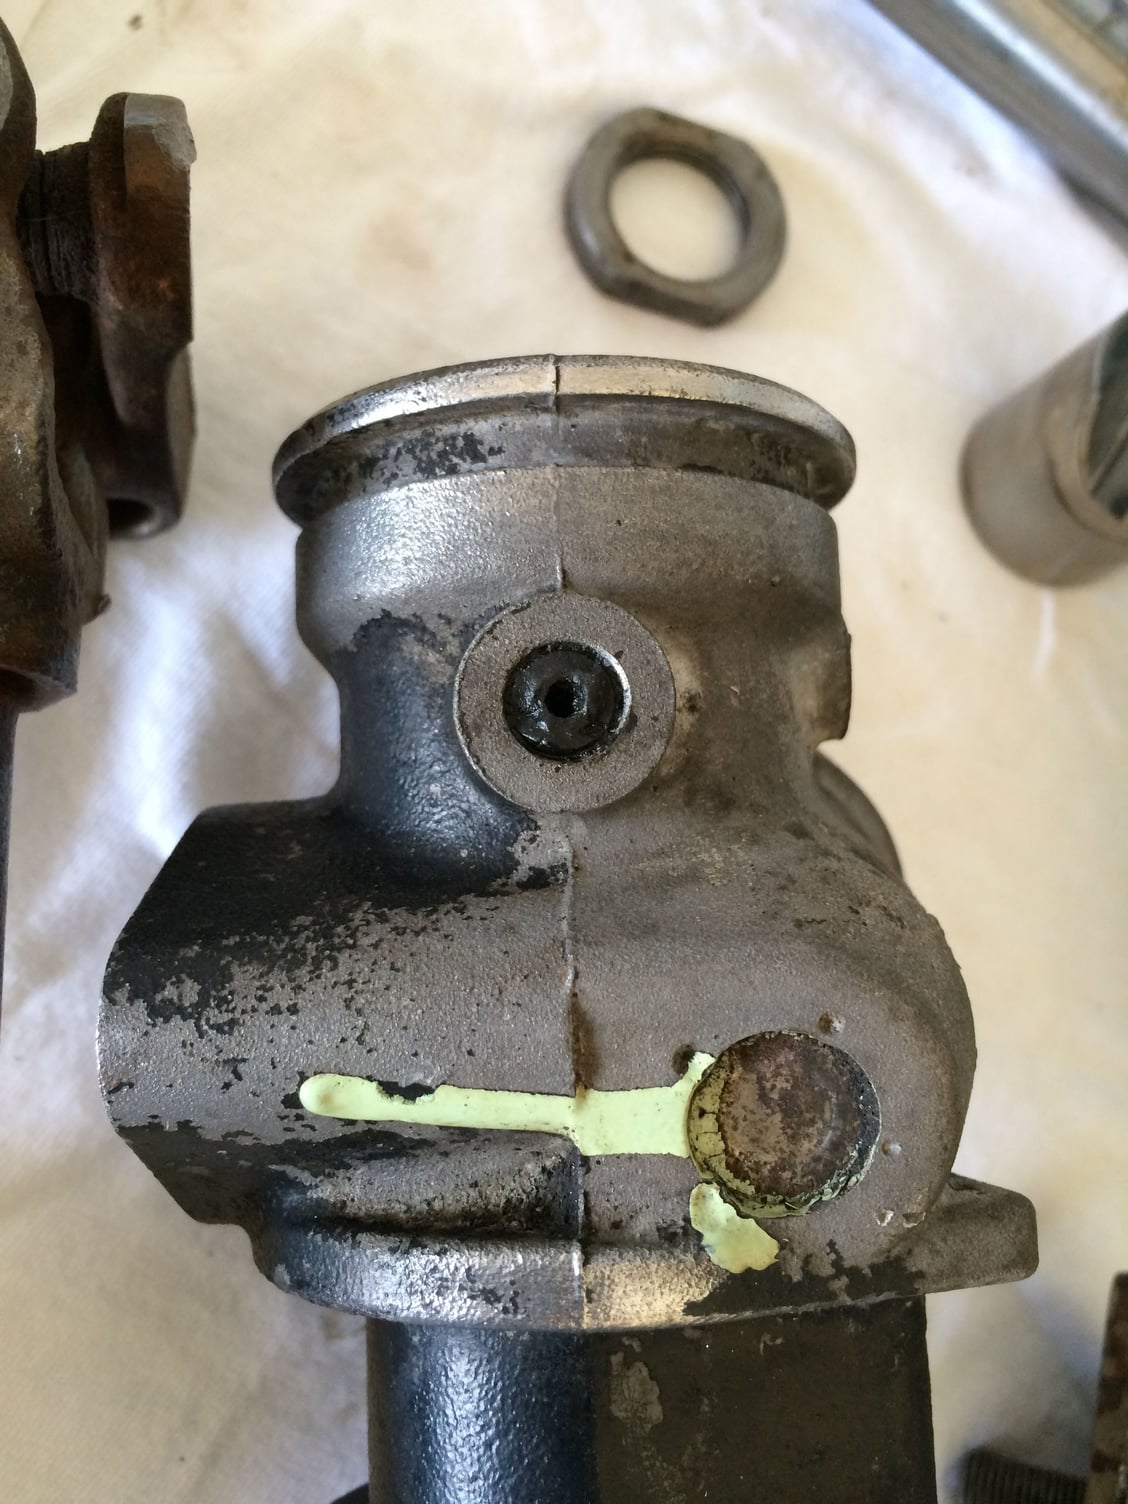
Question. The black rubber plug in the bottom of the housing (see photo)? What is the purpose? I can see through it, so my concern is grease will leak out over time. Should I plug it with something else? Is that how its suppose to look? Thanks for the help in advance.
Is that where the steering rack lock bolt goes? I bought one of those bolts for alignment purposes. It has a cone shaped end which locks into a groove in the toothed rack itself (long toothed part). The groove is located dead center so it is used for alignment - much better than lock the steering wheel from the cockpit, which is the alternative.
This is all "if I am correct". Now after writing the above paragraph I am instead thinking it's this other hole I plugged up with a wad of tinfoil. No leaks.
Didn't know it had a lock bolt but that sounds correct. I pulled out (destroyed) the rubber plug and its a threaded hole. I find a bolt and plug it up.
Thanks.
Bonus12 your post is correct. It's for doing a front end alignment. You center the dimple in the hole, then screw in the special bolt. This centers the rack and then you can proceed with the alignment. Porsche sells a special rubber plug to keep dirt out.
Bonus12 your post is correct. It's for doing a front end alignment. You center the dimple in the hole, then screw in the special bolt. This centers the rack and then you can proceed with the alignment. Porsche sells a special rubber plug to keep dirt out.
If you can't find a plug, you can make a custom bolt to thread into the hole to keep dirt out.
thread a 10x1x35mm bolt into the view port to lock the rack in the centered position. The bolt should have a smooth tapered end to engage the dimple. Use a grinder or hand file to accomplish this. At this time, I recommend to cut a second bolt of the same thread to 15mm to use after install as a plug for the hole. The plastic plug that you removed in step #1 above is probably disintegrated or in poor shape, the bolt is a much better solution.
From the tutorial on installing a manual rack here:
Great tutorial and great thread. Thanks for putting it together Bonus.
On a slightly different matter, I am thinking of converting a powered rack to non-powered. I would plug the hydraulic ports and fill the body with grease.
Do you have any advice or suggestions regarding this idea?
Great tutorial and great thread. Thanks for putting it together Bonus.
On a slightly different matter, I am thinking of converting a powered rack to non-powered. I would plug the hydraulic ports and fill the body with grease.
Do you have any advice or suggestions regarding this idea?
Only ideas are to fully dissassemble the thing so you can get a good look at it and remove all old ATF and debris. It's a good time to inspect things and replace what you can.
As for the rest, use a a high quality grease and fill it up real nice.
Pretty basic I guess.
Sounds good. Pretty much what I had in mind. I'm pretty sure I rebuilt at least one of my potential racks using the Rennbay kit. So most everything should be in decent shape. Cleaning and greasing it will probably be all I need to do (and plugging).
Sounds good. Pretty much what I had in mind. I'm pretty sure I rebuilt at least one of my potential racks using the Rennbay kit. So most everything should be in decent shape. Cleaning and greasing it will probably be all I need to do (and plugging).
Thanks for reinforcing my thoughts.
Also, you probably want to mark the orientation of the IMS joint with the rack. It has splines so you can easily have it off by 1 or two "teeth". I forgot to do it so I just had to line things up without knowing the previous orientation. Trying to think of other things but its a pretty basic / intuitive project. Good luck.
Never tried a plugged power rack, but manual is the way to go for "drivers". I liken the power steering to automatic shifting. It's just another barrier between you and the car. IMHO!

 09-18-2014, 08:32 PM