944/968 hybrid "S3R" story and rebuild with pictures
 08-16-2012, 12:27 PM
#1
Drifting
Thread Starter
Here's a little article I wrote for our PCA region's news letter. I left out some of the 944/968 history, but left the rest in case you're bored at work and want a story to read.
After considering a number of potential vehicle classes and types, I settled on another 944 variant as I know these old cars well and have a trove of spare parts. The 944 spec series was appealing, but not as exciting as I was wanted. I looked at a number of S2 and 968 race cars before finding a former DE instructor�s car that fit the bill just right. Terry Thomas from the Pacific Northwest Region PCA had been instructing in a fully caged S2 with a 968 transplant engine and now this car was for sale. The car unfortunately had just had an oil fire from a failed accusump o-ring which splashed oil onto the wrapped headers. Header wrap is notorious for soaking up flammable liquids and igniting. Thankfully the fire had only destroyed the wiring and rubber on one side of the engine bay. Terry was able to get the car back into running condition and we negotiated a �fire sale� price for the car and trailer.
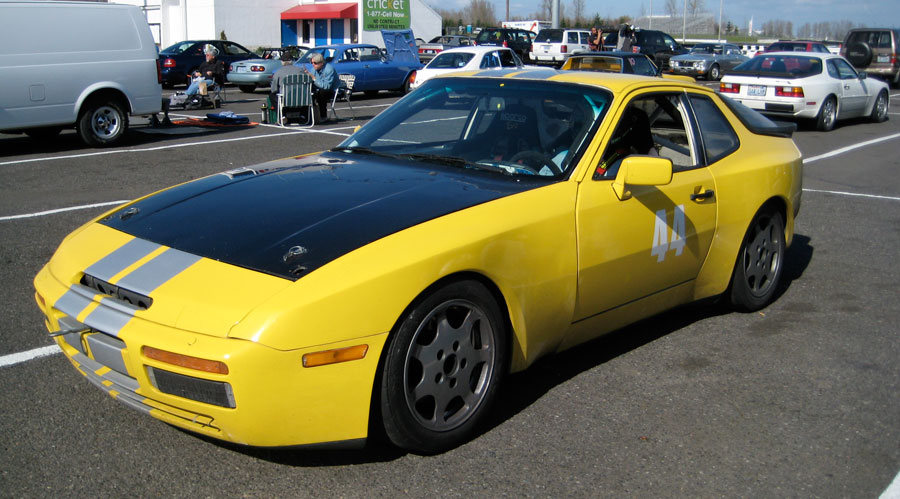


The drive to Seattle is beautiful in September and we made a nice family trip out of the run down to pick up the car and tour the Pacific Northwest region. Terry had the car prepared and we started it up to see if all was well. The car sounded great, had no leaks (no small feat for a 944) and came with another pile of spare 944 parts. The only problem was that cylinder 4 had lower compression than 1-3. No problem I thought, cracked ring or worn valve. I�d have all winter to fix it.
Back home the car found a new spot up on stands in the garage while I went over it inch by inch. Terry had indeed prepared the car very well. All the chassis bushings were replaced with metal bushings. The suspension is double adjustable Leda with appropriate springs. A known weak point in 944 race cars is the front control arms, which had been replaced with billet Charlie arms. The roll cage to my novice eye looks exceptionally well done. Offsetting the increased weight of the cage is light weight bodywork in front of the doors and polycarbonate windows and rear hatch. The transmission has the short 5th gear and an GT engineering Torsen limited slip differential.


The engine is a 3.0L 16 valve 968 unit with a hot set of Millege cams, Stahl long tube headers, Carrillo rods, lightened crank and forged JE pistons. Head removal was the next step in discovering why #4 had low compression. Once off it was obvious what had gone wrong. Terry was extremely gracious and offered me a refund, but of course I declined. This is a project and 944s are what I am enthusiastic about.

More to follow...
After considering a number of potential vehicle classes and types, I settled on another 944 variant as I know these old cars well and have a trove of spare parts. The 944 spec series was appealing, but not as exciting as I was wanted. I looked at a number of S2 and 968 race cars before finding a former DE instructor�s car that fit the bill just right. Terry Thomas from the Pacific Northwest Region PCA had been instructing in a fully caged S2 with a 968 transplant engine and now this car was for sale. The car unfortunately had just had an oil fire from a failed accusump o-ring which splashed oil onto the wrapped headers. Header wrap is notorious for soaking up flammable liquids and igniting. Thankfully the fire had only destroyed the wiring and rubber on one side of the engine bay. Terry was able to get the car back into running condition and we negotiated a �fire sale� price for the car and trailer.
The drive to Seattle is beautiful in September and we made a nice family trip out of the run down to pick up the car and tour the Pacific Northwest region. Terry had the car prepared and we started it up to see if all was well. The car sounded great, had no leaks (no small feat for a 944) and came with another pile of spare 944 parts. The only problem was that cylinder 4 had lower compression than 1-3. No problem I thought, cracked ring or worn valve. I�d have all winter to fix it.
Back home the car found a new spot up on stands in the garage while I went over it inch by inch. Terry had indeed prepared the car very well. All the chassis bushings were replaced with metal bushings. The suspension is double adjustable Leda with appropriate springs. A known weak point in 944 race cars is the front control arms, which had been replaced with billet Charlie arms. The roll cage to my novice eye looks exceptionally well done. Offsetting the increased weight of the cage is light weight bodywork in front of the doors and polycarbonate windows and rear hatch. The transmission has the short 5th gear and an GT engineering Torsen limited slip differential.
The engine is a 3.0L 16 valve 968 unit with a hot set of Millege cams, Stahl long tube headers, Carrillo rods, lightened crank and forged JE pistons. Head removal was the next step in discovering why #4 had low compression. Once off it was obvious what had gone wrong. Terry was extremely gracious and offered me a refund, but of course I declined. This is a project and 944s are what I am enthusiastic about.
More to follow...
 08-16-2012, 12:45 PM
#2
I think I heard a bit of this story from the seller's perspective. It sounds like a rare deal between two true gentleman. The seller's willingness to help, and the buyer's understanding that the condition was unknown to the seller.
I can't imagine how I would have felt taking that head off... Hopefully I would have come to the same resolution you two did.
I can't imagine how I would have felt taking that head off... Hopefully I would have come to the same resolution you two did.
08-16-2012, 01:18 PM
#3
Drifting
Thread Starter
Part 2: What to do with scored cylinder walls
Disassembly (with a lot of help from rennlister Chrenan and Dand86951) is the first step in any situation like this to assess how bad the damage actually is. With the pistons out, the piston rings also were revealed to have chunks missing from them. Bearing in mind that this engine only had five hours on it after a complete rebuild it was important to try to figure out what had gone wrong to avoid repeating the previous builder�s mistakes. Dan Worley and I came up with a couple of hypotheses. 1. Perhaps the rings were incorrectly gapped and when heated up expanded and tore up the walls. 2. The JE piston itself may have been improperly sized for the block and when it heated it began scraping the wall. 3. Alusil bores are not compatible with standard forged pistons and the JE piston may not have had the proper coating to run in an Alusil block.


With the deep gouges in the walls, something needed to be done to get back to a smooth finish. Alusil can be bored and honed, but the trick is that it also needs the cylinder walls to be etched as a final step to remove the aluminum and leave a silicon surface. A second option is to sleeve the block with iron sleeves. The drawback here is having two dissimilar metals with different expansion rates bonded together. Some 944 owners have had good luck with this, and others have had never ending leaks. There is another choice that has proven reliability and this is called Nikasil. The big downside to Nikasil plating is that only one company in North America can do it and they are in Wisconsin. The plating itself is a nickel silicon carbide that is extremely hard (harder than Alusil) with very low friction. Invented by Mahle, Nikasil is a trade name and is used by Porsche for most of the high end engines like the Mezger (Turbo, GT3, GT1) and Carrera GT V10. Despite being very hard, Nikasil is not indestructible. The coating is very susceptible to high sulfur content fuel and compatible piston rings need to be selected.
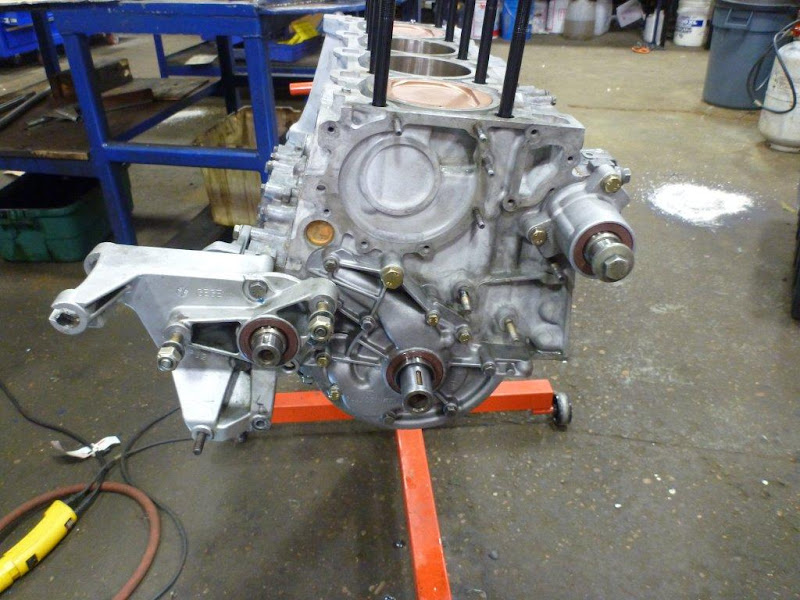
As Nikasil is what Porsche and many race teams use in their race engines, this seemed like the most reliable option. NiCom plating as US Chrome calls it requires every bit of ferrous metal has to be removed from the block before plating can begin. 928 Motorsports who handled all the block machining offered to do this at a price� but how hard could it be? Turns out, many of the head studs came out of their 25 year old red loctite quite easily, though some put up more of a fight. Locating pins on the other hand, were downright impossible given the tools we had. The 944 block stripped of all iron is surprisingly light with a shipping weight of under 70lbs. After arriving at 928 motorsports, turn around time was held up waiting for a set of custom Arias pistons that were needed to match the new bores.


Pictured is the block as it was returned to me in May. The daunting next step is re-assembly.


Disassembly (with a lot of help from rennlister Chrenan and Dand86951) is the first step in any situation like this to assess how bad the damage actually is. With the pistons out, the piston rings also were revealed to have chunks missing from them. Bearing in mind that this engine only had five hours on it after a complete rebuild it was important to try to figure out what had gone wrong to avoid repeating the previous builder�s mistakes. Dan Worley and I came up with a couple of hypotheses. 1. Perhaps the rings were incorrectly gapped and when heated up expanded and tore up the walls. 2. The JE piston itself may have been improperly sized for the block and when it heated it began scraping the wall. 3. Alusil bores are not compatible with standard forged pistons and the JE piston may not have had the proper coating to run in an Alusil block.
With the deep gouges in the walls, something needed to be done to get back to a smooth finish. Alusil can be bored and honed, but the trick is that it also needs the cylinder walls to be etched as a final step to remove the aluminum and leave a silicon surface. A second option is to sleeve the block with iron sleeves. The drawback here is having two dissimilar metals with different expansion rates bonded together. Some 944 owners have had good luck with this, and others have had never ending leaks. There is another choice that has proven reliability and this is called Nikasil. The big downside to Nikasil plating is that only one company in North America can do it and they are in Wisconsin. The plating itself is a nickel silicon carbide that is extremely hard (harder than Alusil) with very low friction. Invented by Mahle, Nikasil is a trade name and is used by Porsche for most of the high end engines like the Mezger (Turbo, GT3, GT1) and Carrera GT V10. Despite being very hard, Nikasil is not indestructible. The coating is very susceptible to high sulfur content fuel and compatible piston rings need to be selected.
As Nikasil is what Porsche and many race teams use in their race engines, this seemed like the most reliable option. NiCom plating as US Chrome calls it requires every bit of ferrous metal has to be removed from the block before plating can begin. 928 Motorsports who handled all the block machining offered to do this at a price� but how hard could it be? Turns out, many of the head studs came out of their 25 year old red loctite quite easily, though some put up more of a fight. Locating pins on the other hand, were downright impossible given the tools we had. The 944 block stripped of all iron is surprisingly light with a shipping weight of under 70lbs. After arriving at 928 motorsports, turn around time was held up waiting for a set of custom Arias pistons that were needed to match the new bores.
Pictured is the block as it was returned to me in May. The daunting next step is re-assembly.
08-16-2012, 03:08 PM
#4
Drifting
Thread Starter
When the engine came back from it's trip through the nikasil bath, it was actually quite dirty. Every threaded hole needed to be thoroughly cleaned and some threads chased. I was glad that I had taken lots of pictures of the block for reference of where the studs go. It's worth checking the part numbers of the studs as they are frequently generic parts and I replaced a couple with "exhaust studs" that have the same part number. Setting the depth of the ARP head studs is a bit tricky, because they don't bottom into the holes. There is a good diagram in the workshop manual about how to set the depth... which I didn't refer to until after I was done. We screwed the studs down and did some repeated test fits of the head and head gasket to make sure to get full thread engagement of the nuts. Once we had the number we used this to set all the other depths. The same process was used for the crank girdle. One mistake I made was putting a washer on the stud for the oil pickup.
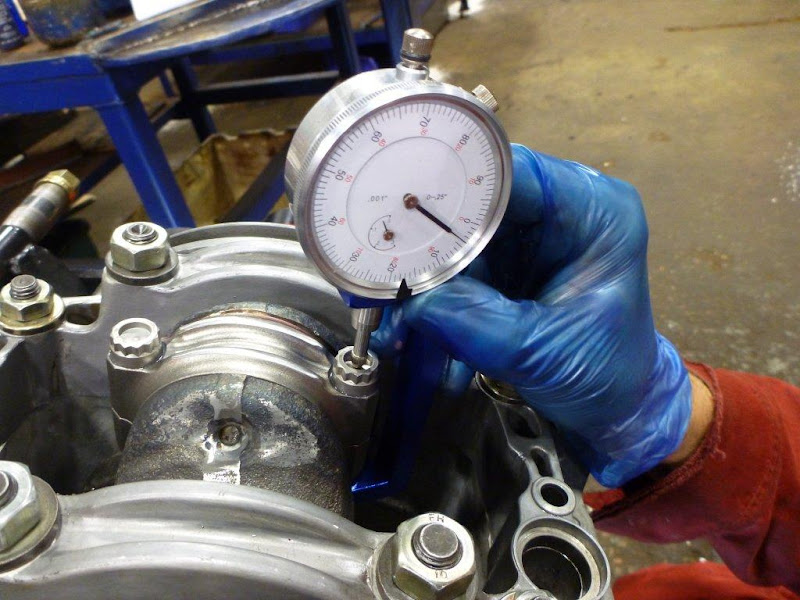
All the bearings were replaced, both main and rod bearings. I had a machine shop do the balancing of the rotating assembly (BeL engines here in Edmonton). They also did the bearing clearances and assembly of the rods to pistons. The specs for Carillo rods asks for bolt stretch, so I bought a stretch gauge and learned how to do this as well when torquing the rods.


All the bearings were replaced, both main and rod bearings. I had a machine shop do the balancing of the rotating assembly (BeL engines here in Edmonton). They also did the bearing clearances and assembly of the rods to pistons. The specs for Carillo rods asks for bolt stretch, so I bought a stretch gauge and learned how to do this as well when torquing the rods.
Last edited by JustinL; 08-16-2012 at 04:35 PM.
08-16-2012, 05:34 PM
#5
Drifting
Thread Starter
The pistons were the factor that slowed the whole build down the most. Arias had a big wait time on them and Carl at 928 motorsports couldn't finish the cylinders without them. The pistons themselves are a slight overbore for the repaired cylinders. I think the displacement is up to 3065cc now. I don't know what coatings were used, but they should be compatible with the nikasil walls. The rings are totalseal rings and I gapped them according to the specs provided. The design of the piston top was matched to the JE pistons that came out, so I'm anticipating that I'll still be good with 94 octane fuel.
Torquing the carillo rod bolts was interesting as we couldn't get the bolts to stretch without exceeding the 45 ftlb maximum, but after waiting a while and then re measuring, the bolts had stretched to within spec. For next time I do it, I will remember that the bolts take some time to achieve their stretch value.
Torquing the carillo rod bolts was interesting as we couldn't get the bolts to stretch without exceeding the 45 ftlb maximum, but after waiting a while and then re measuring, the bolts had stretched to within spec. For next time I do it, I will remember that the bolts take some time to achieve their stretch value.
08-16-2012, 05:45 PM
#6
Drifting
Thread Starter
Balance shaft installation was held up because I didn't clean the crap out of the dowel pin hole on the cover. This caused the first redo of the upper balance shaft when there was a visible gap under the housing. The second time through I got the case to come down, but because I used a bit too much assembly lube it dripped onto the loctite 574 and blocked the sealing. I came back to it after a couple days to see a trail of assembly lube running down the block from the rear balance shaft bearing. The balance shaft itself did not turn very freely in this round either. Third time was the charm. I got it sealed and both balance shafts can be turned with fingers.

08-16-2012, 05:59 PM
#7
Drifting
Thread Starter
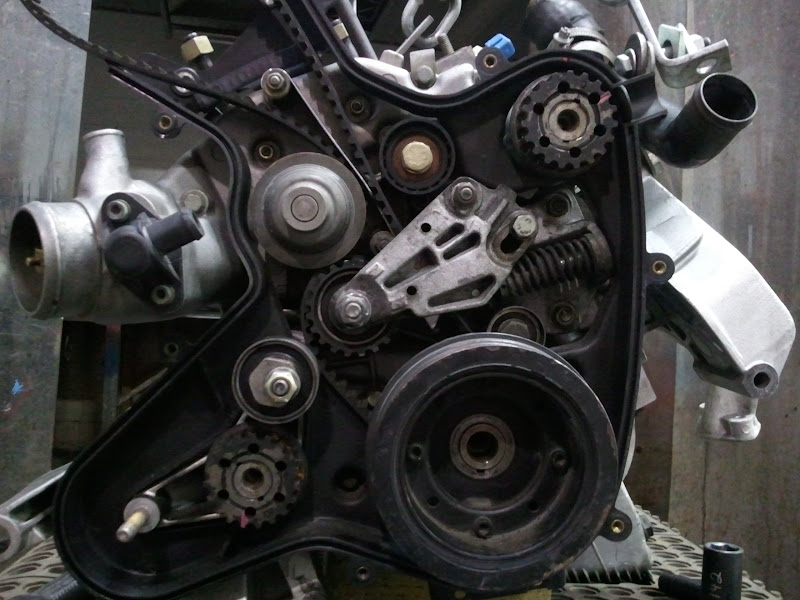
Actually this part was pretty straight-forward. I followed the procedure that came with the studs. Make sure not to flip the head upside down until the cover is on or the little pins at the back of the head will fall out. I didn't have the special tools for camshaft installation, so we gently pulled the cams into place and slowly tightened all the bearing bridges down to distribute the load. Everything went in smoothly. Make sure to check the torque values for each of the bolts in the variocam and chain tensioner, because they are different than I expected.


The following users liked this post:
Tiger03447 (11-01-2023)
Trending Topics
08-16-2012, 06:27 PM
#10
Drifting
Thread Starter
08-17-2012, 08:49 AM
#11
Rennlist Member
Cool project and congratulations on your persistence.
08-20-2012, 02:05 PM
#12
Three Wheelin'
Hey, just saw this Justin, nice documentation of all the work you've put into the car so far! Its going to be great once you get it all buttoned up, and its really made me want to build my own engine, its been too long since I've done one.
08-21-2012, 12:31 PM
#13
Drifting
Thread Starter
Once I got to the oil pickup tube, I figured out why I was one washer short on the crank girdle studs. The pickup tube is the washer for that stud. It's also very important to note that the bolt for the pickup tube is slightly longer than the bolt for the return tube. I also had the Victor Reinz kit of assorted seals with no indication of where they go. I read that it was the clear ring and the black ring, which both fit. Neither of these look like the factory part that came out of the car, so I ordered the factory seal. After a friend Brock lost his bottom end because of this seal, I didn't want to take any chances. I couldn't find a seal for the return tube, nor any way of attaching a seal to the tube. After some reading it seems that the return tube doesn't need a seal as it's just redirecting the oil, so I'm hoping that works.
The oil pan was next and it has the hinged Lindsey baffle and the factory S2 baffling. The oil pan gasket really squishes with torquing. I followed the steps in the factory manual, but noticing how loose some of the bolts get after tightening their neighbors I went for a couple more rounds of the final step in the torquing procedure. I'm glad I did because had I stopped where the factory manual says to, bolts 1-8 would have been way too loose. The last thing I did to the oil pan was to change the drain plug to a new one with the magnet.


The oil pan was next and it has the hinged Lindsey baffle and the factory S2 baffling. The oil pan gasket really squishes with torquing. I followed the steps in the factory manual, but noticing how loose some of the bolts get after tightening their neighbors I went for a couple more rounds of the final step in the torquing procedure. I'm glad I did because had I stopped where the factory manual says to, bolts 1-8 would have been way too loose. The last thing I did to the oil pan was to change the drain plug to a new one with the magnet.
08-21-2012, 12:41 PM
#14
Drifting
Thread Starter
I decided to write all this stuff down before I forget what I did! (It's already happening) During the work I used a lot of reference pictures from other people's builds, so I thought it would be a good idea to put a bunch of my own build pictures in one thread for anyone else doing something similar.
08-21-2012, 01:01 PM
#15
Drifting
Thread Starter
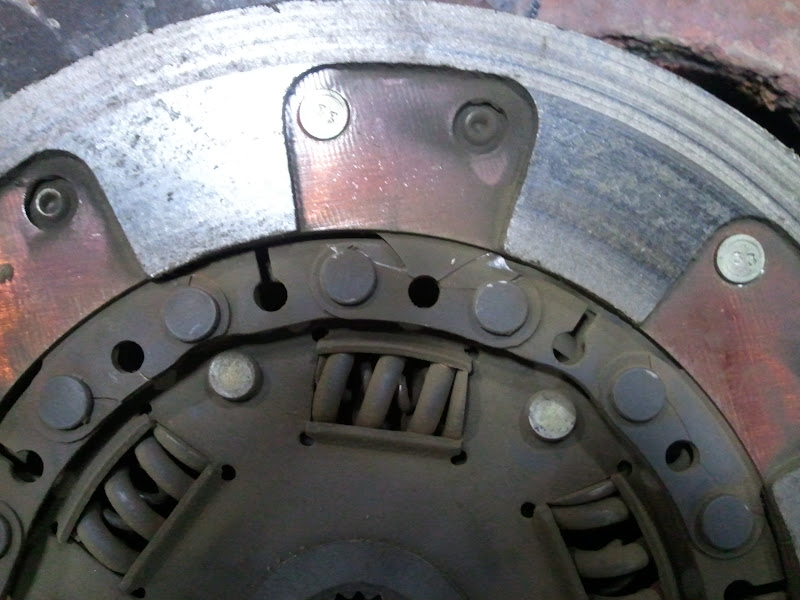
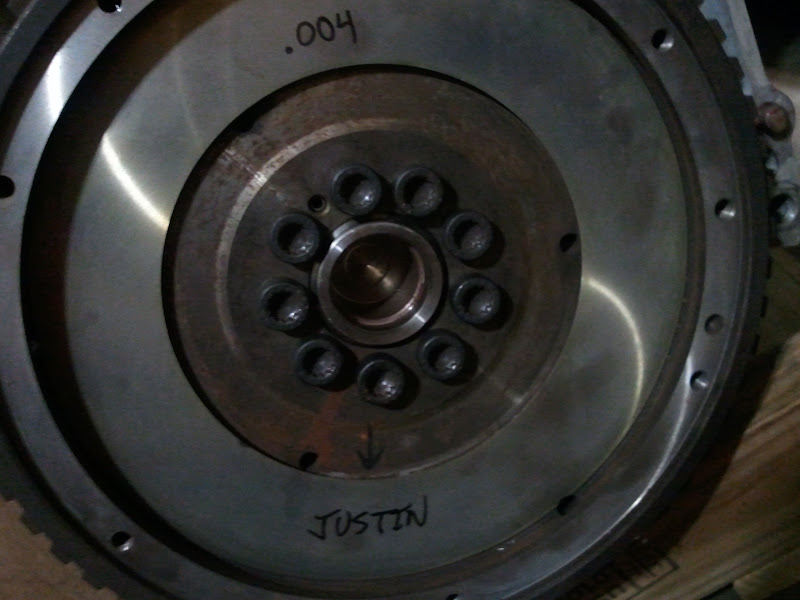
The flywheel was also balanced by BeL engines and resurfaced to remove the glazing. I thought about going to a lightweight flywheel, but decided against it due to the price of the 60-2 toothed flywheels for the S2 and 968. The SPEC pressure plate was also way out of balance and had to have a weight welded to it to bring it back. I can't say that I'm impressed with the SPEC clutch parts I pulled out of this car. The disc itself was about to let go because the friction ring is not well connected to the centre. There is a picture of this above and you can see the cracks and missing pieces in structural parts of the disc. In my 951S I've been using a clutchnet 6 puck disc and visually it appears to be a much better design than the SPEC. It's a bit hardcore for a street car, but should be perfect for the race car with less torque.
Even with the engine on the floor, the pilot bearing is a pain to remove. I used the long bolt with vice grips and a hammer technique. The RMS is also surprisingly tough to tap into place. I thought I had it in and then checked some pictures only to see that it actually goes in much deeper than I thought.


Even with the engine on the floor, the pilot bearing is a pain to remove. I used the long bolt with vice grips and a hammer technique. The RMS is also surprisingly tough to tap into place. I thought I had it in and then checked some pictures only to see that it actually goes in much deeper than I thought.