944/968 hybrid "S3R" story and rebuild with pictures

 08-24-2012, 01:46 PM
#17
Drifting
Thread Starter
The next step was putting the bell housing back on and gapping the sensor. I used my trusty "old sensor with a washer glued to it" special tool. When I took the cam sprocket off, I didn't put the retaining bolts in and I had to use the scribe marks from the previous engine builder. The bolts that are in there are just temporary because I thought I'd lost the original bolts... turns out I left them in the distributor cap. Tensioning the belts was something new to me with the factory special tool that Chrenan lent me. The balance shaft belt is looser than I thought, but I'm going to trust the tool. Letting the spring tensioner do it's job got the cam timing belt within spec. A final torque check was done on the front end nuts and bolts. I hope I haven't missed anything... The last thing I did with the engine on the ground was to swap the rear hoist bracket for a much better looking one from the spare head.
Dan also suggested a cleanup of the back of the engine and engine bay to clear up some rust. I ground the rust off the brake booster and prepped the tunnel for spraying. The paint is just some black engine paint I had laying around, but it seemed to do the job pretty well.
Getting the engine in was a bit of a challenge and we ended up taking the steering rack off to get enough clearance. In the process, one of the steering rack bolts broke off inside the cross member. After some feeble attempts to drill the bolt in situe, Chrenan and I just pulled the cross member and brought it to his drill press. A 7/64" pilot hole and an easy-out was a piece of cake; we marveled at how this was the first time a job on a 944 went according to plan. The engine did go in eventually and it feels good to not have a gaping engine bay staring at me every time I go to the garage.
 08-30-2012, 01:37 AM
#20
Instructor
This is awesome to read. Keep up the good work! I am impressed how detailed you are and how many pictures you have taken. I know in a project sometimes it gets tough to remember to take a picture. Can't wait to see more.
08-30-2012, 02:21 PM
#21
Drifting
Thread Starter
The next step was intake manifold and it took some wrestling of hoses and wires to finally get it in place without pinching anything. I wish the injector harness wire for the #4 injector was longer; it isn't tight on the wire now, but I had to be really careful and use some strategic zipties on the harness. Now I only have one vacuum line from the manifold to the fuel pressure regulator. Are there any other lines I need to think about? There's no heat or emissions controls anymore, so I couldn't think of anything else that needed vacuum. I also wasn't happy with the way the heater line and coolant rail over the headers was setup, so I plugged the line off the back of the head and at the waterpump. Now it's like the heater valve is always in the closed position. The picture below is how it looked before... and I was looking for the bolt that goes in that hole. Does anyone know what that hole is for? Bleeding the back of the head maybe?


After the intake was on, I could plug in a few more electrical connections and put the dipstick in. I must admit I got lost a couple times remembering where all the wires go and had to refer to the manual. I still have a couple mystery plugs that I think were for the vapor purge and diagnostics stuff.
Stahl header was next. That really is a nice piece. It fit in easily on the first try, lined up with all the studs and piping. No issues at all here. Over top of that went the new Lindsey racing fuel lines. I had to switch the fittings because one line was really tight and the other too loose. I don't think this will be an issue because both hoses are the same diameter, so flow will be unchanged.


The accusump plumbing was interesting as this was my first experience with cutting braided line and swapping AN fittings. It took time as I learned how to deal with that damned chinese fingertrap of a hose. I did get it done and routed to the new valve and filter adapter. There is precious little space at the filter and I hope the fittings won't contact the frame, but if they do then I'll need to think about solid engine mounts.

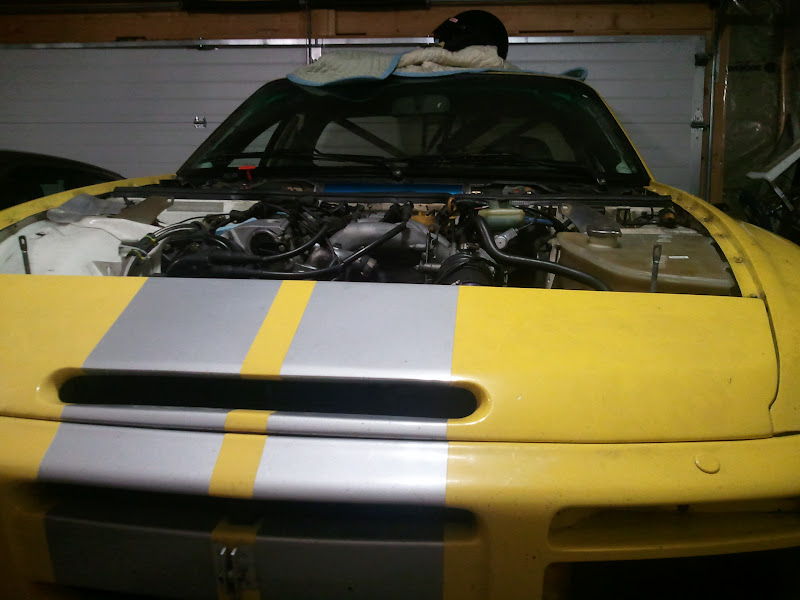
The intake pipe was a bit more fun until I found that the MAF is slightly bigger than 3" which necessitated some modification to the purosil coupler. It's sealed now and not going anywhere, but I did need to do some cutting. I don't think I would do a vented nose panel as there is still lots of airflow from the normal slot.


 09-07-2012, 12:45 PM
#22
Drifting
Thread Starter
I had a real struggle getting it started the first time. It had no spark or fuel, so I ended up crawling around with a multimeter trying to figure out why pin 27 of the DME wasn't getting power. It turns out that last year when I was taking things apart, I removed a bunch of fuses that I thought were unnecessary like parking lights, alarm, etc. I suspect it was the alarm fuse, but when I plugged all these back in, she fired up right away and dripped a puddle of oil on the floor.
A week of fighting with a pretty substantial oil leak...Oil pump reseal thread
I did get it fired back up and no puddles instantly appeared under the car, so that's an improvement. The engine sounds amazing with the Stahl header, Millege cams, and straight through exhaust. I ran some cheap oil through for the first couple minutes of running and then drained it and replaced the filter to try to eliminate any shavings and gunk from assembly. Now it has amsoil break-in oil. I'm following the procedure prescribed by Carl at 928motorsports. She is a thirsty girl with the accusump. I have to fill the engine, run it to fill the accusump, then add another 2.5L of oil.
Next steps:
Clean off oil that I poured all over the place changing filters etc.
Reinstall fans and belt cover.
Get the rest of the instruments working
Run an extinguisher line to the engine bay
Torque all front suspension nuts and bolts
Strut brace
Hood
Zip tie all the wires out of harms way
fiddle with steering linkage
Put wheels on it
Control arm to crossmember bolt 65 Nm (48 flt.lb)
Castor block to body 46Nm (34 ft.lb)
Ball joint to spindle 50 Nm (37 ft.lb)
Crossmember to body 85Nm (63 ft.lbs)
Sway bar to body 23 Nm (17 ft.lbs)
Sway bar to control arm 25 Nm (18 ft.lbs)
Last edited by JustinL; 09-07-2012 at 06:48 PM.

The following users liked this post:
Tiger03447 (11-01-2023)
09-10-2012, 11:50 AM
#25
Drifting
Thread Starter
The last day of assembly was a final push to get everything back together, tightened down, and loaded up on the trailer. I couldn't have done it without Chrenan's help. Thanks dude! The 10" wheels with 275 tires all around is a bit tight to the front left fender and the car will just stall randomly with a warm idle, but otherwise it seems pretty well sorted. My very patient wife helped me get everything loaded up and prepared for Sunday. This was also the first time towing with the Touareg, which is actually pretty good. The VR6 engine could use a bit more power during acceleration, but steady speed towing was giving decent fuel economy.
Sunday was a big day with doing the break-in procedure given to me by 928motorsports, checking the car, instructing newbies, and helping keep the event flowing. It was pretty exciting running the engine up and down the revs getting the rings bedded. I used Amsoil break-in oil with no detergents etc. The factory tach gauge and water temp gauge weren't working, so I used the AIM dash from my go-kart and that worked well except for mounting it to the dash.
Driving impressions: It's really easy to drive. Very predictable and has way more grip than power. The exhaust is really loud and raspy; it doesn't sound like many other engines I've heard. I was keeping the revs quite a bit lower than the engine can handle, so there's probably some more speed if I let it rev higher. Compared to the 951S, it feels slower because of the linear torque, but of course pulls much better in the low end and when the 951 is off boost. Under braking it's much squirmier than the 951, this is something that I'm going to need to dial out. The Torsen style LSD may not be stabilizing the rear end like I'm used to. I'll stiffen the rear rebound on the shocks and make sure the fronts have enough front compression.
At the end of the day, there were no leaks, no rods through the block, temperature stayed from 83�C to 88�C. There are a few minor problems to take care of, but nothing as major as last year. I set some respectable times at the autocross while trying not to push the engine too hard. The next goal is to get into wheel to wheel racing with this car. I finally feel like it's my car now that I've touched almost every bolt and actually driven it. Feels good.
The following users liked this post:
Tiger03447 (11-01-2023)
09-12-2012, 11:30 AM
#29
Developer
Nice write-up. Many will benefit from the reading of it - you did it right!
Glad to hear the engine is tight and strong for you again. If you followed our recommended break-in procedure, you should be good!
Glad to hear the engine is tight and strong for you again. If you followed our recommended break-in procedure, you should be good!
12-13-2012, 06:52 AM
#30
Rennlist Member
The only thing I'd add is that in my opinion you should put a hood vent in there to assist in the flow through from the vented nose panel and general bumper openings.