My 1967 912 Build Thread
 01-25-2014, 11:42 AM
#46
Professor of Pending Projects
Rennlist Member
Rennlist Member
Thread Starter
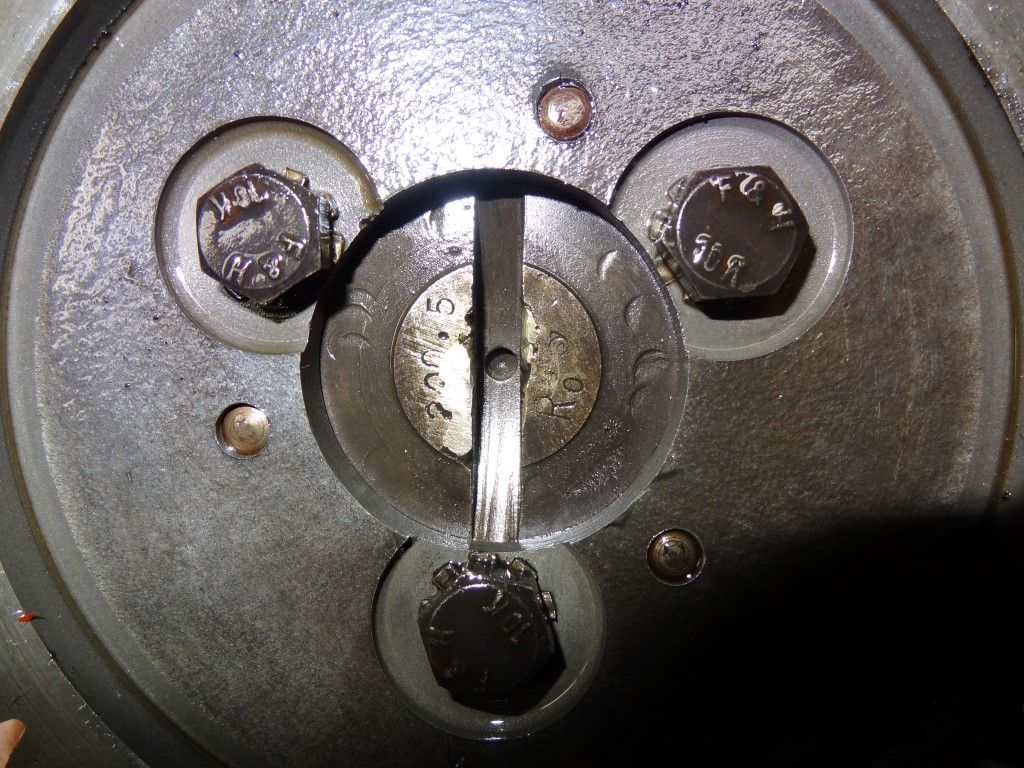
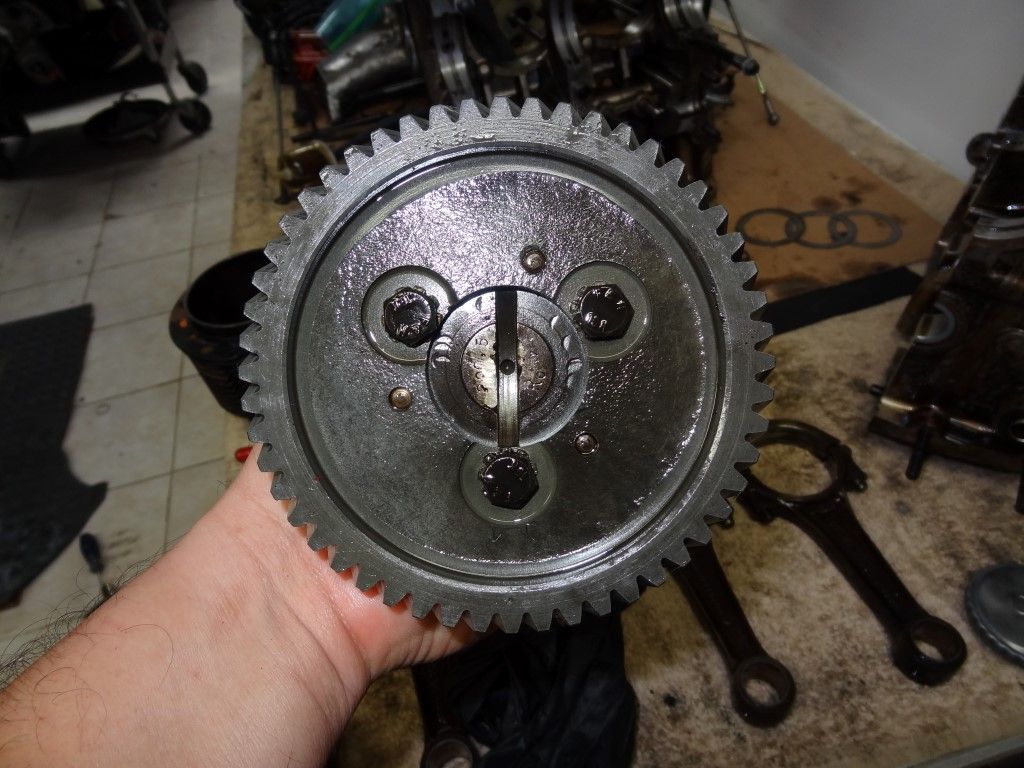
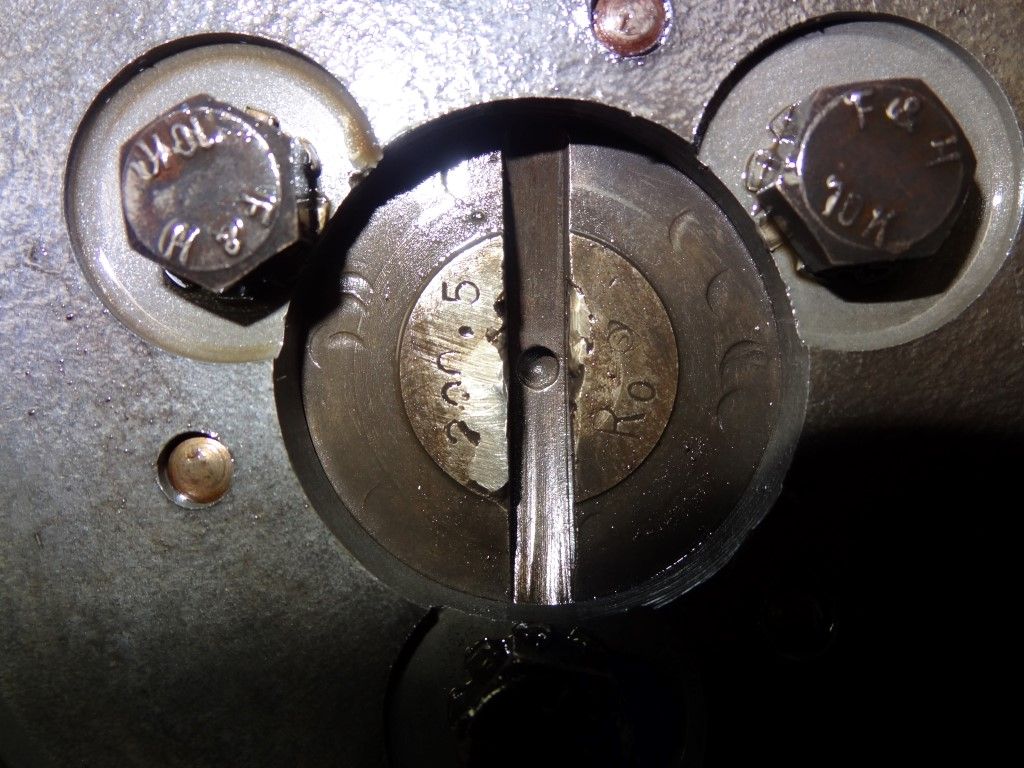
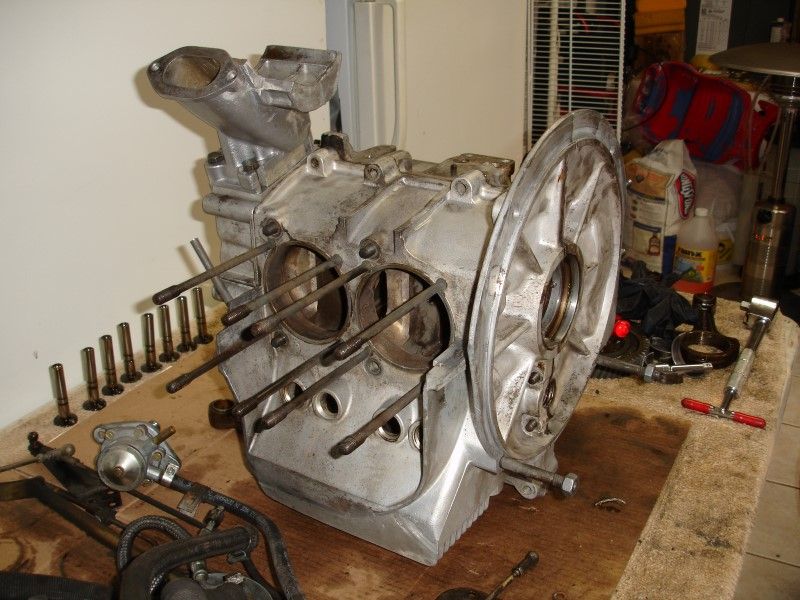
Are the pins supposed to stay on the crank shaft or the flywheel? Three stayed in the flywheel... so I punched those out and put them in the crank shaft only to question that move...
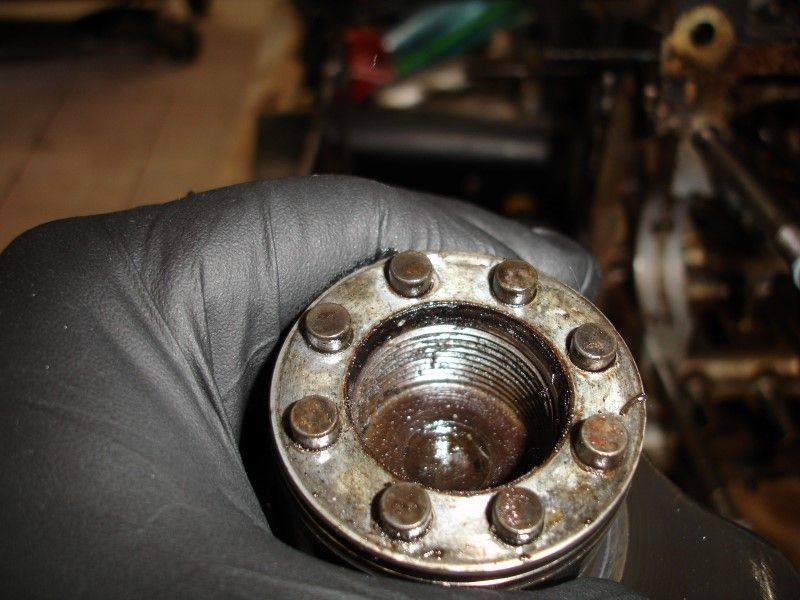
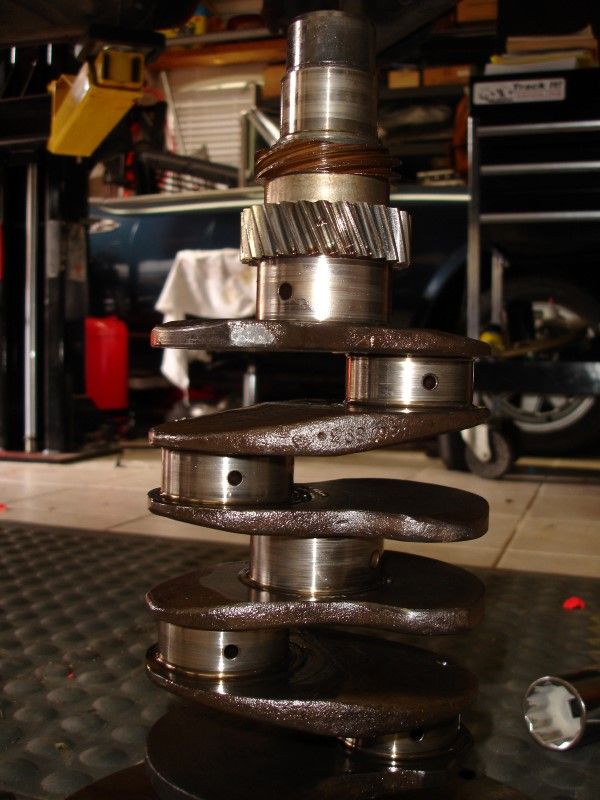
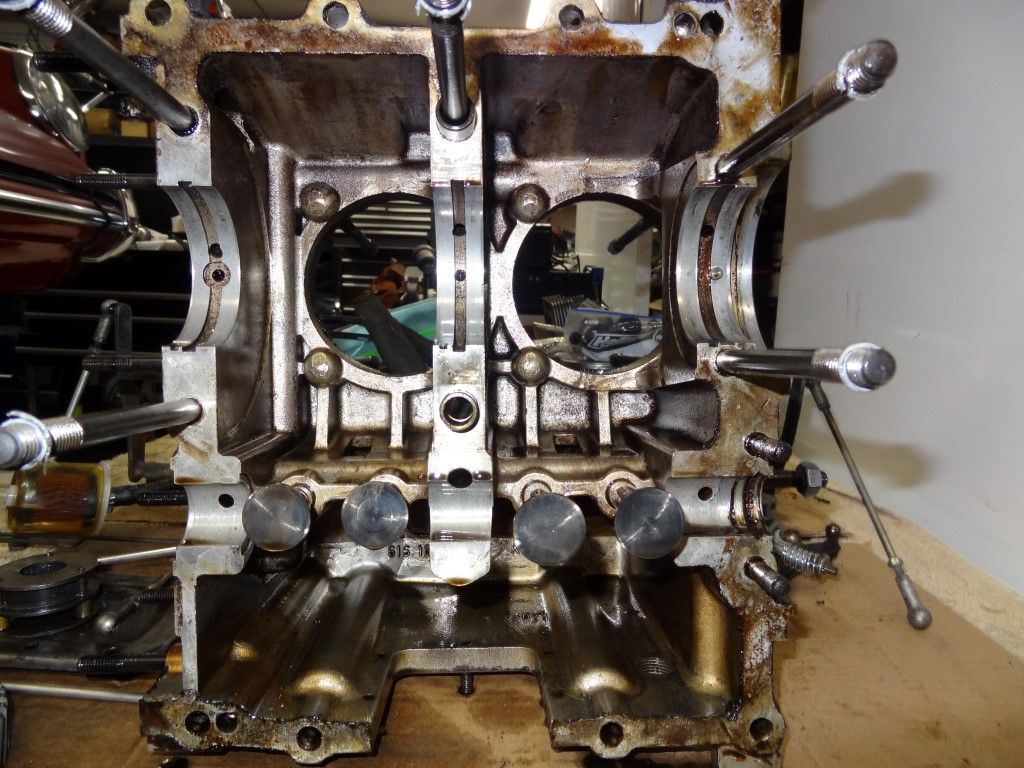
Gasket removed
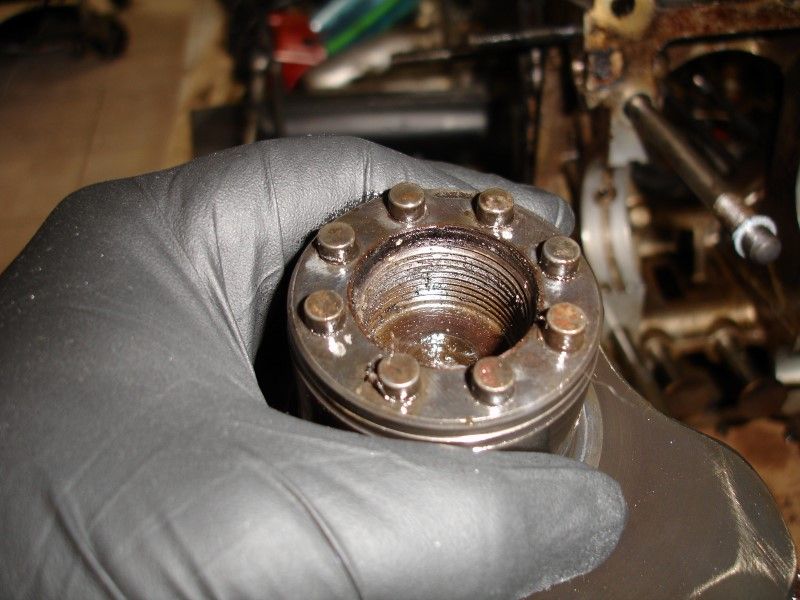
The gasket and shims...

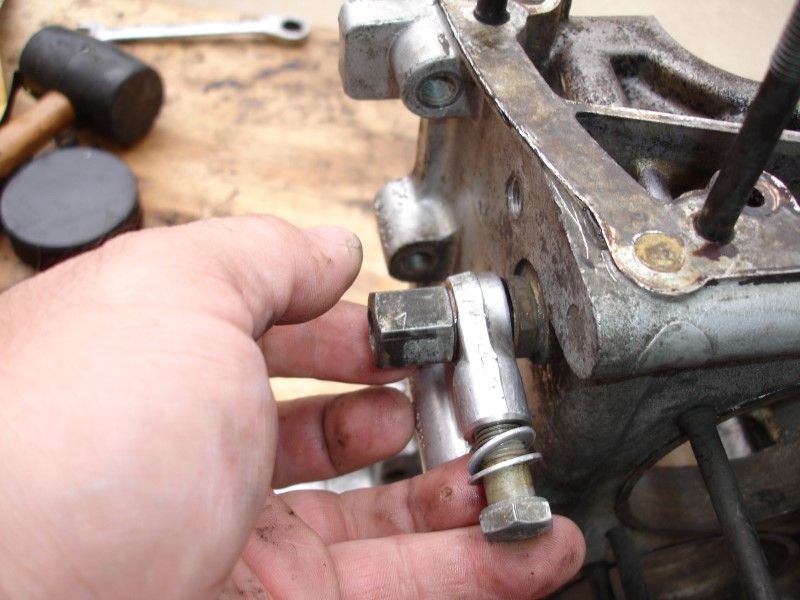
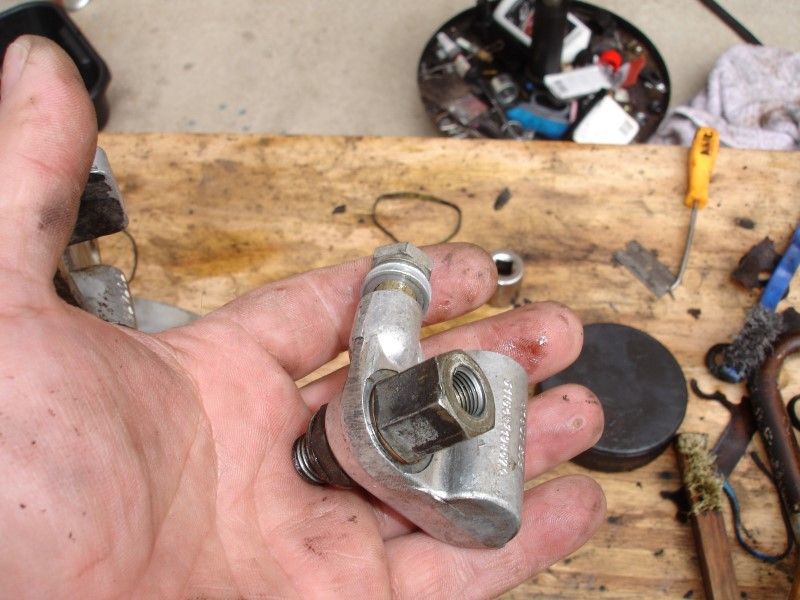
Back on the flywheel to use it as a solid base to remove the connecting rods
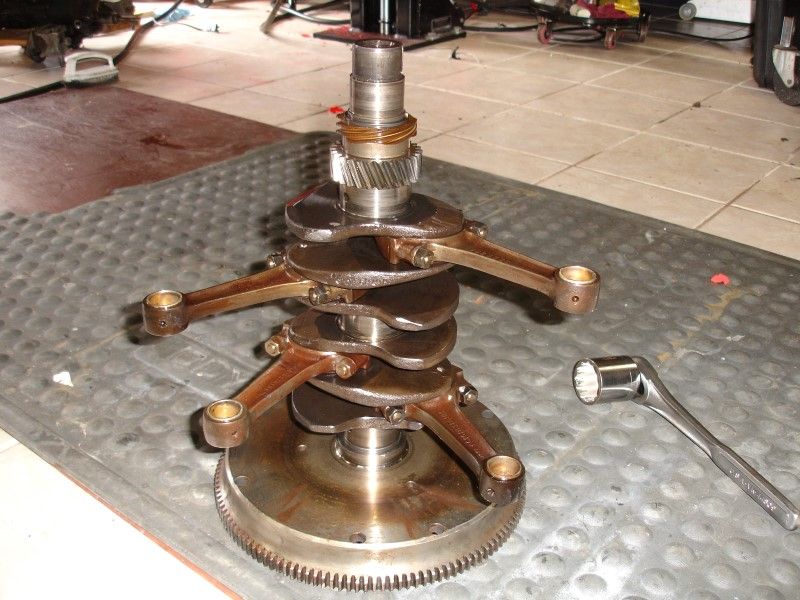
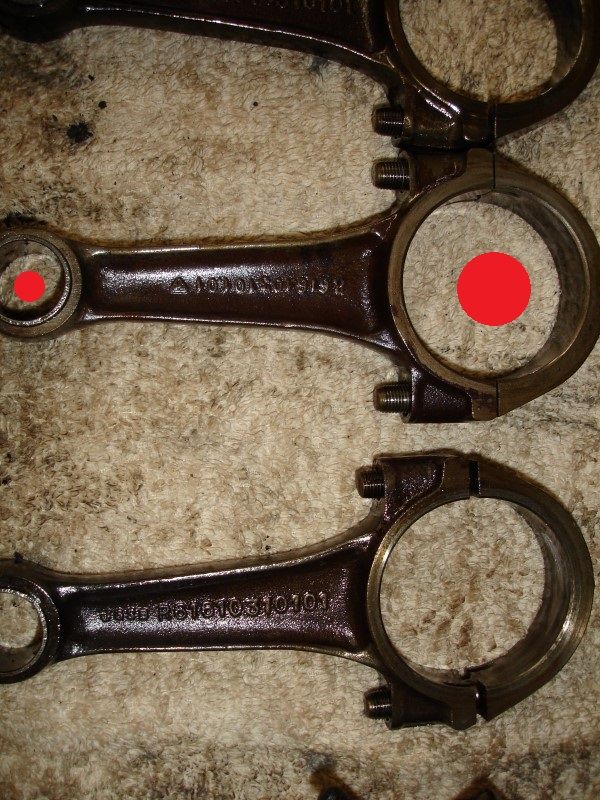
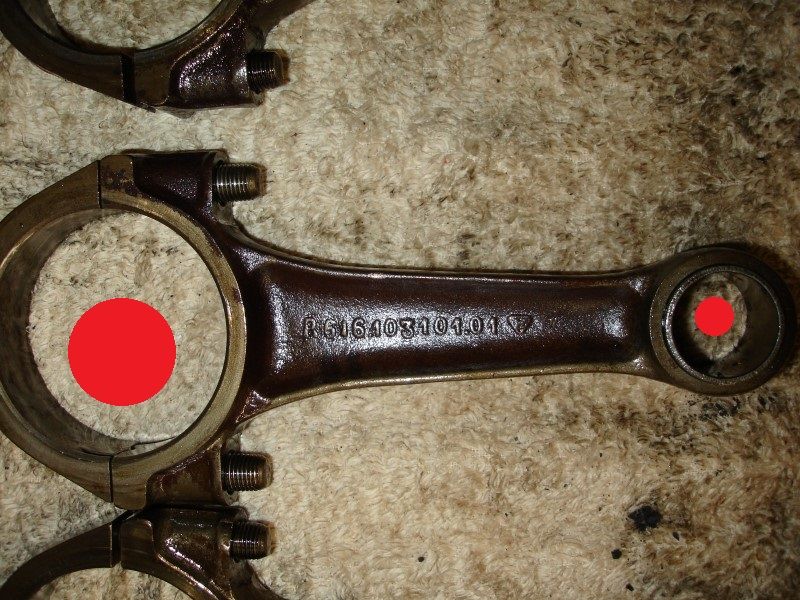
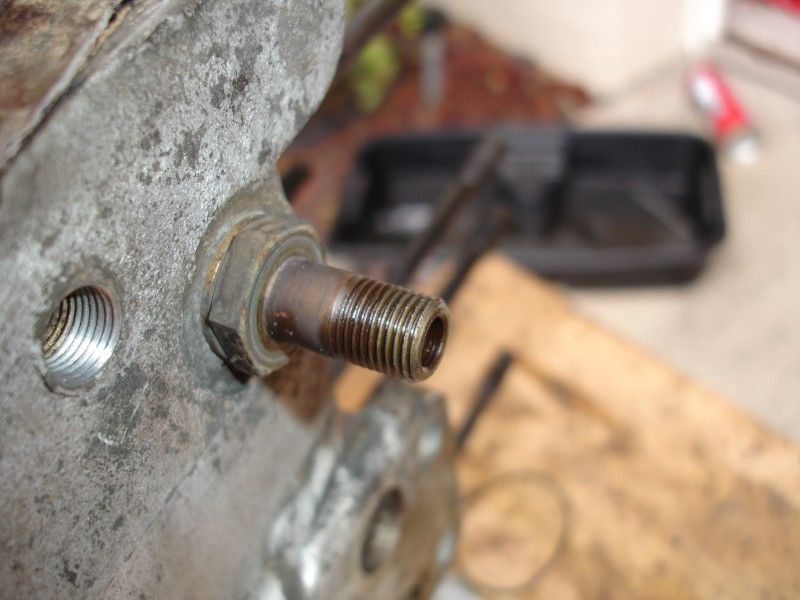
All rods removed
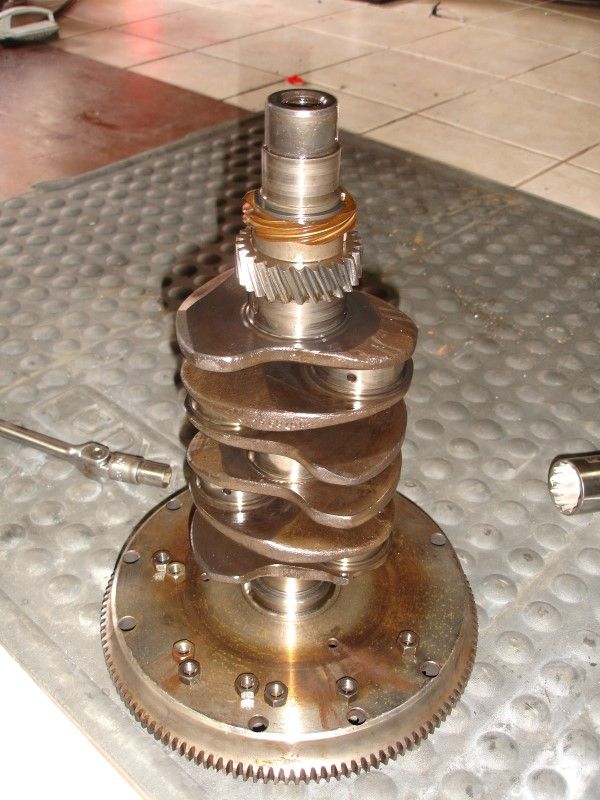
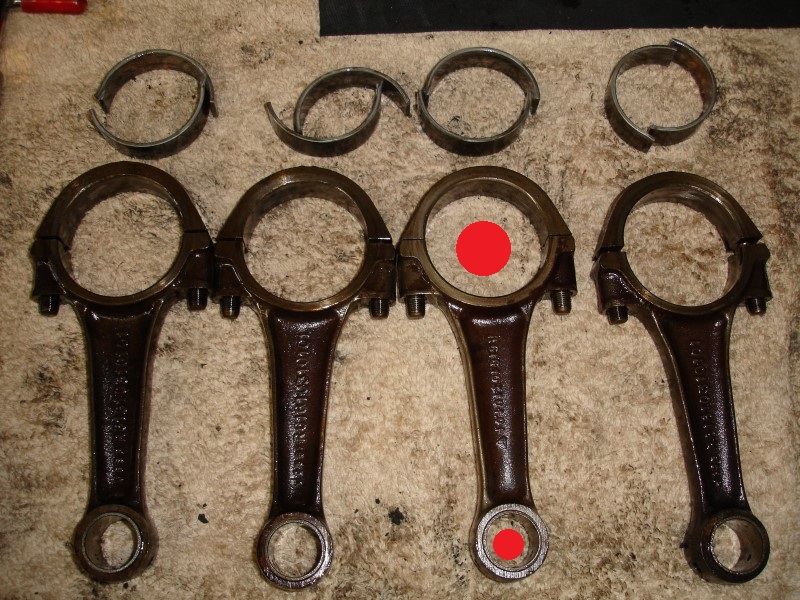
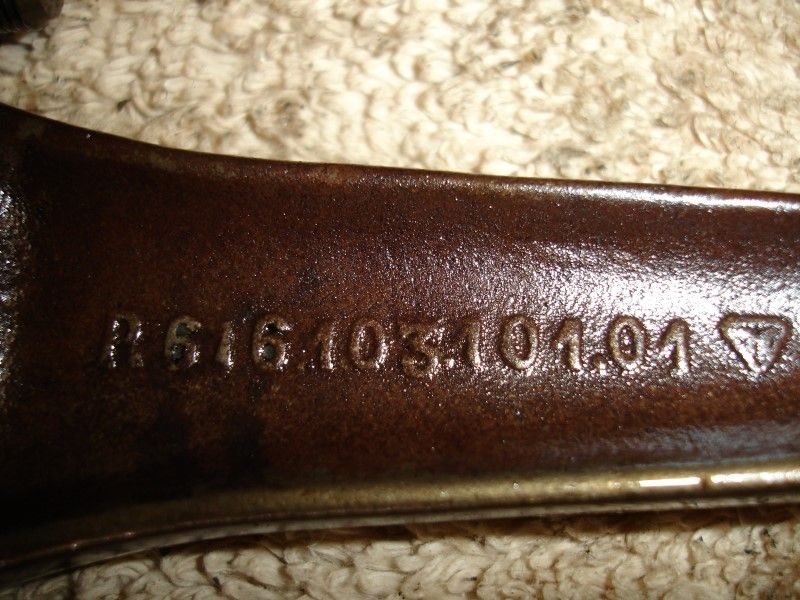
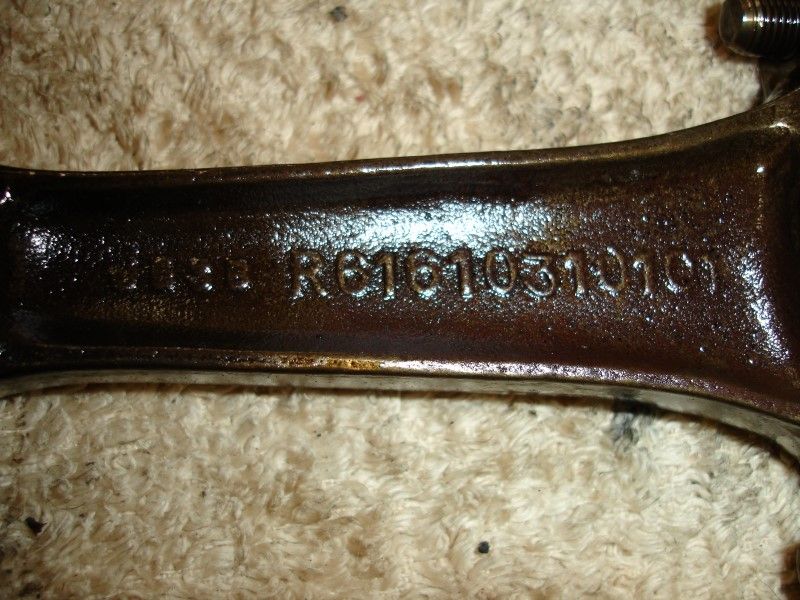
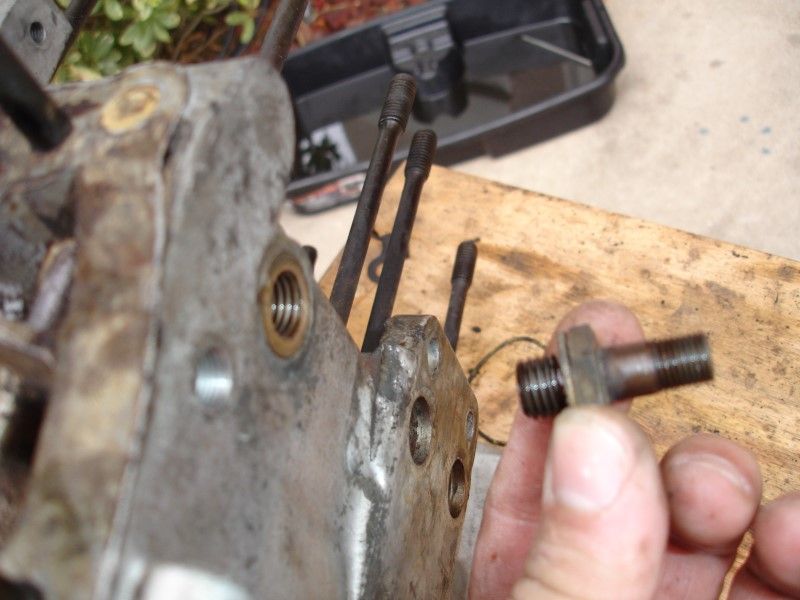
One of the rods looks different... same part number on it... but you can tell it was replaced... I will check weight and see if it was even balanced with the others...
Gasket removed
The gasket and shims...
Back on the flywheel to use it as a solid base to remove the connecting rods
All rods removed
One of the rods looks different... same part number on it... but you can tell it was replaced... I will check weight and see if it was even balanced with the others...
 01-25-2014, 11:52 AM
#47
Professor of Pending Projects
Rennlist Member
Rennlist Member
Thread Starter
You need the workshop manuals, the orange book I shared above, any other book on the subject... and the DVDs and photos should help with visualizing the different tasks...
Let me get back in the garage

Last edited by Wachuko; 01-25-2014 at 04:00 PM.
01-25-2014, 03:59 PM
#48
Professor of Pending Projects
Rennlist Member
Rennlist Member
Thread Starter
Help me out... what do you think of this list? I told my wife, earlier on, that I would need about 3,500.00 in parts to do the engine... I might be off a little from that number 
For a grand total of US4,786.50 and I will need to add the cost of the machine shop...
Heads look fine. I was just going grind/smooth out the damage from the piston ring and then have it checked by a local shop. JB Racing is about an hour from my house, I found a few good references from them in the Pelican forum... do not know anyone else with the facilities to work these parts. And they can check the case and balance the crankshaft with the flywheel, and all that... Local shops that are closer to me do not do their own machining.
What else am I missing?
- P&C Set - 86MM PORSCHE 356/912 BIG BORE PISTON & CAST CYLINDER KIT - US$460.00
- 1.0mm 616-104-191-00 Copper Cylinder Base Gasket (4) - US$20.00
- .25mm 539-04-209 Copper Cylinder Base Gasket (8) - just in case so I do not have to run around the last minute looking for them - US$24.00
- Crankshaft - PORSCHE 74MM 356/912 CRANKSHAFT 4340 CHROMOLY FORGED
- US$1,210.00 or should I go with the one from Stoddard? - 4340 Chromoly Steel Standard Stroke Crankshaft - 18 pounds - US$1,122.00 - Main Bearing Set - Standard - NLA-100-138-00 Standard Steel Main Bearing Set - US$510.00
- Connecting Rod Bearings - 616-103-142-02-SET Standard Alloy Rod Bearing Set - US$75.00 (Pelican parts has a set for 38.00, not sure what the difference is, but when ordering, I try to order as much as possible from one source...)
- Connecting Rod Nuts (8) - US$28.00
- Connecting Rod Upper Bushings (4) - US$21.00
- Connecting Rods (4). 616-103-012-02 Late Style Connecting Rod. Not sure if to reuse the ones I have... - US$620.00
- Oil Pushrod Tubes (8) - US$156.00
- Engine Cylinder Head Gasket Set - US$58.00
- Engine Crankcase Gasket Set - US$57.00
- Gland Nut with Pilot Bearing - Flywheel to Crankshaft - US$41.00
- Piston Ring Compressor Tool (I have one but this one looks like it will work better for air-cooled engine assembly... - US$17.00
- Oil Pressure Relief Piston (2) - US$61.00
- Sump Screen - US$65.00
- Mainely Sump Cover - US$80.00
- Aluminum Oil Cooler - US$510.00
- Precision Matters Full Flow Oil Filter Adapter with Pressure Relief - US$525.00
- Oil lines to and from oil filter canister (2) - US$48.50
- Bolts and stuff one always forget at the last minute... approximate - US$200.00
For a grand total of US4,786.50 and I will need to add the cost of the machine shop...
Heads look fine. I was just going grind/smooth out the damage from the piston ring and then have it checked by a local shop. JB Racing is about an hour from my house, I found a few good references from them in the Pelican forum... do not know anyone else with the facilities to work these parts. And they can check the case and balance the crankshaft with the flywheel, and all that... Local shops that are closer to me do not do their own machining.
What else am I missing?

The following users liked this post:
ddinham (03-19-2020)
01-25-2014, 10:49 PM
#50
Professor of Pending Projects
Rennlist Member
Rennlist Member
Thread Starter
 I was writing down the parts required so far for the engine... crankshaft, main bearings (price shock as they cost as much as the piston&cylinder set!!), rod bearings, piston set...
And you know what? I need a drink....or three...

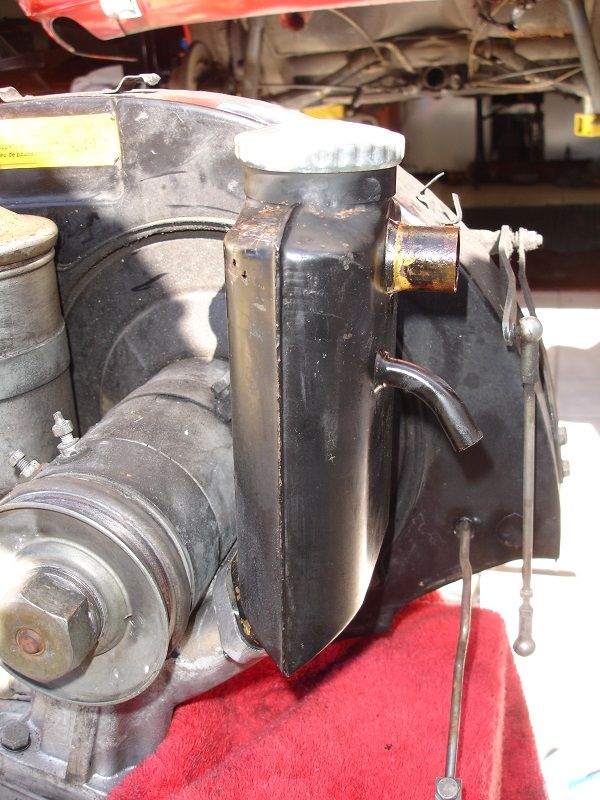
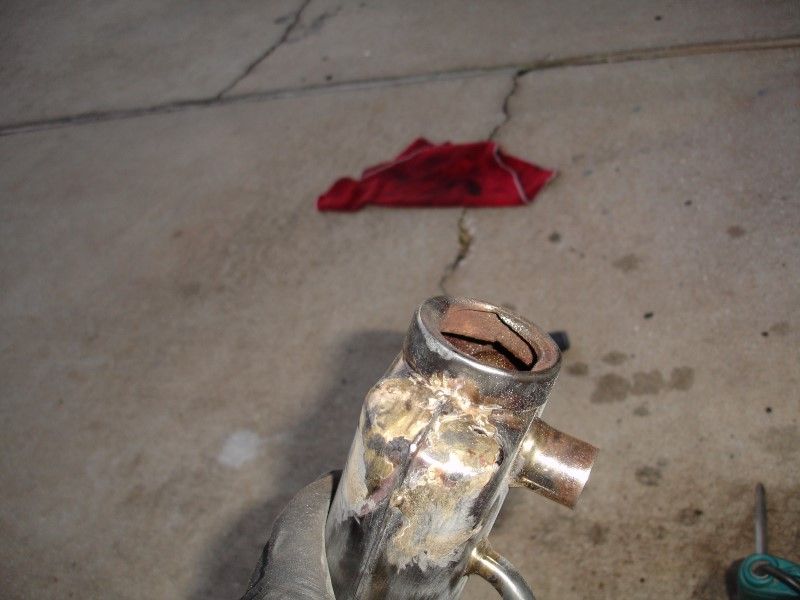
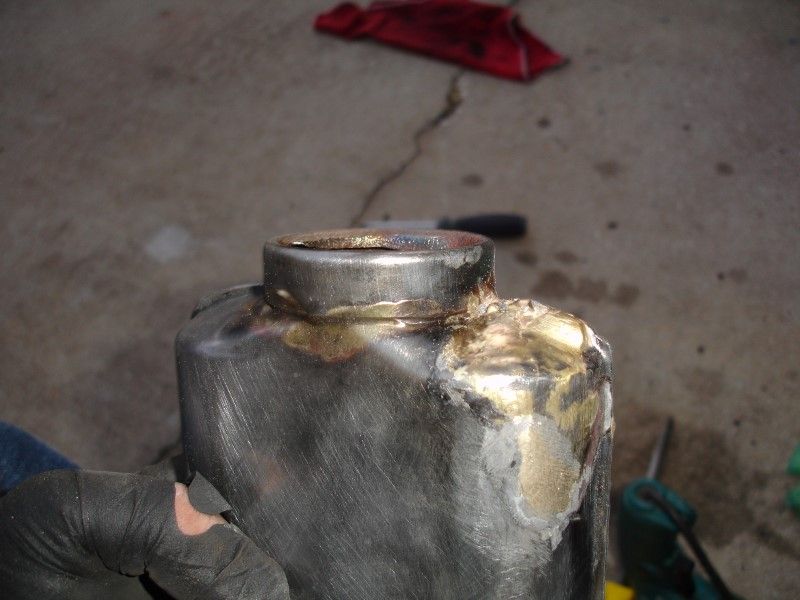
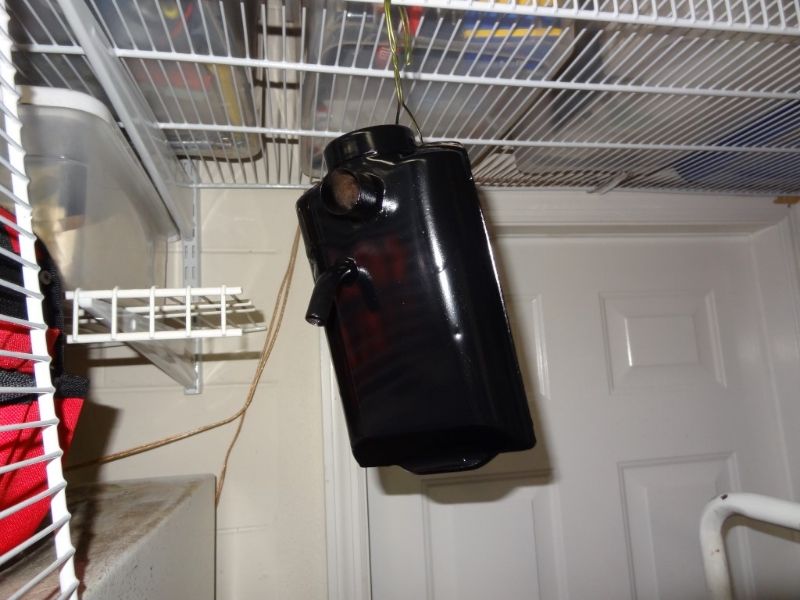
After the news of the crankshaft needing to be replaced... needed to feel like I had fixed something... I have never done brazing and the Oil Breather needed fixing unless I wanted to spend another 500.00 on a new one...
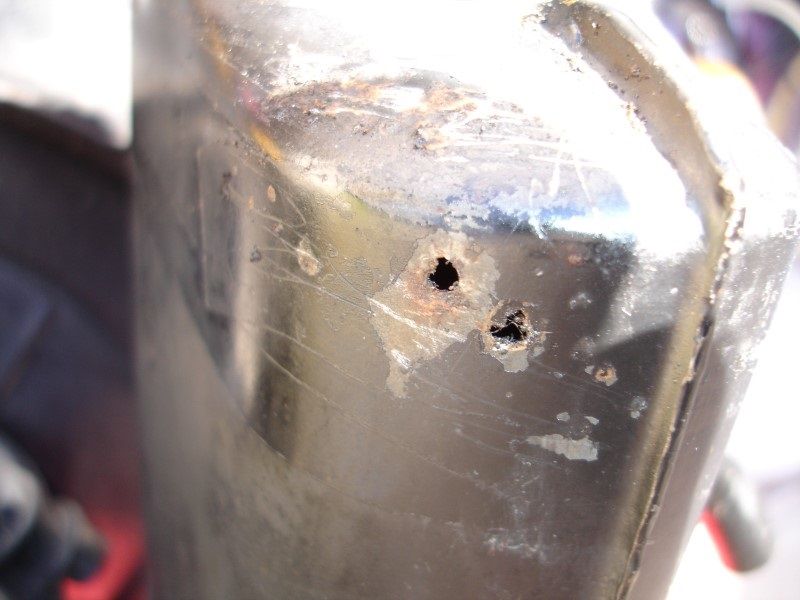
I sanded everything down... took a metal pointed tipped screwdriver and started poking for additional rusted spots...
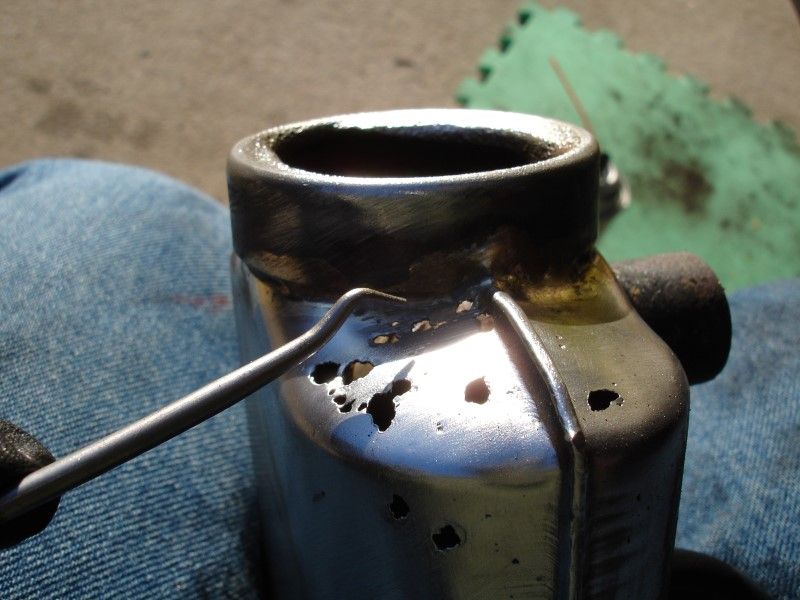
Heating the canister...
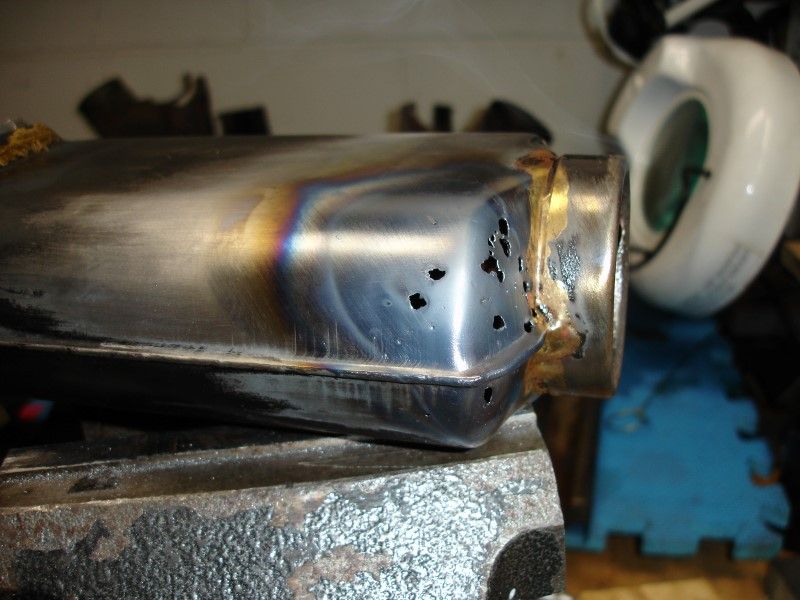
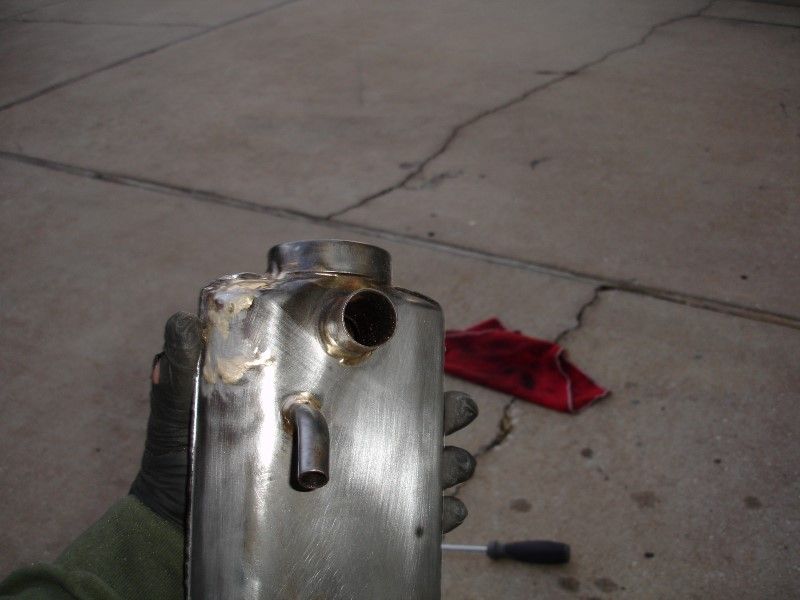
Let's try this...
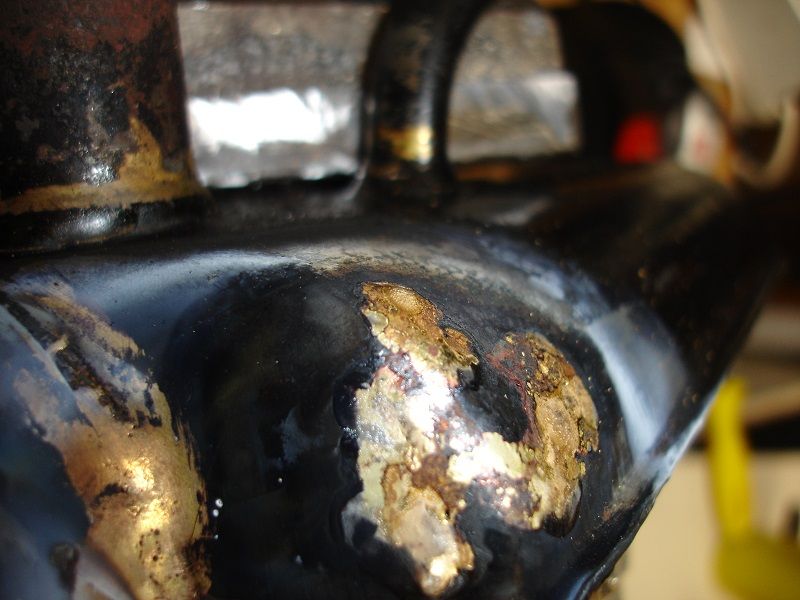
For a first timer...oh well... it is fixed...
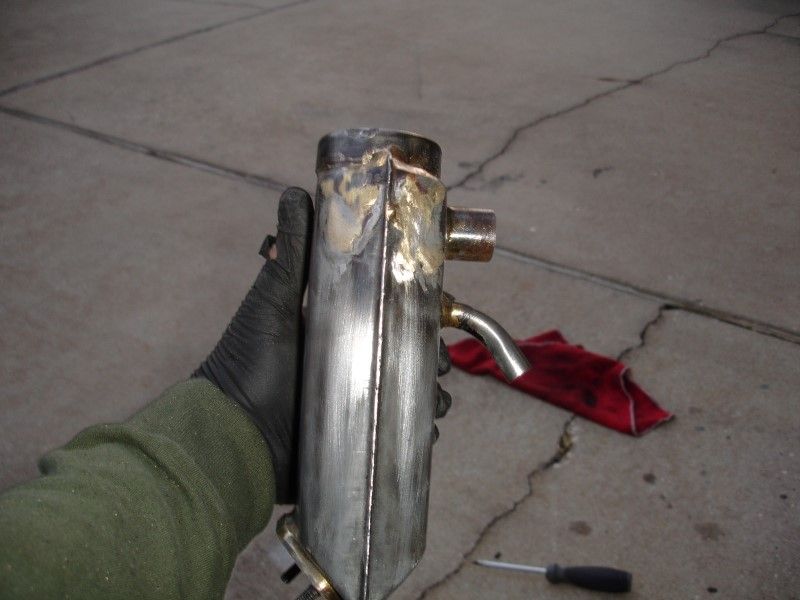
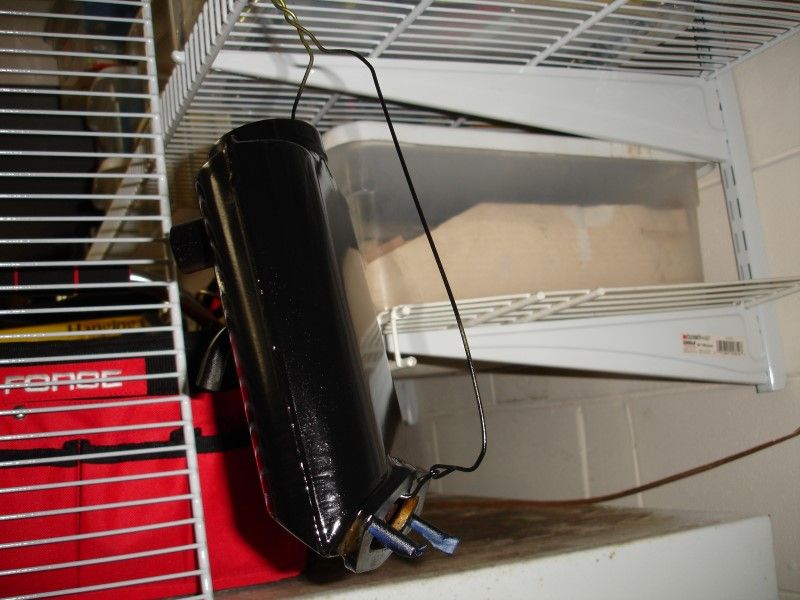
A coat of paint so that it does not get any surface rust...
Now let me go back in the garage to take those photos of the engine case...
 01-26-2014, 09:16 AM
#52
Professor of Pending Projects
Rennlist Member
Rennlist Member
Thread Starter
You do not know how happy this post made me feel... I was waiting for the "well... looks like you will also have to replace the <insert another costly part here> "
I will spend today cleaning the case and getting it ready to take to Sid (Troy Motorsport here in Orlando, FL) for validating the condition of the case. I will take the heads with me as well. What else should I take for him to inspect?
How do I check the distributor?
In my naive opinion, carburetors just need to be cleaned. And I will need to check adjustment once the engine is back together. Remember that I could start the car and it ran (well, now we know all the damage that was going on inside)... There were no leaks in the carbs, car rev well... again, now that they are out of the car, any way to check them?? Not sure if you got to see the video I took of the engine while in the car...
All throttle linkage parts are in good shape. Just need a good cleaning.
I did order a bunch of stainless steel cheese head screws and hex.... for all the tin when it is time to install back... and I will be damned if I don't get all the tin powder coat it... as good as painted parts look, not a match for how those look powder coated.
I still have to order the shocks (another 1K), and the replacement panels for the rusted areas and all the seals and suspension bushings (estimate so far on those parts is around 1.5K). Brakes are in good shape. Just removing them to clean and paint and install back. I will have to use silver caliper paint because I am not going to send them to get cad plated...
Engine bay must look great... now knowing the cost of getting the engine to a healthy state, it just means that it will take longer than I expected to get it there and looking amazing... but I rather do things right than cut corners just to get it on the road faster... This is a car I plan to keep and I want to be able to use it as a daily driver (sharing that task with the 964 once I get that one on the road as well)... I am not looking to have a car that is restored to like new condition, I can't afford that... so it will not be "like original". But it will look nice and with as many recondition parts I can afford. Drive train to me is the most important part to get right. I want to lift the engine lid (and have it stay up, lol) and see a "like new" engine, also look under the car and see all suspension components and brakes, look like new (and work like new)... Interior and Exterior I can fix as I enjoy the car.
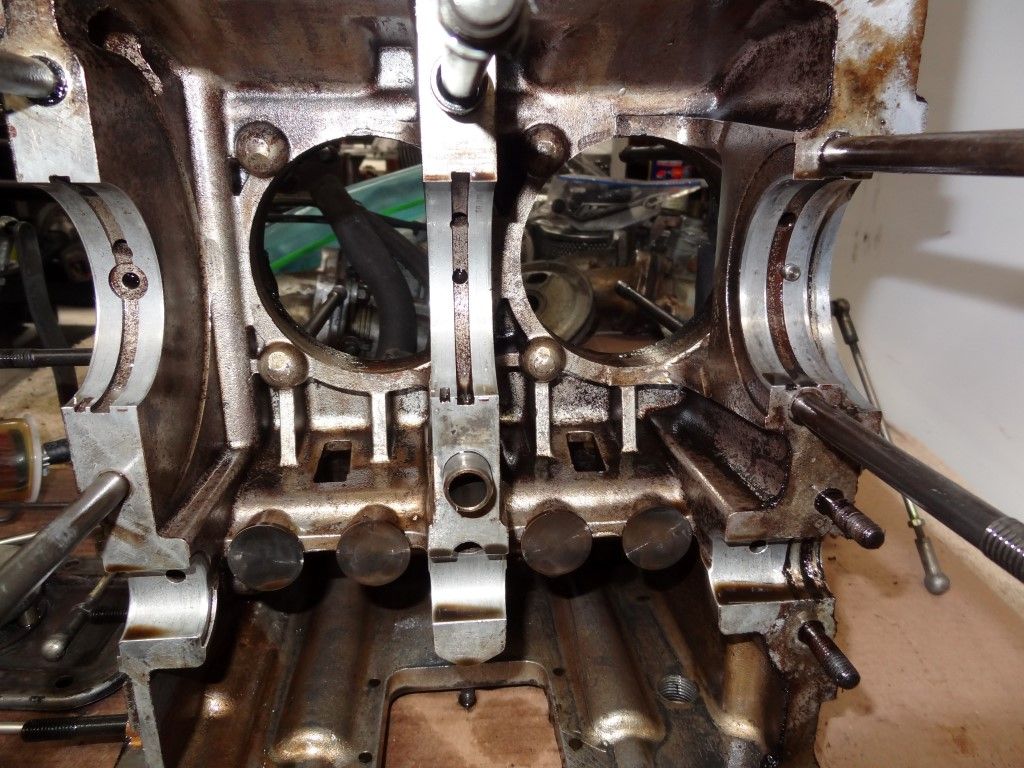
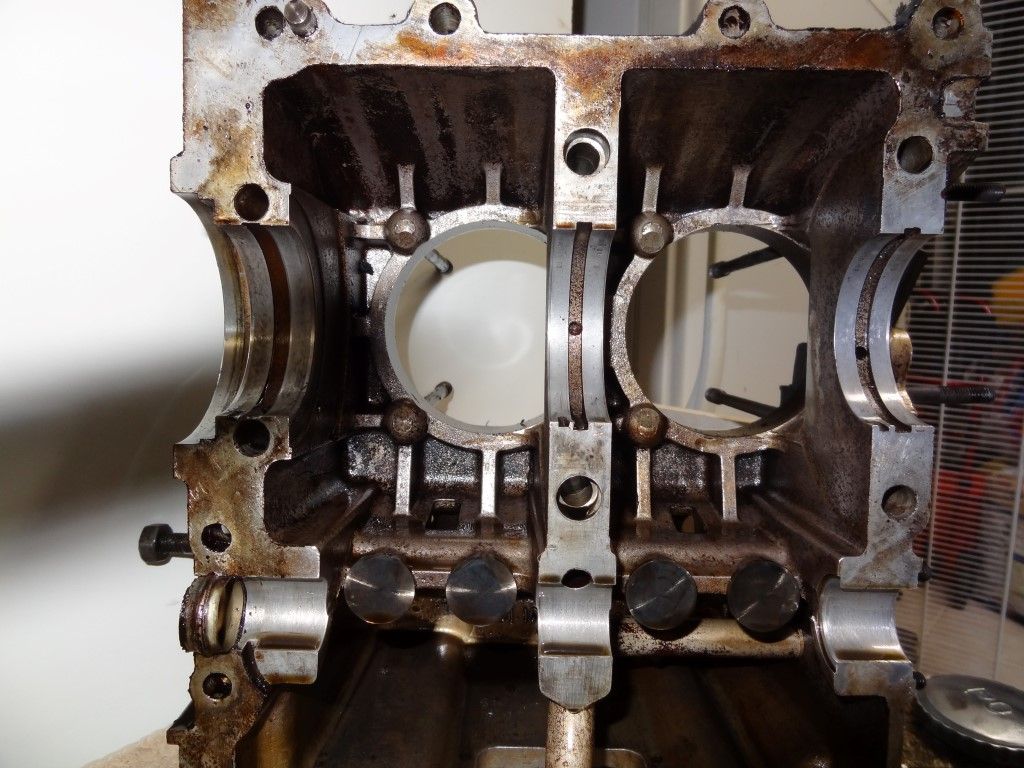
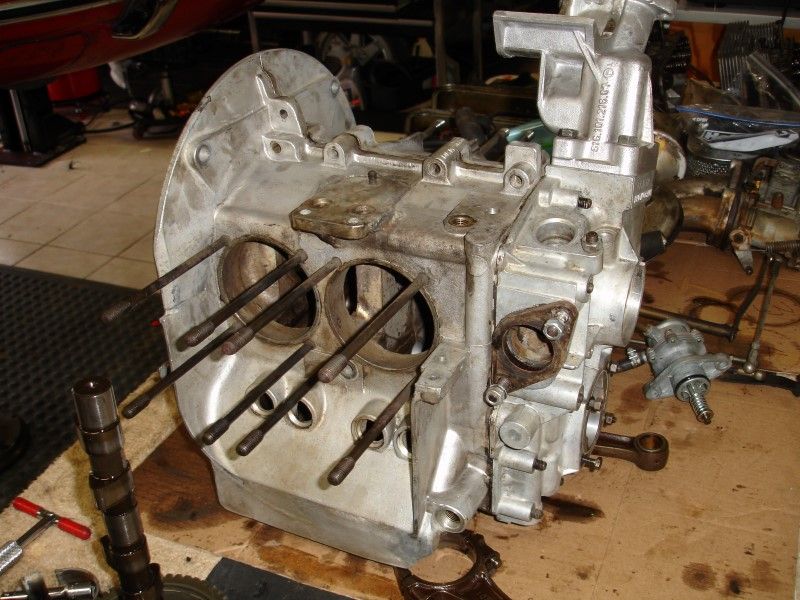
These are 3-main, 4-cylinder engines which are designed to spin to ~6KRPM, so that crank is gonna flex and take the mains with it.
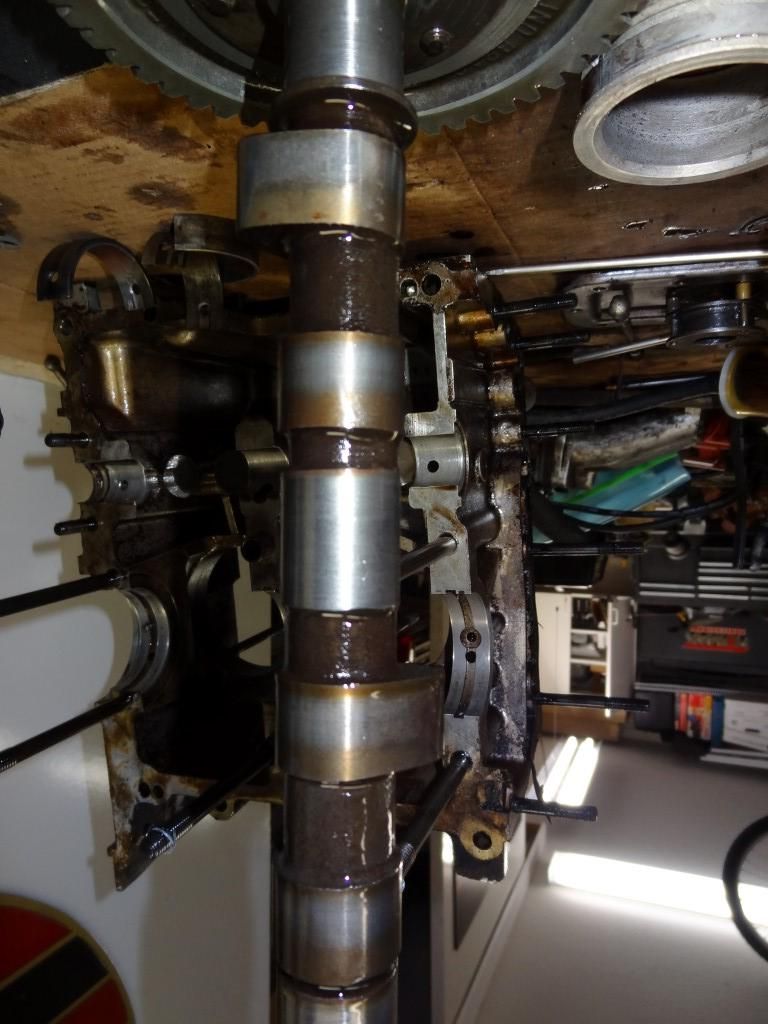
The case surfaces at the mains don't look any worse than most of the ones I've opened. After the cases are cleaned, you will need to measure (or get measured) the main saddles.
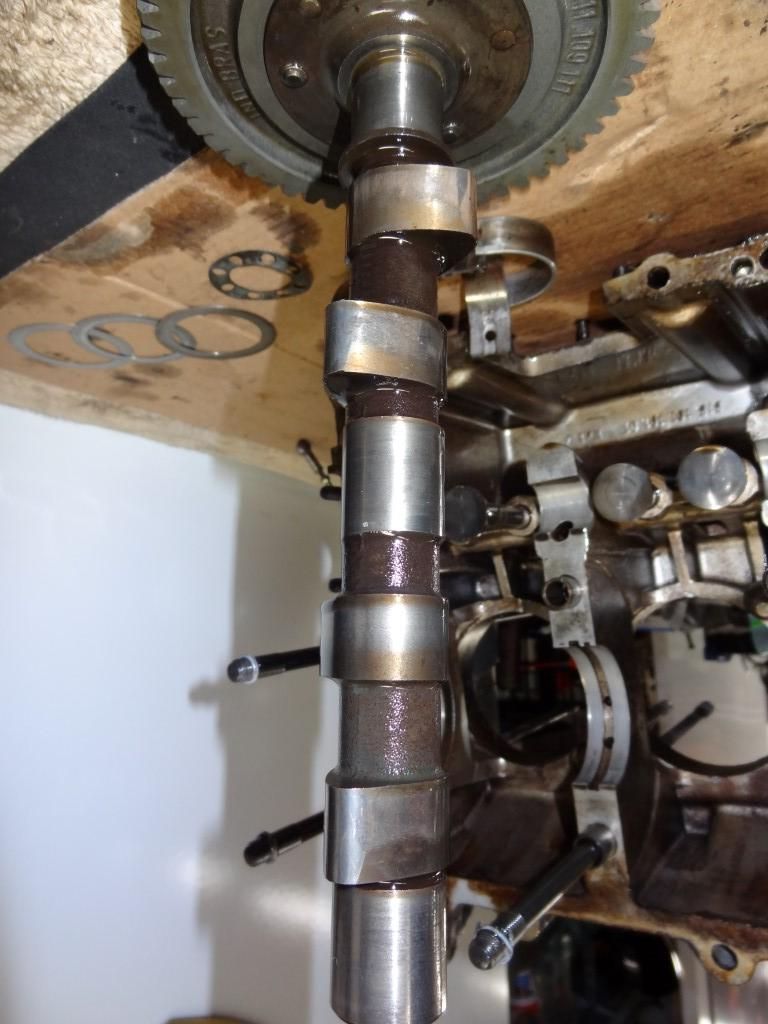
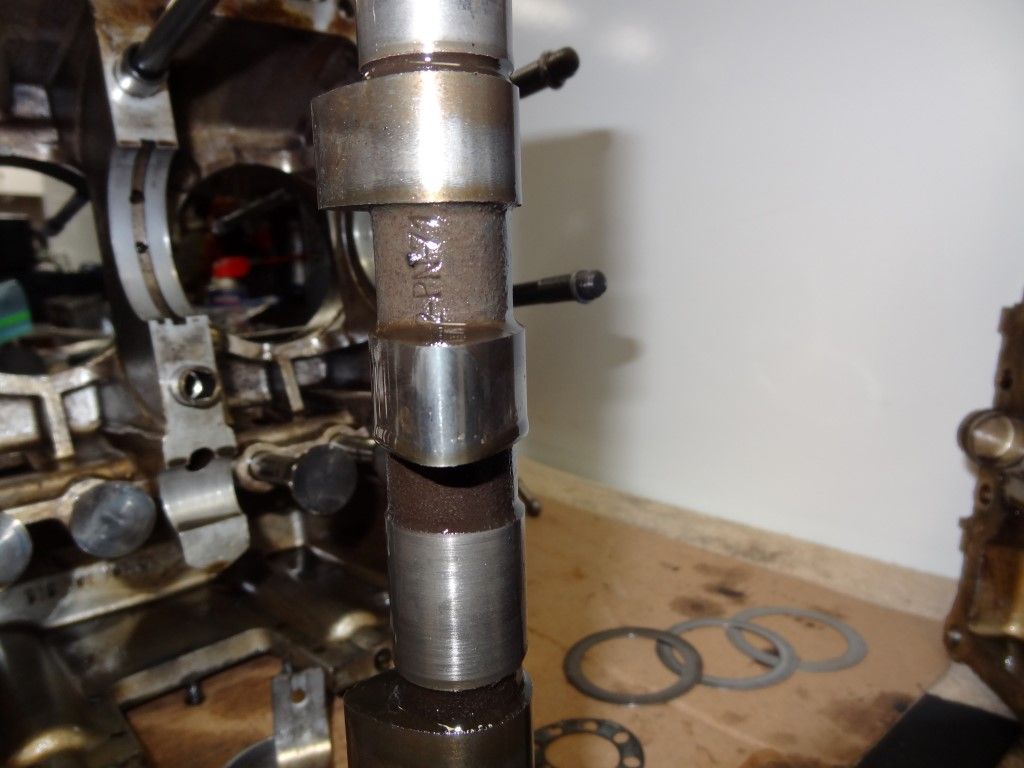
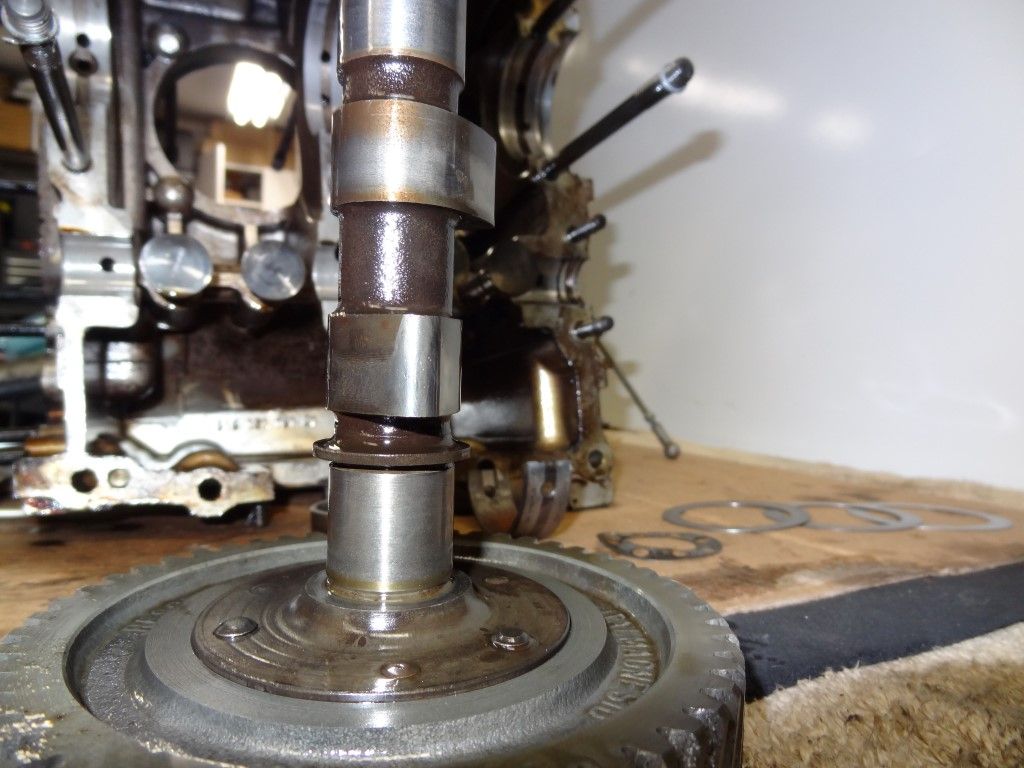
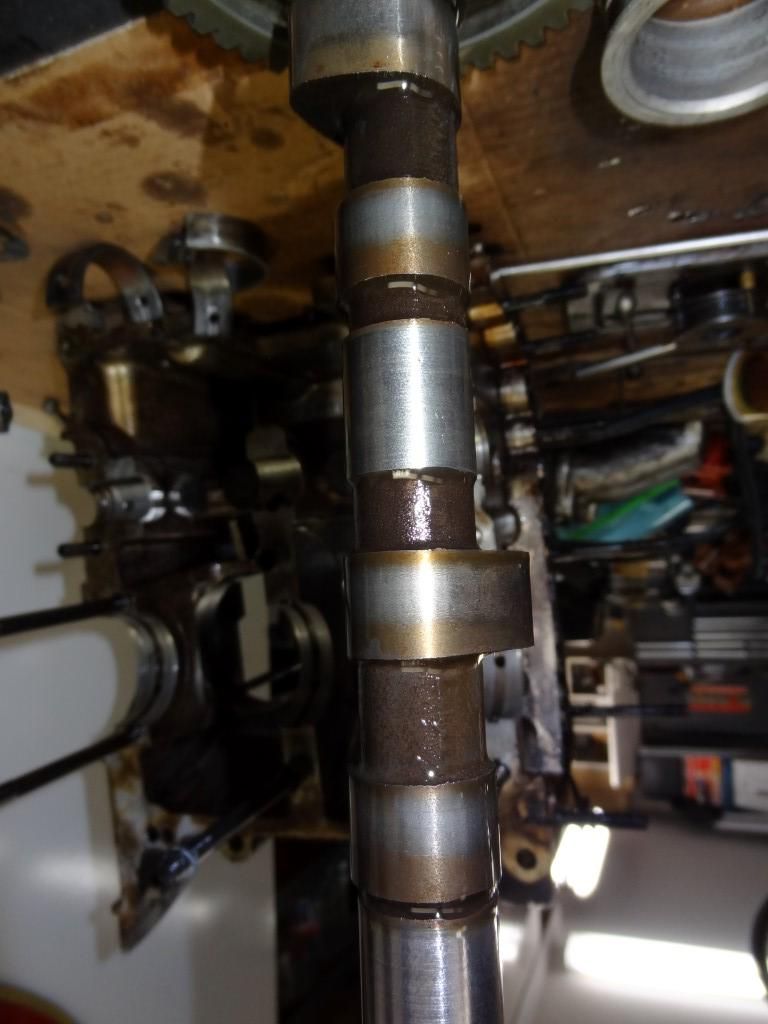
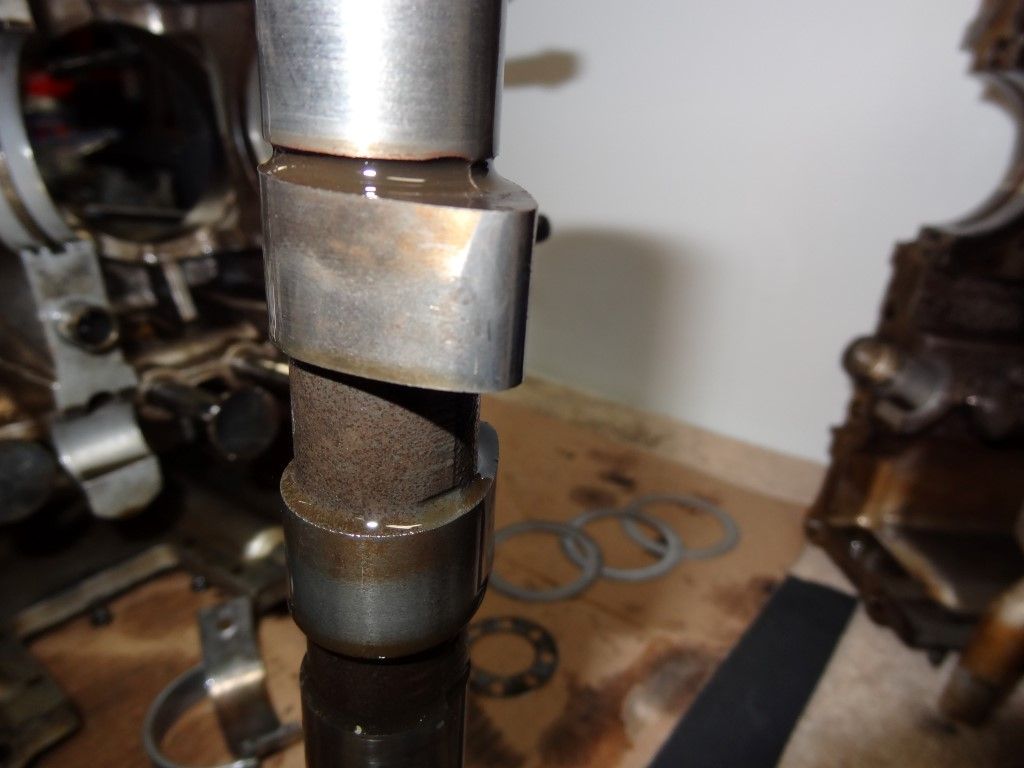
The cam looks like it's been around the block, but someone has done a pretty nice job welding the wear at oil pump drive slot.
You don't have any visible disasters, just a bunch of well-used parts that need reconditioning.
I think your budget is low; can you really put it back together without a good paint job on the tin and plating on the fasteners? What condition are the carbs and the distributor in? Any better than the parts you're rebopping? Throttle linkage parts?
Check the generator pulley halves, and also the generator itself; what's the first thing you see when you open the lid?
The case surfaces at the mains don't look any worse than most of the ones I've opened. After the cases are cleaned, you will need to measure (or get measured) the main saddles.
The cam looks like it's been around the block, but someone has done a pretty nice job welding the wear at oil pump drive slot.
You don't have any visible disasters, just a bunch of well-used parts that need reconditioning.
I think your budget is low; can you really put it back together without a good paint job on the tin and plating on the fasteners? What condition are the carbs and the distributor in? Any better than the parts you're rebopping? Throttle linkage parts?
Check the generator pulley halves, and also the generator itself; what's the first thing you see when you open the lid?
Last edited by Wachuko; 01-26-2014 at 09:11 PM.
01-26-2014, 02:46 PM
#53
Professor of Pending Projects
Rennlist Member
Rennlist Member
Thread Starter
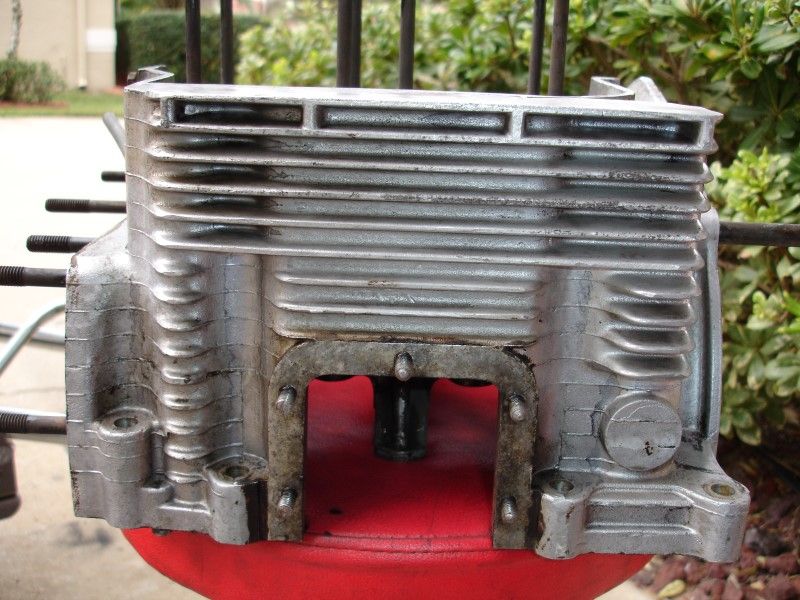
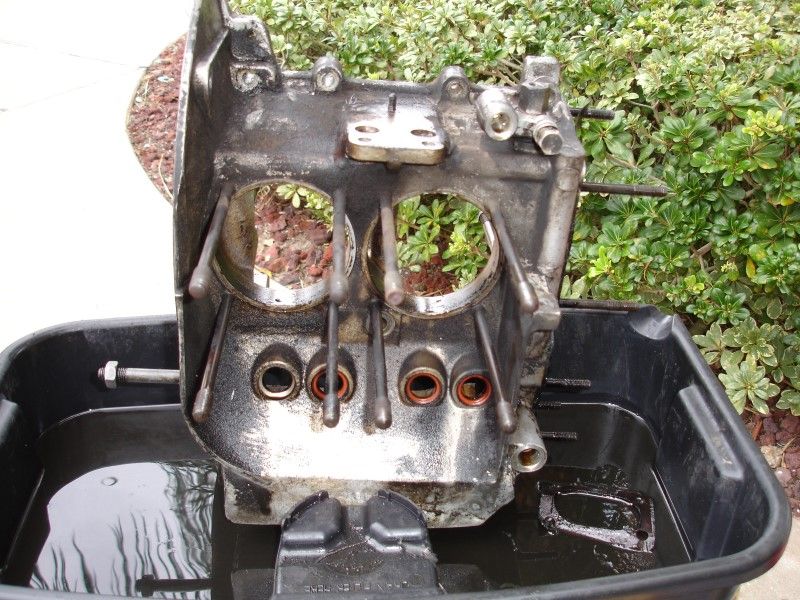
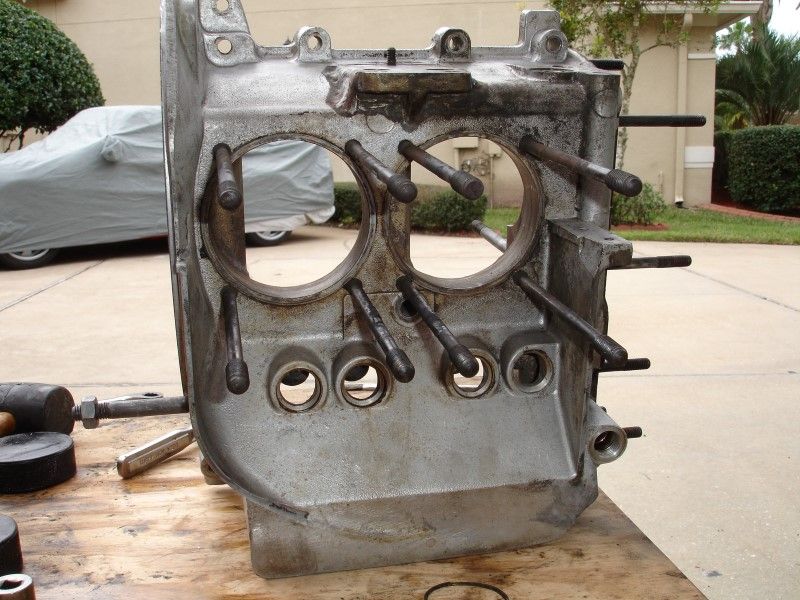
Just wanted to clean the case enough so that it would not get the FIAT dirty when moving the parts around..
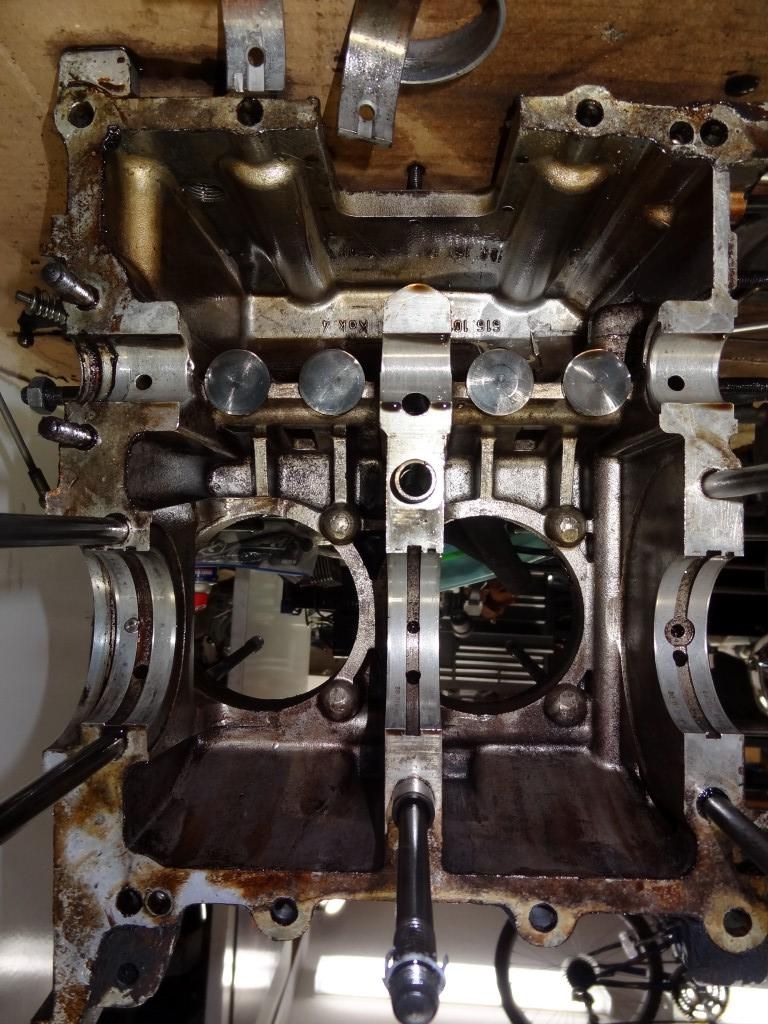
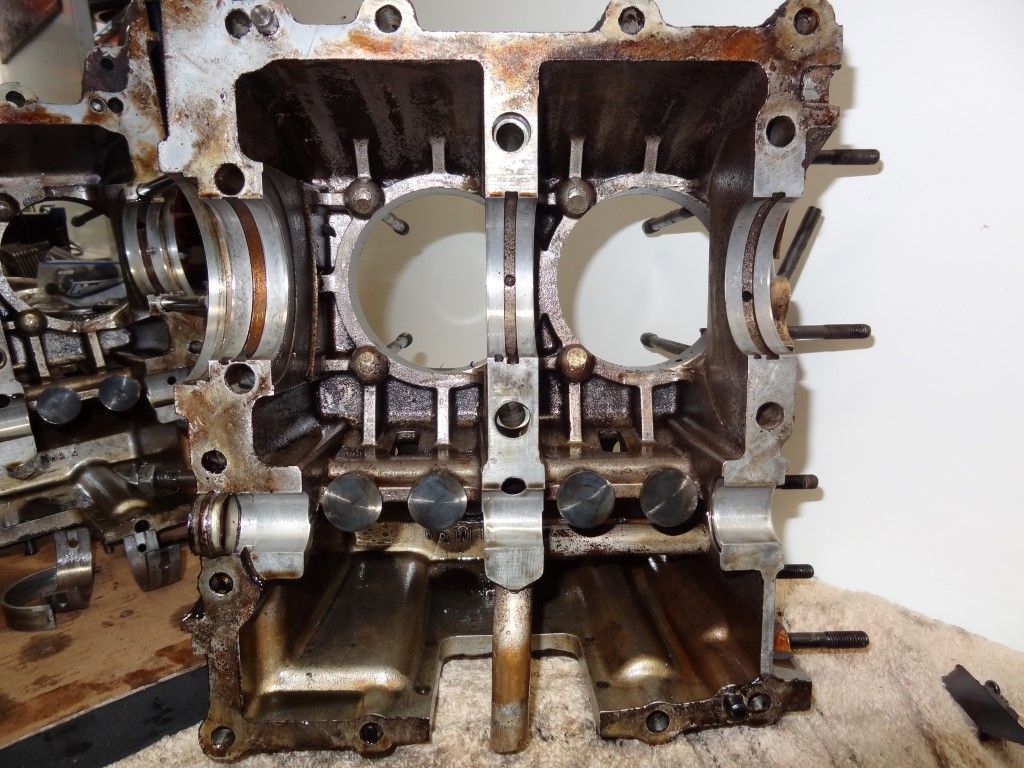
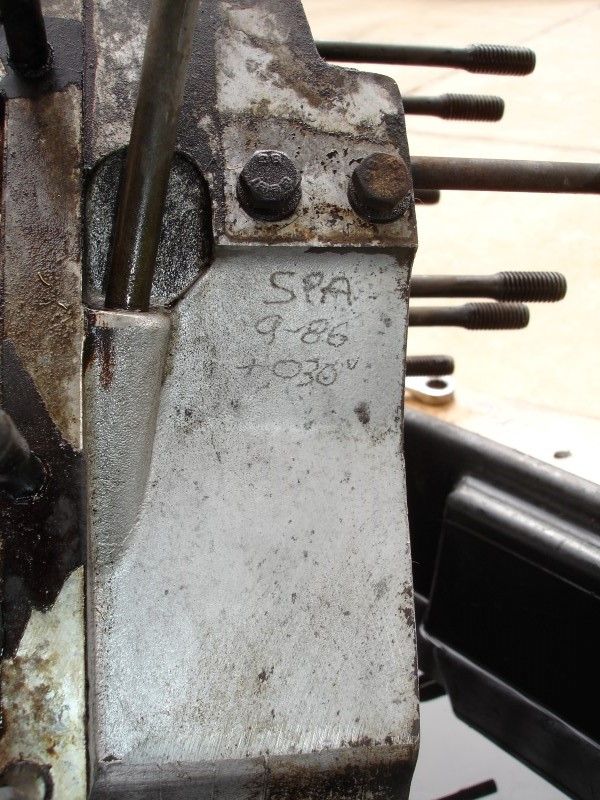
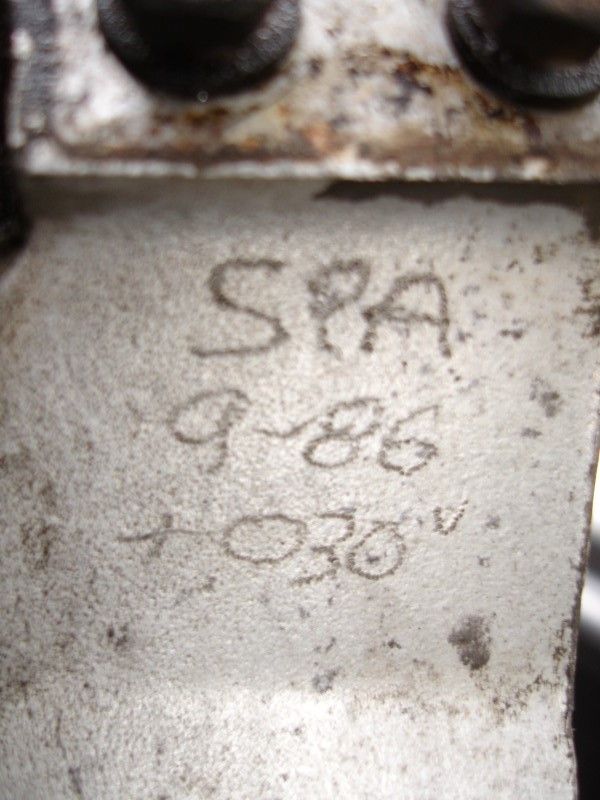
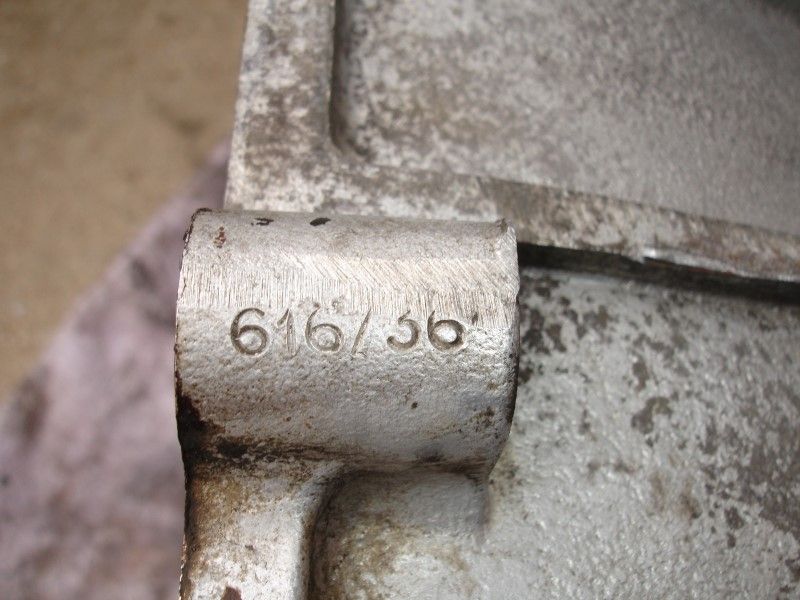
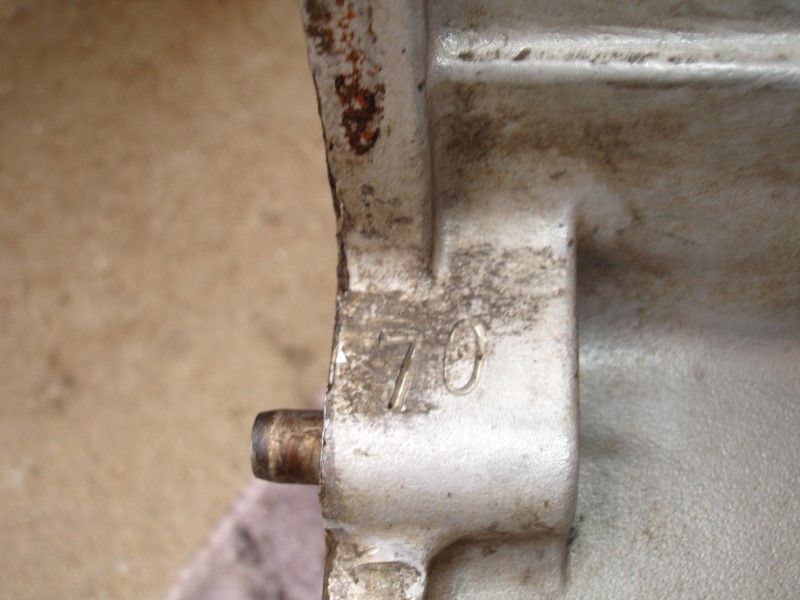
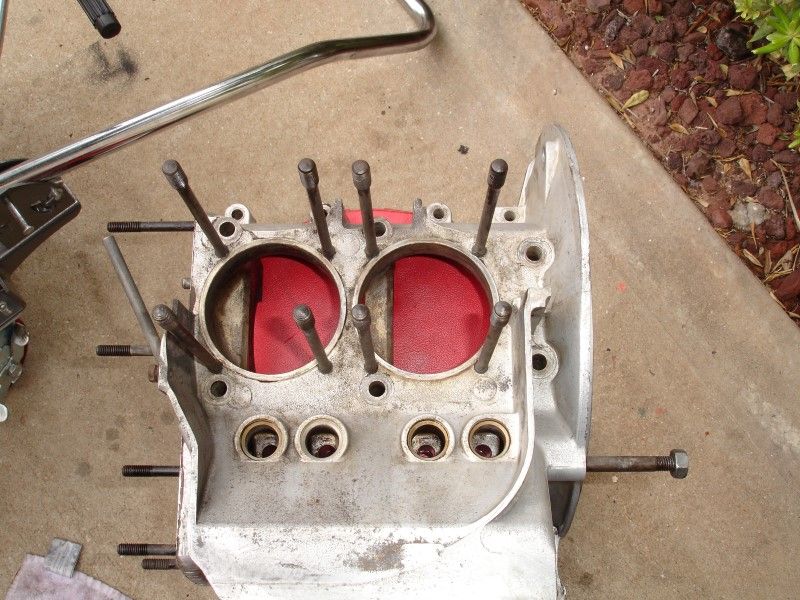
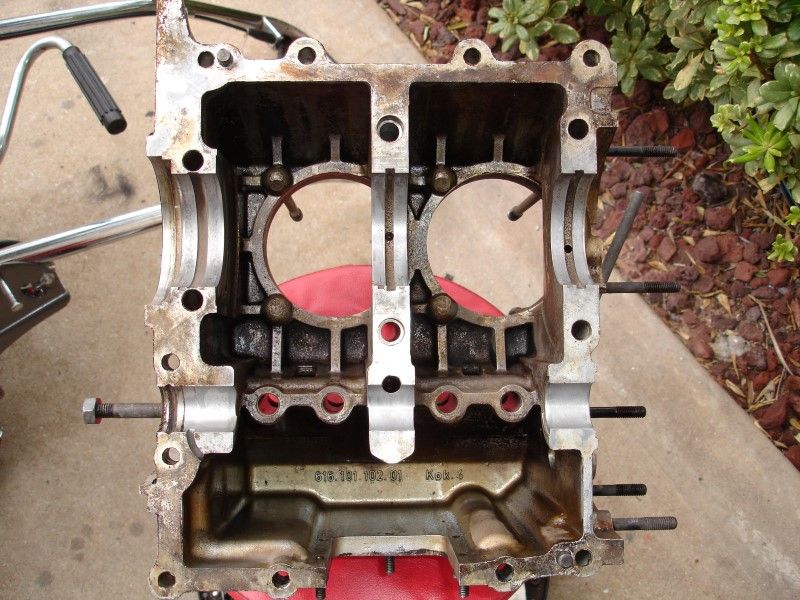
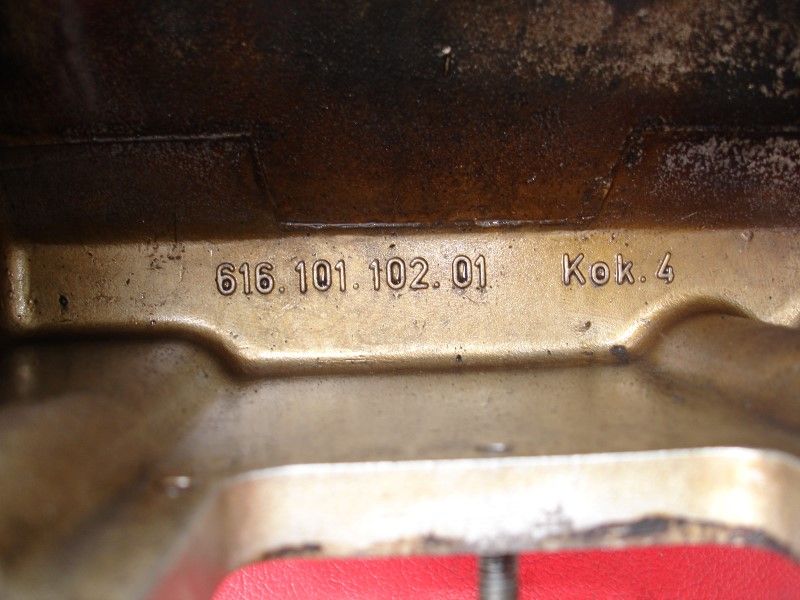
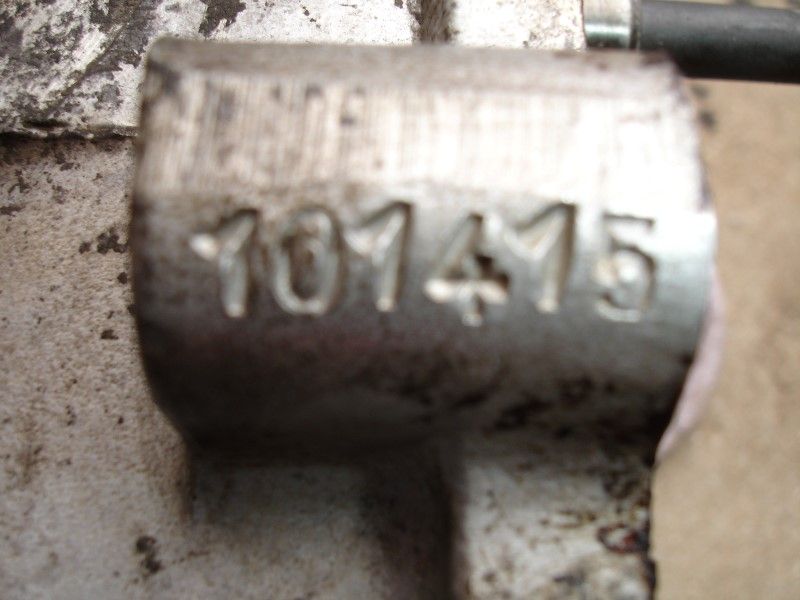
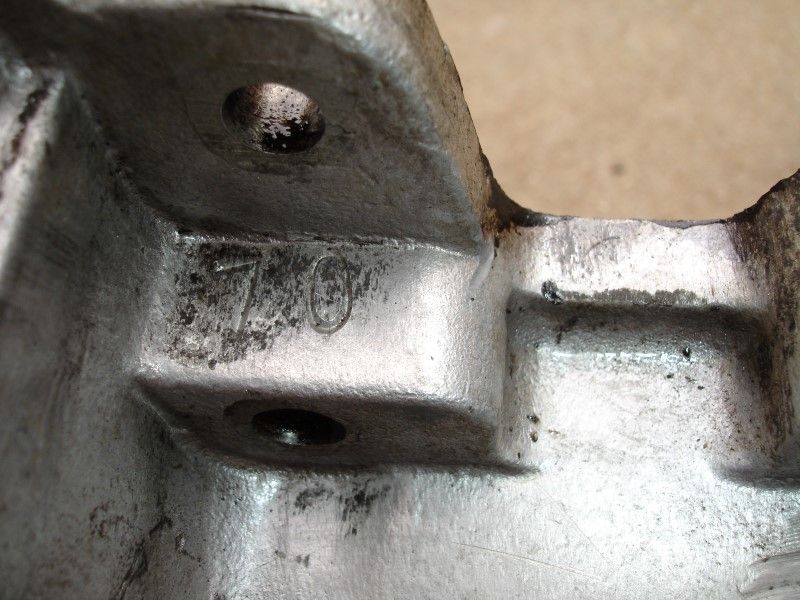
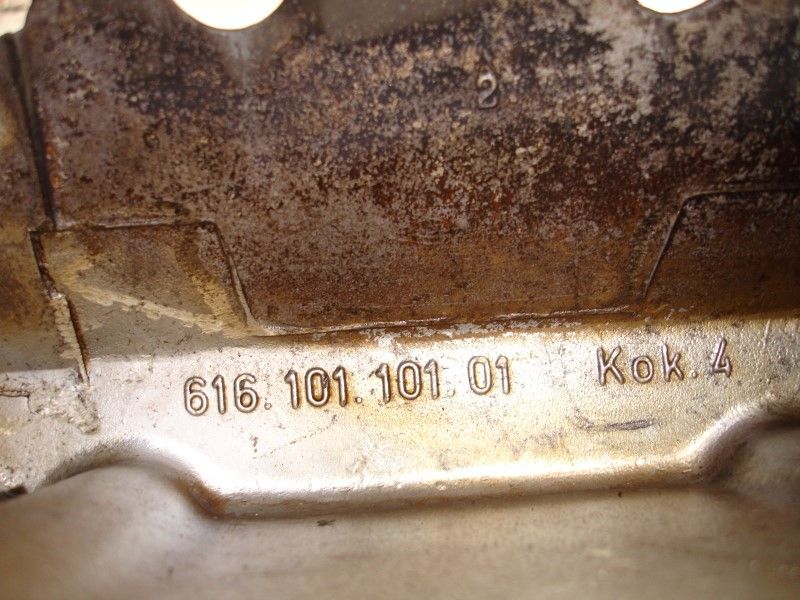
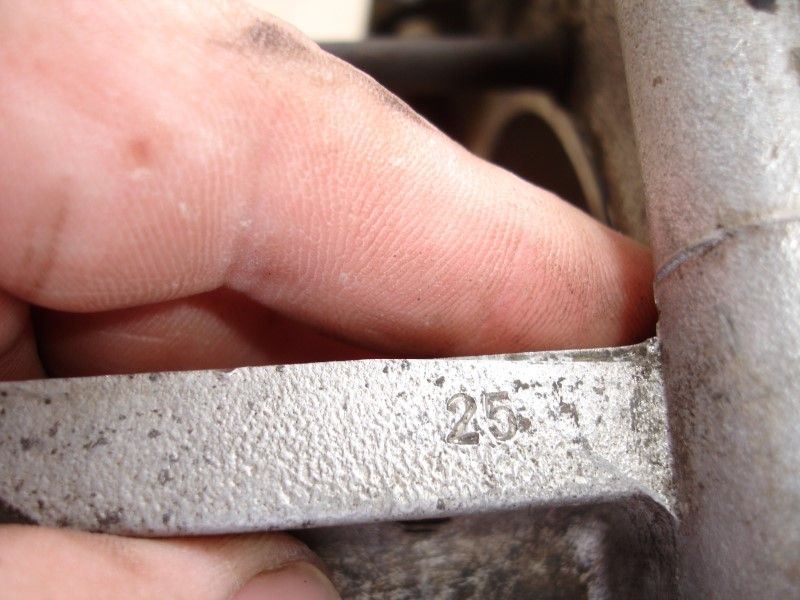
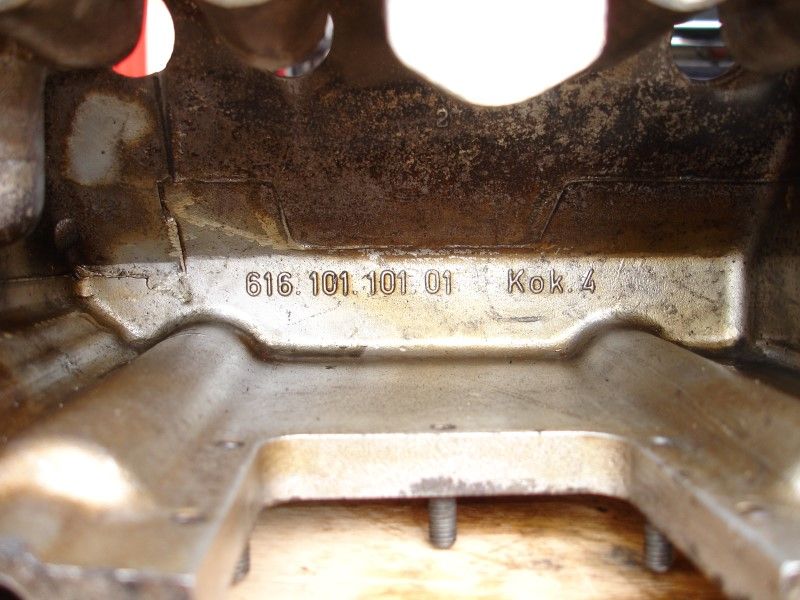
Took photos of some numbers in the case...
Let's start cleaning...
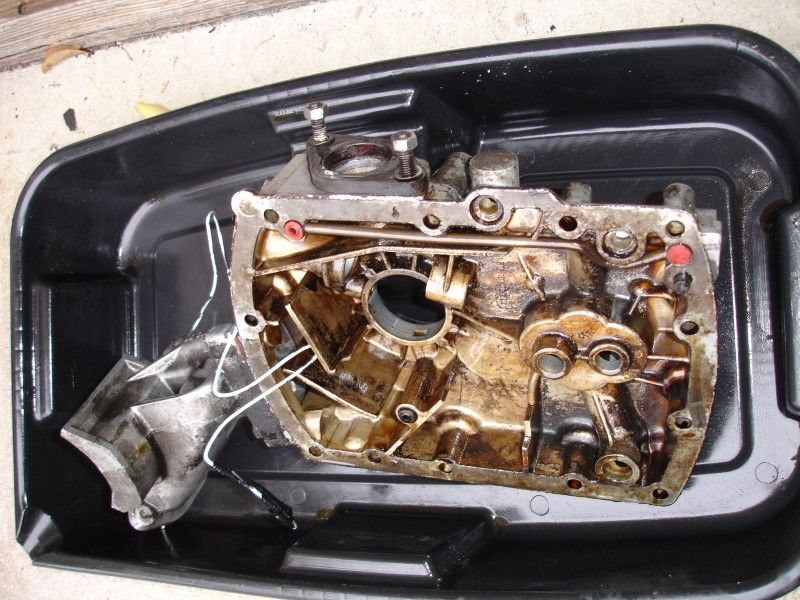
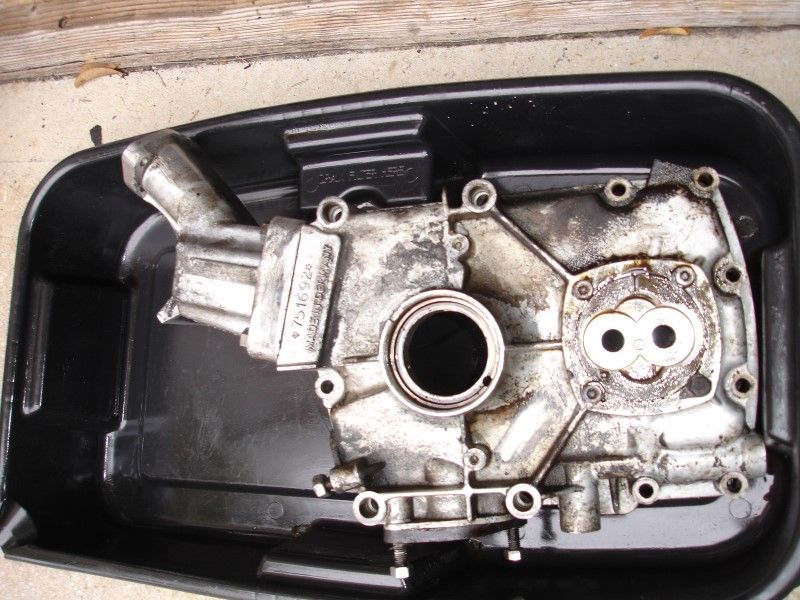
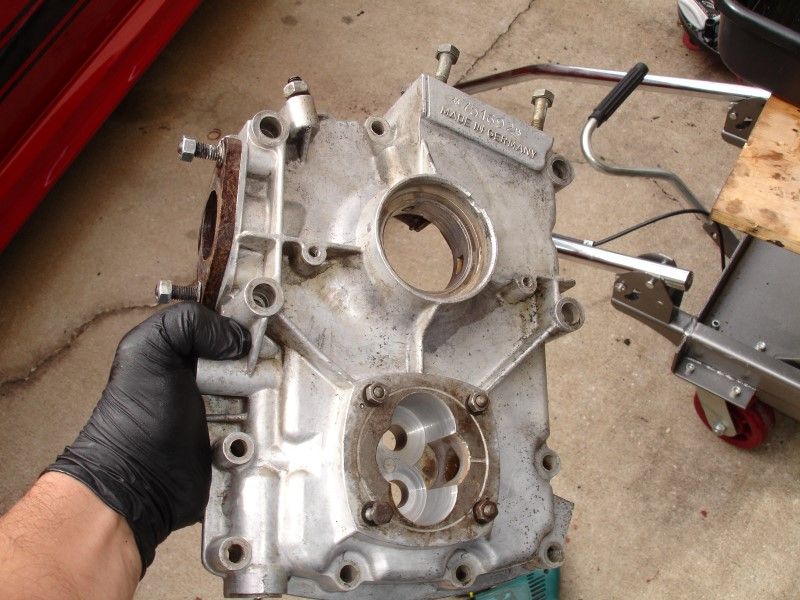
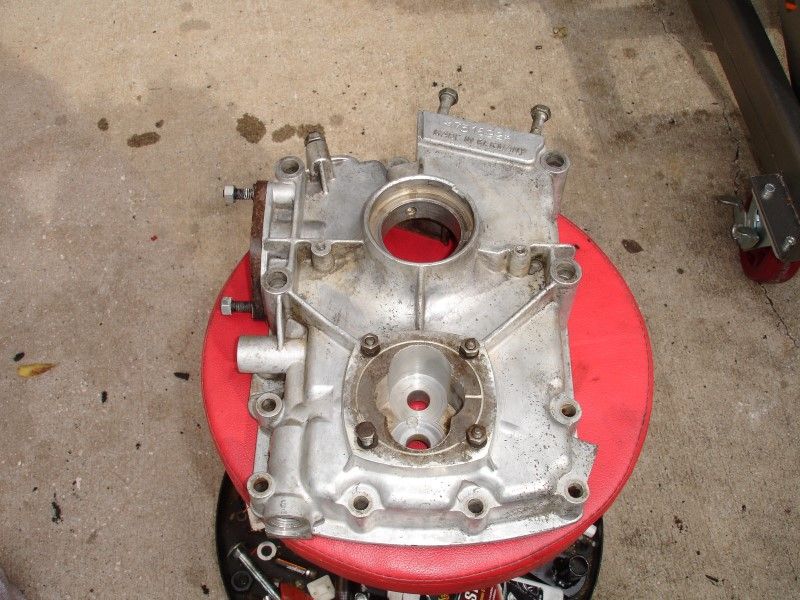
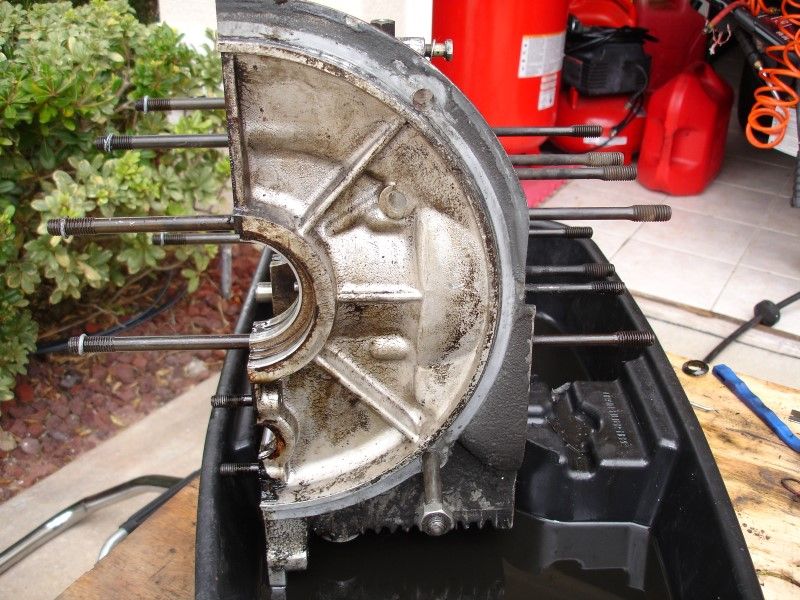
On with the rest... found this on the case...
Now the other half

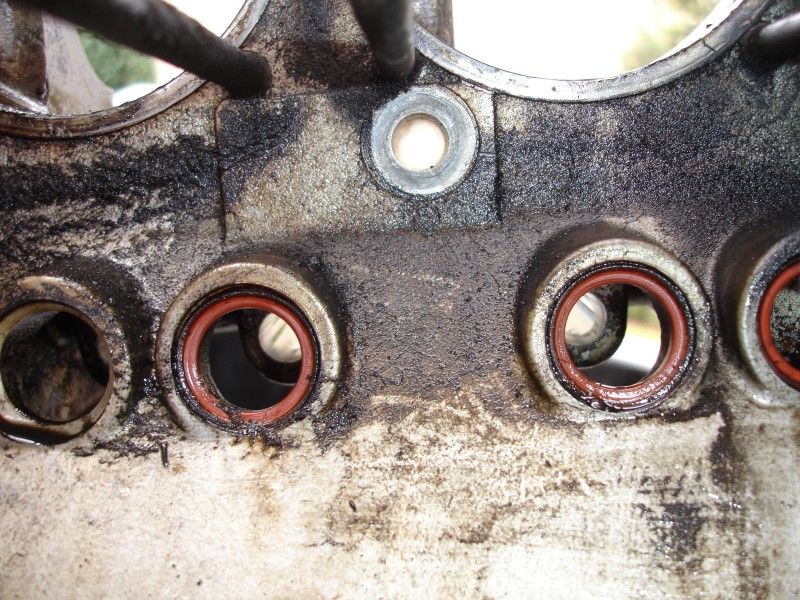
Black seals on one side...red on the other... good grief...
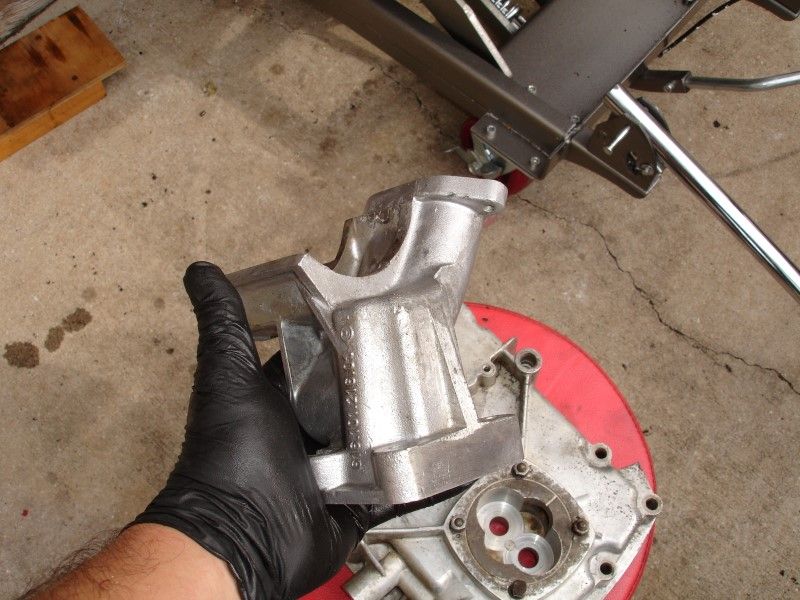
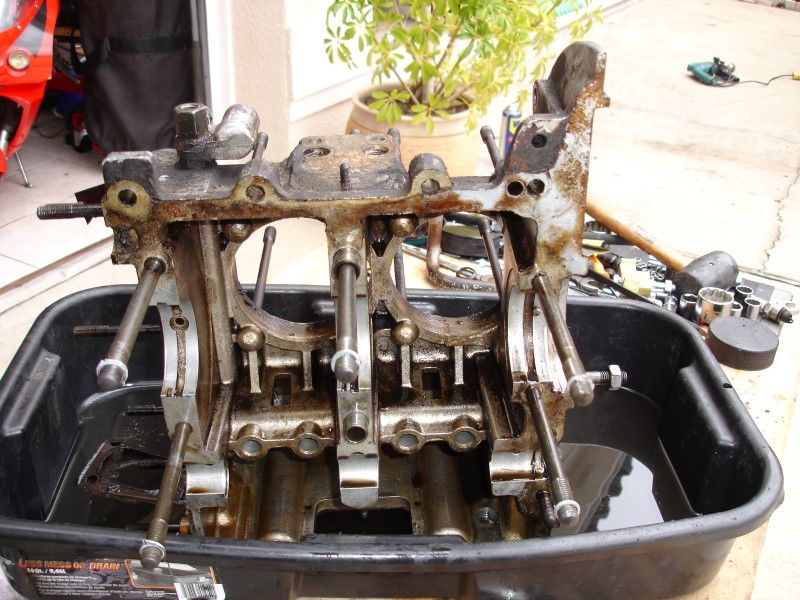
Almost forgot to take this out..
Let's keep it all together...
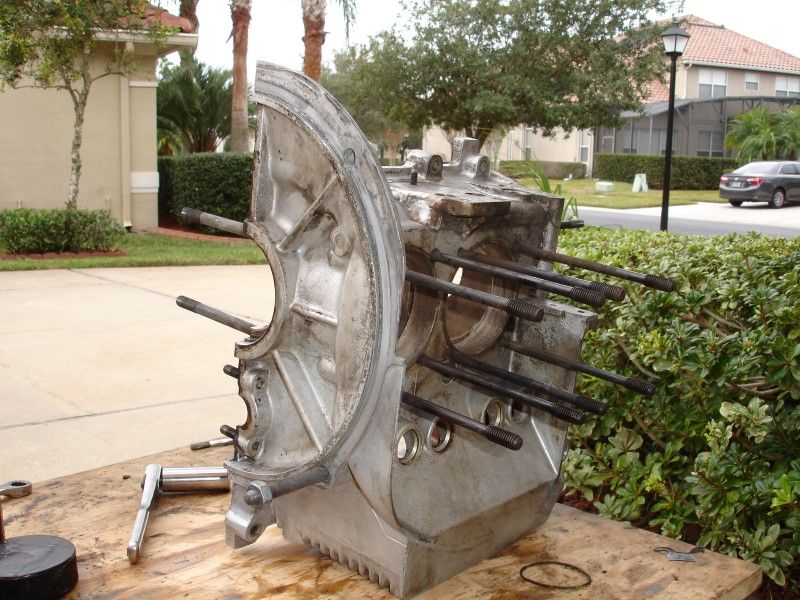
easier to move around as one piece...
Took photos of some numbers in the case...
Let's start cleaning...
On with the rest... found this on the case...
Now the other half
Black seals on one side...red on the other... good grief...
Almost forgot to take this out..
Let's keep it all together...
easier to move around as one piece...
01-26-2014, 09:15 PM
#55
Professor of Pending Projects
Rennlist Member
Rennlist Member
Thread Starter
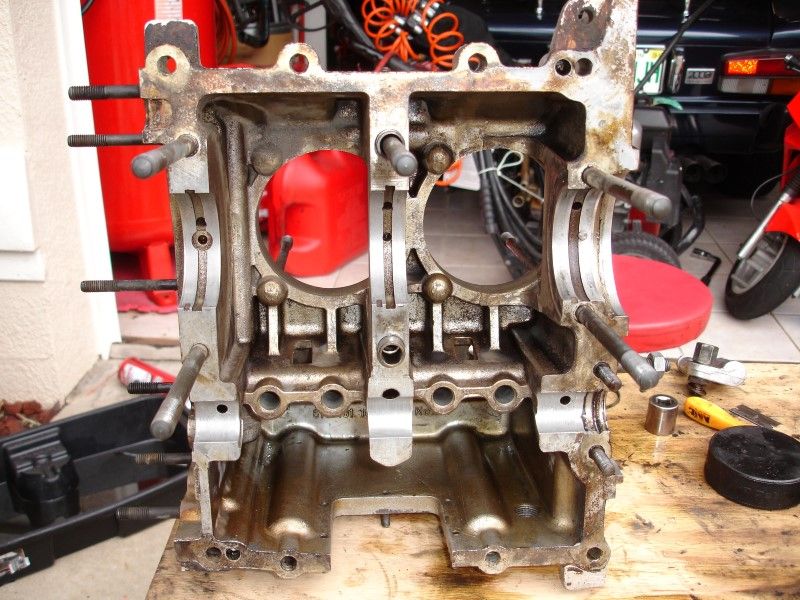
Thank you for the encouragement. I need all that I can get. Remember how you were joking that the only thing not on the part list was the case... well... Looks like the case was 3rd over bored. The stock OD for a F/W main bearing should be 60.29mm mine measures 61mm...
Trying to figure out (with the helps of the folks at 912bbs.org) what are the next steps...
Looks like the case was 3rd over bored. The stock OD for a F/W main bearing should be 60.29mm mine measures 61mm...Trying to figure out (with the helps of the folks at 912bbs.org) what are the next steps...
01-26-2014, 10:40 PM
#57
Professor of Pending Projects
Rennlist Member
Rennlist Member
Thread Starter
Not letting the issue with the engine bring me down or stop me... It took me many years to find a car like this one, I love this car and plan to drive it in the very near future...
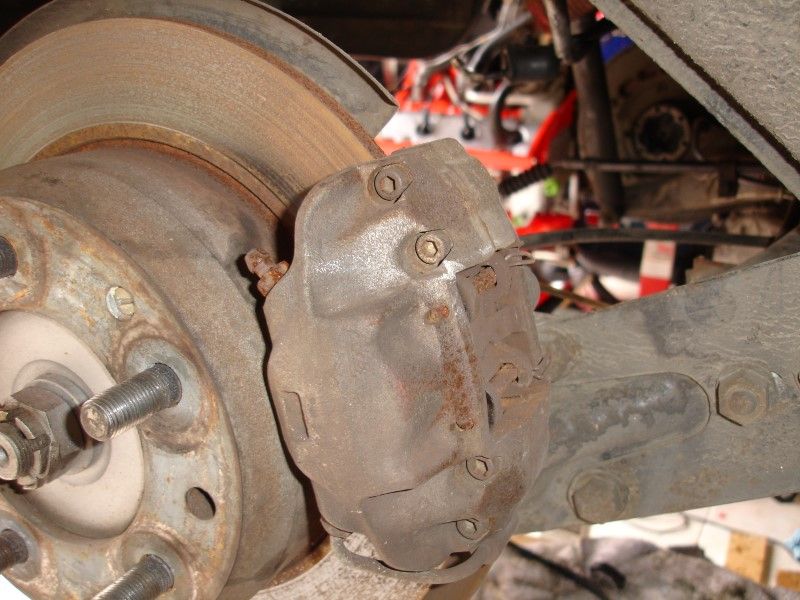
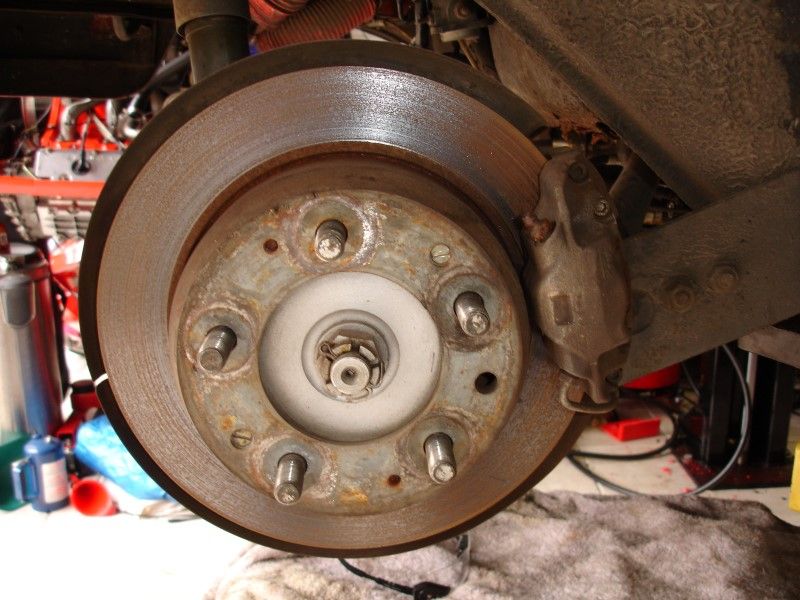
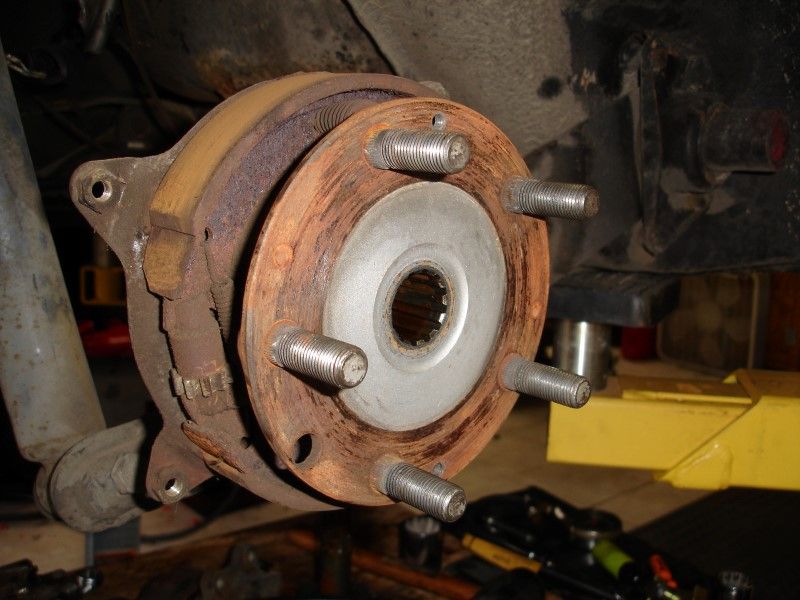
Started to work on the brakes. As I had mentioned, prior to the previous owner, the brakes were done. So my plan is just to refresh the looks... get rid of the rust, protect the calipers with some silver caliper paint, powder coat the sheet metal. Maybe replace bearings while I am at it...
Plan is to clean all the wheel well, and make it look nice. Refresh those bushings as well... got to look for some better bushings without going solid... those red polyurethane bushings... if anyone knows where they sell those, chime in please.
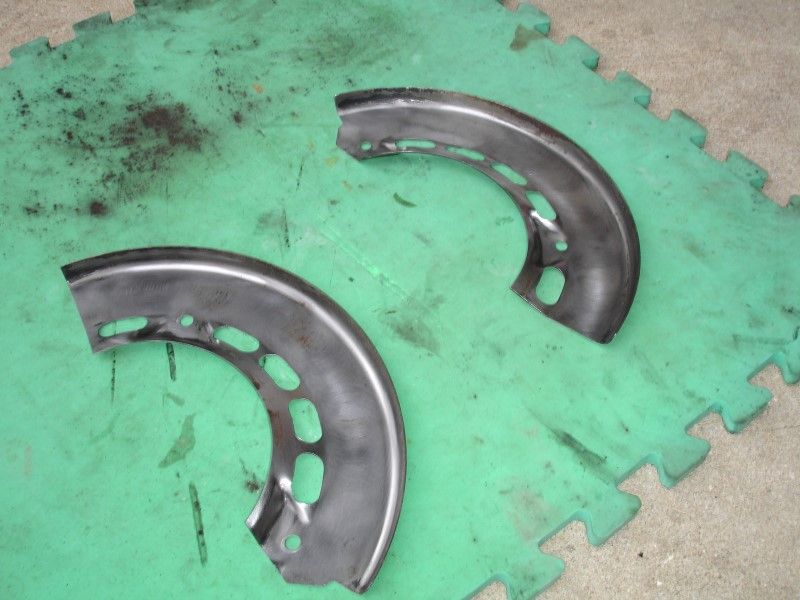
Removed the shields... got all the grime and paint off them...
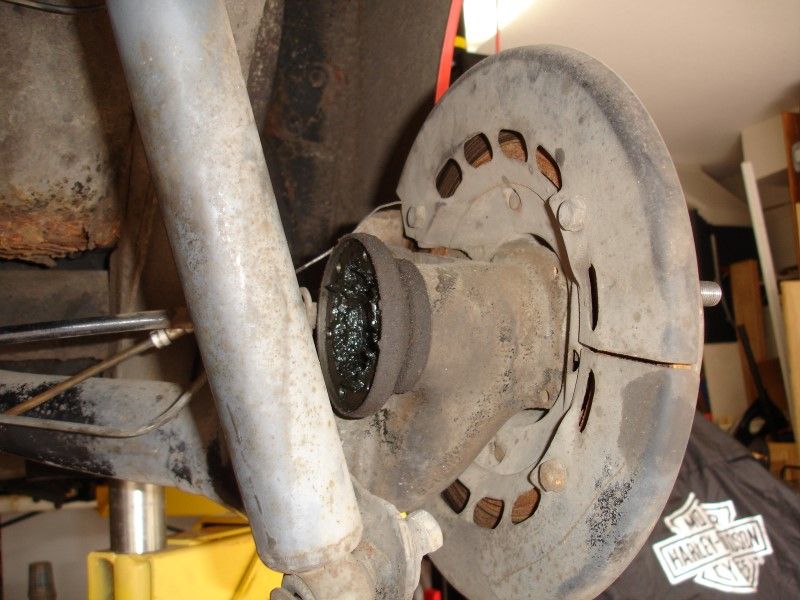
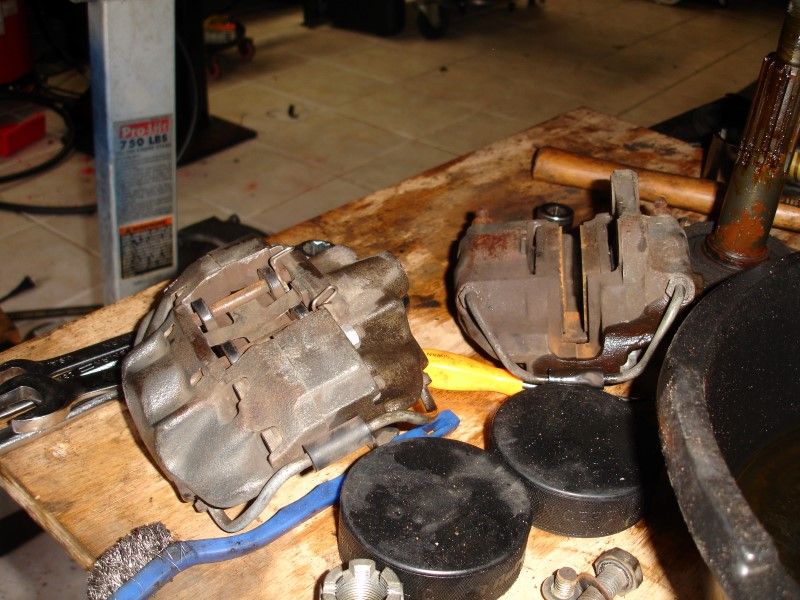
Removed both rear calipers
Need to read in the manual on how to remove this so that I can get that part in the back...
I was going to try painting them... and actually did paint a set, but it was too cold for painting... no shine at all from the paint with the temperature like it is. I will just get them to the powder coater for stripping and powder coating.
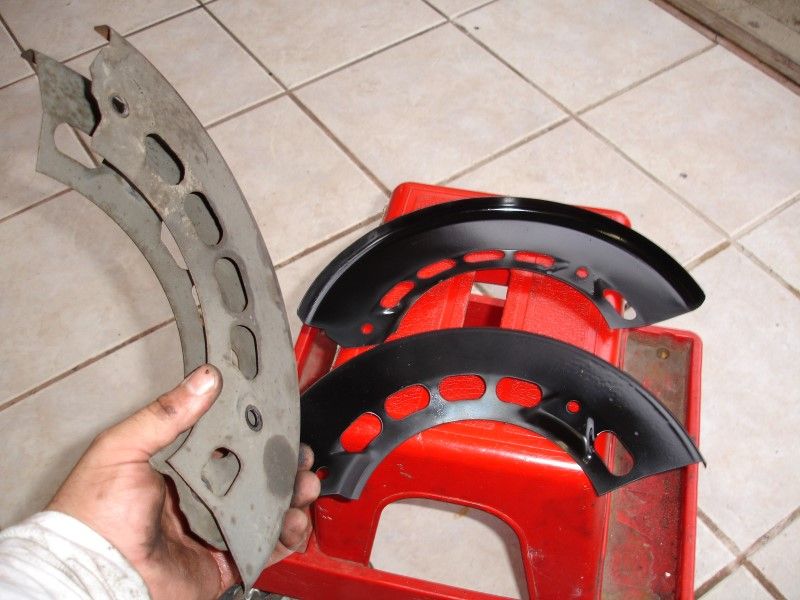
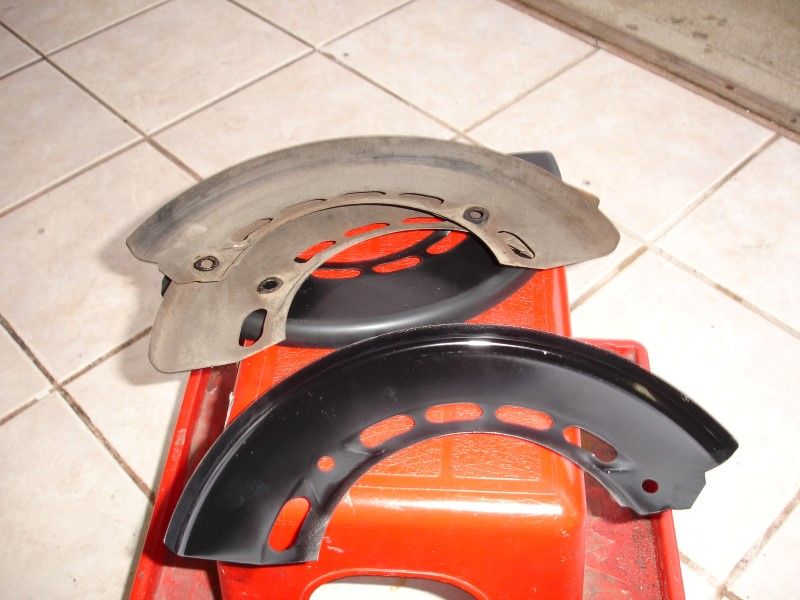
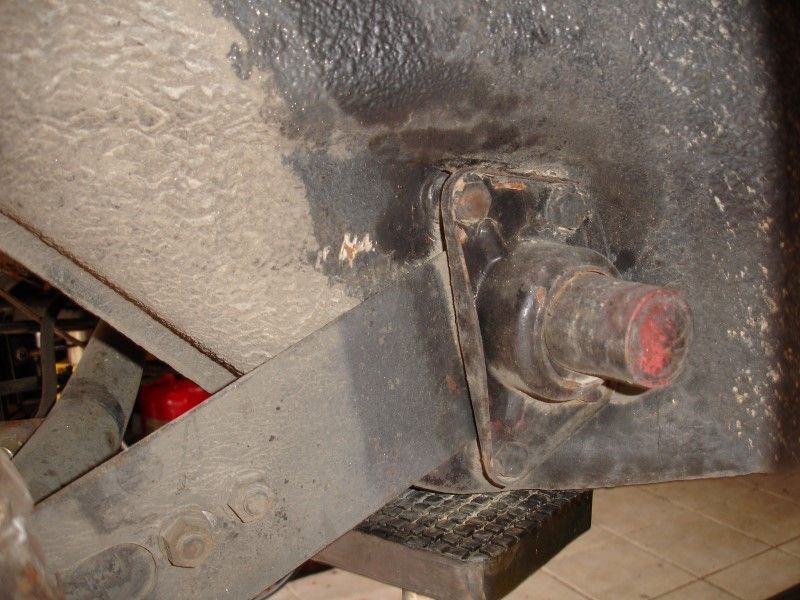
Removed the shields in the front as well...
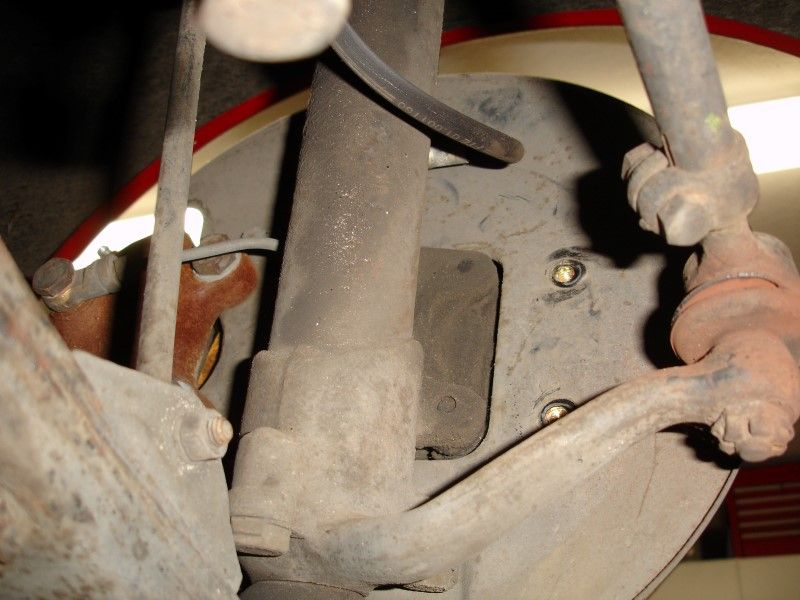
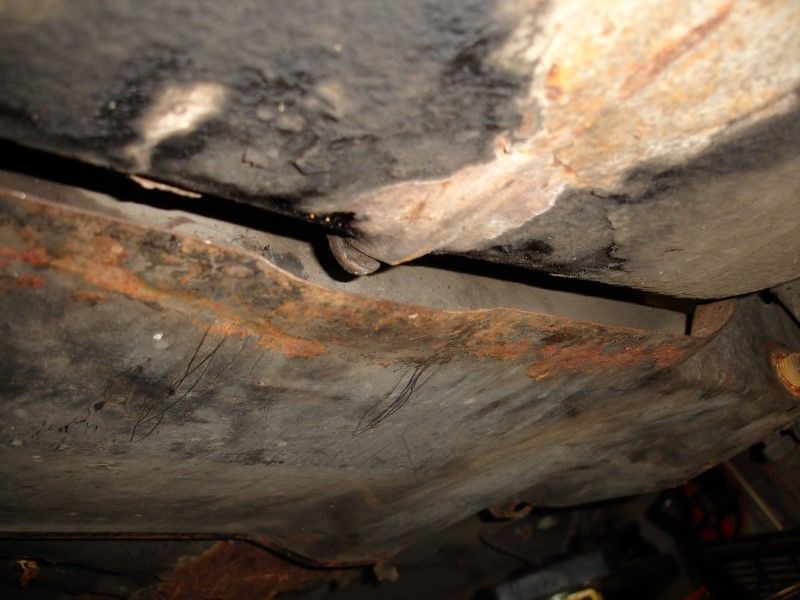
Removed the cover under the steering rack to check the condition of the brake lines and master cylinder. Another indication that it was replaced. The oil you see is from me spraying WD40 to brush off the surface rust. I will remove all that undercoating and prepared the surface for painting with POR-15.
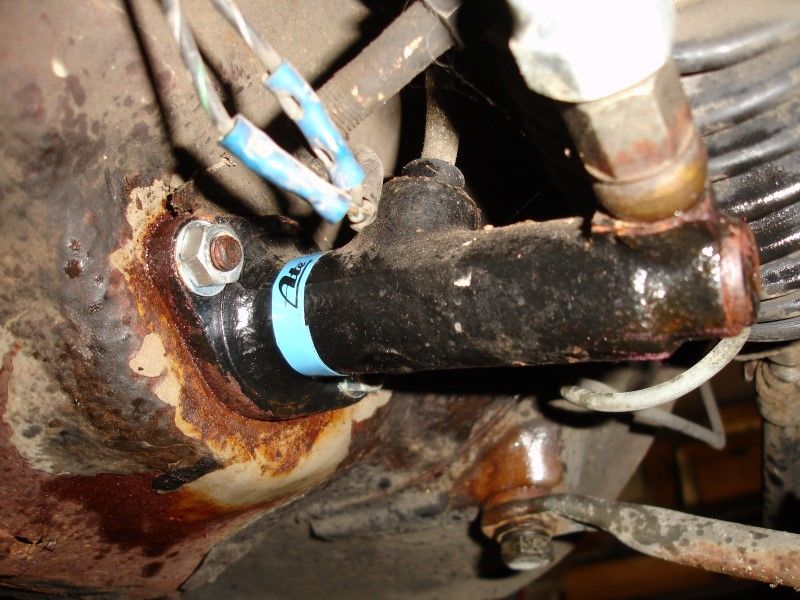
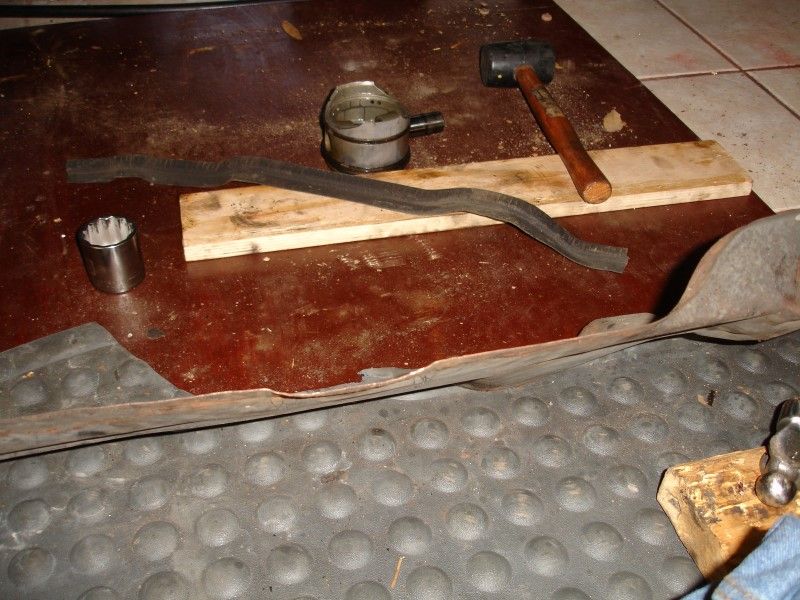
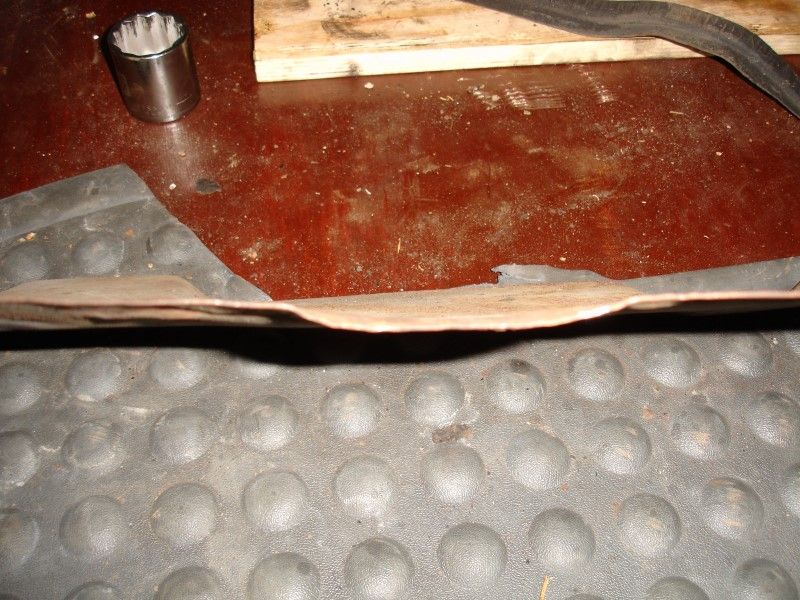
The cover under the steering rack was all bent... with the help of a hammer, a block of wood, and patience... I was able to bring it back in to shape. Now, I am not sure if that cover is straight all the way... I made that curved bend in the middle to clear better the drain plug from the tank... let me know if it is not like that originally and I will shape it back straight...
On to the pile of stuff to powder coat...
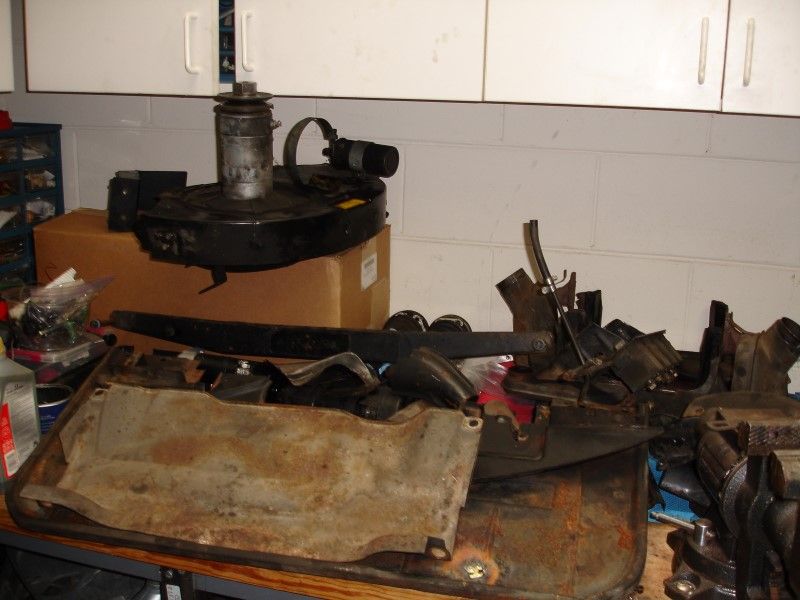
That is all for tonight... must think happy thoughts to avoid engine nightmares...
Started to work on the brakes. As I had mentioned, prior to the previous owner, the brakes were done. So my plan is just to refresh the looks... get rid of the rust, protect the calipers with some silver caliper paint, powder coat the sheet metal. Maybe replace bearings while I am at it...
Plan is to clean all the wheel well, and make it look nice. Refresh those bushings as well... got to look for some better bushings without going solid... those red polyurethane bushings... if anyone knows where they sell those, chime in please.
Removed the shields... got all the grime and paint off them...
Removed both rear calipers
Need to read in the manual on how to remove this so that I can get that part in the back...
I was going to try painting them... and actually did paint a set, but it was too cold for painting... no shine at all from the paint with the temperature like it is. I will just get them to the powder coater for stripping and powder coating.
Removed the shields in the front as well...
Removed the cover under the steering rack to check the condition of the brake lines and master cylinder. Another indication that it was replaced. The oil you see is from me spraying WD40 to brush off the surface rust. I will remove all that undercoating and prepared the surface for painting with POR-15.
The cover under the steering rack was all bent... with the help of a hammer, a block of wood, and patience... I was able to bring it back in to shape. Now, I am not sure if that cover is straight all the way... I made that curved bend in the middle to clear better the drain plug from the tank... let me know if it is not like that originally and I will shape it back straight...
On to the pile of stuff to powder coat...
That is all for tonight... must think happy thoughts to avoid engine nightmares...
01-26-2014, 10:45 PM
#58
Professor of Pending Projects
Rennlist Member
Rennlist Member
Thread Starter

If you get stuck on anything, just ask. There is a vast amount of knowledge in this forum and in the 912bbs.org forum. Many folks willing to help out. Ask me how I know, that is how I am doing this. Facing my fears of working on the internals of these engines. And with my luck, it looks like I have one that will allow me to learn a lot

")
 01-26-2014, 11:00 PM
#59
Do not be afraid to work in the car... the worst that can happen is that you do it right and enjoy the process
If you get stuck on anything, just ask. There is a vast amount of knowledge in this forum and in the 912bbs.org forum. Many folks willing to help out. Ask me how I know, that is how I am doing this. Facing my fears of working on the internals of these engines. And with my luck, it looks like I have one that will allow me to learn a lot
If you get stuck on anything, just ask. There is a vast amount of knowledge in this forum and in the 912bbs.org forum. Many folks willing to help out. Ask me how I know, that is how I am doing this. Facing my fears of working on the internals of these engines. And with my luck, it looks like I have one that will allow me to learn a lot
01-26-2014, 11:18 PM
#60
Lifetime Rennlist
Member
"...Plan is to clean all the wheel well, and make it look nice. Refresh those bushings as well... got to look for some better bushings without going solid... those red polyurethane bushings... if anyone knows where they sell those, chime in please..."
I believe I have a set of black poly bushings for the rear. They came with the car. I have been told it will take an act of congress to get them on - so I went with factory rubber. You want? I am not using.
I believe I have a set of black poly bushings for the rear. They came with the car. I have been told it will take an act of congress to get them on - so I went with factory rubber. You want? I am not using.

