My 1967 912 Build Thread

 01-19-2014, 06:15 PM
#32
Professor of Pending Projects
Rennlist Member
Rennlist Member
Thread Starter
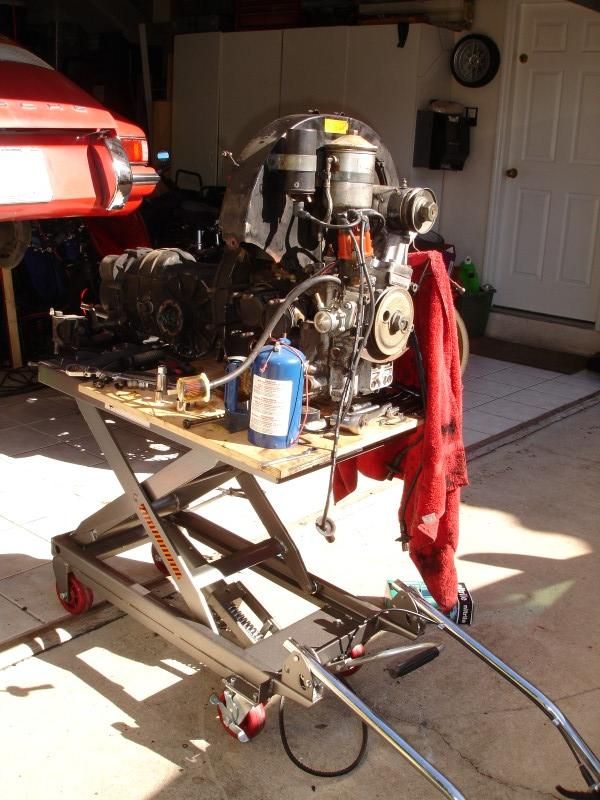
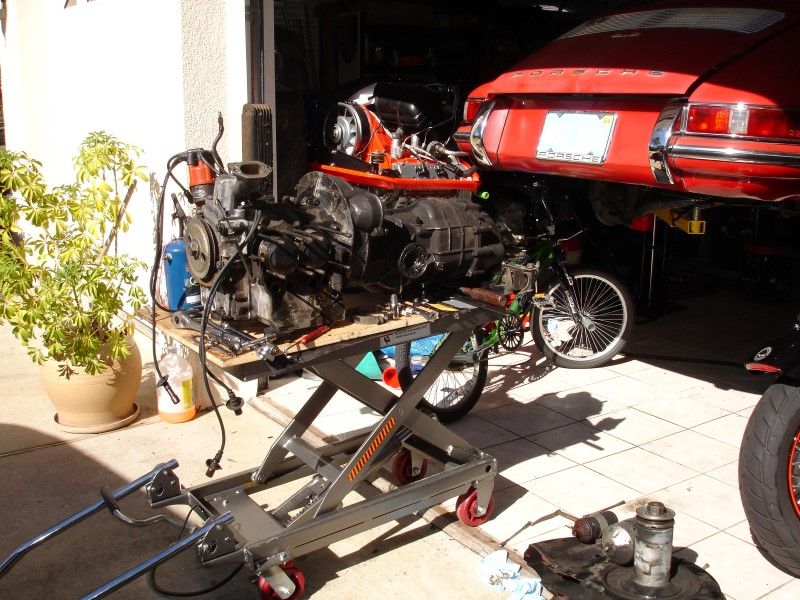
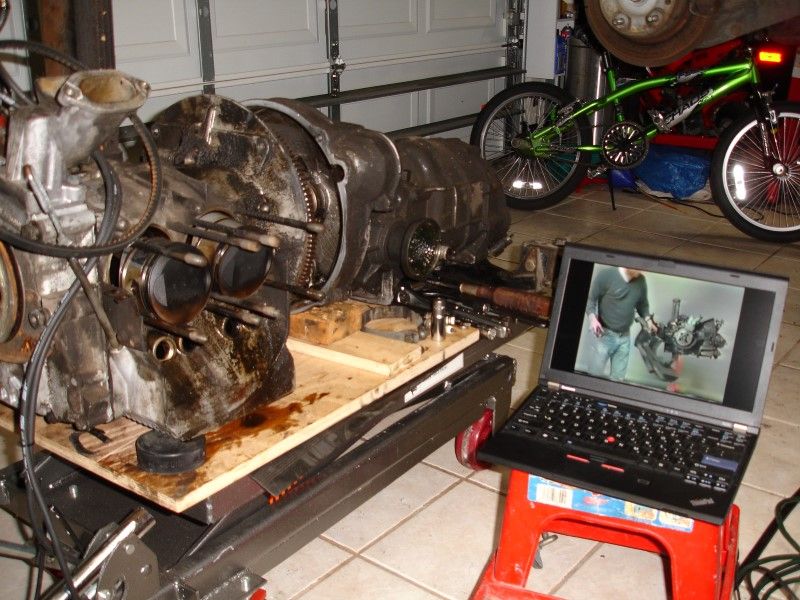
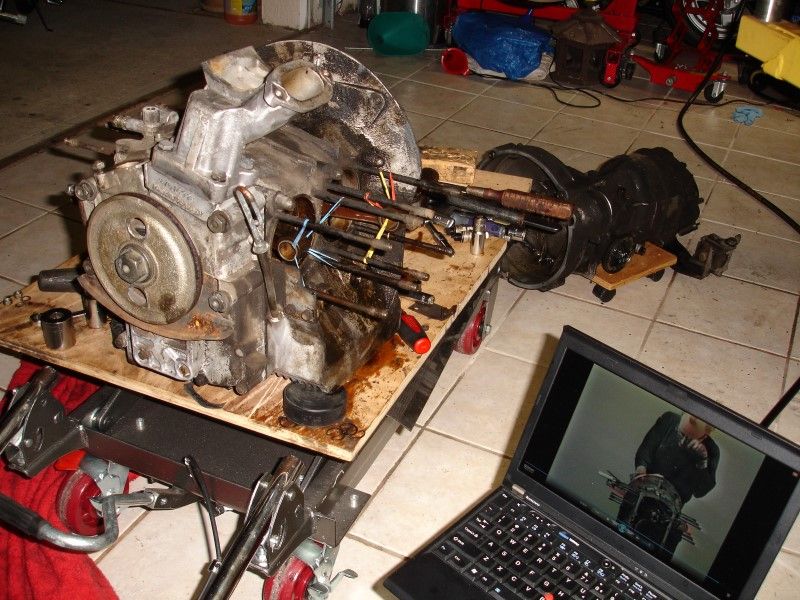
Continue of tear down... Wives have a weird sense of humor... I was working on the car, she grabs the camera and starts taking photos and talking to me...asking what I was doing... then she asks if that was the lift table that I bought to lower engines... I replied, "yes, and it works great!"... She then asks the stupidest question... "Why are you bending like that when it is a lift table? Why not raise it so that you are comfortable while working the engine?" I tell you... they come up with the most non-sense comments... 
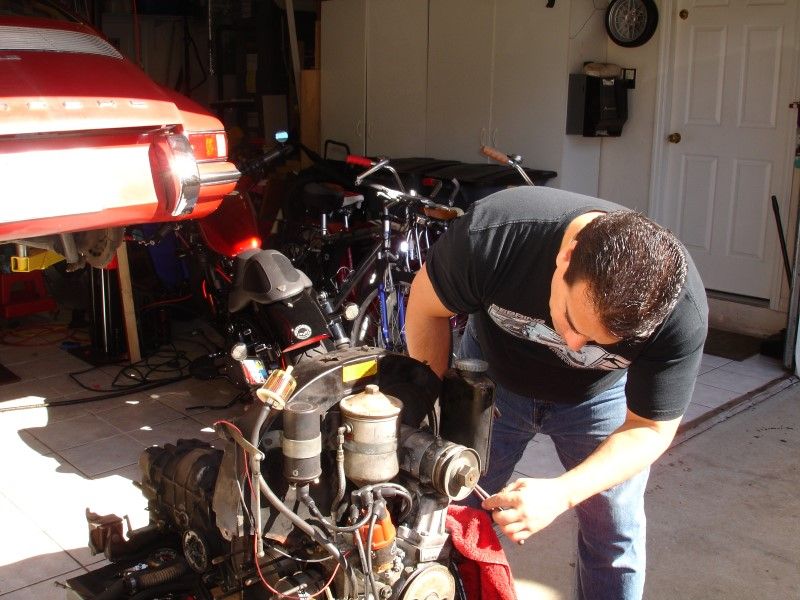
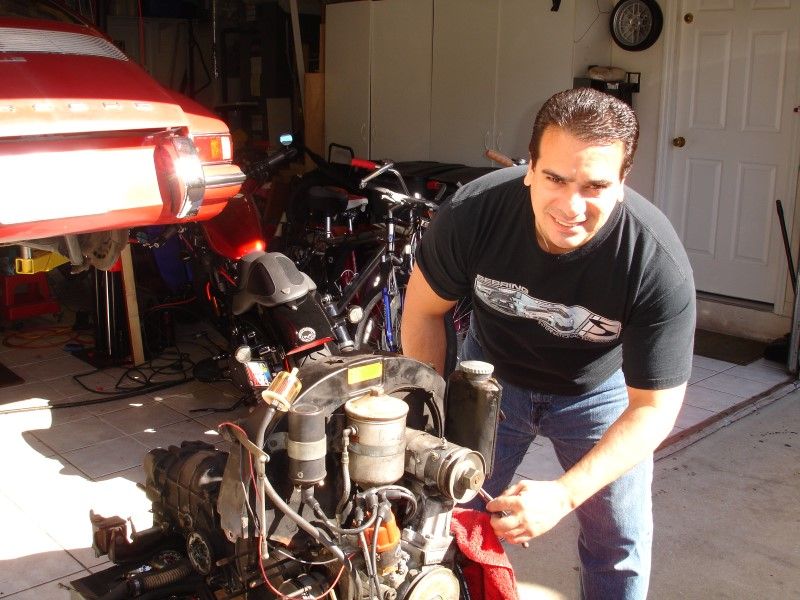
So I, of course, took the camera away from her and proceeded to continue working on the engine... women! what do they know!!??
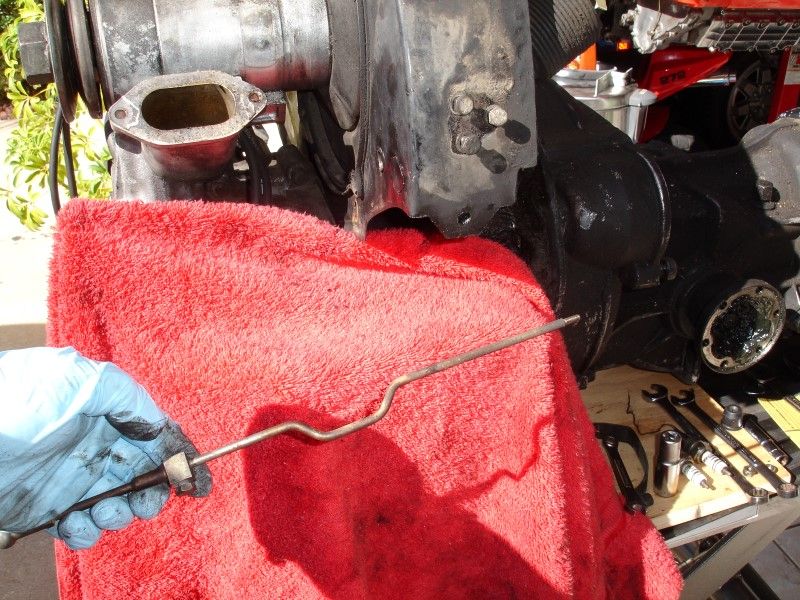
Removed the Oil breather canister. I will try to fix these two pin holes with a brass rod. Replacement canisters are in the neighborhood of 400.00 . If I can fix this one I will clean it well, treat the interior for any additional rust, and then paint it.
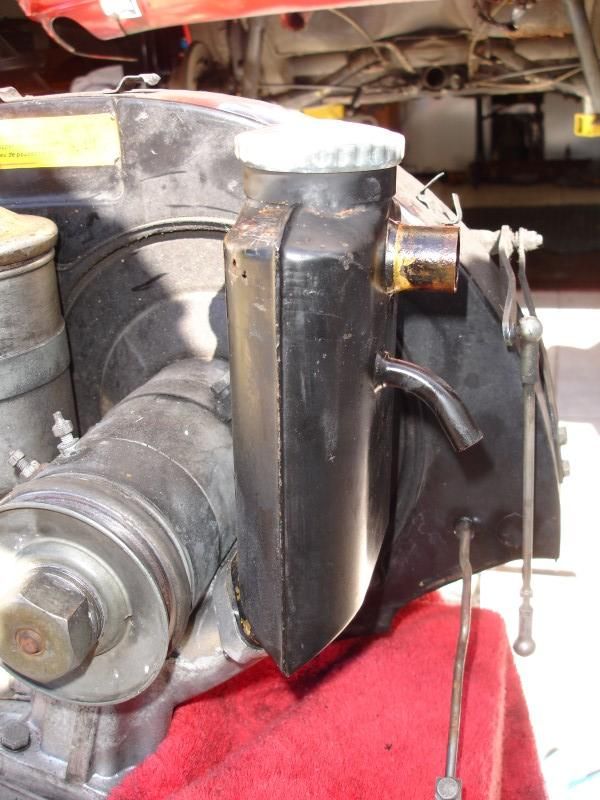
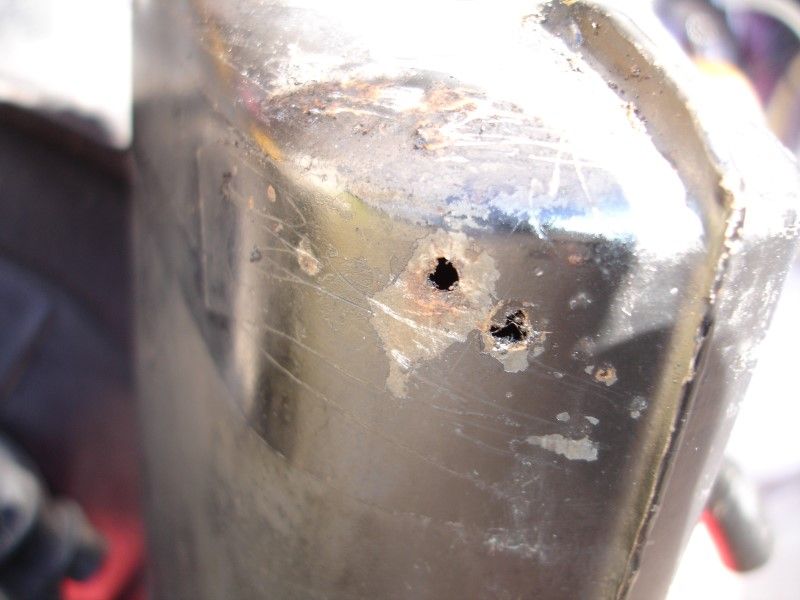
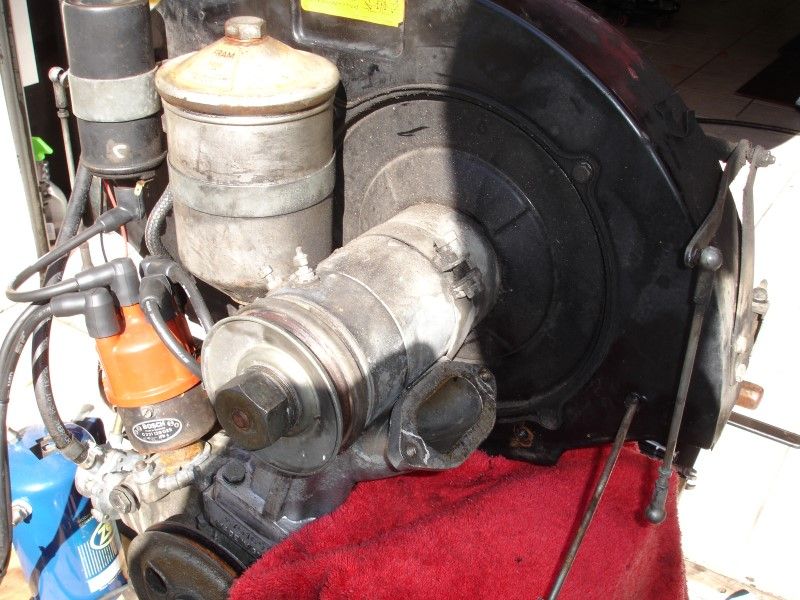
Table is filling with parts... better get the tools off the table...
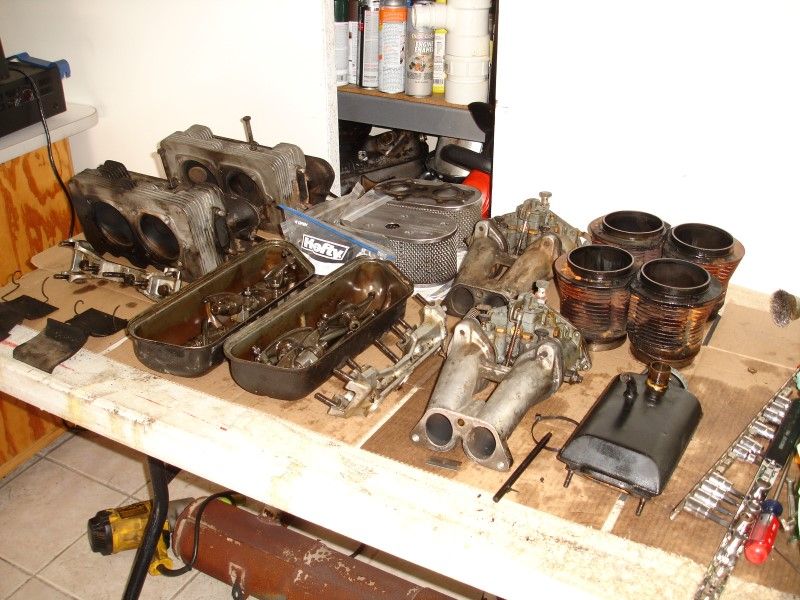
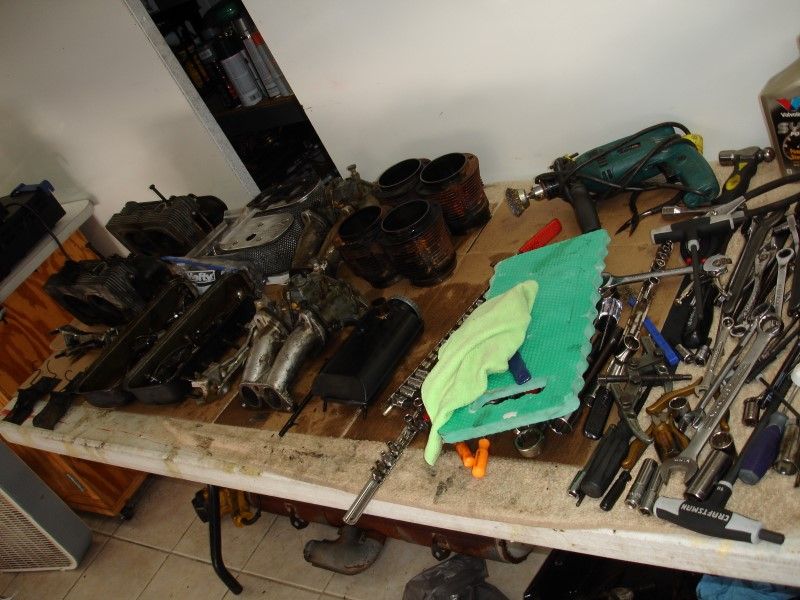
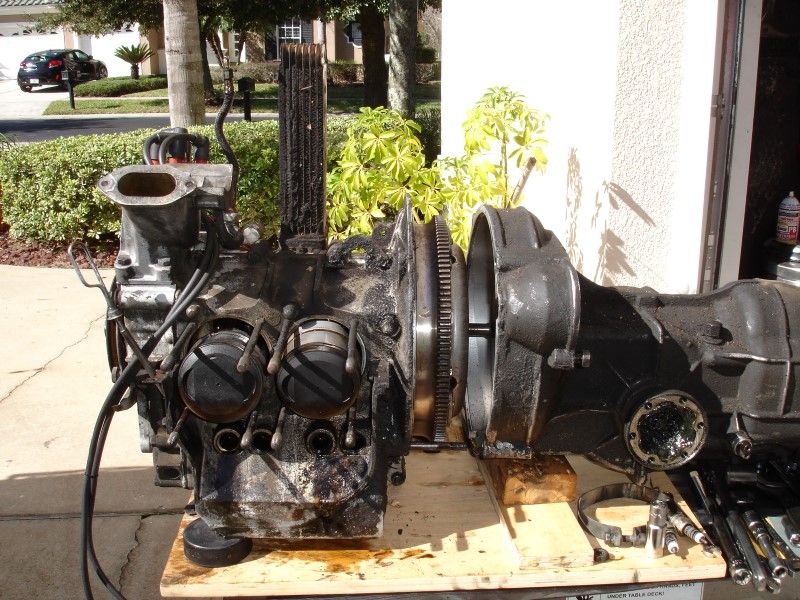
Getting everything off to be able to get the blower housing off the engine...
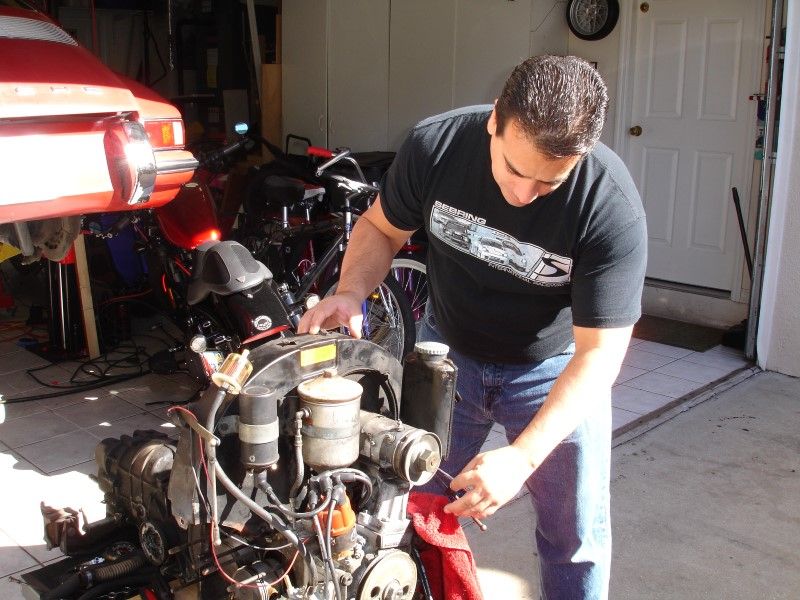
When the wife left, I then proceeded to lift the engine... my pride intact!!
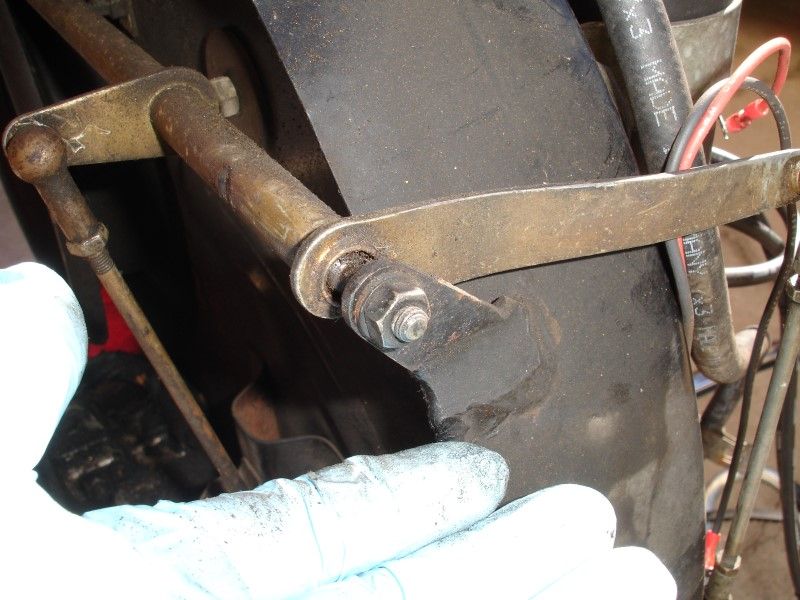
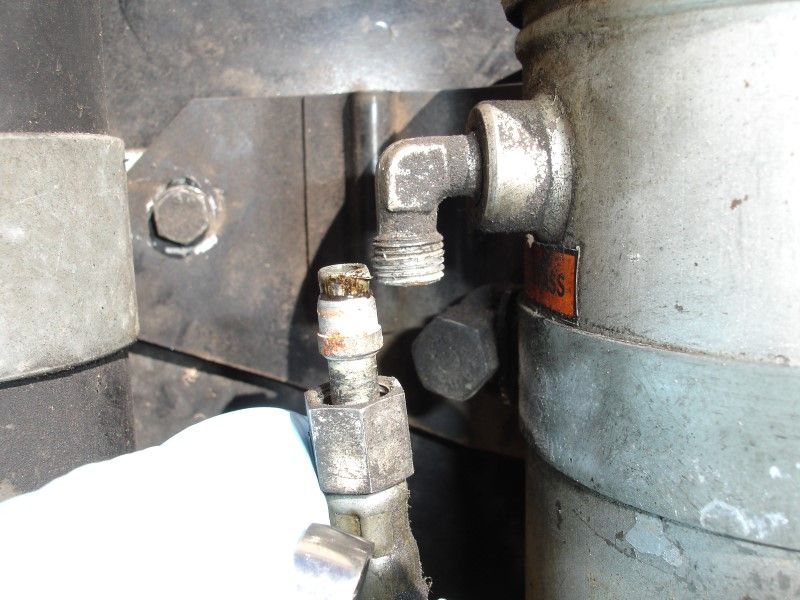
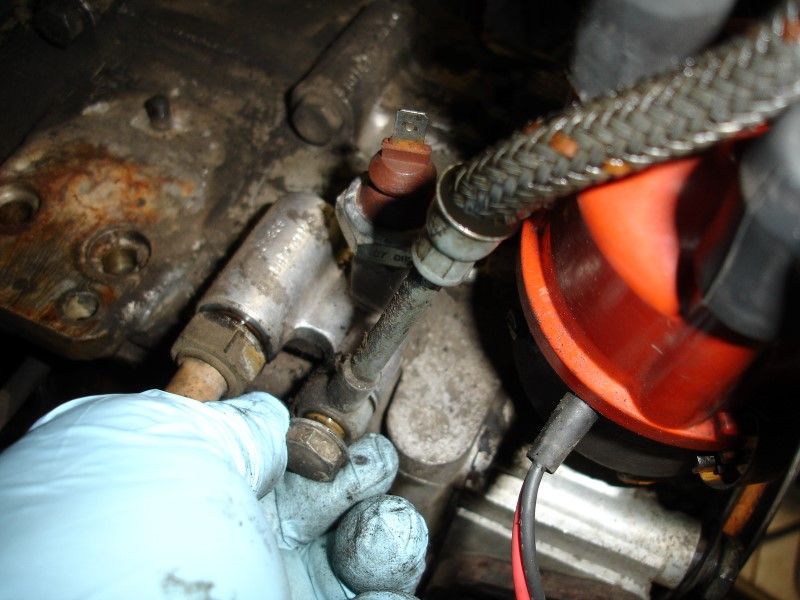
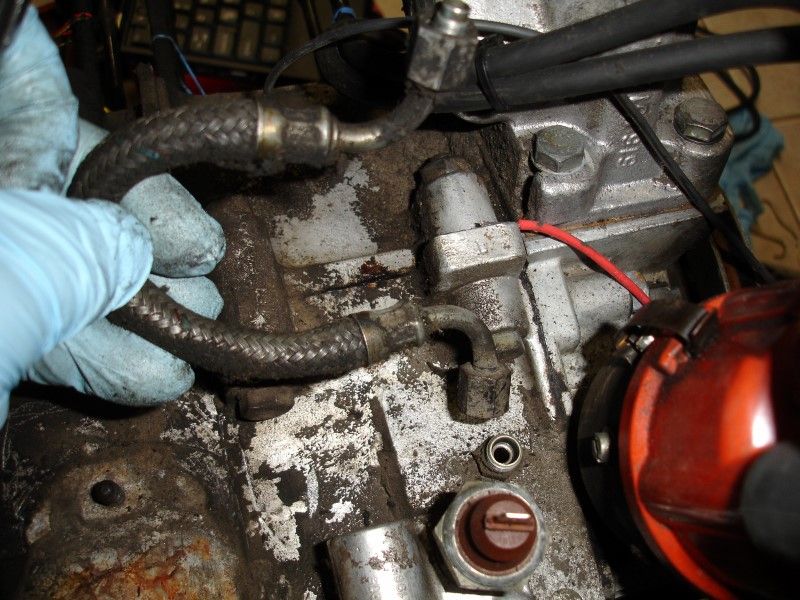
Disconnecting the oil filter canister, top and bottom lines...

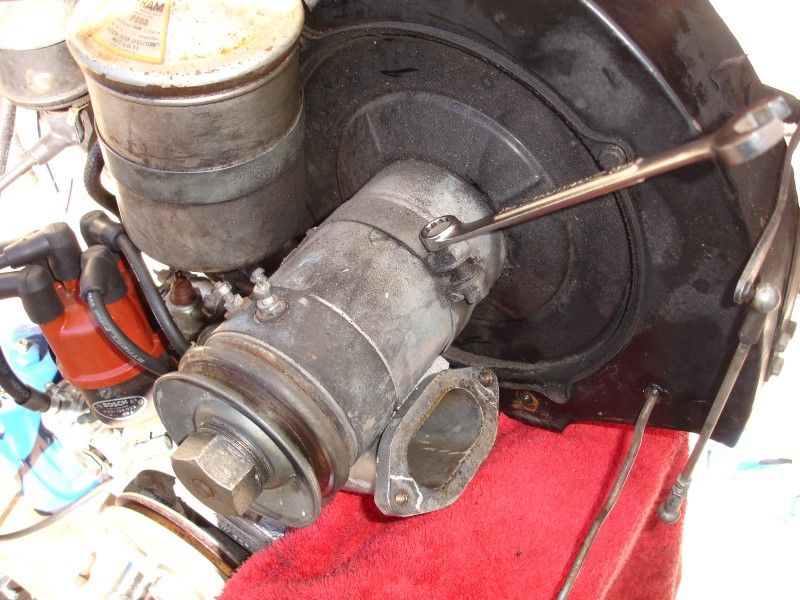
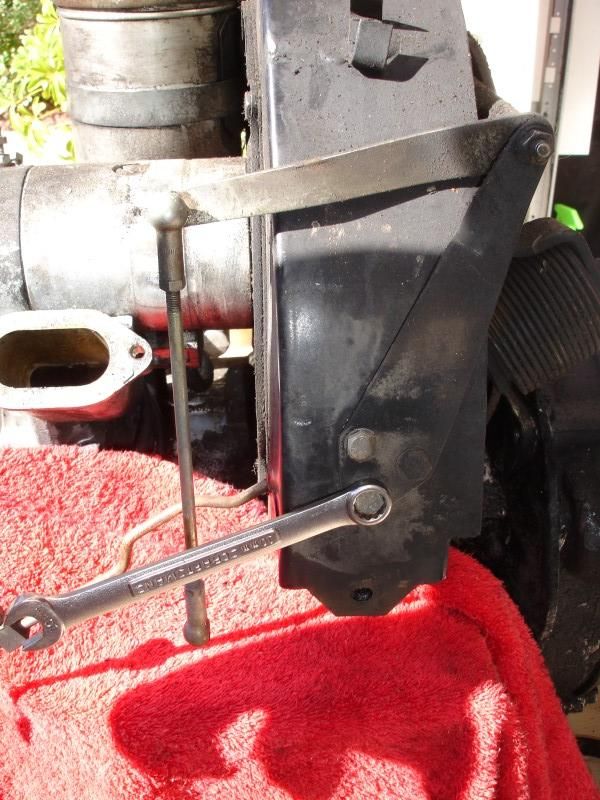
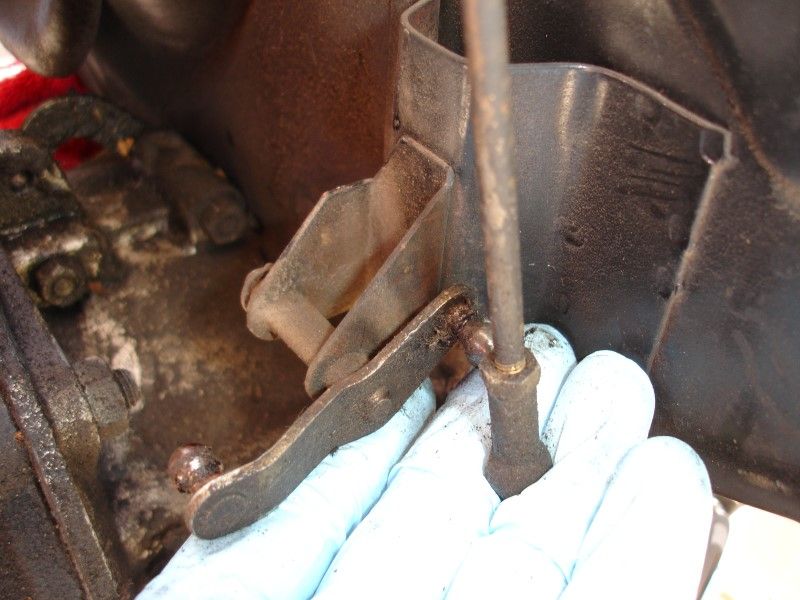
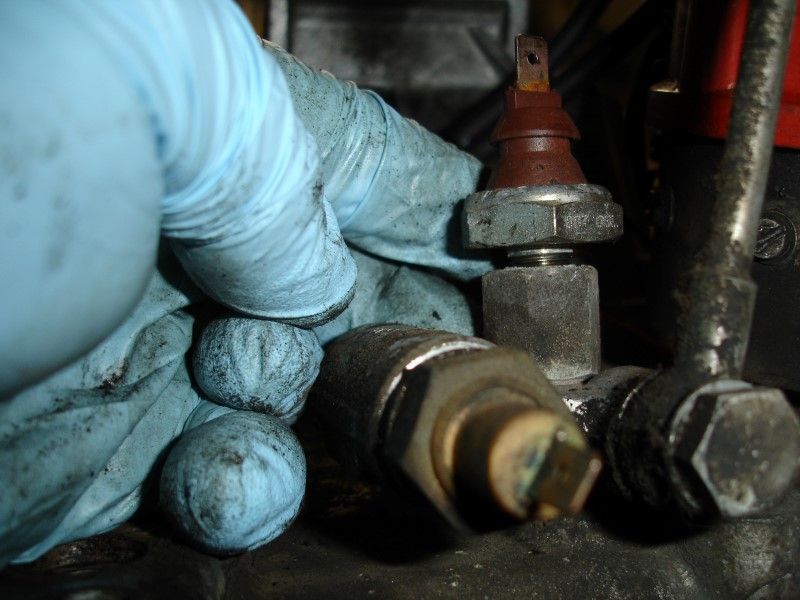
Disconnecting the rod that goes into the thermostat in the back...lucky that it turned easy.

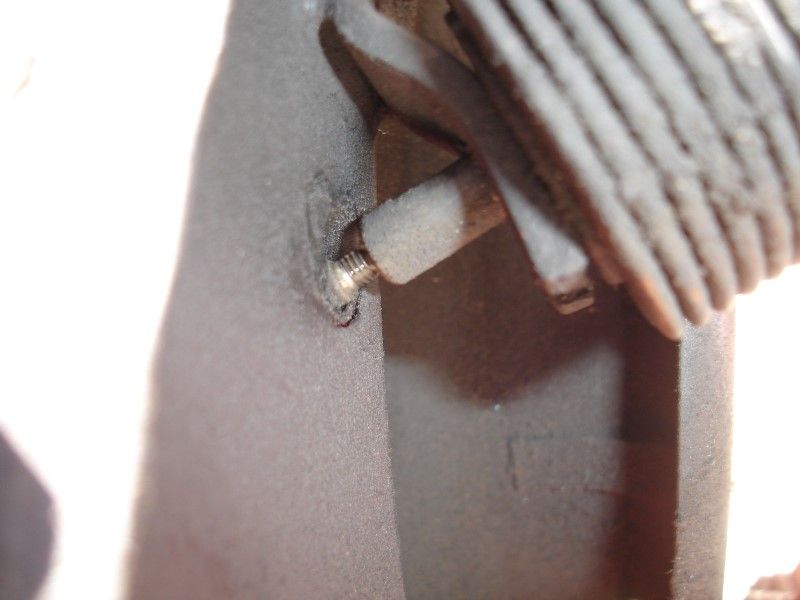
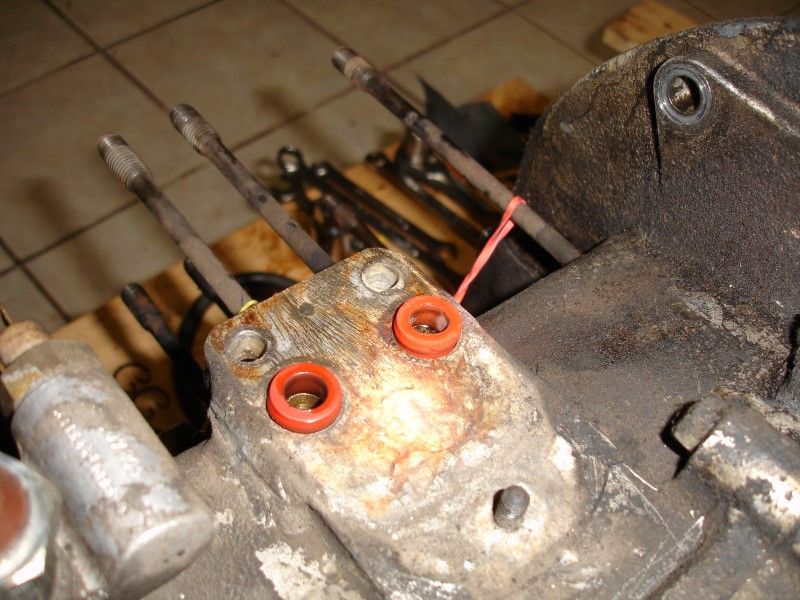
Looks nasty...
Much better now...
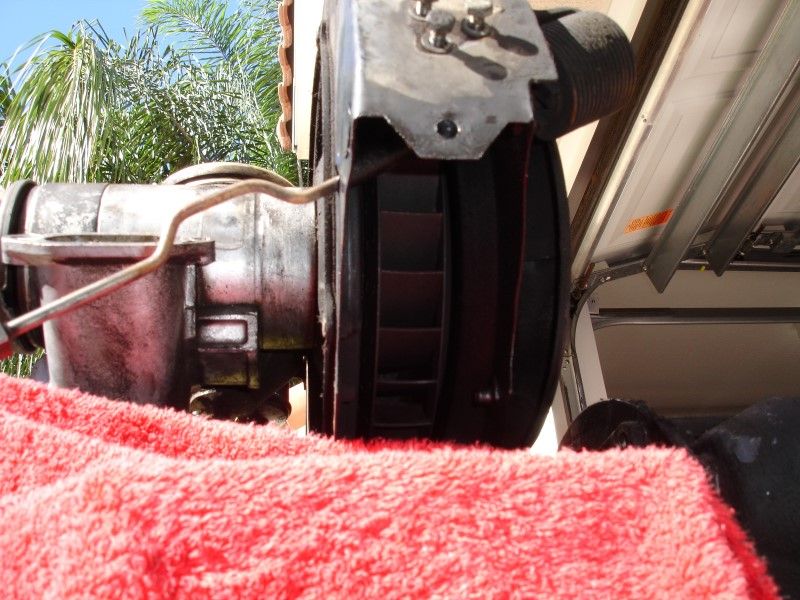
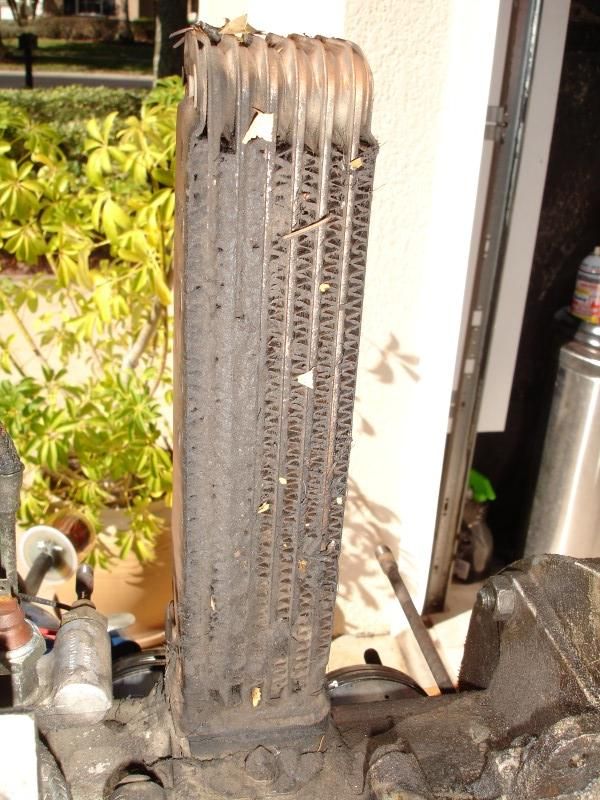
Blower housing with generator off the engine...

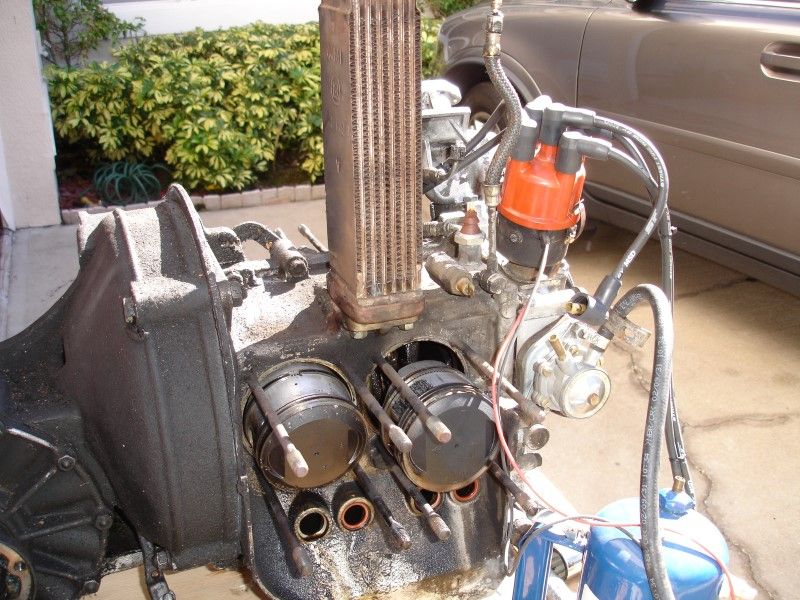
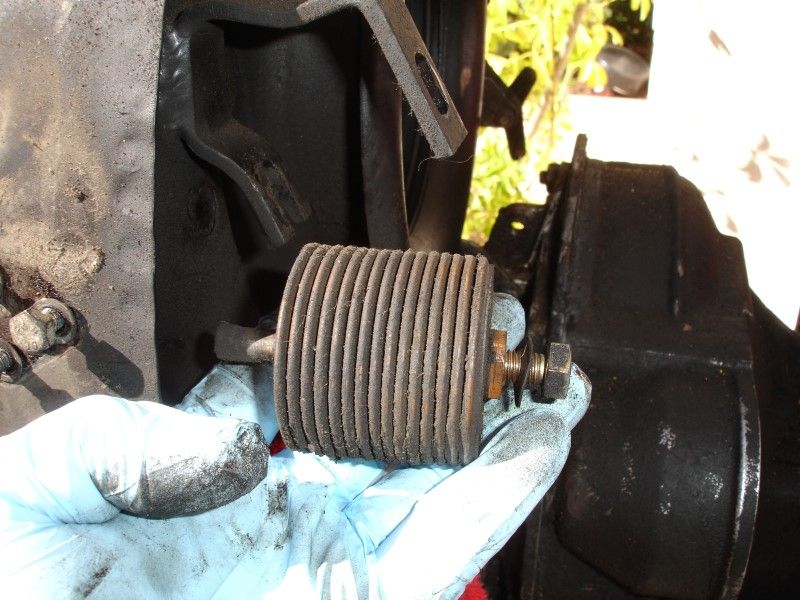
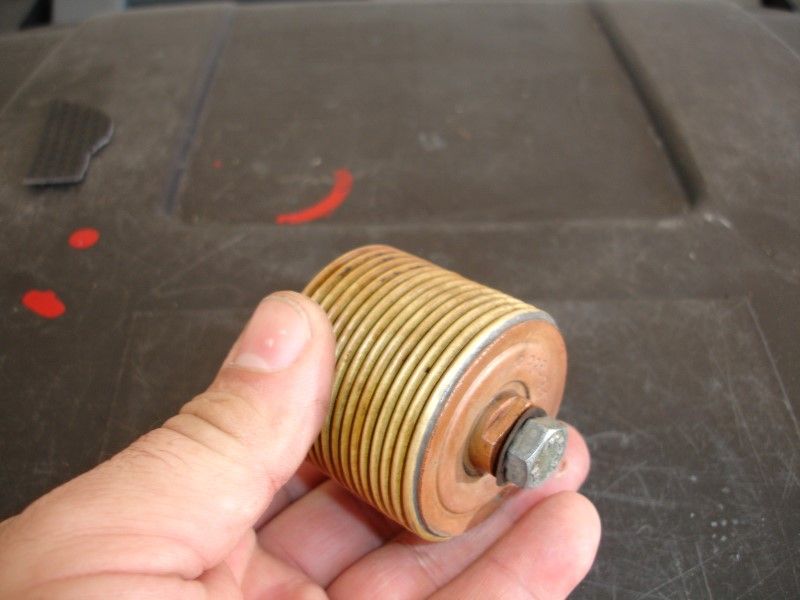
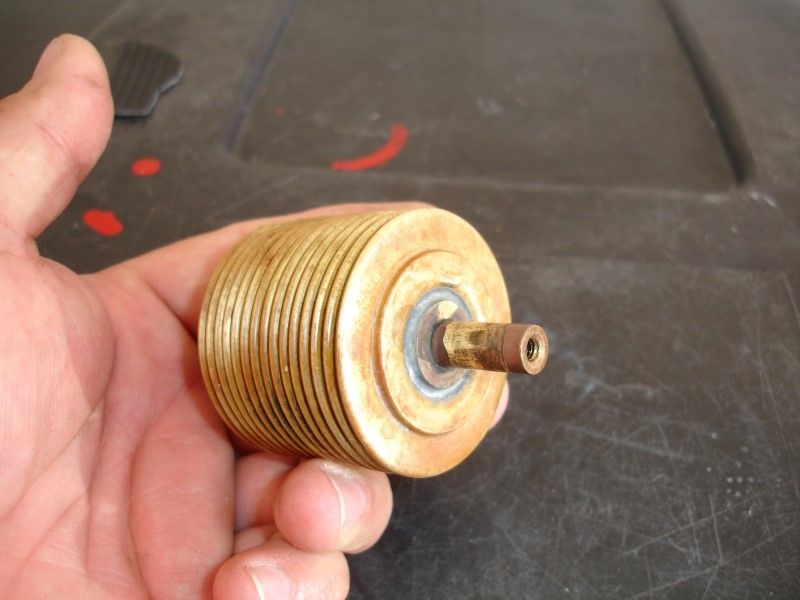
I question the efficiency of this oil cooler... a good cleaning is in order...
Fuel pump removed
At this point I should get the engine on a stand to have better access at the rest of the stuff... let me start by separating the engine from the transmission. Just a support under the front of the transmission... get the bolts out... slide slide slide and it is off...
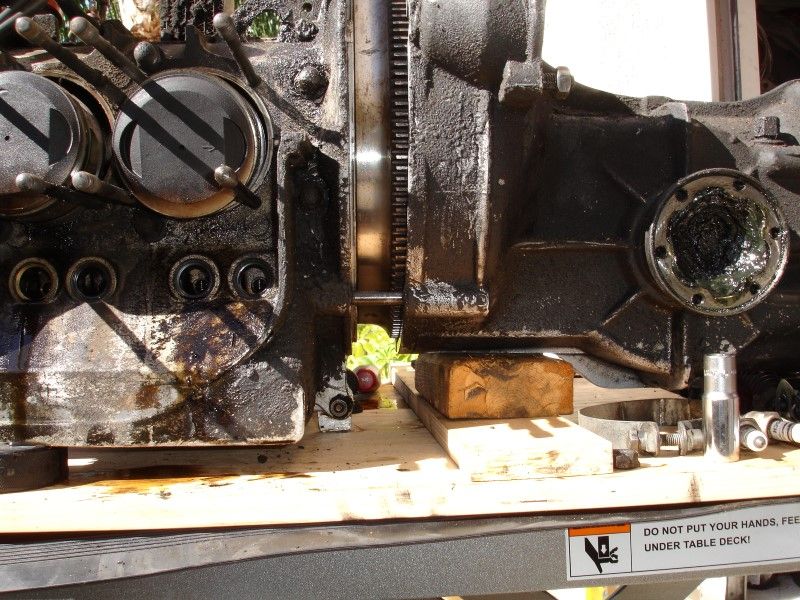
Everything looks good in there...

So I, of course, took the camera away from her and proceeded to continue working on the engine... women! what do they know!!??
Removed the Oil breather canister. I will try to fix these two pin holes with a brass rod. Replacement canisters are in the neighborhood of 400.00 . If I can fix this one I will clean it well, treat the interior for any additional rust, and then paint it.
Table is filling with parts... better get the tools off the table...
Getting everything off to be able to get the blower housing off the engine...
When the wife left, I then proceeded to lift the engine... my pride intact!!
Disconnecting the oil filter canister, top and bottom lines...
Disconnecting the rod that goes into the thermostat in the back...lucky that it turned easy.
Looks nasty...
Much better now...
Blower housing with generator off the engine...
I question the efficiency of this oil cooler... a good cleaning is in order...
Fuel pump removed
At this point I should get the engine on a stand to have better access at the rest of the stuff... let me start by separating the engine from the transmission. Just a support under the front of the transmission... get the bolts out... slide slide slide and it is off...
Everything looks good in there...
Last edited by Wachuko; 01-19-2014 at 06:48 PM.
01-19-2014, 09:32 PM
#33
Professor of Pending Projects
Rennlist Member
Rennlist Member
Thread Starter
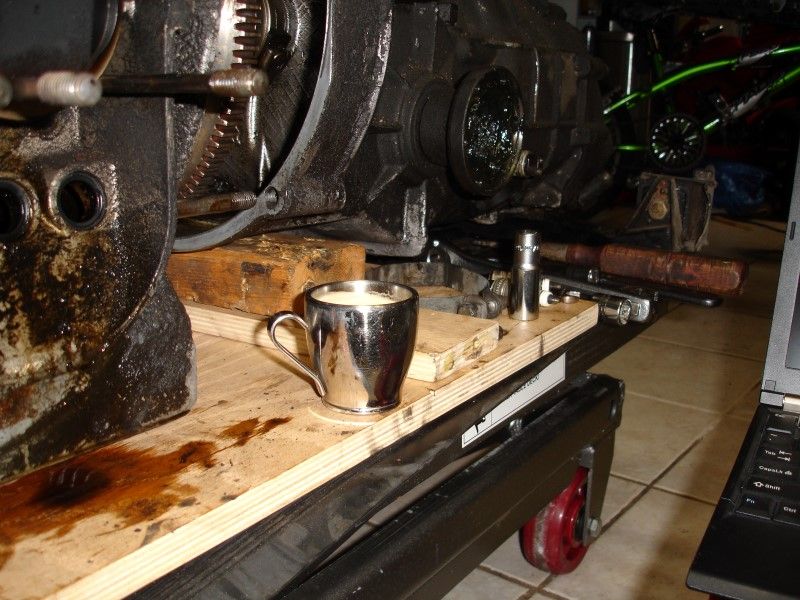
After a coffee break... let's continue
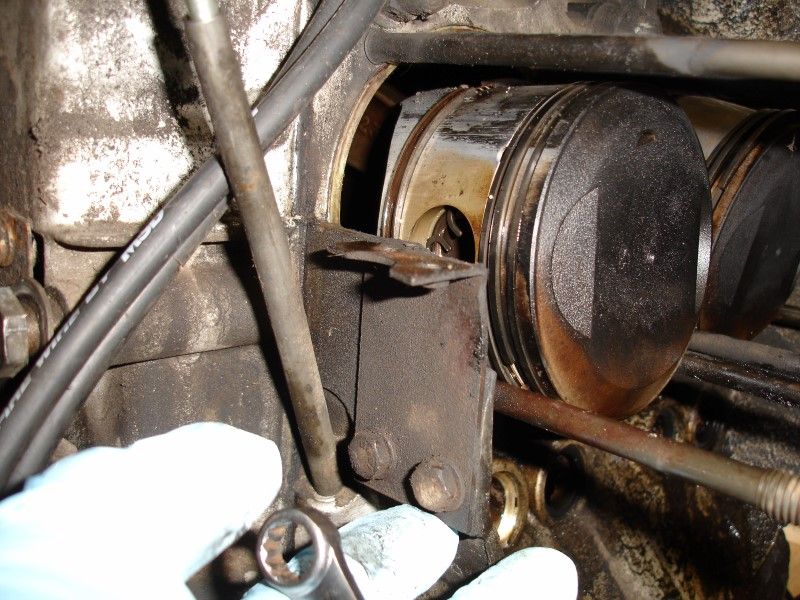
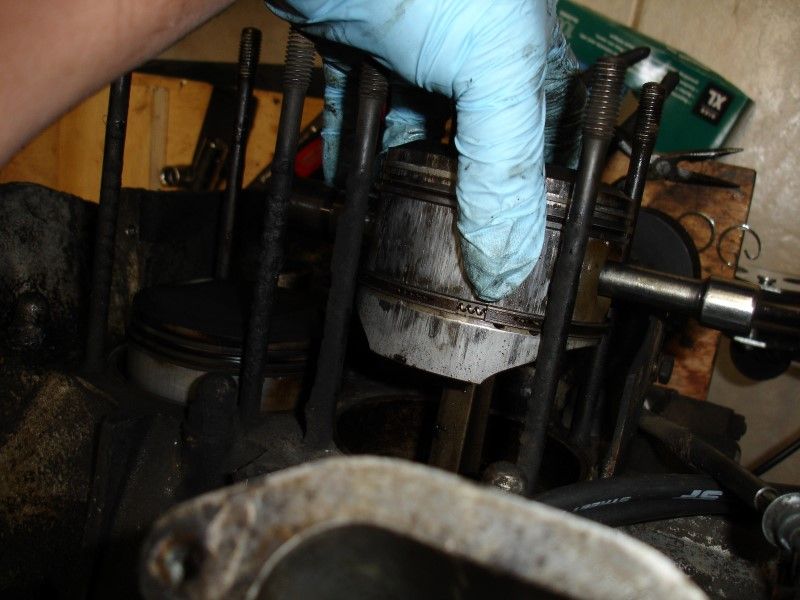
Removing this bracket for better access to the side of the piston... later to find out that the piston comes out enough that it did not matter if that bracket was there or not...
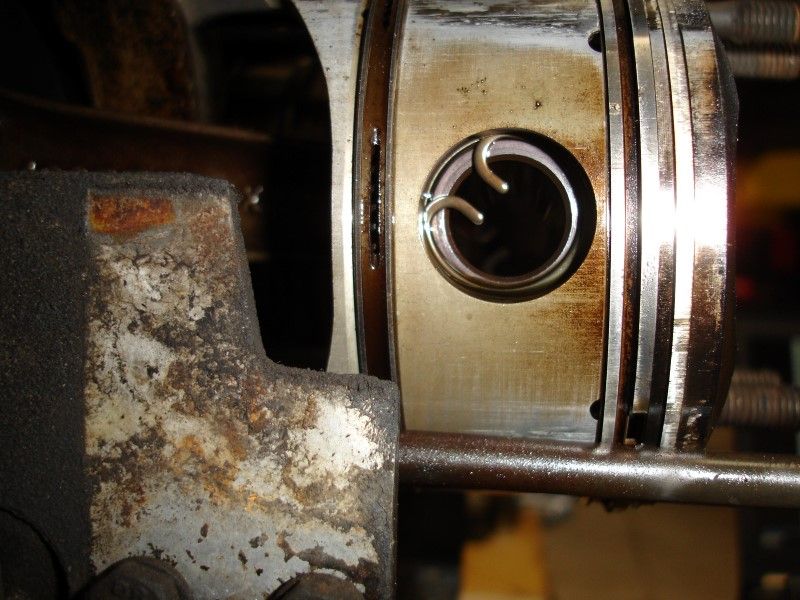
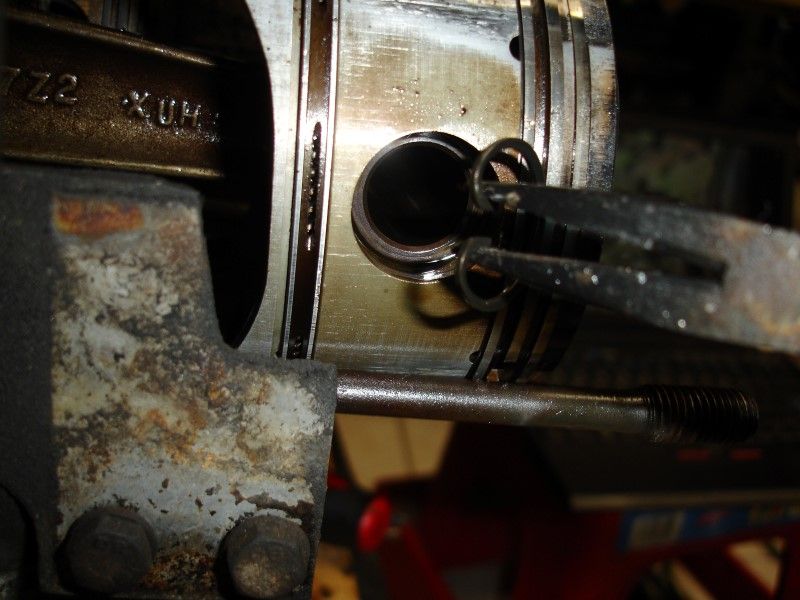
Used long nose pliers to remove these clips

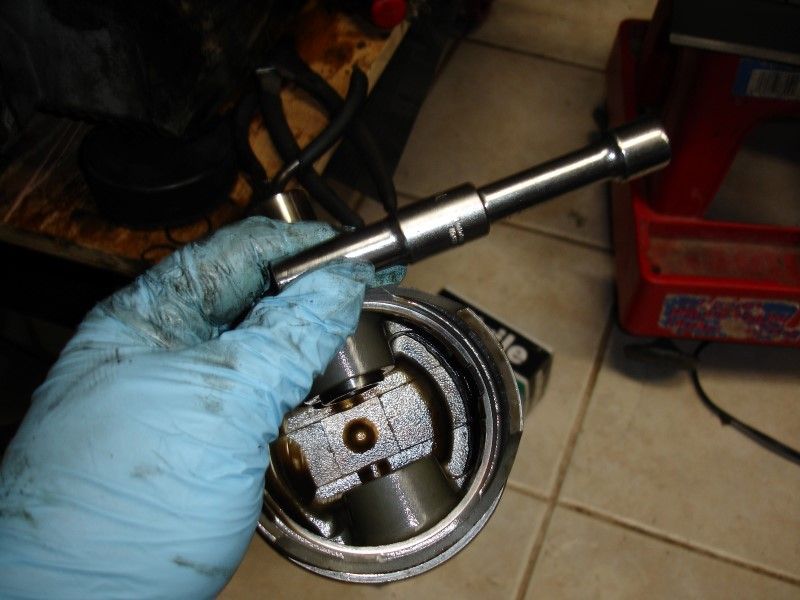
This part was not easy... I was afraid of damaging something as I was hitting that extension with the socket on it...
Always wanted to do this with rubber bands
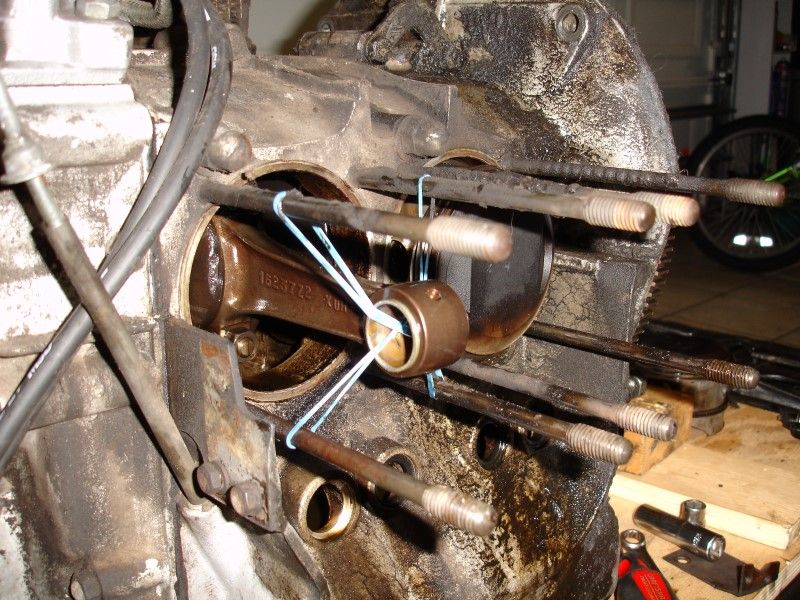
Rinse and repeat three more times...
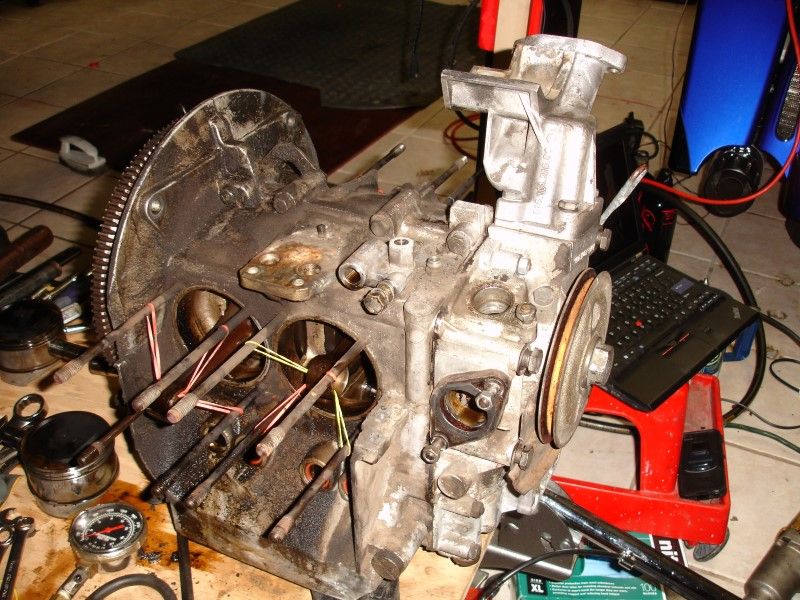
All pistons are now out.
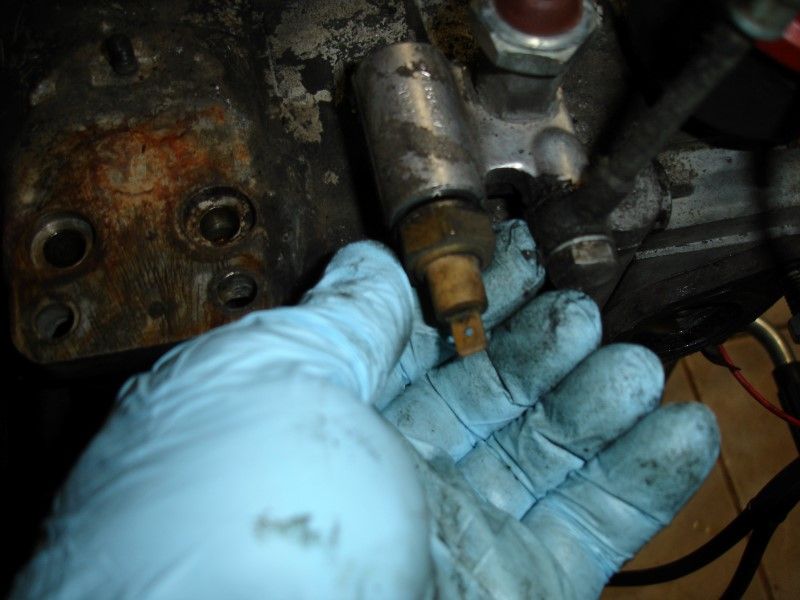
Removed the oil cooler, oil filter lines, sensors...
That is as far as I can take it tonight... missing an additional yoke for the engine stand and missing the lock for the flywheel so that I can undo the front pulley...
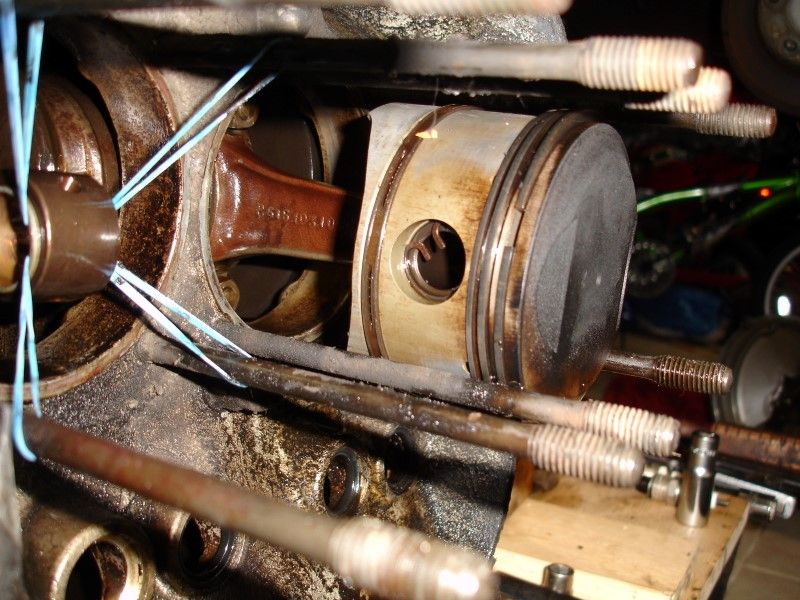
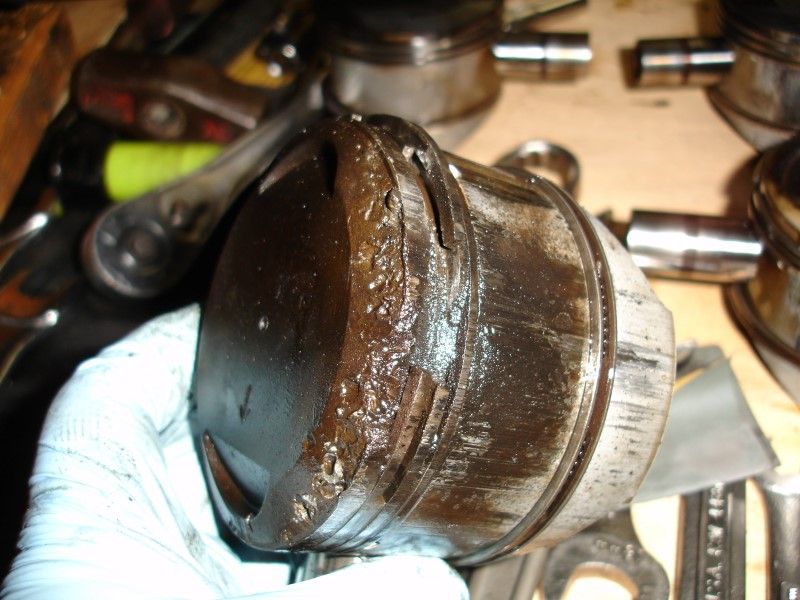
A few more photos of the pistons... 3 are completely toast...
The really, really bad one...
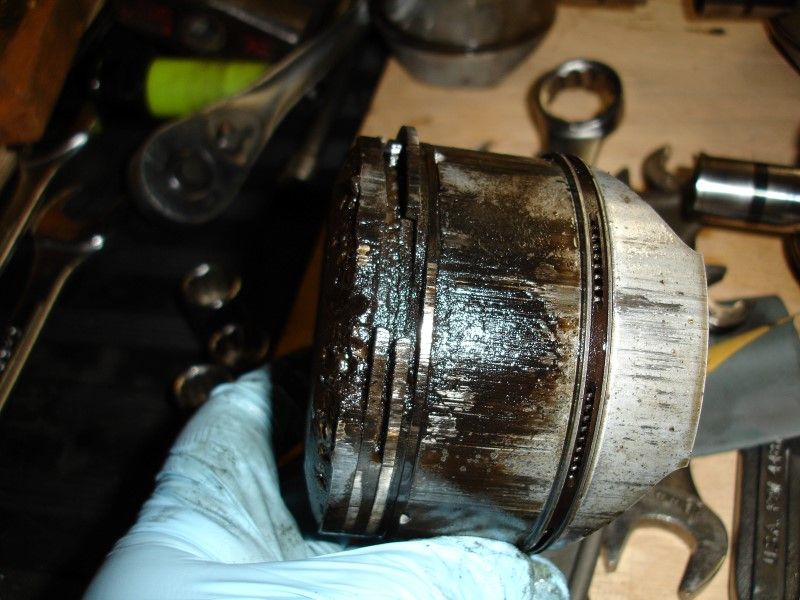
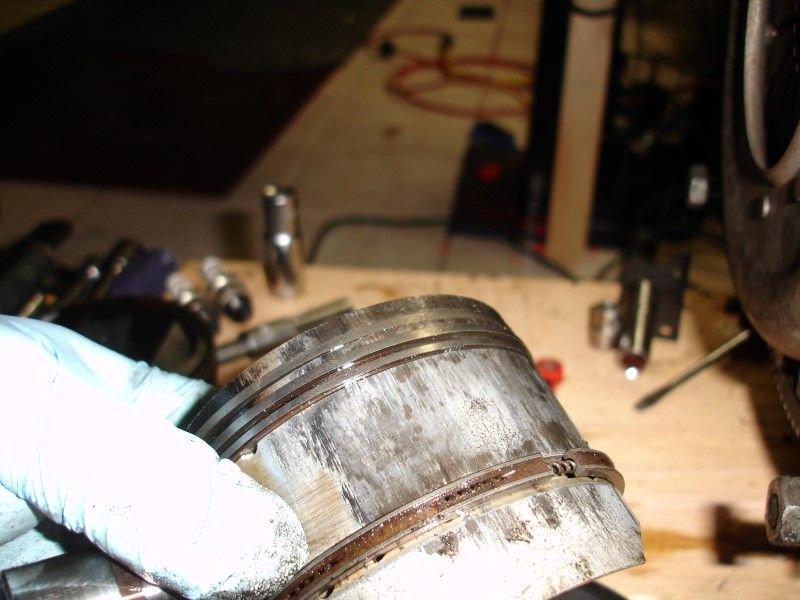
This one had the rings almost welded in place...
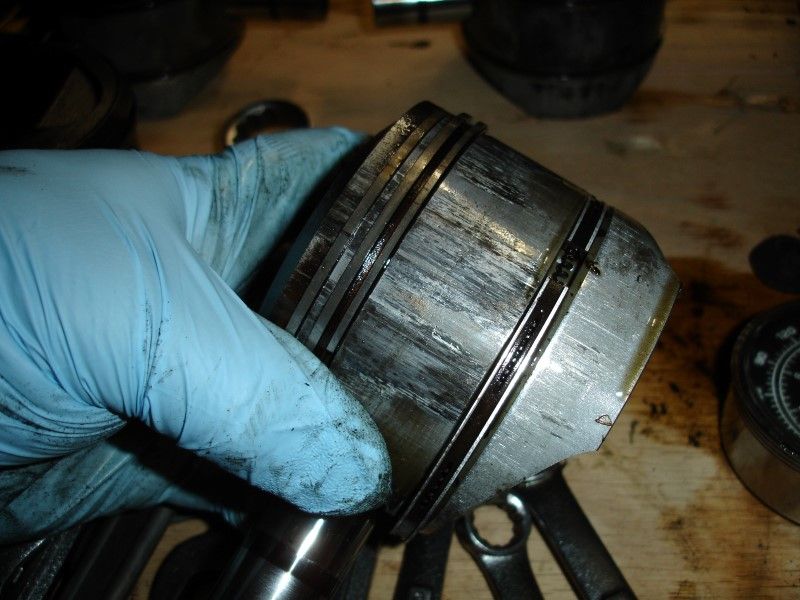
And the third one, just look at the side of that piston...
Once I split the case I can check the condition of the rods and everything else inside... Good night!
Removing this bracket for better access to the side of the piston... later to find out that the piston comes out enough that it did not matter if that bracket was there or not...
Used long nose pliers to remove these clips
This part was not easy... I was afraid of damaging something as I was hitting that extension with the socket on it...
Always wanted to do this with rubber bands
Rinse and repeat three more times...
All pistons are now out.
Removed the oil cooler, oil filter lines, sensors...
That is as far as I can take it tonight... missing an additional yoke for the engine stand and missing the lock for the flywheel so that I can undo the front pulley...
A few more photos of the pistons... 3 are completely toast...
The really, really bad one...
This one had the rings almost welded in place...
And the third one, just look at the side of that piston...
Once I split the case I can check the condition of the rods and everything else inside... Good night!
The following users liked this post:
Superdave312 (07-13-2020)

 I'm amazed how well those air cleaners turned out.
01-20-2014, 10:55 PM
I'm amazed how well those air cleaners turned out.
01-20-2014, 10:55 PM
#35
Professor of Pending Projects
Rennlist Member
Rennlist Member
Thread Starter
Some additional work done today... but came to a stop due to missing a 36mm socket...
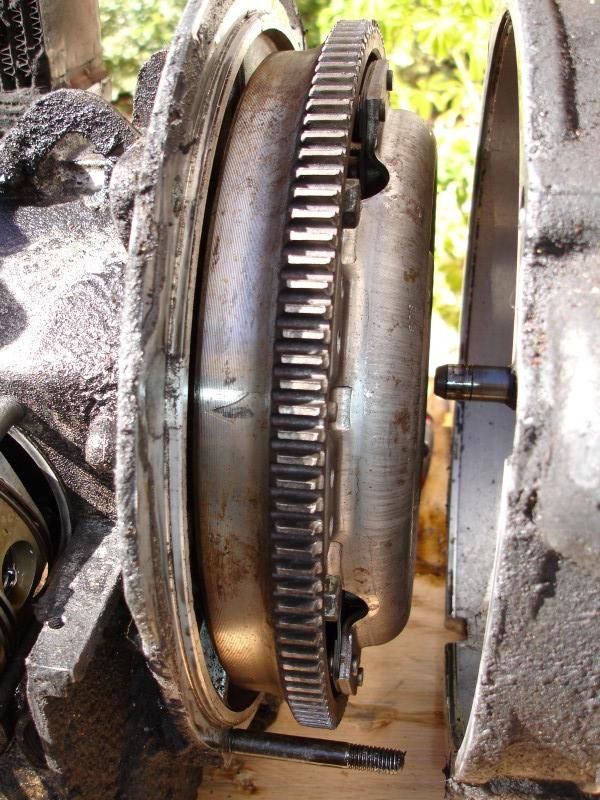
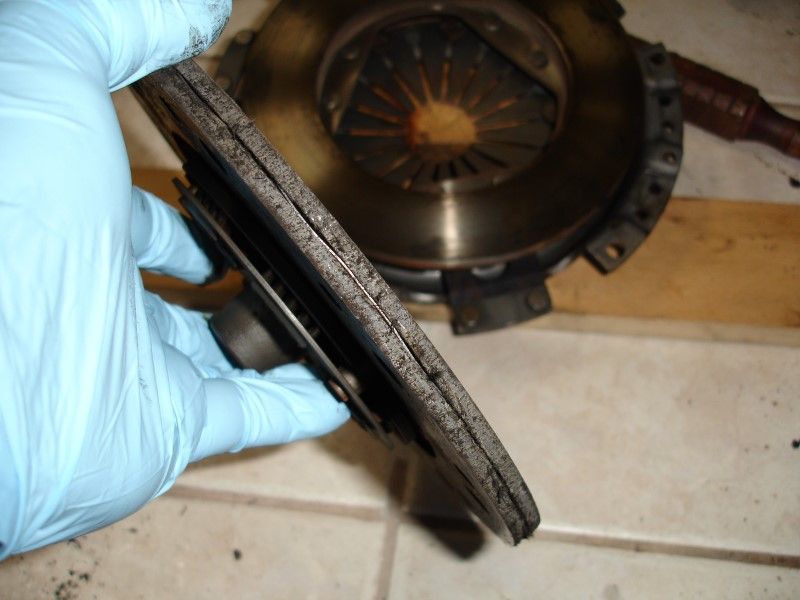
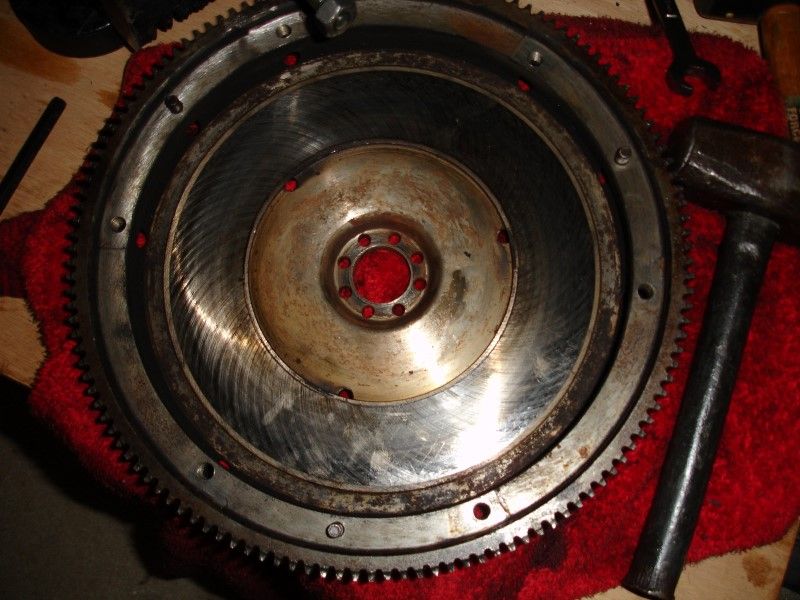
Removed pressure plate and clutch disk... both looked like they were replaced not too long ago...

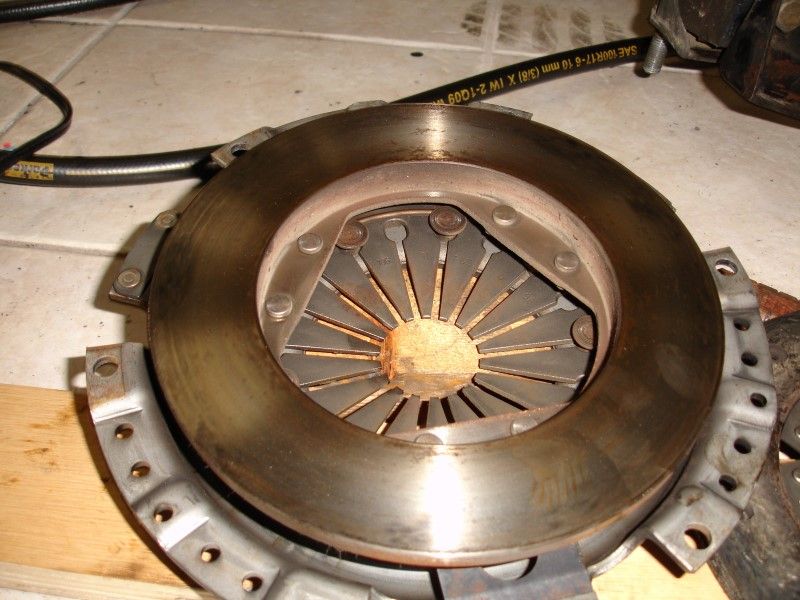
Flywheel also looks like it was resurfaced... forgot to take a photo of that one... will do so tomorrow and update the thread.
I then got the front nut on the pulley removed... This required getting the engine on the stand (I need to order the correct yoke for my stand, had to improvise with what I had...
). Using an assistant that would not let me take a photo of her, lol, and the use of a breaker bar with a long pipe....
Was very careful when removing the pulley... I saw in the video and read that these could break easy...
and it is out...
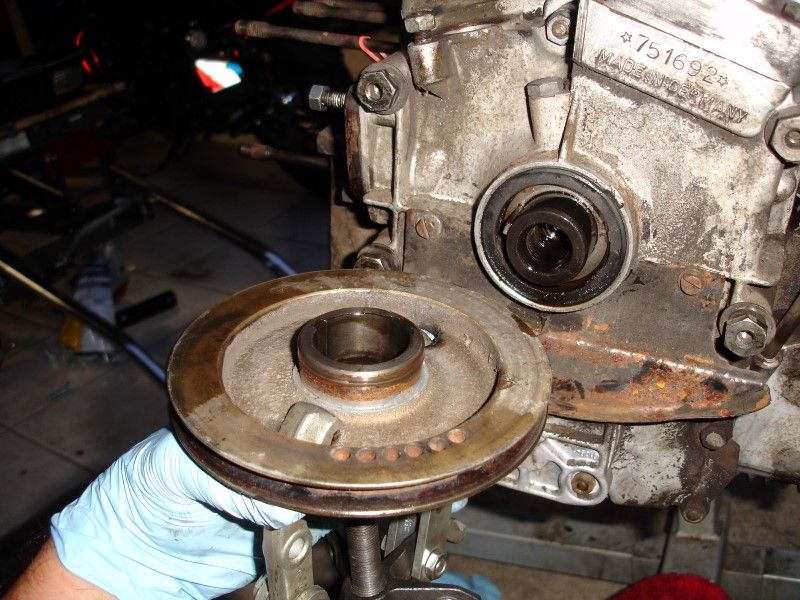
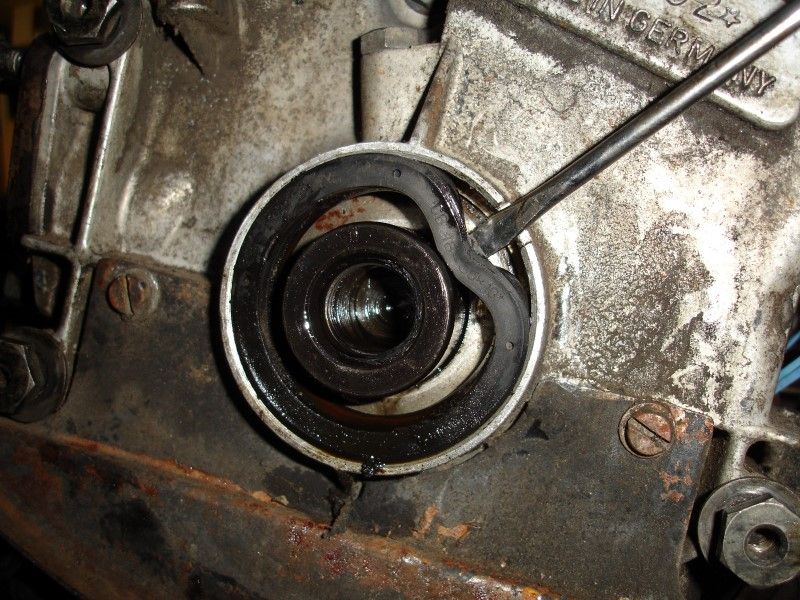
Removed seal and woodruff key
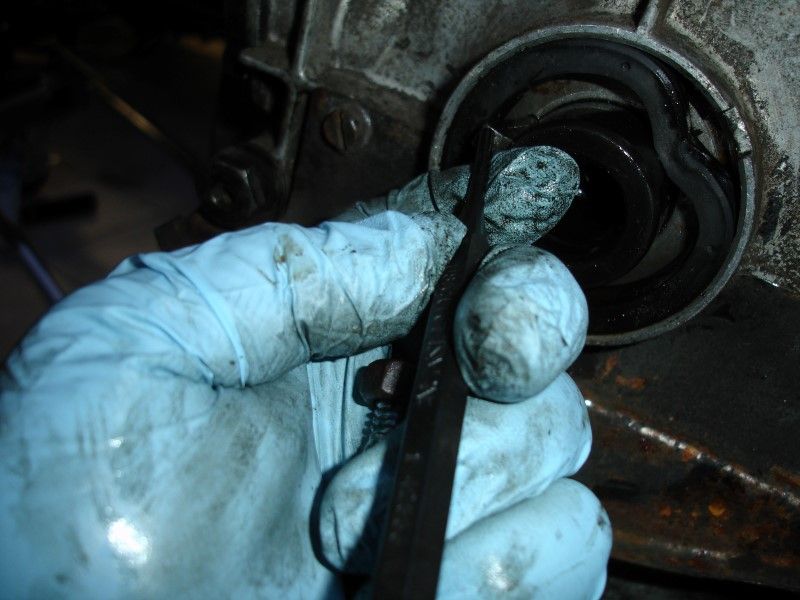
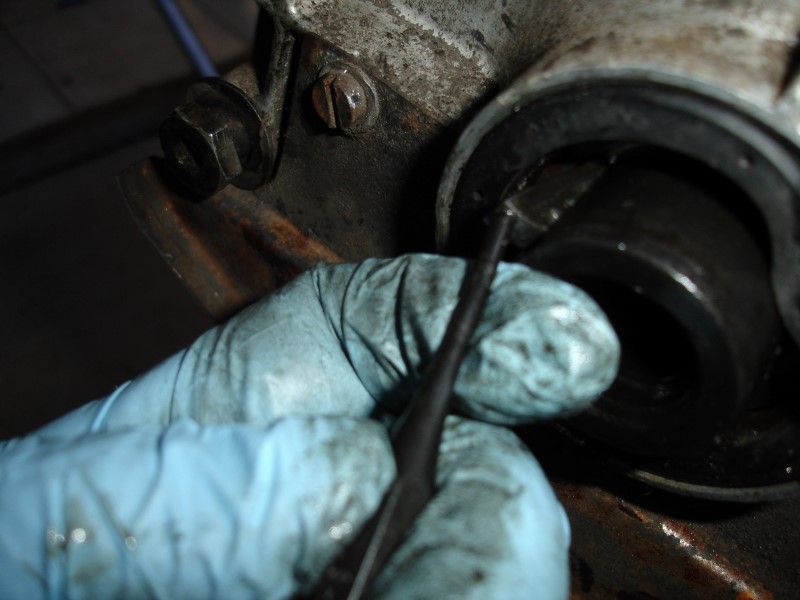
Pushing seal out... tap it to deform the seal inwards and then carefuly pry it out...
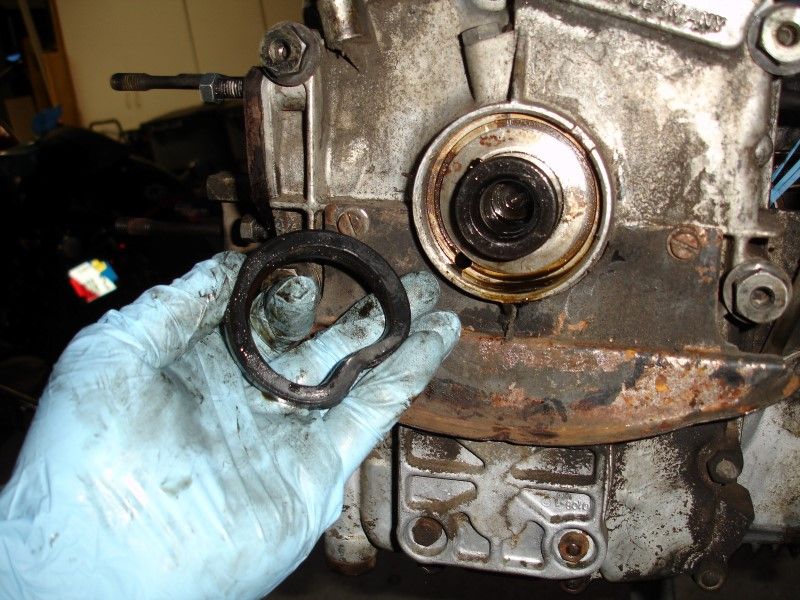
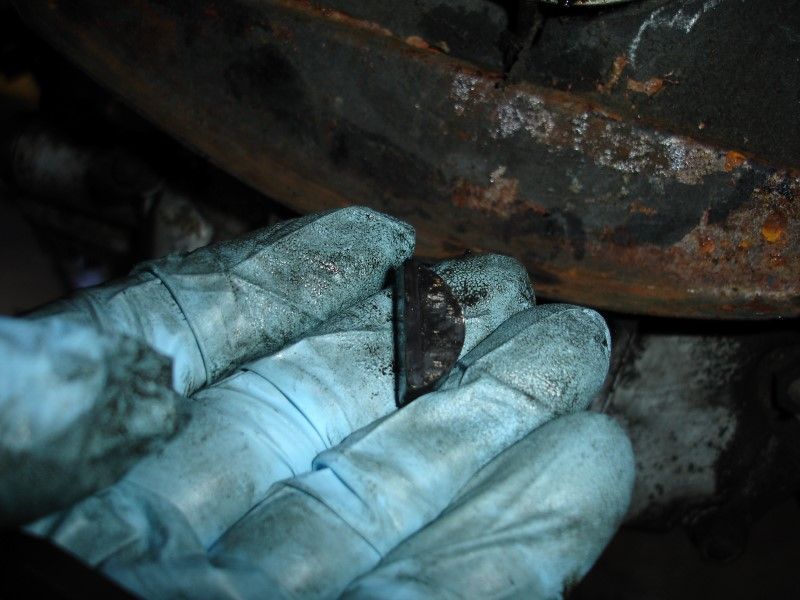
But wait! There is one more washer in there... had to use two bent helpers to get it out...
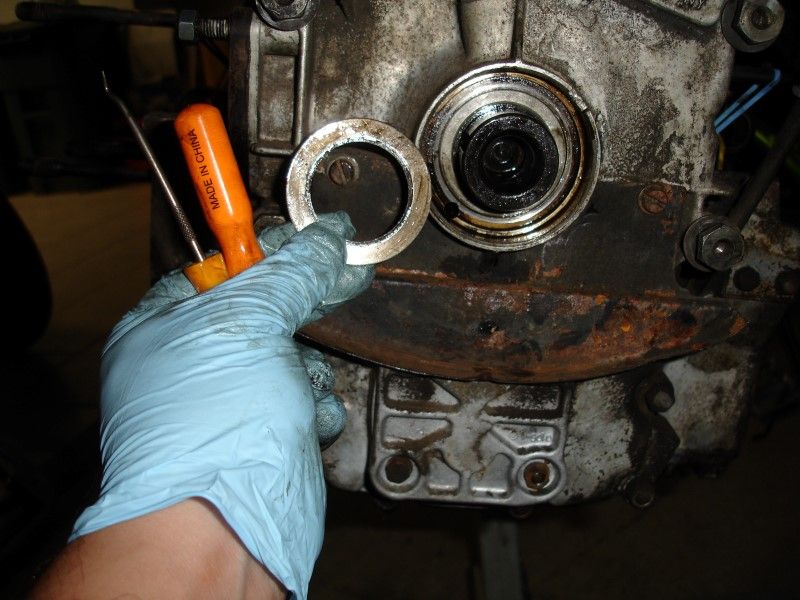
I placed the washer in a ziploc bag with the bolt, additional washer, and woodruff key... Do not lose them!
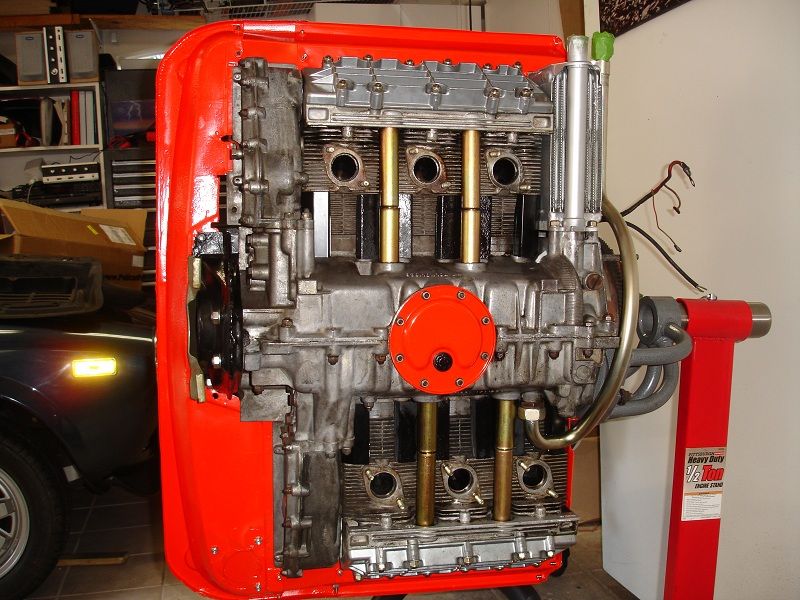
Now I can finally remove this cover... <NOTE TO SELF - REMEMBER TO INSTALL BEFORE INSTALLING PULLEY!!!!")
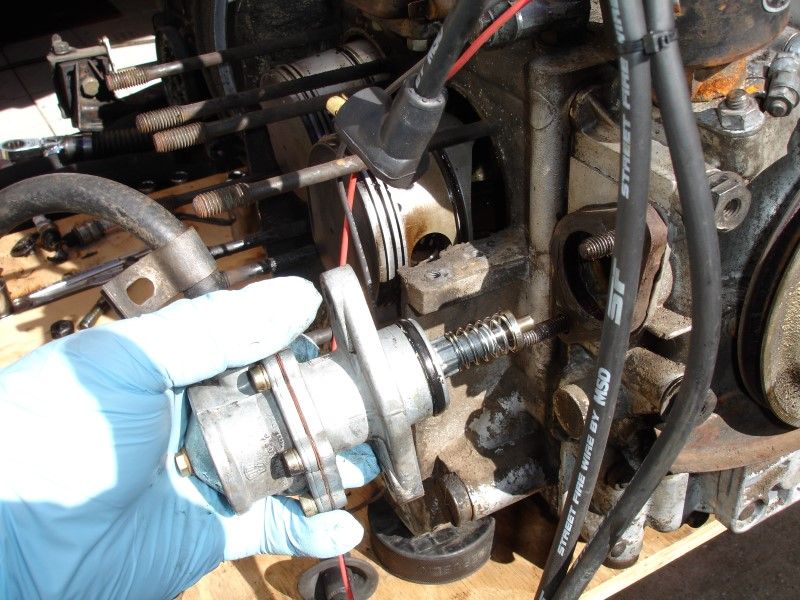
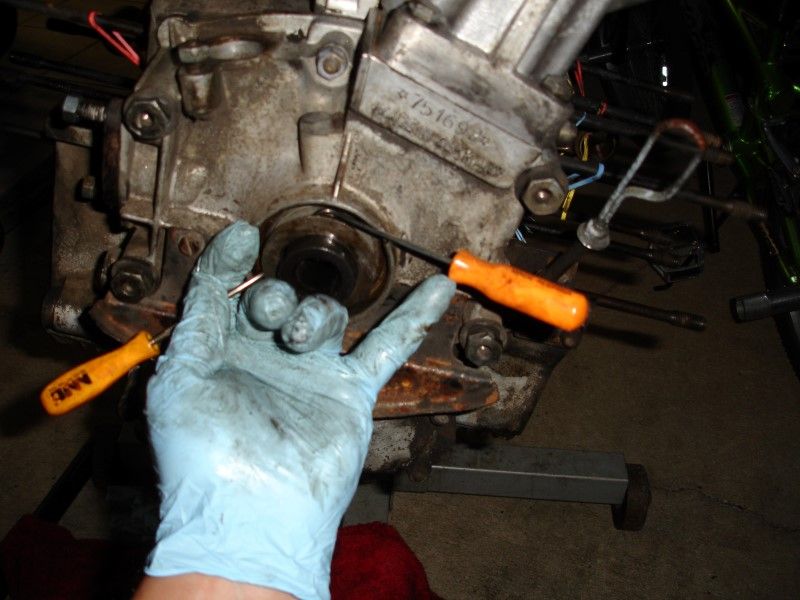
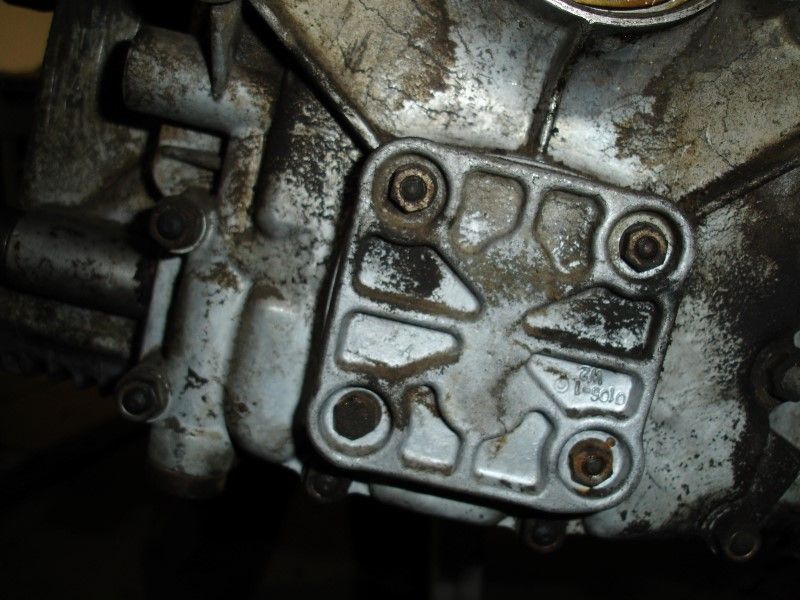
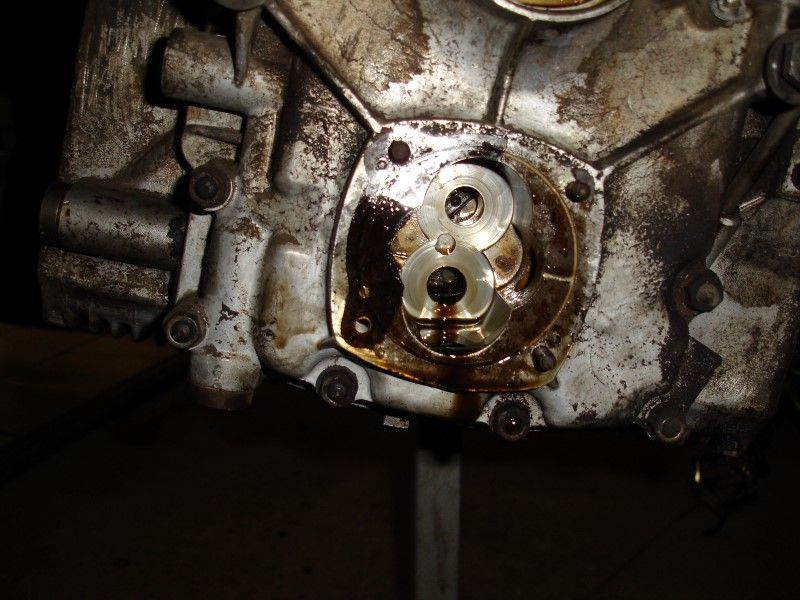
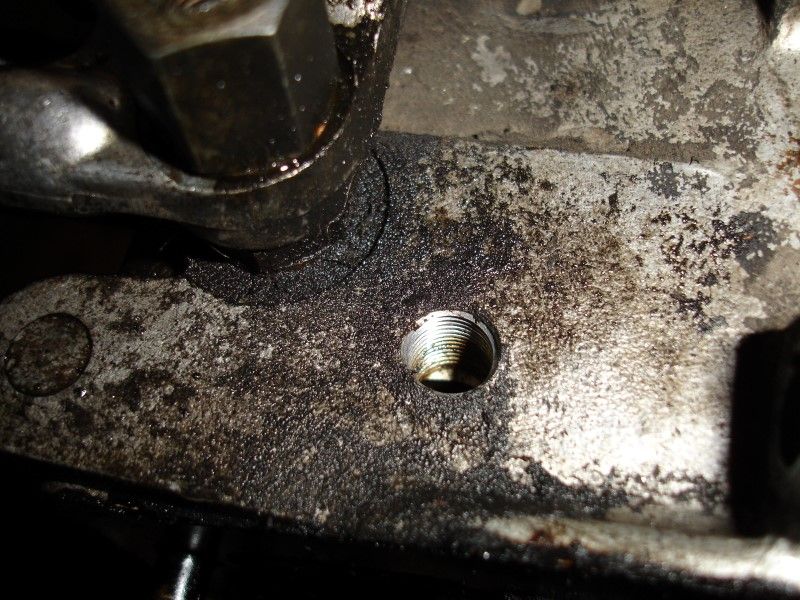
Now for the oil pump... I need to check if this is correct... three nuts and a bolt?? could it be that one of the studs came out and instead of replacing they just used a bolt? Again, need to check diagram...
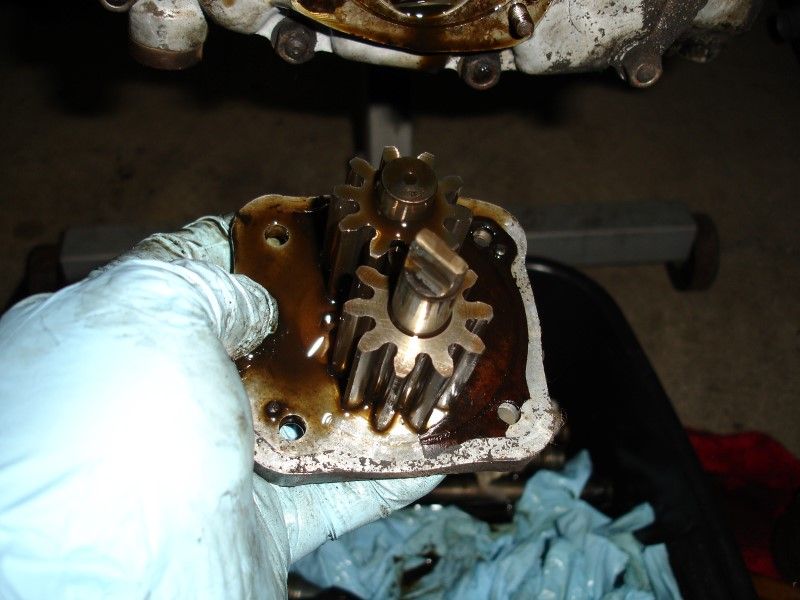
Oil pump is out... gears look fine, shaft or key tab that goes into looks fine... great!
Only got to loosen these... did not remove for now...
And that is where I left it... I need a 36mm socket to remove the flywheel... then remove front cover of the engine block so that I can proceed to split the case...
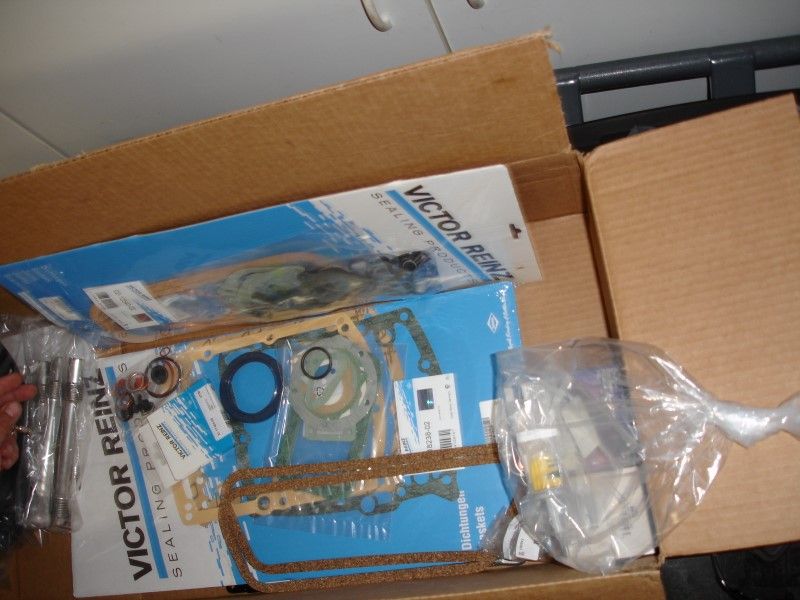
First box of parts came in... and based on what I have found so far, looks like I will have to order many more parts!!!! I think my wife knows... she is hiding the credit cards from me...
Good night... more tomorrow night. After I get from work I will get the flywheel removed, remove the front case cover, split the case... take a deep breath, and then look at the crank...
Removed pressure plate and clutch disk... both looked like they were replaced not too long ago...
Flywheel also looks like it was resurfaced... forgot to take a photo of that one... will do so tomorrow and update the thread.
I then got the front nut on the pulley removed... This required getting the engine on the stand (I need to order the correct yoke for my stand, had to improvise with what I had...
). Using an assistant that would not let me take a photo of her, lol, and the use of a breaker bar with a long pipe....
Was very careful when removing the pulley... I saw in the video and read that these could break easy...
and it is out...
Removed seal and woodruff key
Pushing seal out... tap it to deform the seal inwards and then carefuly pry it out...
But wait! There is one more washer in there... had to use two bent helpers to get it out...
I placed the washer in a ziploc bag with the bolt, additional washer, and woodruff key... Do not lose them!
Now I can finally remove this cover... <NOTE TO SELF - REMEMBER TO INSTALL BEFORE INSTALLING PULLEY!!!!
Now for the oil pump... I need to check if this is correct... three nuts and a bolt?? could it be that one of the studs came out and instead of replacing they just used a bolt? Again, need to check diagram...
Oil pump is out... gears look fine, shaft or key tab that goes into looks fine... great!
Only got to loosen these... did not remove for now...
And that is where I left it... I need a 36mm socket to remove the flywheel... then remove front cover of the engine block so that I can proceed to split the case...
First box of parts came in... and based on what I have found so far, looks like I will have to order many more parts!!!!
I think my wife knows... she is hiding the credit cards from me...Good night... more tomorrow night. After I get from work I will get the flywheel removed, remove the front case cover, split the case... take a deep breath, and then look at the crank...
01-21-2014, 06:00 PM
#37
Professor of Pending Projects
Rennlist Member
Rennlist Member
Thread Starter
01-21-2014, 06:02 PM
#38
Professor of Pending Projects
Rennlist Member
Rennlist Member
Thread Starter
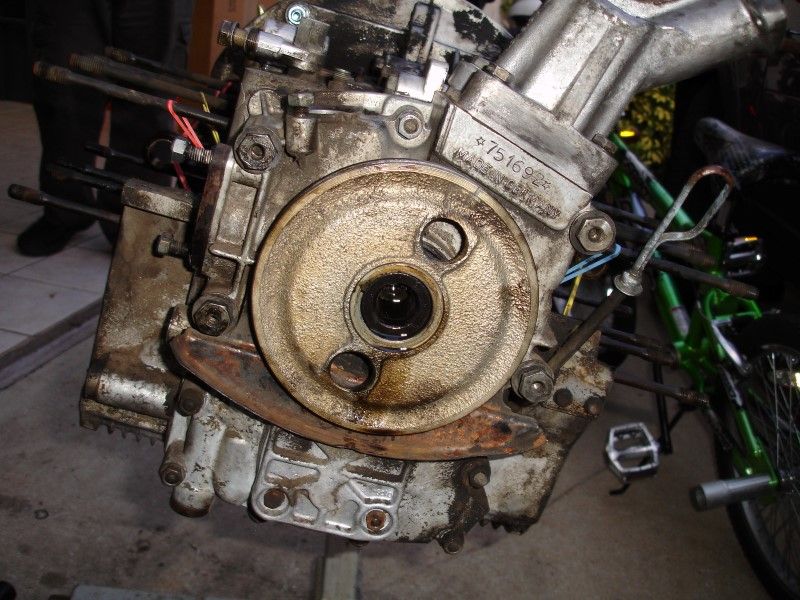
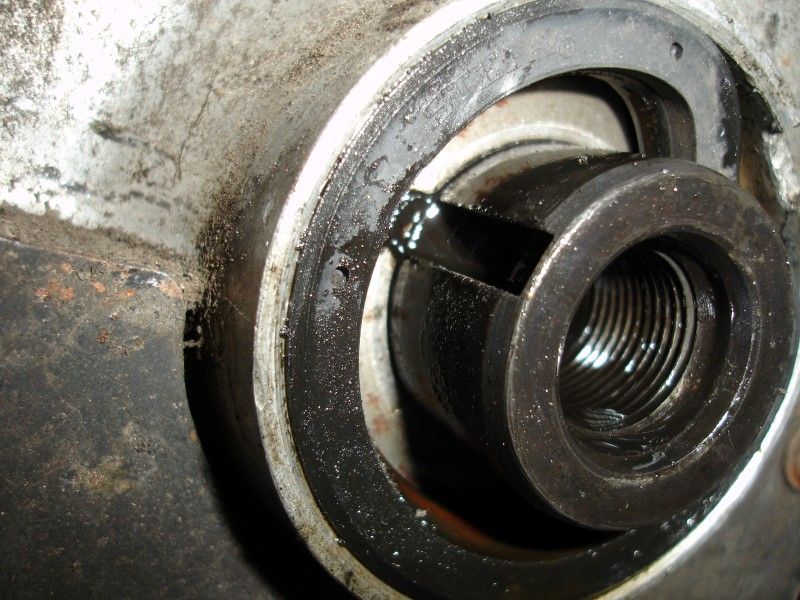
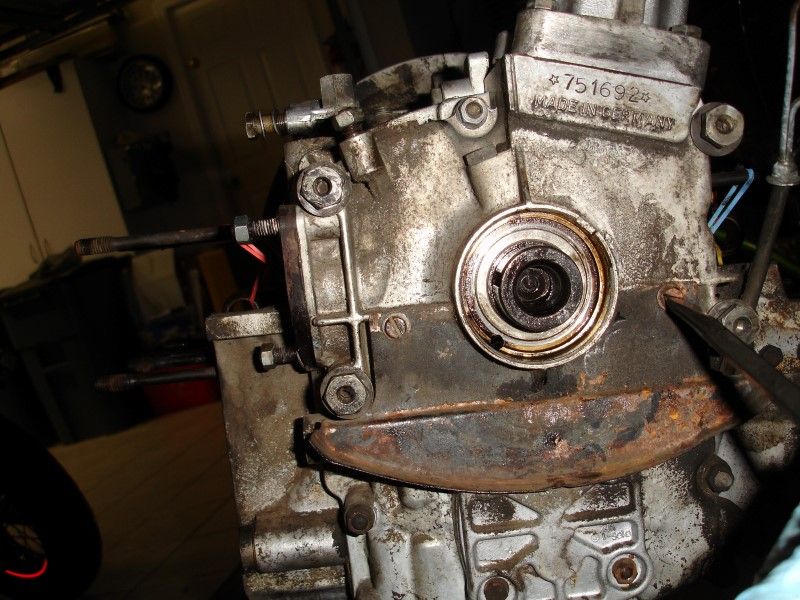
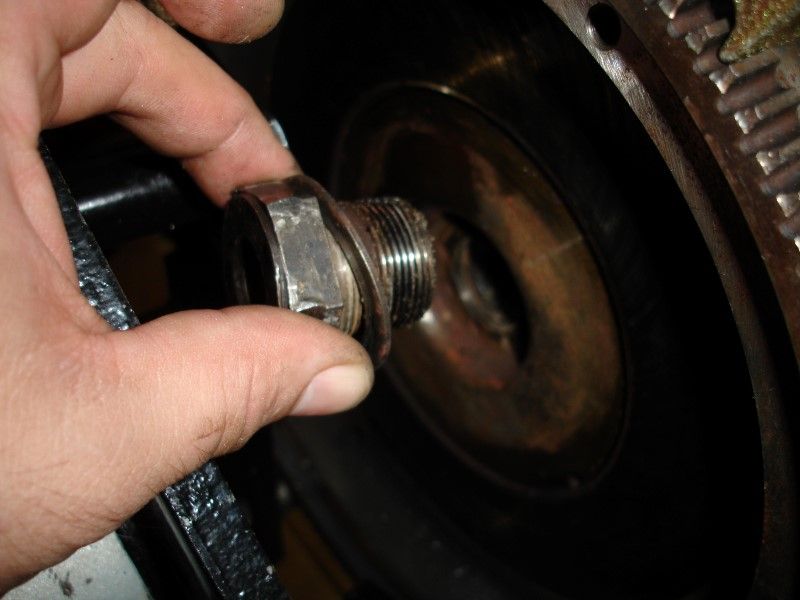
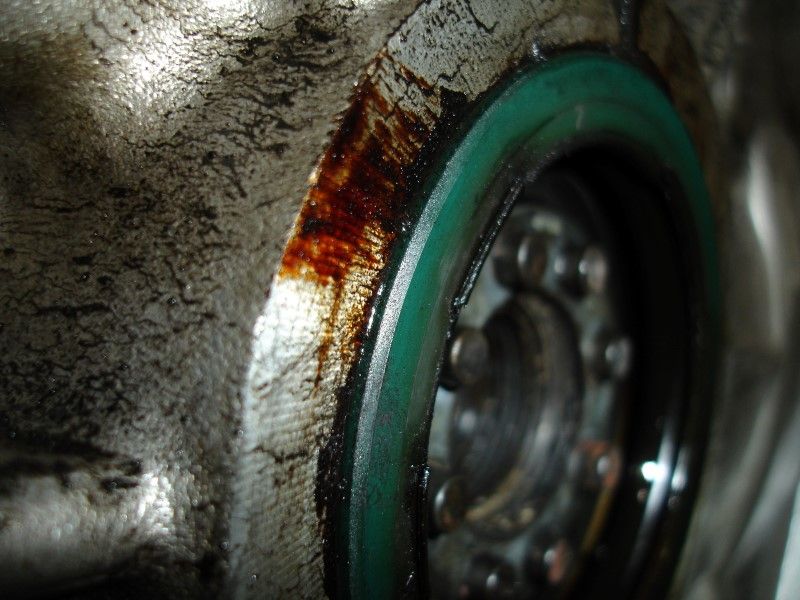
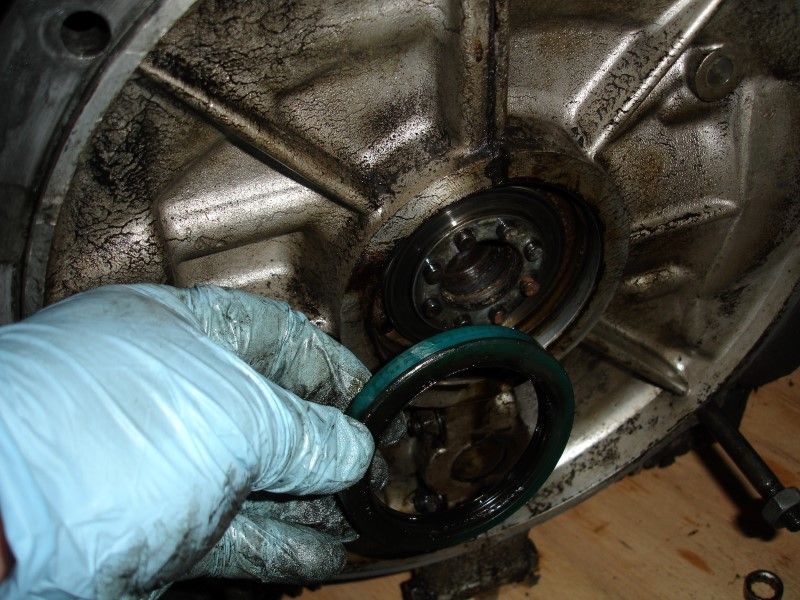
Something else that I found was done wrong with the previous build... Just noticed it in the photos....
This seal is supposed to be seated inside... not flush with the outside... seems that the person that did this last, did not bother to drive the seal in correctly.
Anyone has the part number for the tool to drive this seal in correctly?
This seal is supposed to be seated inside... not flush with the outside... seems that the person that did this last, did not bother to drive the seal in correctly.
Anyone has the part number for the tool to drive this seal in correctly?
01-22-2014, 10:06 PM
#39
Professor of Pending Projects
Rennlist Member
Rennlist Member
Thread Starter
Went to Sears to get the 36mm socket needed for the flywheel nut. But I do not trust the improvised stand yoke... I need the correct yoke and the one I have is already in use holding the engine for my son's future car (he is 11 now and I am building him a 911... another project pending...) And since that engine does not have headers, I do not feel comfortable taking it off the stand and risking damaging an oil line or something else.
So I went ahead and ordered a less expensive engine stand yoke for the 912 project... I hope it is good enough for the task. I just could not shell out another 275.00 for the proper yoke...hope I don't regret the decision (seems like I am already doing so...)
What I ordered.. 100 bucks shipped...
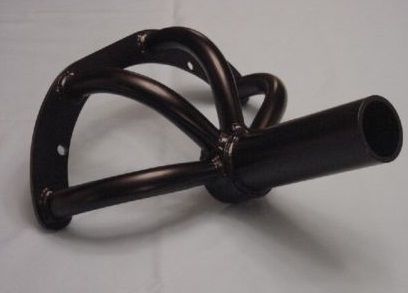
So I went ahead and ordered a less expensive engine stand yoke for the 912 project... I hope it is good enough for the task. I just could not shell out another 275.00 for the proper yoke...hope I don't regret the decision (seems like I am already doing so...)
What I ordered.. 100 bucks shipped...
01-22-2014, 10:10 PM
#40
Professor of Pending Projects
Rennlist Member
Rennlist Member
Thread Starter
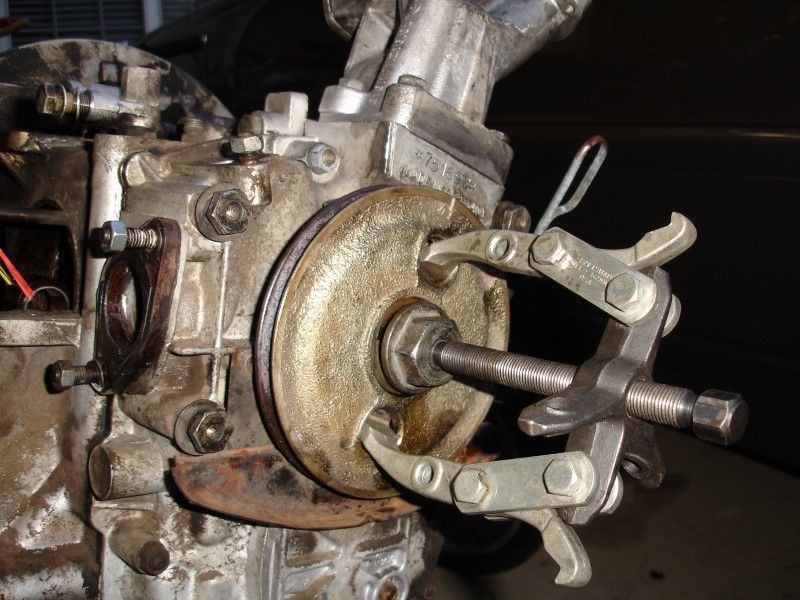
I as very naive to think that I could remove the nut on the flywheel side... it is torque to over 400lbs... Folks in the 912bbs forum told me of this tool:
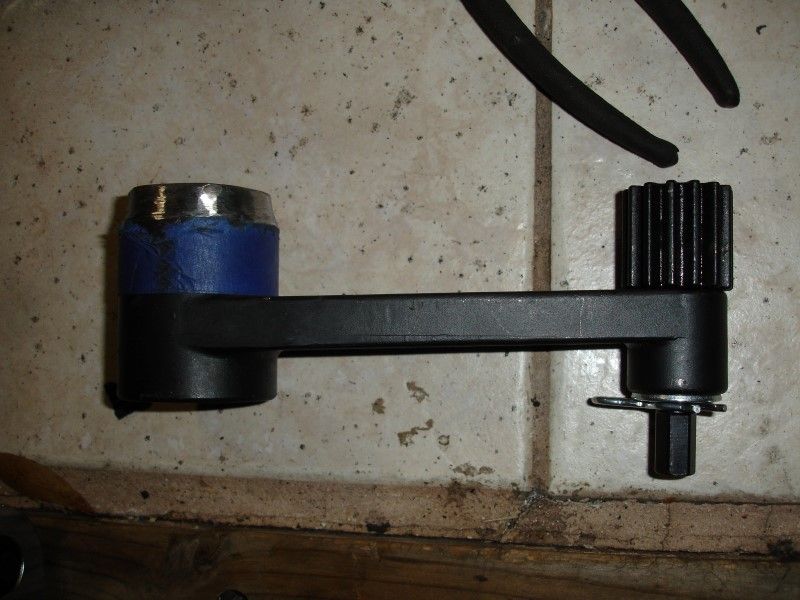
Was not aware of the Torque Dude... A torque multiplier wrench.

There is a local VW shop near by that had one in stock. Got it and it was so easy to remove that it was not even funny...
Let's get this nut out!
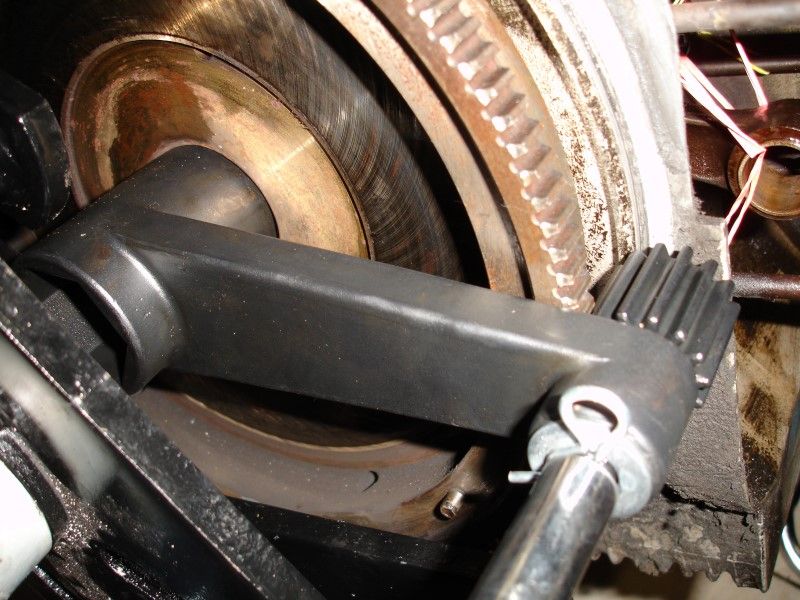

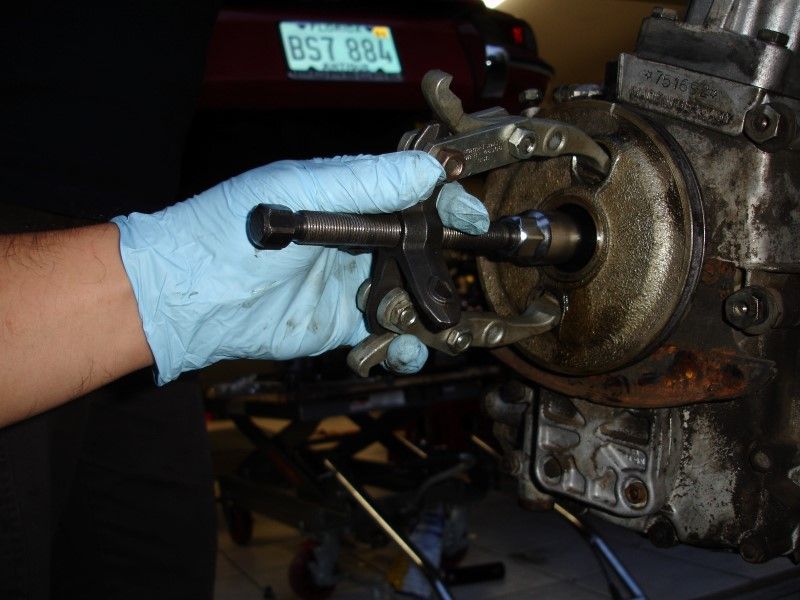
I had to modify the tool as mentioned by Mike, so that the tool would go in more...
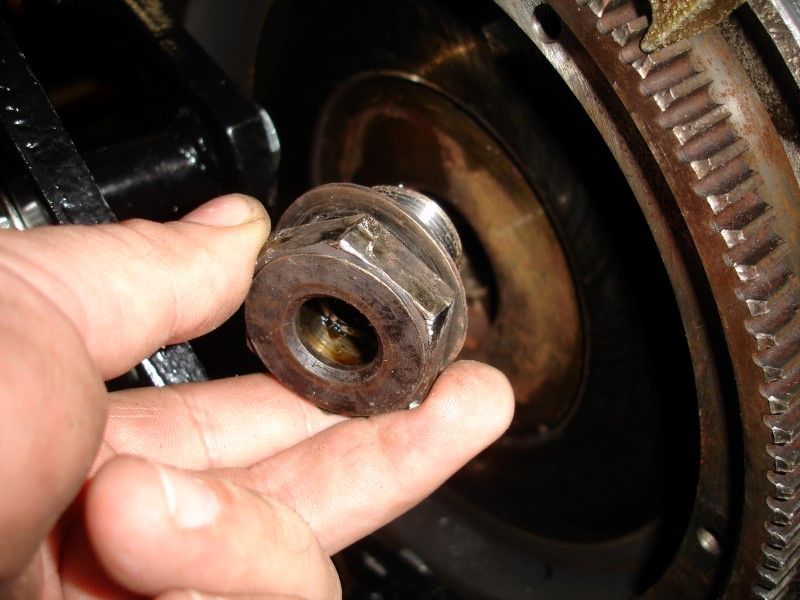
The damage you see on the nut was there, that was not done by the torque multiplier... I will order a new nut to use during assembly.
It is just amazing the little effort required to remove the flywheel nut... I almost broke the breaker bar trying to get it out the first time... with no luck... but using this tool, it was so easy. So glad I told that it existed!!
Was not aware of the Torque Dude... A torque multiplier wrench.
There is a local VW shop near by that had one in stock. Got it and it was so easy to remove that it was not even funny...
Let's get this nut out!
I had to modify the tool as mentioned by Mike, so that the tool would go in more...
The damage you see on the nut was there, that was not done by the torque multiplier... I will order a new nut to use during assembly.
It is just amazing the little effort required to remove the flywheel nut... I almost broke the breaker bar trying to get it out the first time... with no luck... but using this tool, it was so easy. So glad I told that it existed!!
01-22-2014, 10:26 PM
#41
Professor of Pending Projects
Rennlist Member
Rennlist Member
Thread Starter
Got this in the mail today.
There is a copy of the book ABC'S (and 912's) of Porsche Engines or Porsche Engines and The Future of the Human Race [Harry C. Pellow] for sale in Florida at a decent price, but the owner is in Pensacola and I don't believe he is willing to ship it. Looks like he wants to sell it locally...
There is a copy of the book ABC'S (and 912's) of Porsche Engines or Porsche Engines and The Future of the Human Race [Harry C. Pellow] for sale in Florida at a decent price, but the owner is in Pensacola and I don't believe he is willing to ship it. Looks like he wants to sell it locally...
01-23-2014, 11:44 PM
#42
Professor of Pending Projects
Rennlist Member
Rennlist Member
Thread Starter
Not much... but had to at least undo a few bolts tonight... took the bottom cover off...
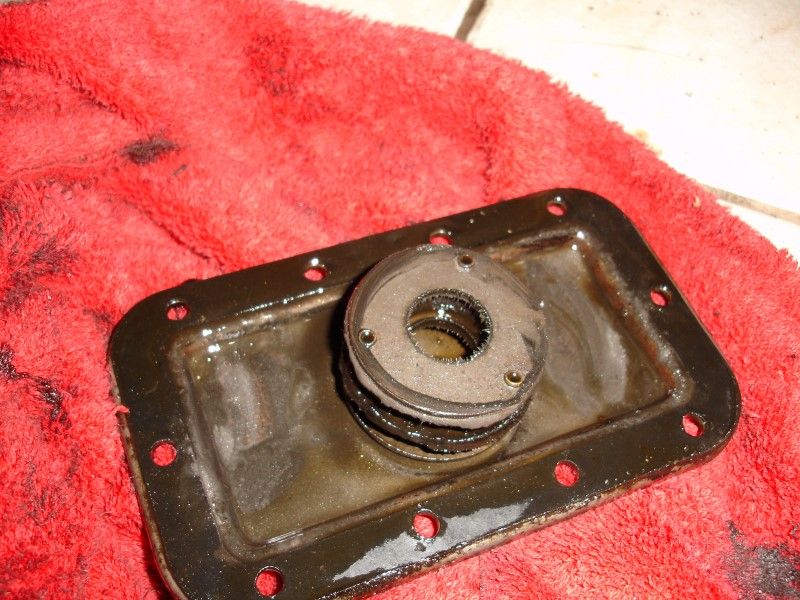

Need to look at photos of what this looks like new... is it really all bent towards the inside like that?
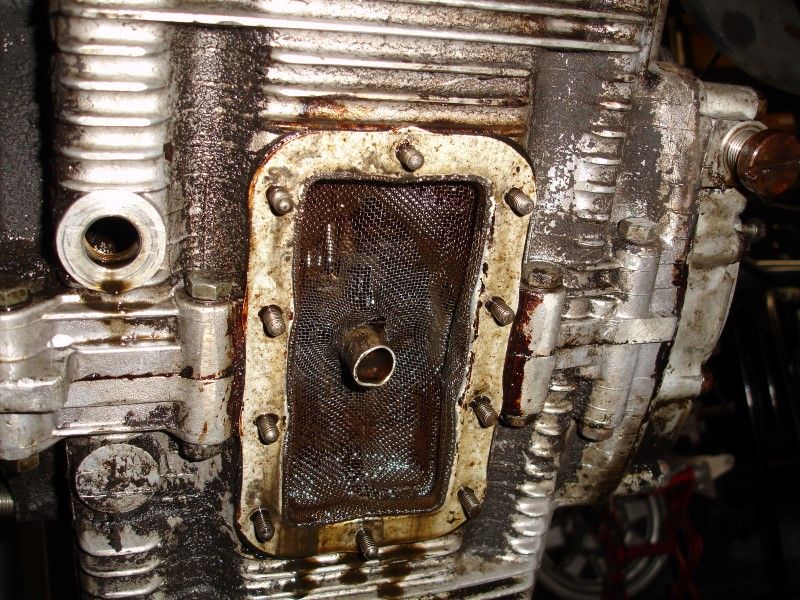
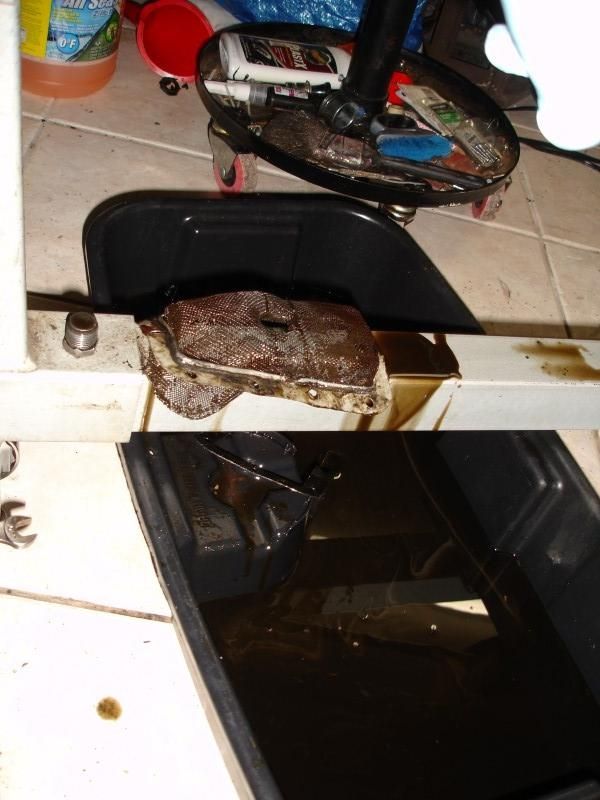
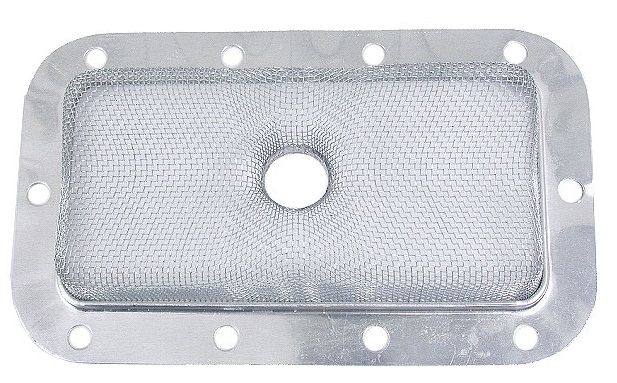
Edit: Found a photo of a new Oil Strainer Sump Screen...ordering a new one for the build.
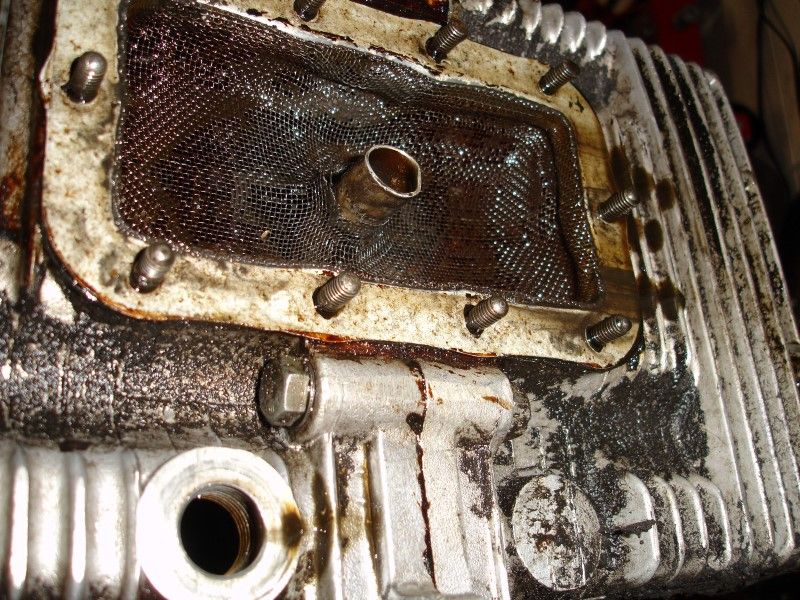
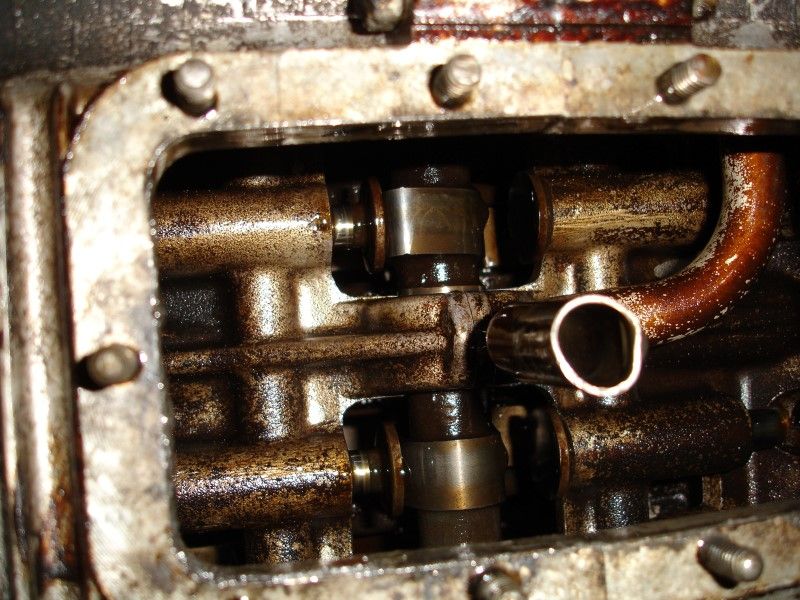
A photo of the insides...
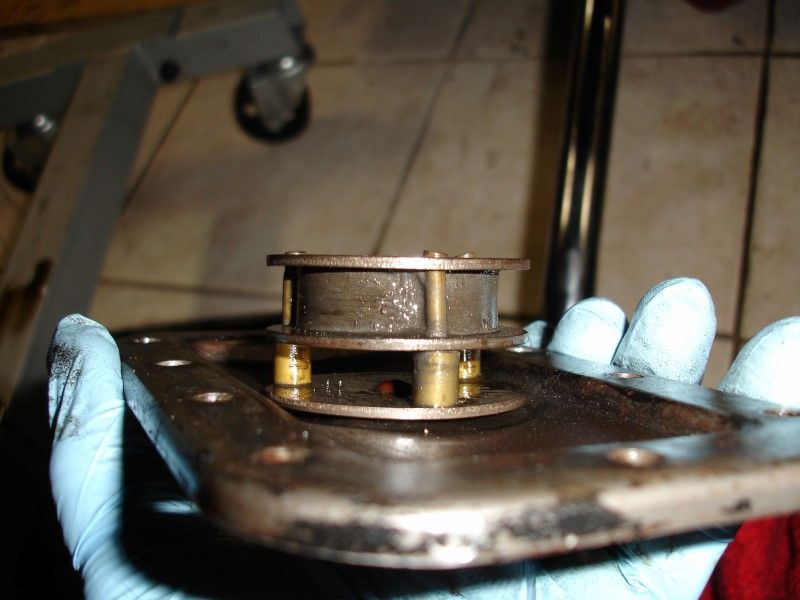
Also, is this supposed to have play? It can be a source of leak if it is not supposed to move... I can move it a little from side to side.
That is for all tonight. I am planning to split the case tomorrow after work.
Need to look at photos of what this looks like new... is it really all bent towards the inside like that?
Edit: Found a photo of a new Oil Strainer Sump Screen...ordering a new one for the build.
A photo of the insides...
Also, is this supposed to have play? It can be a source of leak if it is not supposed to move... I can move it a little from side to side.
That is for all tonight. I am planning to split the case tomorrow after work.
01-24-2014, 10:18 PM
#43
Professor of Pending Projects
Rennlist Member
Rennlist Member
Thread Starter
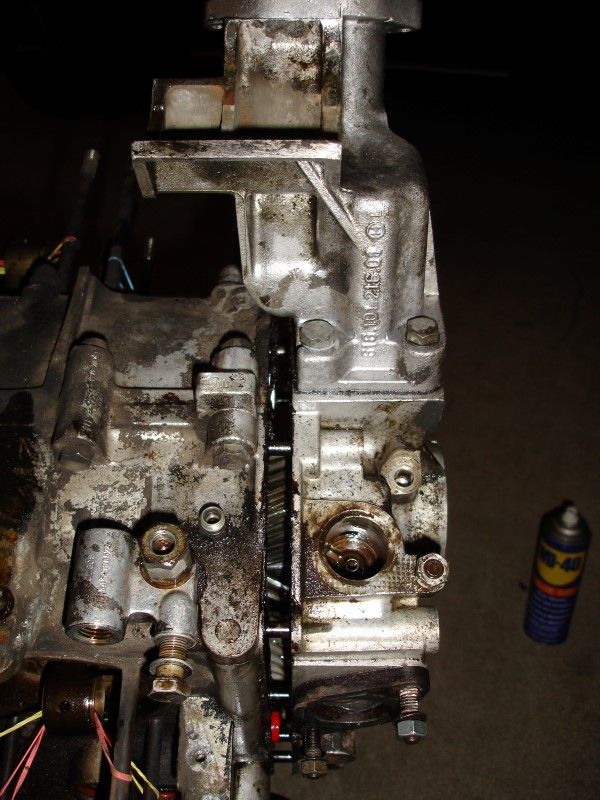
OK, let's continue to take the motor apart... removed the little piston for the relief valve. No way I could get my finger in there... used the method described in the orange book...
Now let's get the front case out... removed all the nuts holding it in place, rubber tap tap tap... and it is out...
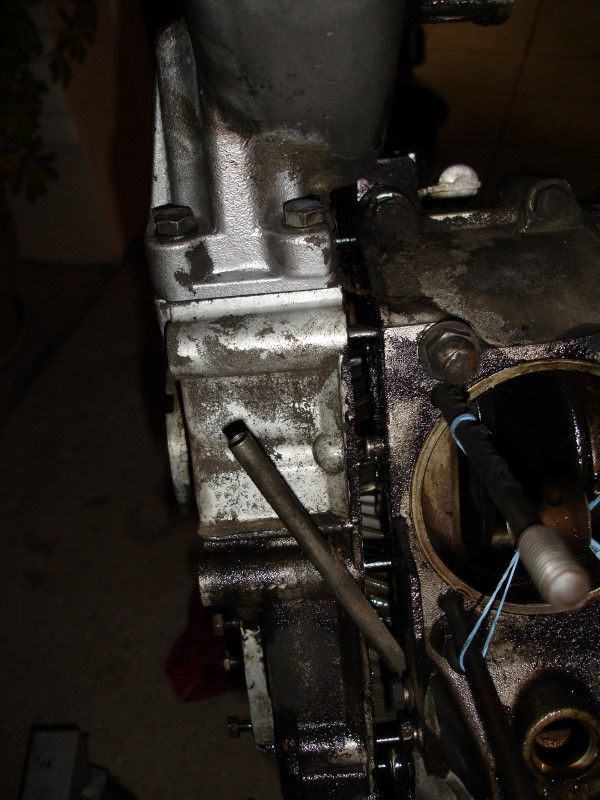
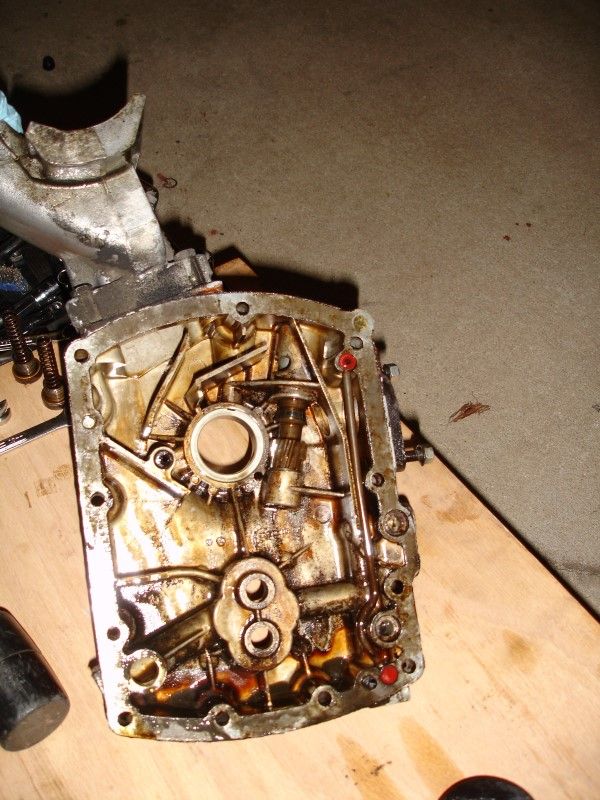
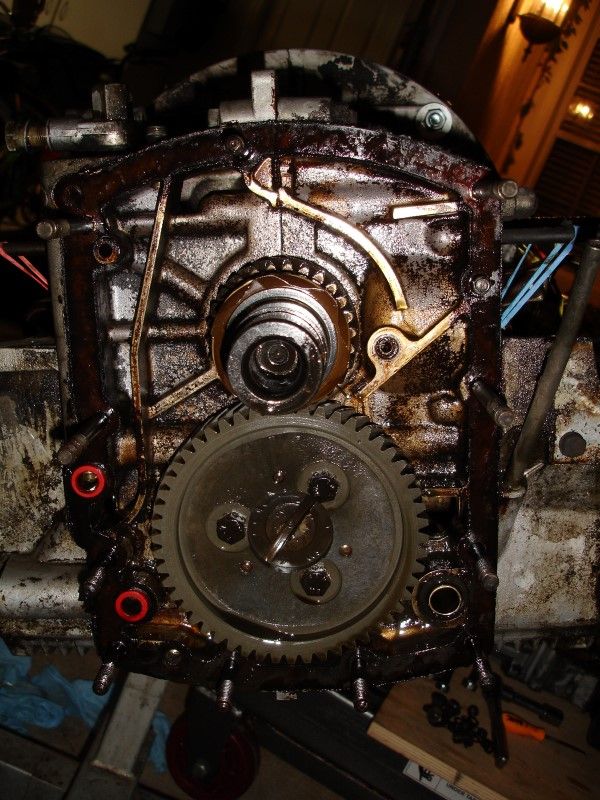
Removed flywheel..
To find that the seal was not seated all the way in...oh brother...

Now let's get the front case out... removed all the nuts holding it in place, rubber tap tap tap... and it is out...
Removed flywheel..
To find that the seal was not seated all the way in...oh brother...
01-24-2014, 10:18 PM
#44
Professor of Pending Projects
Rennlist Member
Rennlist Member
Thread Starter
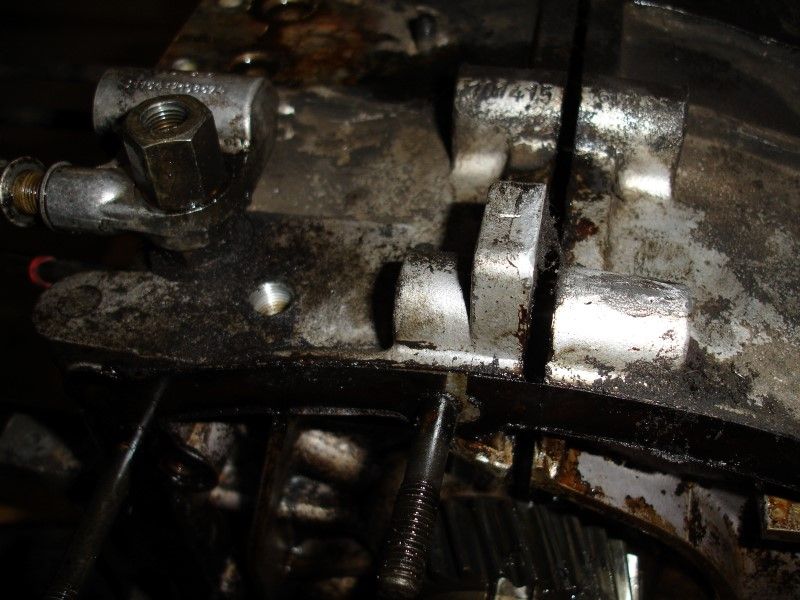
Removed all the bolts holding the case together...
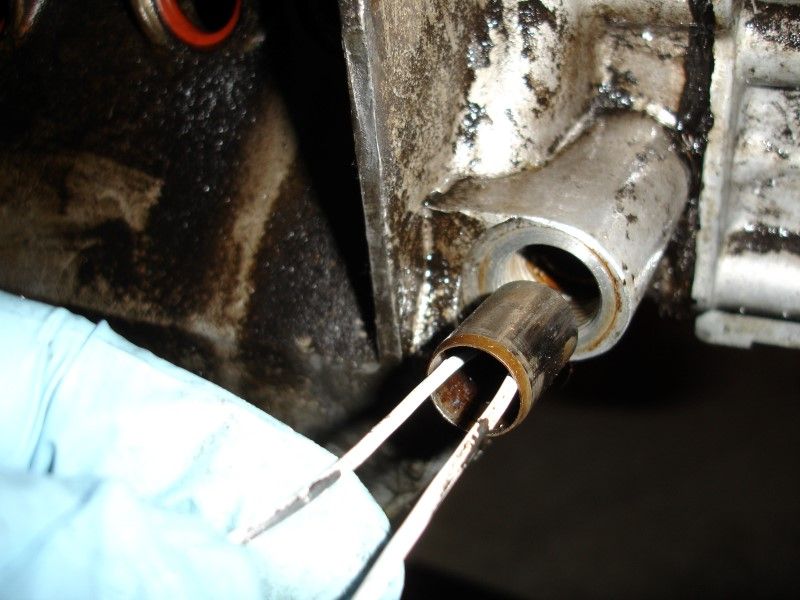
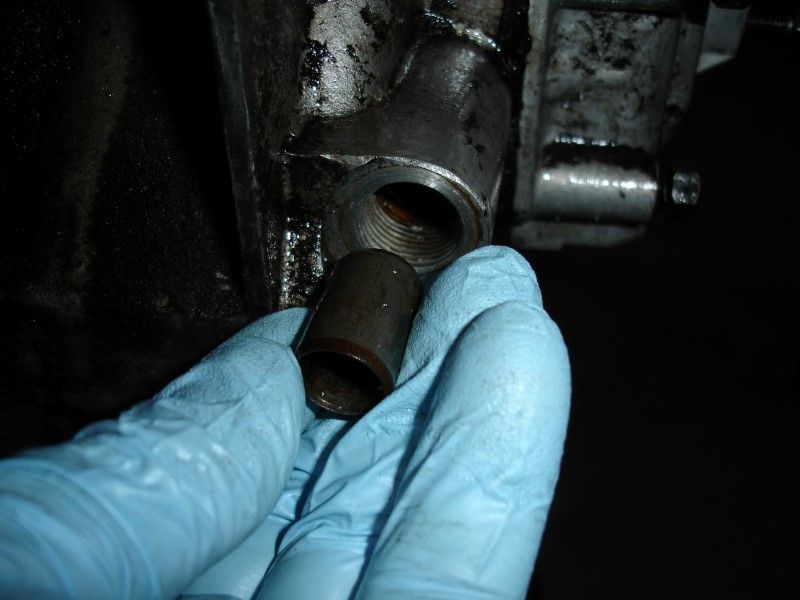
Had to remove the fitting where the oil hose goes to so that I could remove the top bolt.
In the video The Maestro uses a 2x6 to wack the heck out of the case to get them apart... I started with just a rubber mallet... and it did the trick (I was not comfortable hitting the case with a 2x6 and a 3lb mallet...)
I also got it out of the engine stand and on top of a wood panel. Did not want anything to fall on the floor and get damaged.
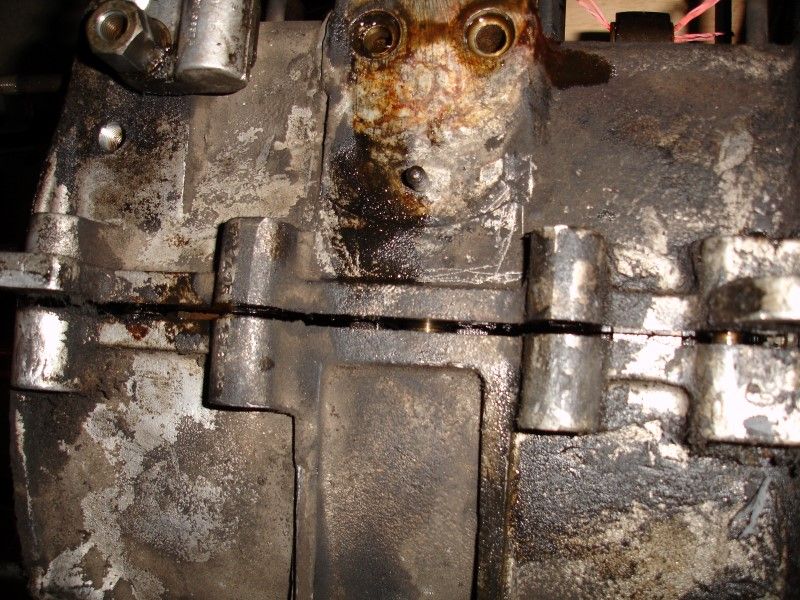
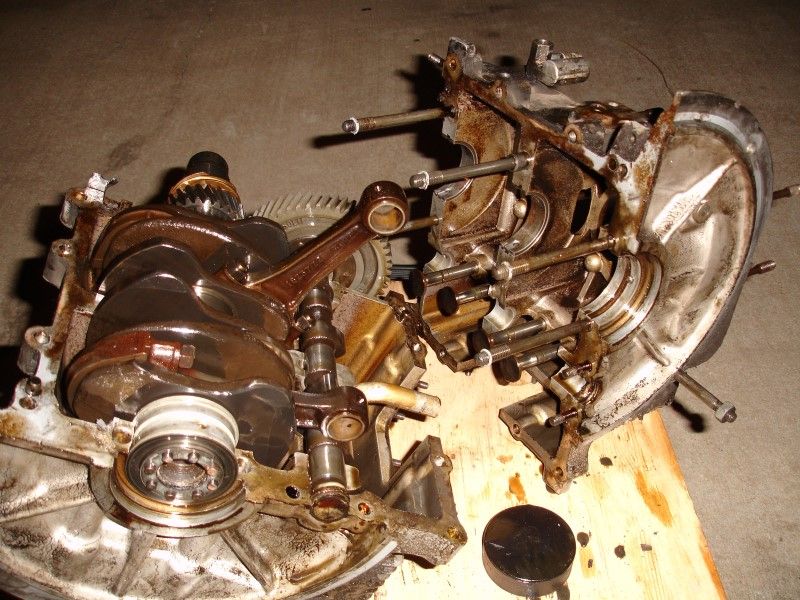
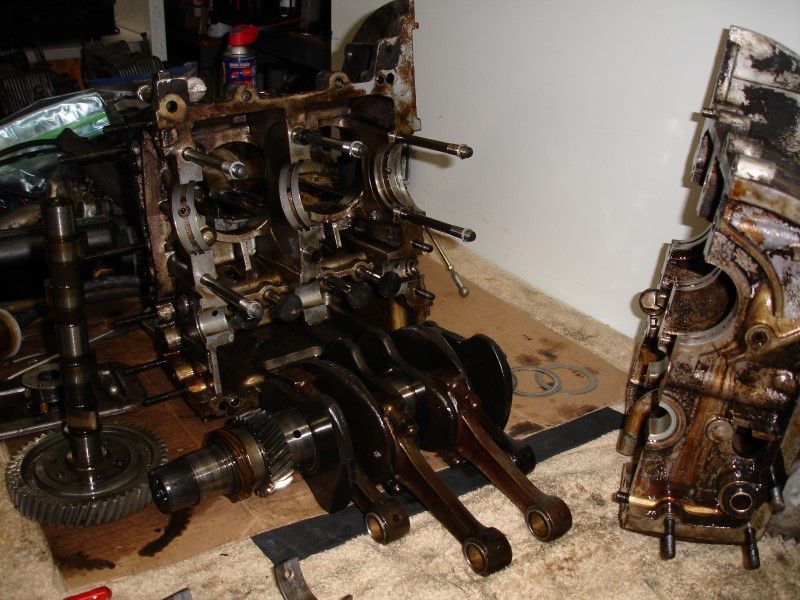
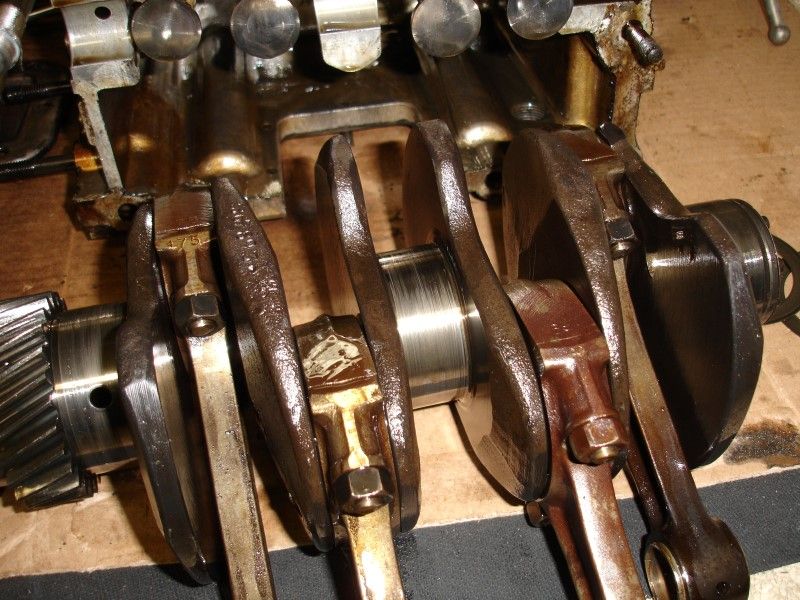
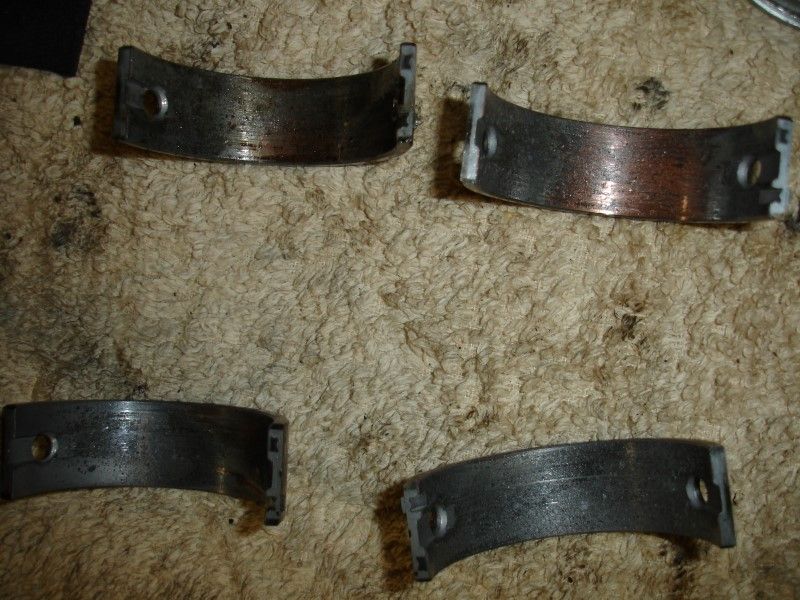
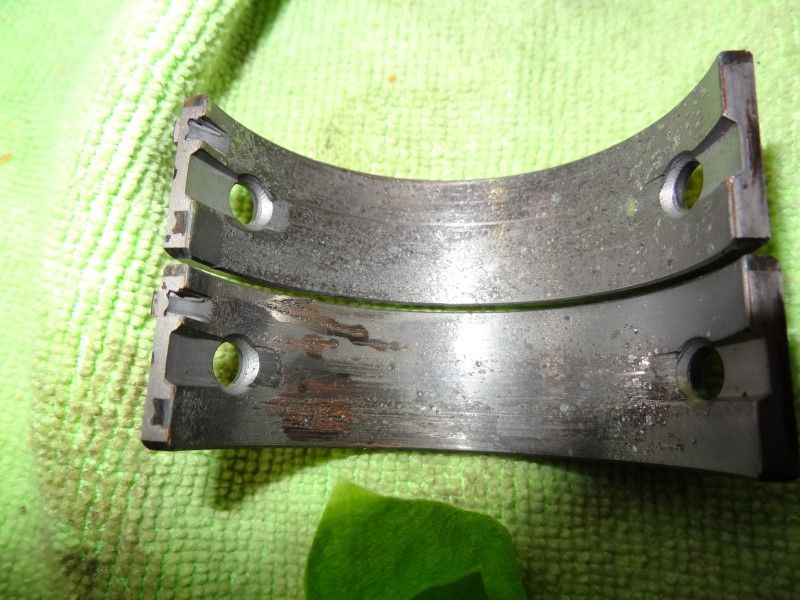
How can I tell if it is standard bearings or if work has been done??
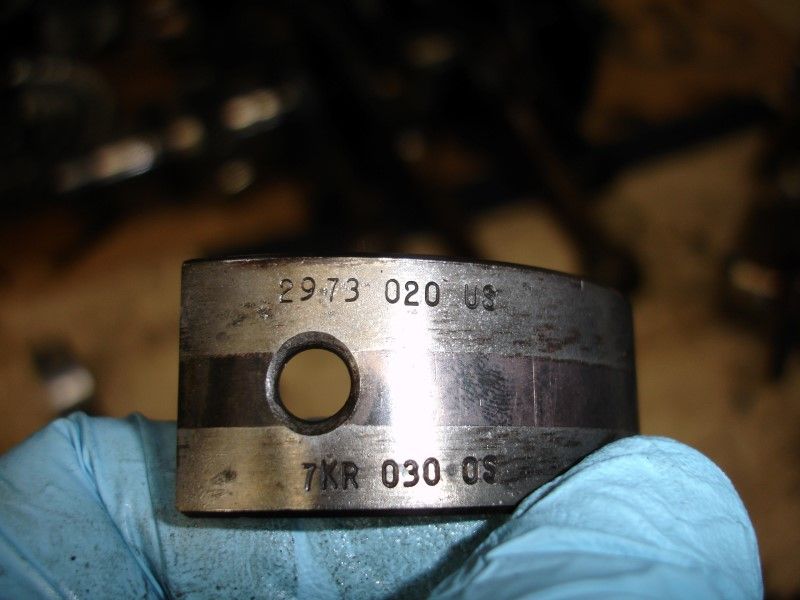
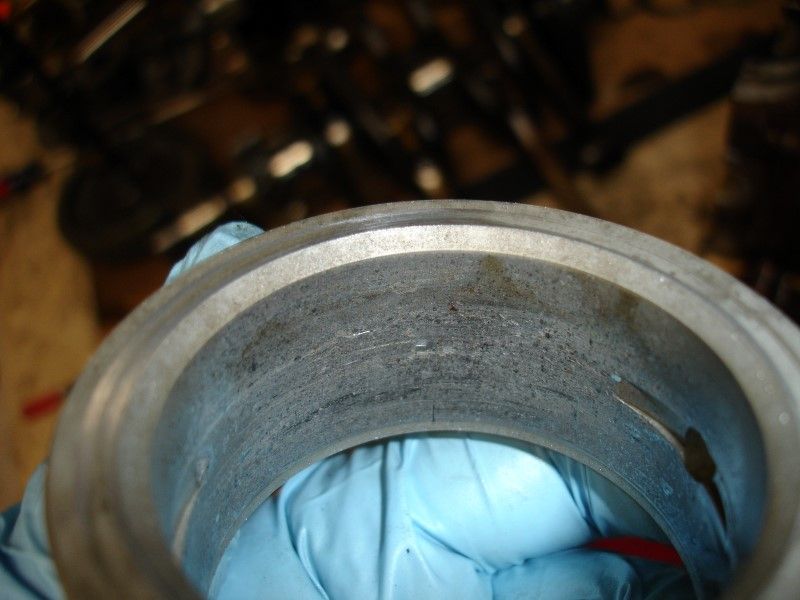
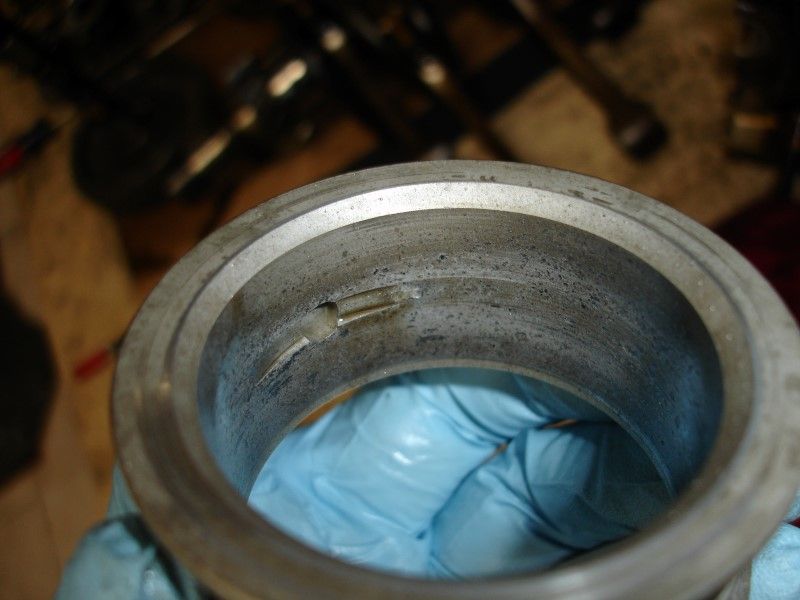
OK... here is the damage...
Had to remove the fitting where the oil hose goes to so that I could remove the top bolt.
In the video The Maestro uses a 2x6 to wack the heck out of the case to get them apart... I started with just a rubber mallet... and it did the trick (I was not comfortable hitting the case with a 2x6 and a 3lb mallet...)
I also got it out of the engine stand and on top of a wood panel. Did not want anything to fall on the floor and get damaged.
How can I tell if it is standard bearings or if work has been done??
OK... here is the damage...
01-24-2014, 11:10 PM
#45
Instructor
Great Job Sir. Please document all you work in step by step method for future reference & along with the proper tools or make video out of it. I recall someone was selling a DVD of his 964 engine rebuilt here on Rennlist.