
Home Built Hot Rod (With full build videos)
 02-12-2016, 05:03 AM
#31
Racer
Thread Starter
Ok, here is the latest instalment. I think I have now tidied up the mess of the RHD conversion to my car, and in the process also manufactured a place to put a brake booster if I choose to add one in the future. It is much easier to do now, rather than after it is painted.
I have also gone through and fixed up the difficult rust areas in the corners of the front windscreen. Only time will tell how good the seal is when I first get to drive it in the rain
I have also gone through and fixed up the difficult rust areas in the corners of the front windscreen. Only time will tell how good the seal is when I first get to drive it in the rain
 02-12-2016, 09:18 AM
#32
Professor of Pending Projects
Rennlist Member
Rennlist Member
Funny! Thank you for the translations. LOL
Great progress! I too realized how time consuming, for a newbie, it is to cut metal, shape it, test fit it, etc... felt good at the end, but could not see myself doing it for the whole car...
I will say it again, you are a brave man doing all this for the first time.
Great progress! I too realized how time consuming, for a newbie, it is to cut metal, shape it, test fit it, etc... felt good at the end, but could not see myself doing it for the whole car...
I will say it again, you are a brave man doing all this for the first time.
02-12-2016, 04:03 PM
#33
Racer
Thread Starter
Thanks Jamie,
I have enjoyed wasting time reading your builds too, but eventually drag myself back out to the shed and keep plodding along on mine
I have enjoyed wasting time reading your builds too, but eventually drag myself back out to the shed and keep plodding along on mine
03-07-2016, 03:03 AM
#34
Racer
Thread Starter
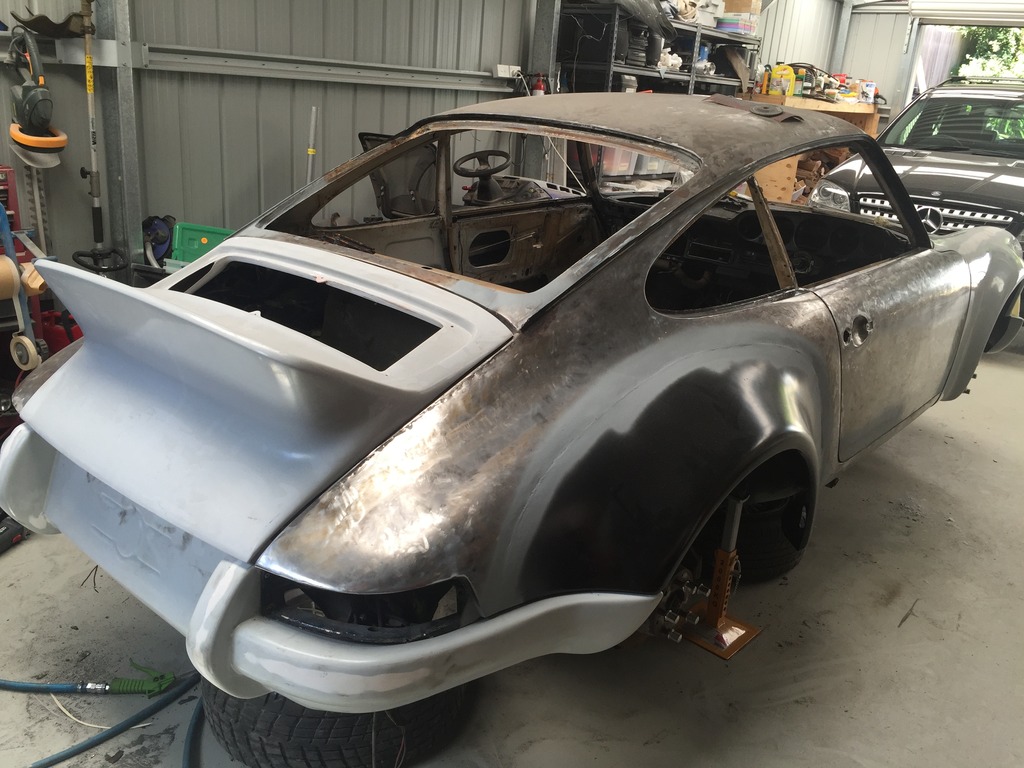
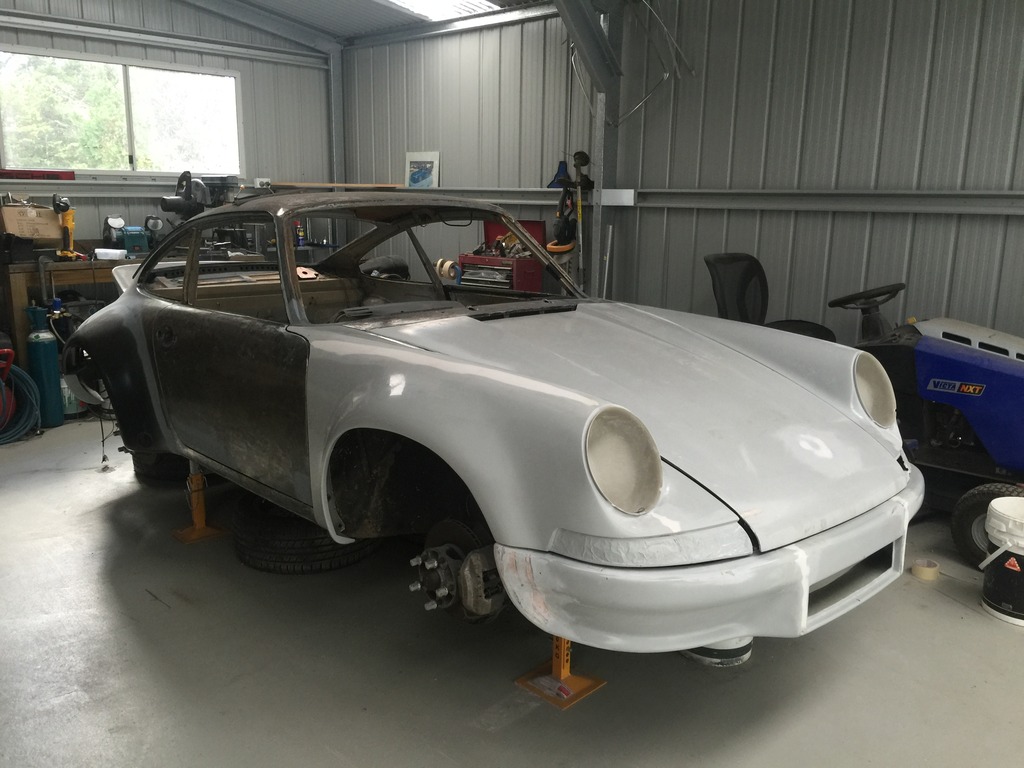
So I have finally gotten the fibreglass body parts fitted to the car. There was a bit of custom fabrication needed. The front bar for the car was not matched to the front guards, so I had to narrow the bar to fit. I also had to make up some brackets so that I could open the bonnet catch and I had to make the brackets fro the front bar.
I really hate working with fibreglass, it is awful itchy, messy stuff, but it is great for its purpose. I am just glad I have finished it now and I can move on to the next phase.
Here is the latest vid.
Here are a couple of pics.
I really hate working with fibreglass, it is awful itchy, messy stuff, but it is great for its purpose. I am just glad I have finished it now and I can move on to the next phase.
Here is the latest vid.
Here are a couple of pics.


 03-12-2016, 04:53 PM
#36
Racer
Thread Starter
Well after a lot of thought about what to do with the fuel filler, and weighing up the options. I decided the best method was to not be a lazy bastard and make a factory style filler. It ended up actually being easier than I was expecting.
Here is the vid.
Here is the vid.
 03-18-2016, 07:30 AM
#39
Racer
Thread Starter
Ok. So my next job was supposed to be making the roll cage. After doing a heap of research online, I found that bending 'tube' is a lot more difficult than I thought, and tube benders are quite expensive. Pipe benders are relatively cheap, but they are not deisgned to bend tube... I found a bunch of people have modified pipe benders to bend tube without kinking or flattening it.
I have subsequently, spent pretty much a whole week stuffing around, trying to modify the pipe bender to bend tube, using every method I have heard about... without a lot of luck.
I thought I should still make a vid' because it is worth seeing the stuff that doesn't work along with what does (and also didn't want to see a weeks worth of work being a complete waste ).
I have subsequently, spent pretty much a whole week stuffing around, trying to modify the pipe bender to bend tube, using every method I have heard about... without a lot of luck.
I thought I should still make a vid' because it is worth seeing the stuff that doesn't work along with what does (and also didn't want to see a weeks worth of work being a complete waste
).
03-18-2016, 09:33 AM
#40
Professor of Pending Projects
Rennlist Member
Rennlist Member
Man that had to be frustrating... as I was watching the video I kept saying "why not fill it with sand?" and then I see you doing just that and the results were not what I was expecting...
So it is all about using the correct die... also read that draw blocks need to be greased before every bend. This will give you longer die life and help in the performance of the die set.
Looking forward to the next try at bending that tube.
So it is all about using the correct die... also read that draw blocks need to be greased before every bend. This will give you longer die life and help in the performance of the die set.
Looking forward to the next try at bending that tube.
03-18-2016, 05:57 PM
#41
Racer
Thread Starter
Yeah, it was really frustrating. I think that the main issues are that the die is not a tight enough fit for the tube, but I think it is also that the radius is too tight. The die I have ordered has a 7" radius, where the one I was using had about 5".
03-25-2016, 06:24 PM
#42
Racer
Thread Starter
This past week I have been doing a LOT of sanding, but the body is looking good, and almost ready for primer.
Here is the latest vid of my exploits.
Here is the latest vid of my exploits.
03-26-2016, 10:29 AM
#43
Rennlist Member
I have spent my fair share of time using tubing benders. Thats how I put myself through school. The problem is partly the shoe you are using does not fit tight enough, but its also that you dont have control over the sides and top of the tubing. The larger tubing benders have a guide shoe that prevents the tubing from flatenning out as can be seen here: http://www.greenlee.com/products/BEN...oduct_id=15440.
The idea is that the shoes prevent the tubing from being able to go out of round throughout the bending process. There are also roller top shoes that work even better than the sliding shoe: http://www.mittlerbros.com/mittler-b...der-shoes.html.
You can fill make your shoe tighter using JB weld and a piece tubing wrapped in parchment paper (cooking paper). Dont use oil or grease cause the jb weld wont stick to the shoe very well.
Another issue I think you might have is that the steel used in conduit is more ductile than the tubing you must use for the roll cage. I dont have any suggestions for that though.
Fantastic work though. Keep it up, your an inspiration.
Last edited by knorrena; 03-26-2016 at 11:54 AM.
03-26-2016, 06:15 PM
#44
Racer
Thread Starter
Thanks. You are definitely right as far as that goes. I didn't think about using JB weld to make a better fitting shoe, that is a great idea. As I mentioned previously, I think another part of the problem is that it too tight of a radius. Either way, I have thrown my toys out of the cot, and had enough of trying things that don't work, so I will just wait on the correct die I have ordered, which should sort out all of the problems
Jeff.
Jeff.
04-03-2016, 01:17 AM
#45
Racer
Thread Starter
Well another week down working away at the build. This week I have been working away at the panel gaps, to make sure they are nice and crisp and even. I am pretty happy with the result.
Here is the latest vid.
Here is the latest vid.