

porsche0nut's 3.2 Carrera Engine Project
 03-07-2015, 12:18 PM
#31
Professor of Pending Projects
Rennlist Member
Rennlist Member
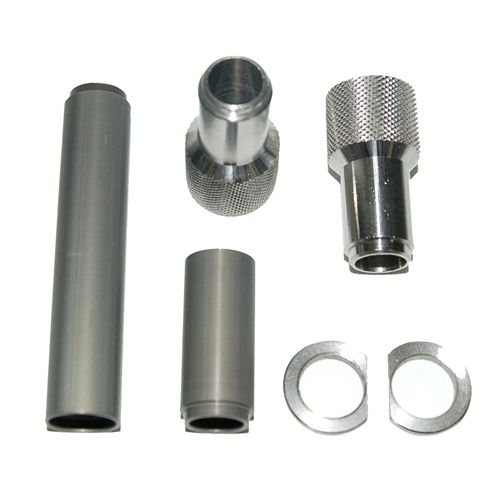
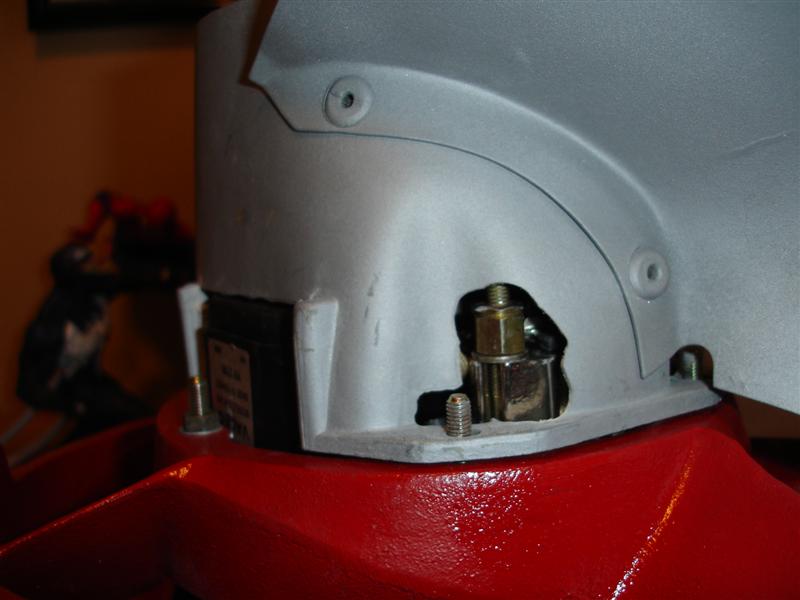
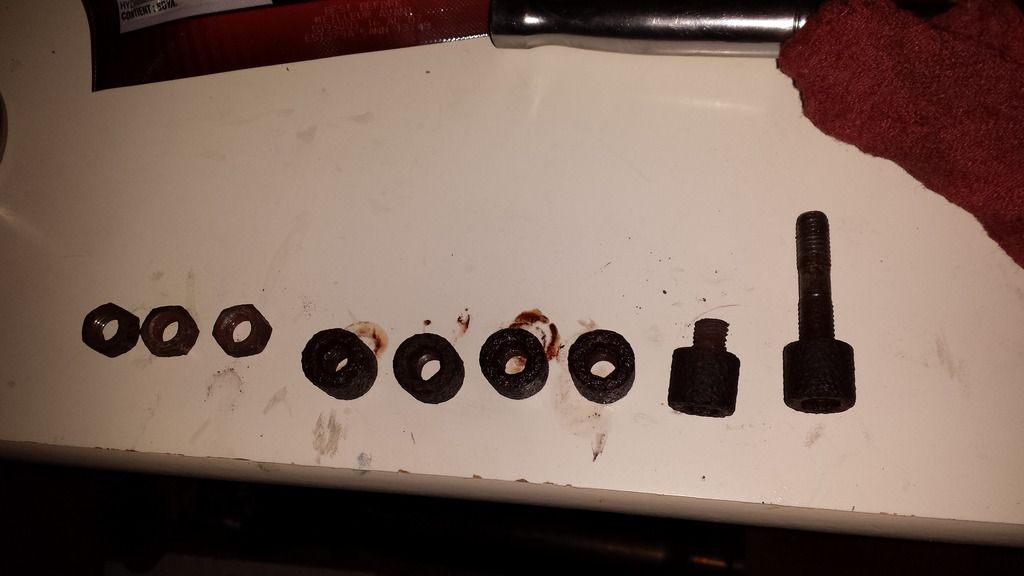
On the photo you see, I used cheap sockets as spacers. Later replaced by these
http://www.partsklassik.com/Porsche-...ring-nuts.aspx
http://www.partsklassik.com/Porsche-...ring-nuts.aspx
 03-07-2015, 02:41 PM
#32
Race Car
Thread Starter
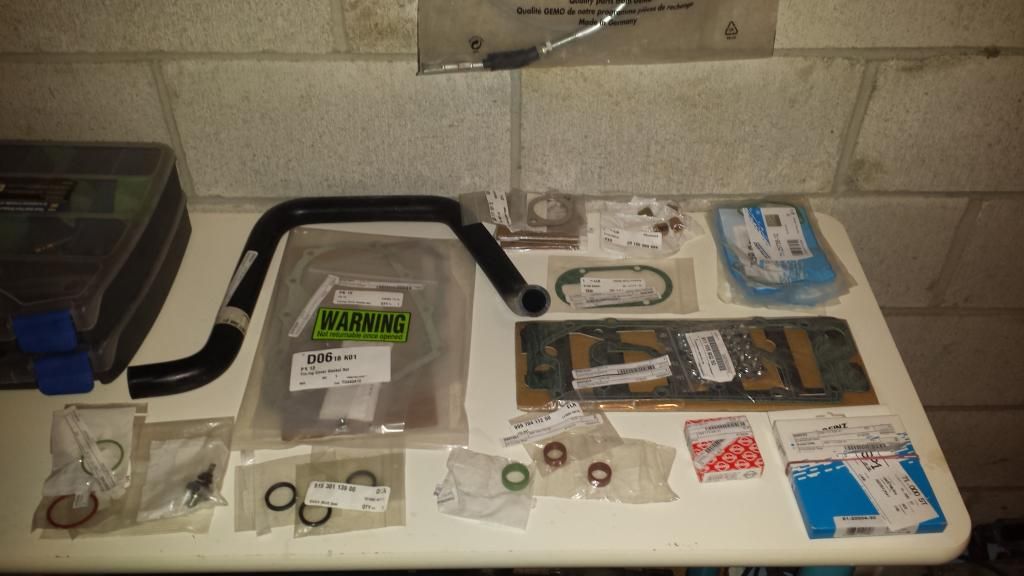
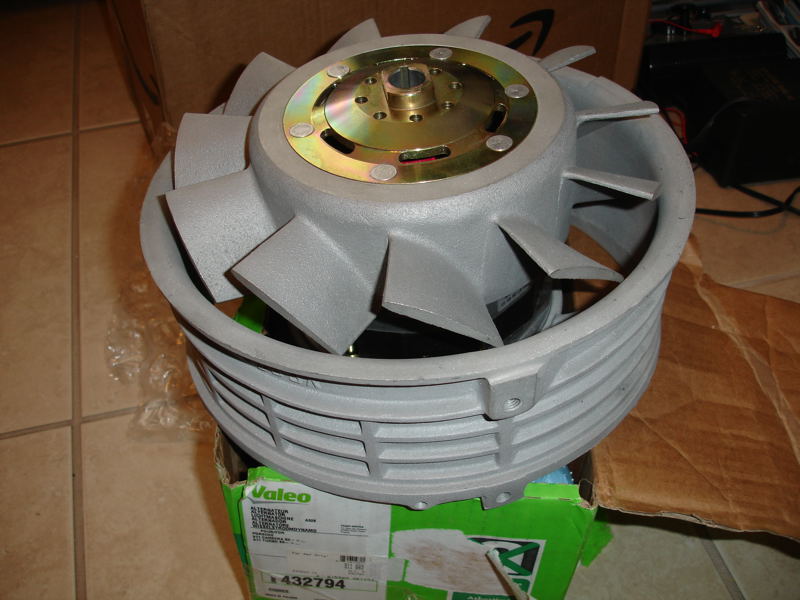
Got some parts in, thanks Jonathon Rolstin & Response Engineering!
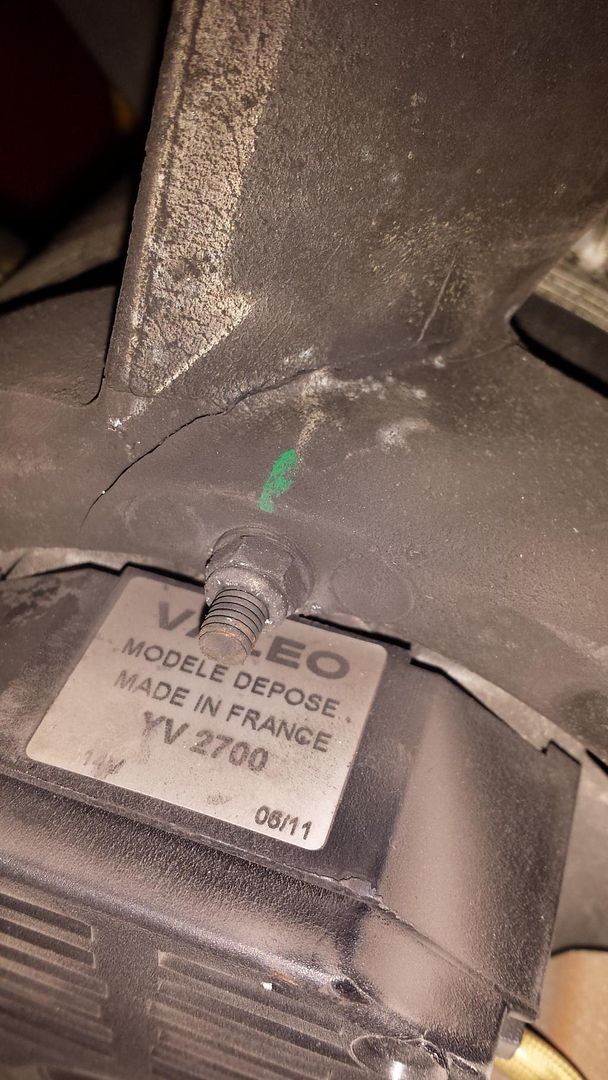
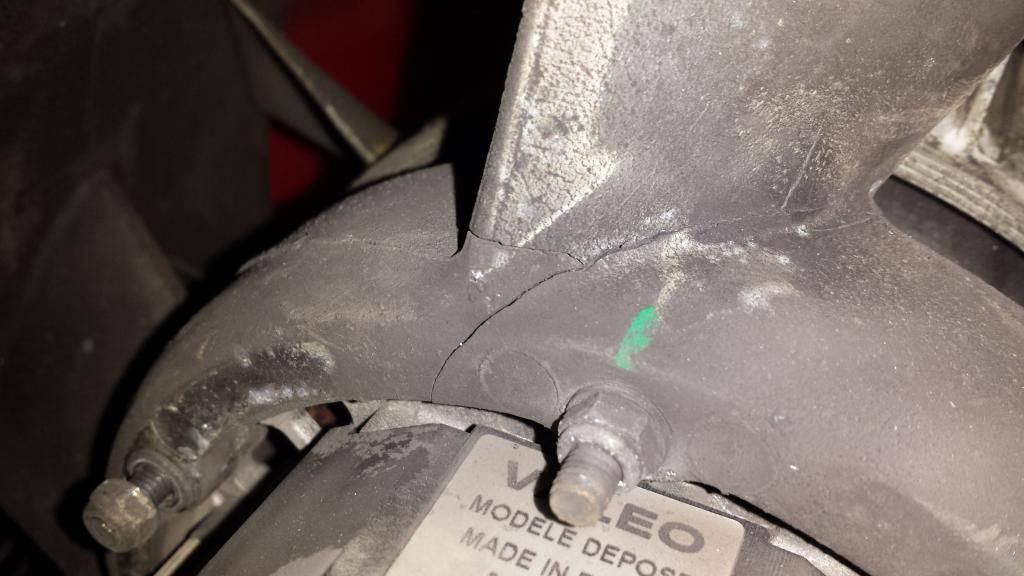
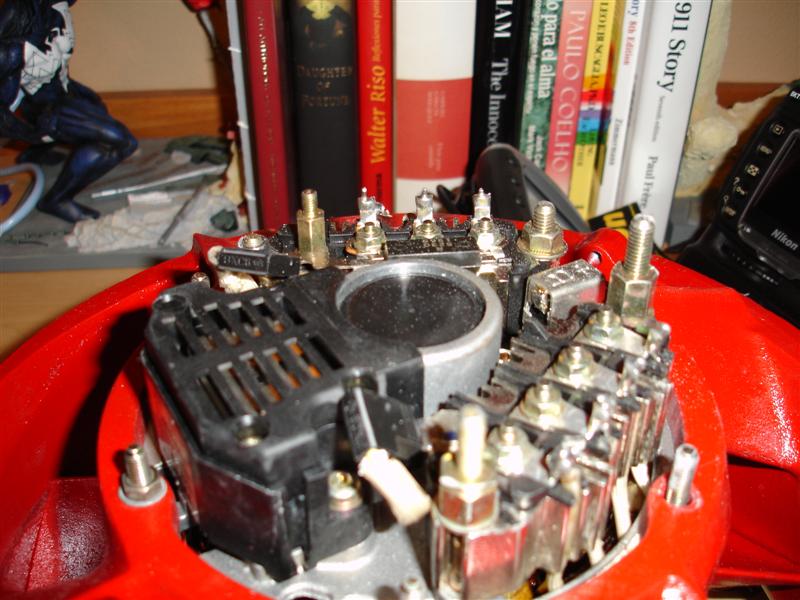
What's the consensus on this crack in the alternator housing? It's only the one blade, at the top. Doesn't flex or budge... can I just JB Weld this up?

What's the consensus on this crack in the alternator housing? It's only the one blade, at the top. Doesn't flex or budge... can I just JB Weld this up?
03-07-2015, 06:25 PM
#33
Professor of Pending Projects
Rennlist Member
Rennlist Member
Find a used one in good condition or buy a new one... not a part to use JB Weld... imho of course...
03-07-2015, 07:10 PM
#34
Team Owner
Looks like you need a new fan shroud. Vertex sells reman that may need some trimming to fit. You may get one at Hershey for a good price
Good thing is it's not an engine out thing and you can put it on a list
Good thing is it's not an engine out thing and you can put it on a list
03-07-2015, 07:47 PM
#35
Professor of Pending Projects
Rennlist Member
Rennlist Member
Here is the link to the one from VertexAuto
http://www.vertexauto.com/ShowItem/2...0Aluminum.aspx
Funny thing is that both are sold/fulfilled by Vertex...
 03-07-2015, 08:16 PM
#36
Race Car
Thread Starter
Guess I'm adding another $500 to the parts list! If I tell myself the aluminum part reduces weight it helps to ease the pain... this is an upgrade right?!
Thanks for the info guys - looks like Pelican has the same part, I might see if they can match the amazon price as I already have an order pending with them.
How has your experience with the part been, Jaime? Good fit and quality?
Thanks for the info guys - looks like Pelican has the same part, I might see if they can match the amazon price as I already have an order pending with them.
How has your experience with the part been, Jaime? Good fit and quality?
03-07-2015, 09:52 PM
#37
Professor of Pending Projects
Rennlist Member
Rennlist Member
In my case, I had to get all three parts. A new alternator, fan, and housing... I am lucky I know... 
Fitment was good but I did have to modify a bit the back alternator cover... let me see if I can find the thread on when I did that and I will update this post with it.
Fitment was good but I did have to modify a bit the back alternator cover... let me see if I can find the thread on when I did that and I will update this post with it.
03-08-2015, 02:52 PM
#38
RL Community Team
Rennlist Member
Rennlist Member
Guess I'm adding another $500 to the parts list! If I tell myself the aluminum part reduces weight it helps to ease the pain... this is an upgrade right?!
Thanks for the info guys - looks like Pelican has the same part, I might see if they can match the amazon price as I already have an order pending with them.
How has your experience with the part been, Jaime? Good fit and quality?
Thanks for the info guys - looks like Pelican has the same part, I might see if they can match the amazon price as I already have an order pending with them.
How has your experience with the part been, Jaime? Good fit and quality?
I have not heard anything bad about the Vertex housings other than the finish is a little crude-appearing, and it may need some tweaking to fit.
03-08-2015, 09:52 PM
#39
Race Car
Thread Starter
Unfortunately magnesium is less dense than aluminum, so the Vertex part will also be heavier. My fan housing was cracked too and it took a fair amount of searching to find an intact replacement. If you do find used online, ask the seller for close-up pictures of the base of every vane. The 3.2 cars had big alternators, which is a contributing factor. Another contributor may be over-tight fan belts. Adjust to the minimum tension that drives the fan without slippage.
I have not heard anything bad about the Vertex housings other than the finish is a little crude-appearing, and it may need some tweaking to fit.
I have not heard anything bad about the Vertex housings other than the finish is a little crude-appearing, and it may need some tweaking to fit.
03-08-2015, 11:11 PM
#40
Professor of Pending Projects
Rennlist Member
Rennlist Member
Good point... so it will be stronger!? I ordered the Vertex one already, should be here this week! What kind of tweaking? I heard a longer bolt is needed for the alternator wiring shroud, other than that haven't had much feedback. Thanks for the tip on the tension. Very strange, but my belt had a total of 7 spacers instead of the normal 6. It had 6 on the nut side of the pulley, and an extra 1 on the fan side. Does this seem strange?
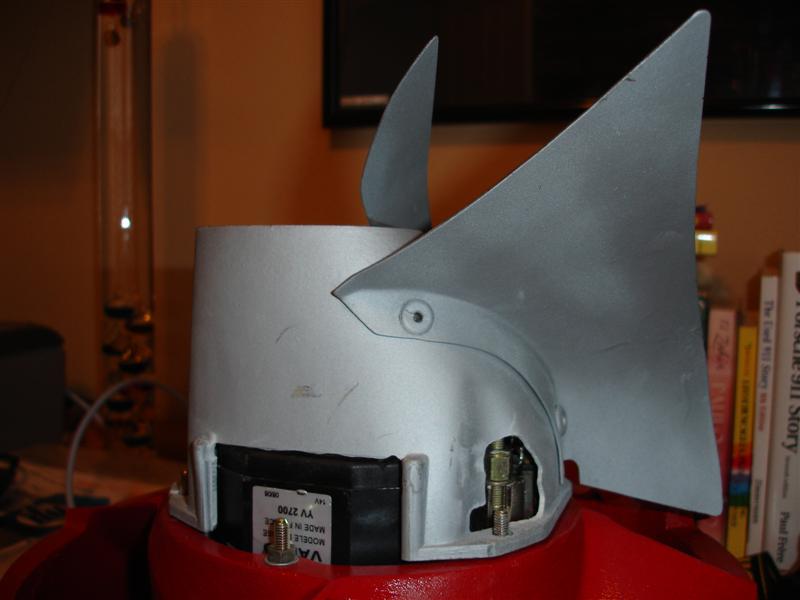
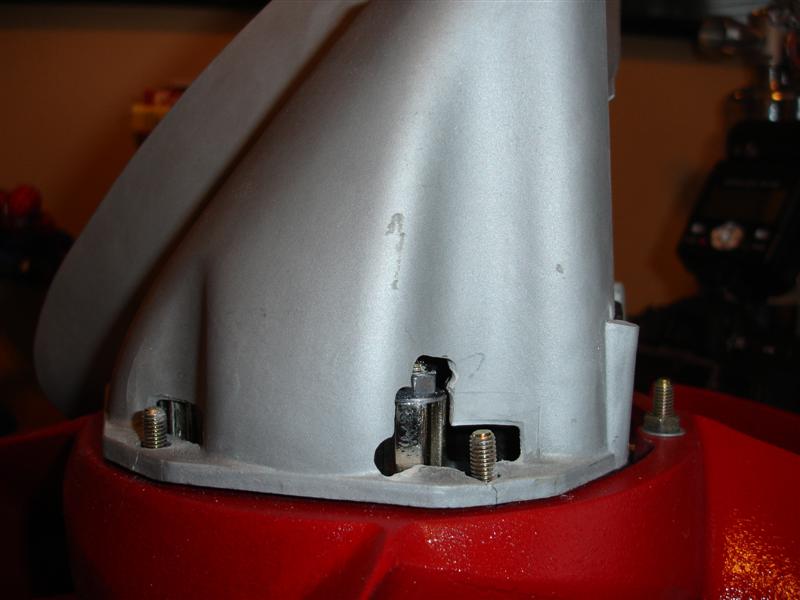
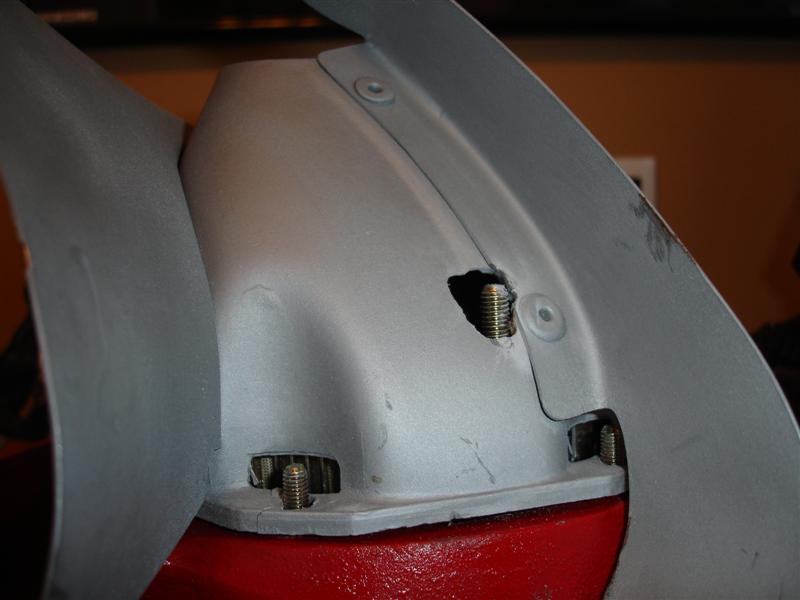
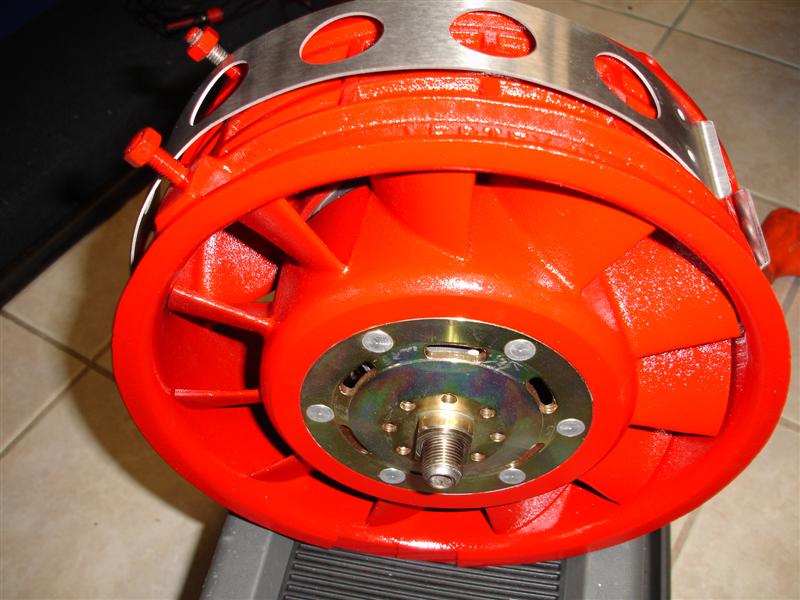
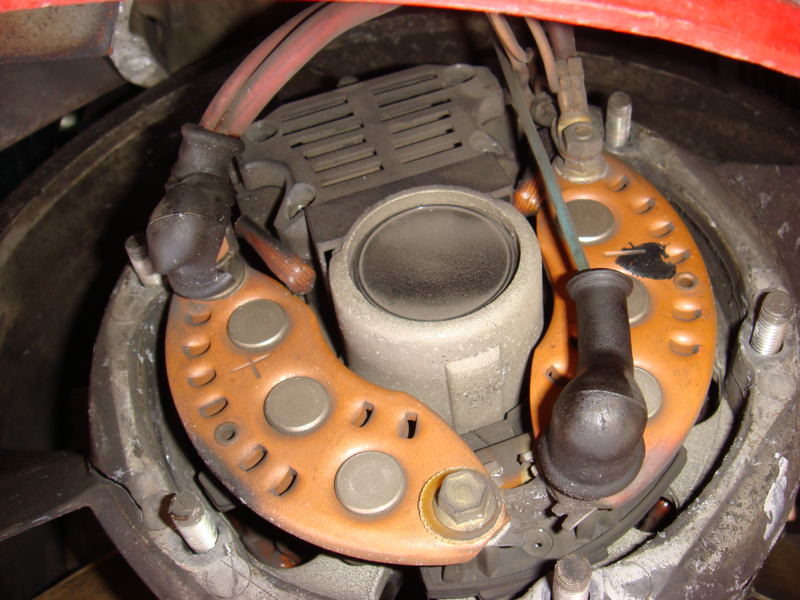
Found the posts when I did mine. Keep in mind that mine was an '83 so going to the updated alternator required some modifications to the back cover...
Due to cracked fan housing I had to update the housing, fan, and alternator.
Alternator is a 90amp unit.
In order to fit the fan shroud I had to make a few modifications to the plastic (see photos).
 03-08-2015, 11:25 PM
#41
Race Car
Thread Starter
Thanks Jaime, and yes, I ordered via Amazon (again, thank-you for posting the link). That $140 difference becomes $180ish after the CAD conversion!!!
Why did you have to update the fan and alternator as well? Did the cracked fan housing cause damage to them also?
Why did you have to update the fan and alternator as well? Did the cracked fan housing cause damage to them also?
03-08-2015, 11:42 PM
#42
Professor of Pending Projects
Rennlist Member
Rennlist Member

Here:
new fan housing, US$349.00 (aftermarket in aluminum since Porsche is no longer selling those...), new 11 Blade Alternator Fan, US$175.00 (also in aluminum), and new 90amp alternator, US$475.00 (because I needed the updated alternator to work with all the other parts, housing is for an 84 and requires this alternator)...
Both the fan housing and fan blades had cracks...
 03-16-2015, 10:10 PM
#43
Race Car
Thread Starter
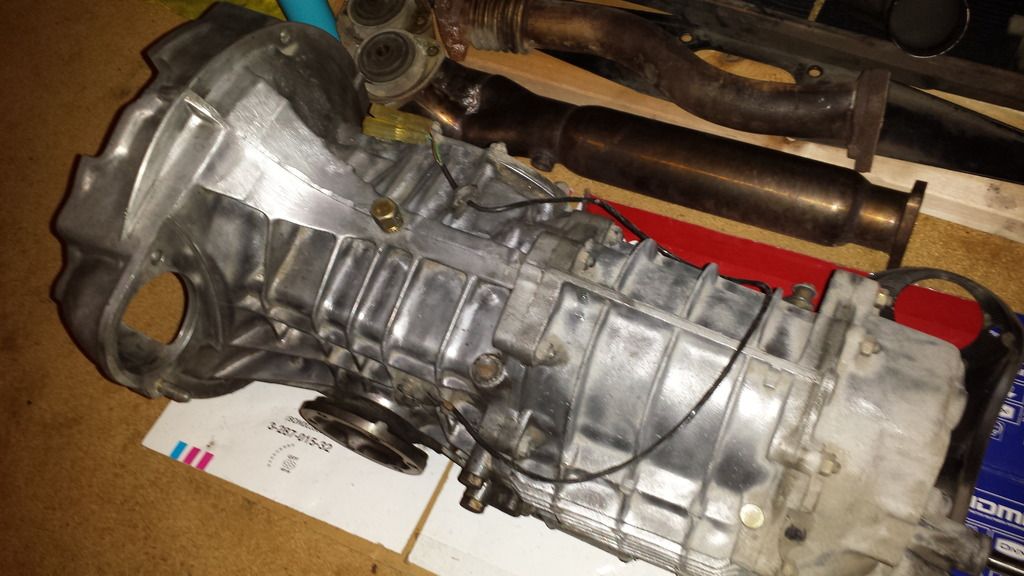
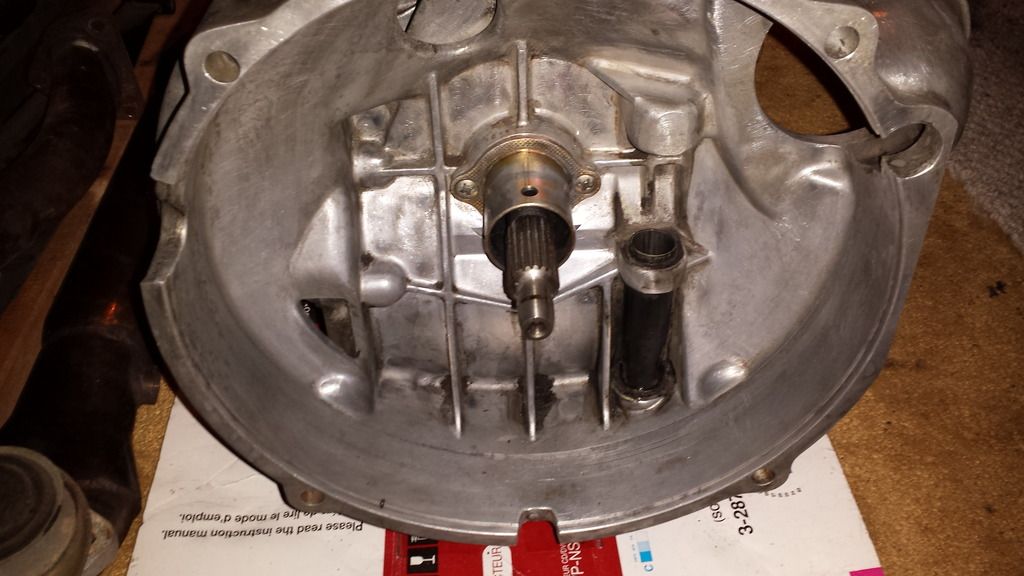
Finally found some time to get some more work done! Started off with some heavy cleaning of the transmission. The problem with me and cleaning is that I don't know when to stop! I get one section all nice and shiny, and then I decide the previous section could get better, and around I go in circles until I finally decide I've spent too much time on it and need to "draw the line" (theme of the project?!). Anyway, I'm happy with how it looks considering it will be hidden, just need to clean up a couple of the corners and crevices, will have to take it out of the basement and give it the brake cleaner treatment for those hard to get spaces, which I didn't want to do inside the house.
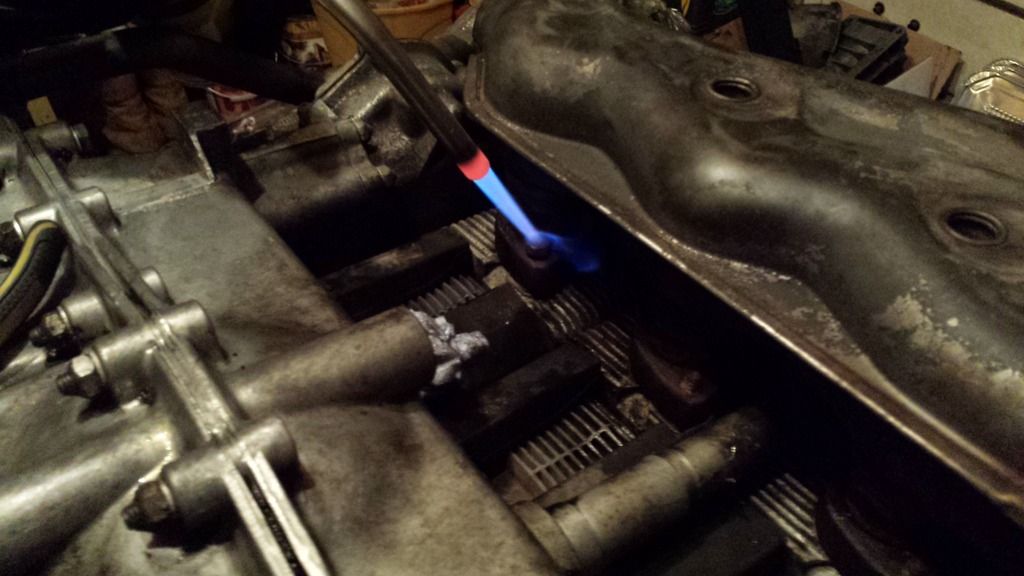
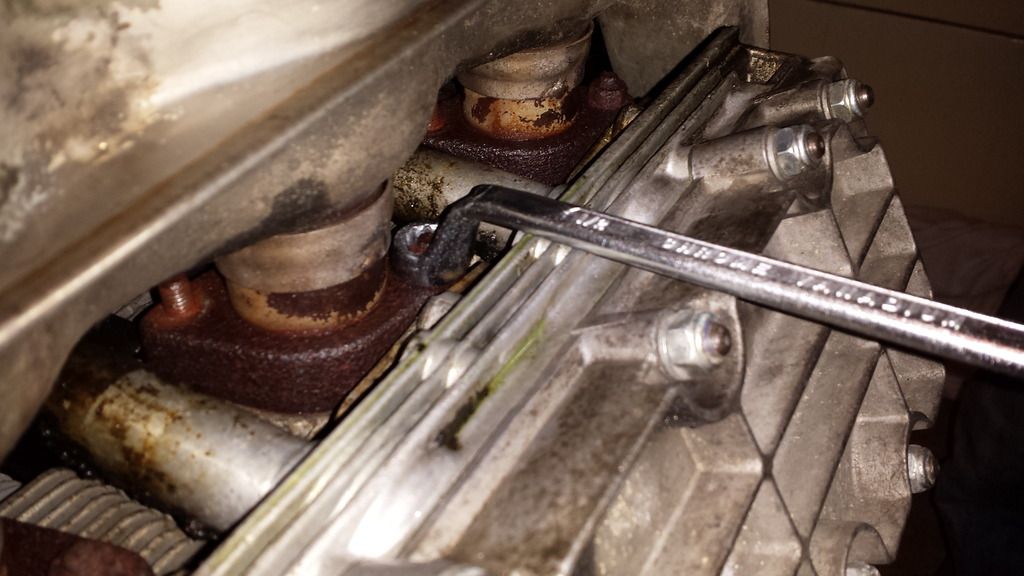
My friend Chris came over Friday night and helped me lift the engine onto the stand. Finally in the air! We tackled the exhaust right away, and the first barrel nut we tackled spun off fairly easily and clean! Of course, that meant we got cocky and subsequently spun the 2nd stud out with the nut, and broke stud number 3. So we got out the MAP gas and applied heat. All in all, we could have been more patient, ended up with 2 broken studs overall. Not too bad, they broke with lots of stud protruding so it shouldn't be a nightmare removing them with the proper tools. Interestingly, both broken studs were on the outside studs of the rearmost cylinders (1 and 4). Furthermore, 2 studs pulled out with the nuts and both of these were on the middle cylinders, inner studs! Coincidence? I think not, must be something with the way these cylinders see heat compared to cylinders 3 and 6?
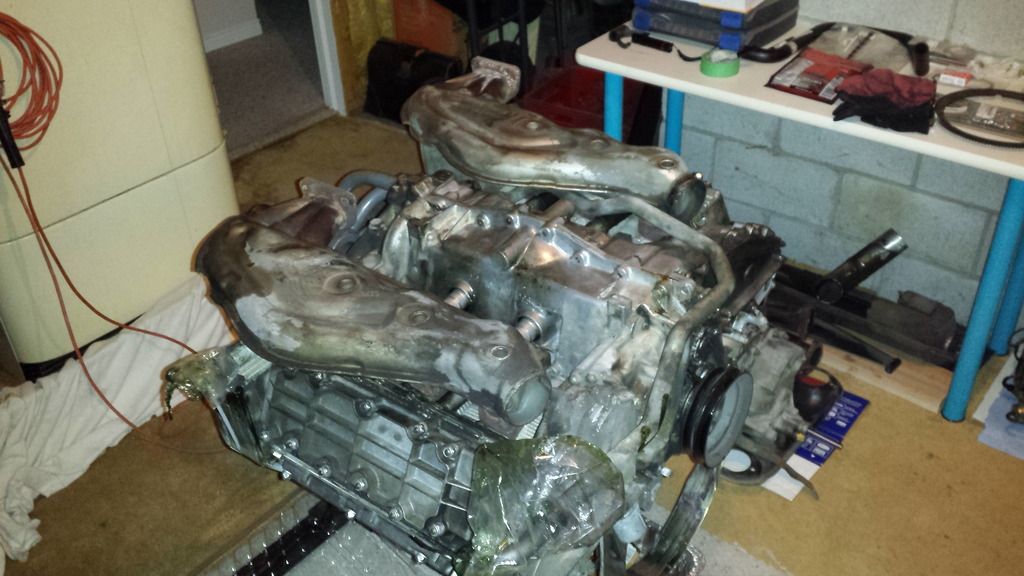
Other than a bit of grime which I'll clean off easily, the heat exchangers are in excellent shape. They will be available for sale along with the rest of the exhaust system, PM me if interested!
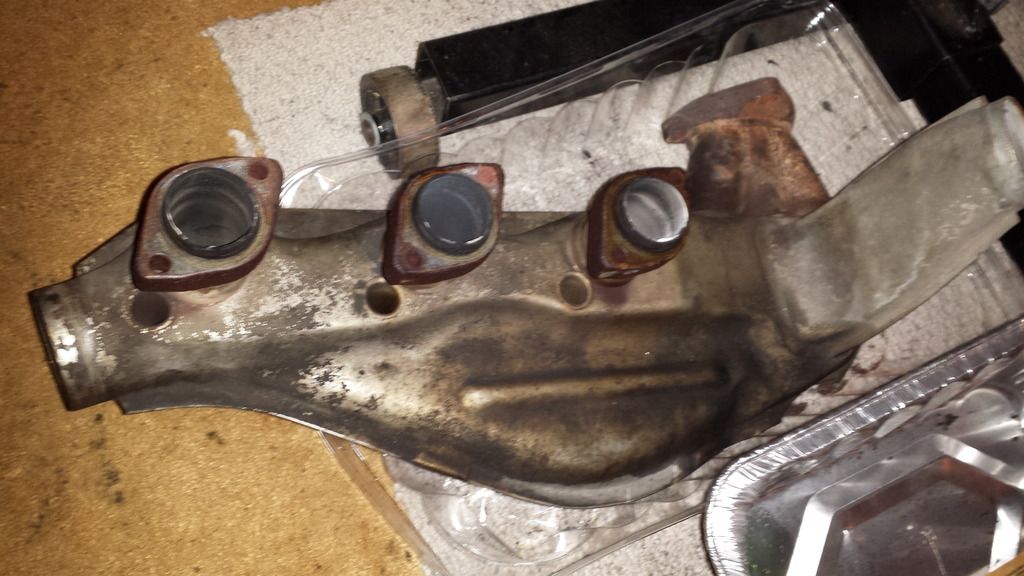
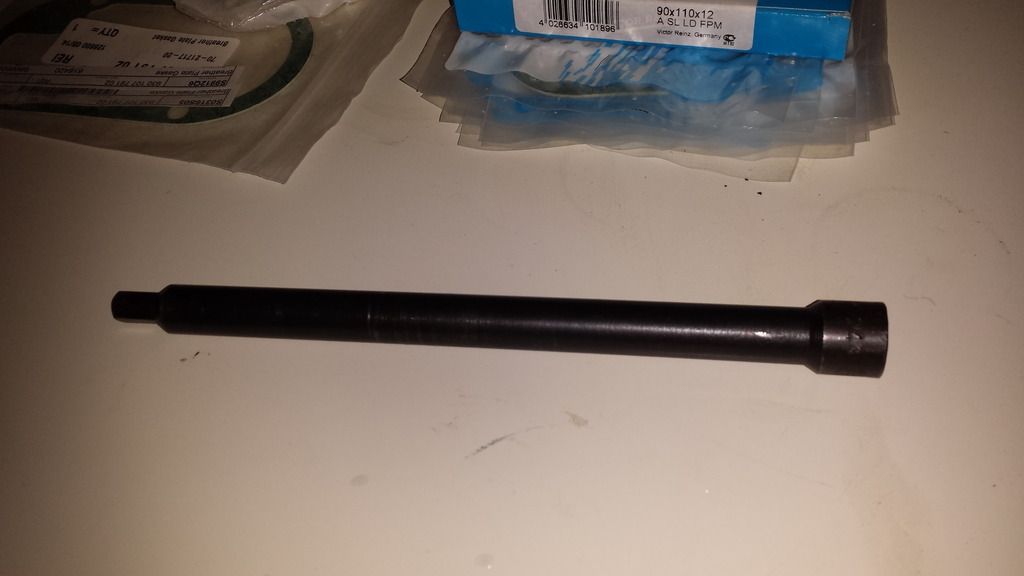
Tools used were the Porsche tool for barrel nut removal (thank-you Jonathon Rolstin) and a box-end wrench I found at the local parts store, which worked perfectly for this!
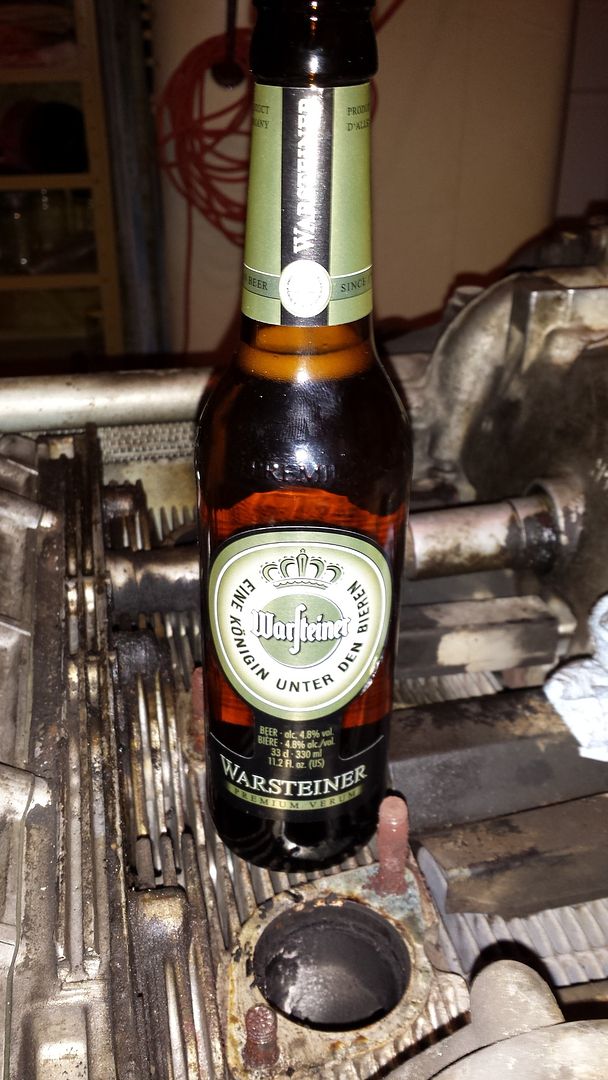
Ok, so exhausts removed means we deserve a beer, German beer seemed appropriate.
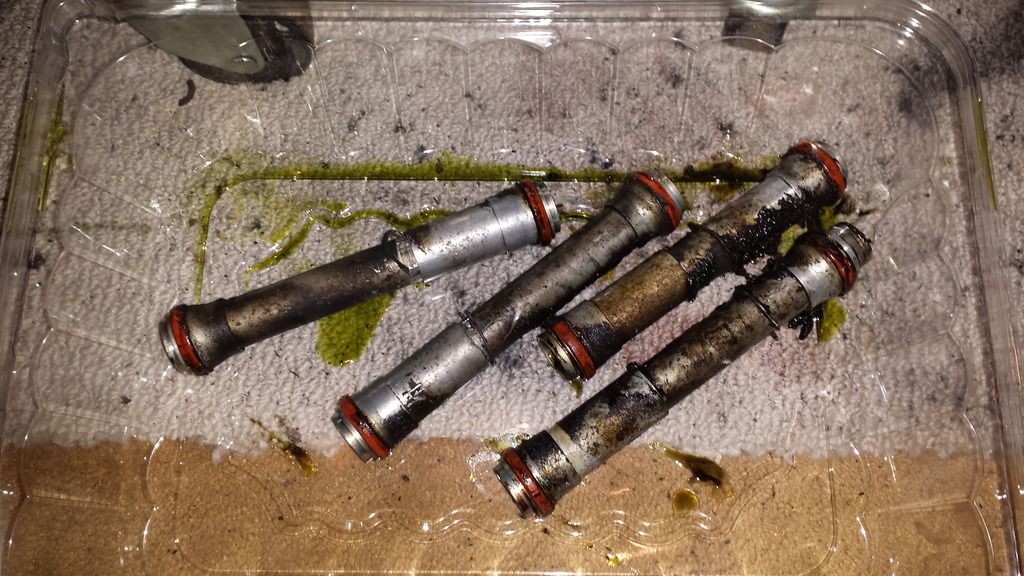
The oil return tubes came out easily, as they were the collapsible type. Pretty grimy!
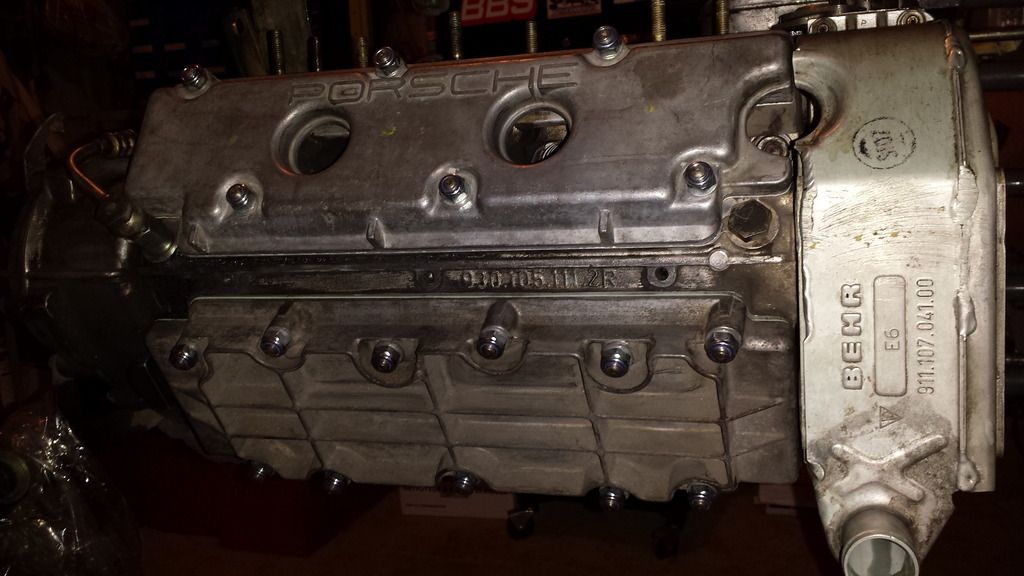
Next we taclked the oil cooler. Was fairly grimy. One thing I'm enjoying about this entire process is taking it piece by piece and learning about each component individually, gaining an appreciation for how all the various parts of the engine interact and contribute to making this incredible machine perform the way it does!
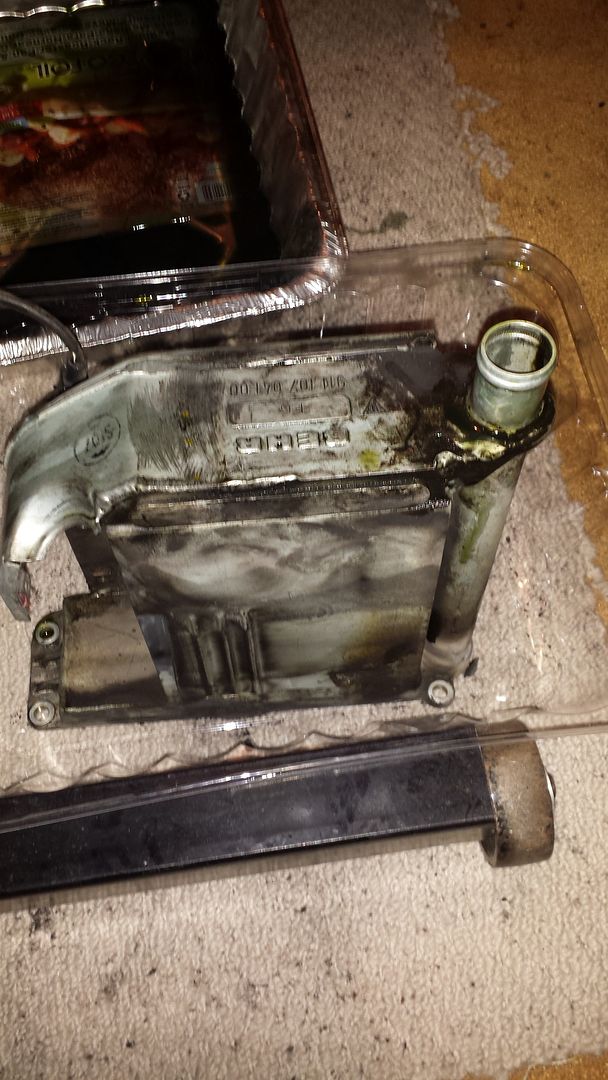
Cleaned up, took a razor blade to the mating surfaces to get rid of burnt oil and gunk that had attached itself to the metal, careful not to mar the surface or edges. Lubed up the new seals with oil and installed the cleaned out oil cooler.
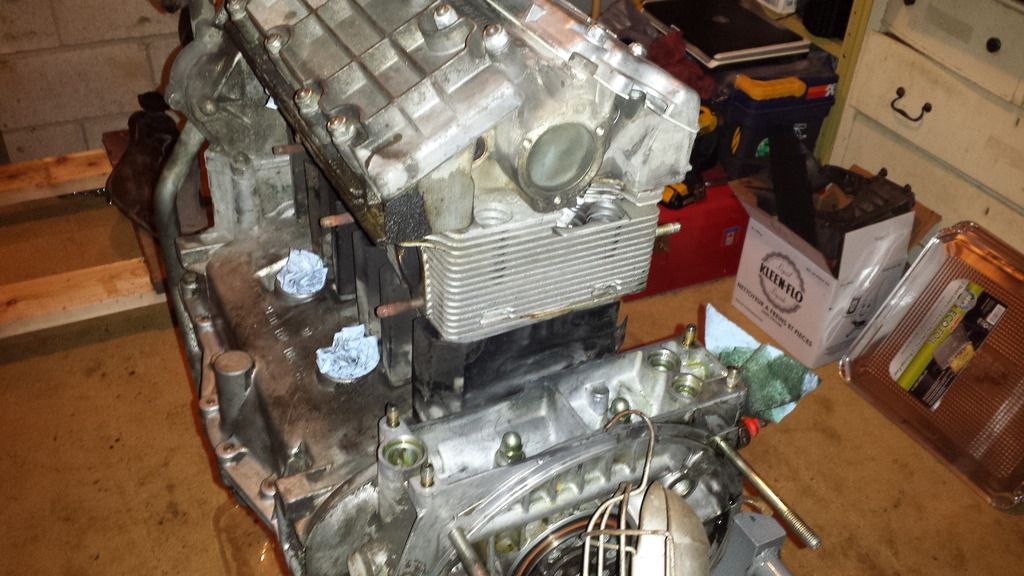
Finally, decided to do a valve adjustment and clean up the valve covers. I've done a few valve adjustments with the engine in the car, and WOW, what a difference when it is on the stand! Took half the time. All buttoned up:
My friend Chris came over Friday night and helped me lift the engine onto the stand. Finally in the air! We tackled the exhaust right away, and the first barrel nut we tackled spun off fairly easily and clean! Of course, that meant we got cocky and subsequently spun the 2nd stud out with the nut, and broke stud number 3. So we got out the MAP gas and applied heat. All in all, we could have been more patient, ended up with 2 broken studs overall. Not too bad, they broke with lots of stud protruding so it shouldn't be a nightmare removing them with the proper tools. Interestingly, both broken studs were on the outside studs of the rearmost cylinders (1 and 4). Furthermore, 2 studs pulled out with the nuts and both of these were on the middle cylinders, inner studs! Coincidence? I think not, must be something with the way these cylinders see heat compared to cylinders 3 and 6?
Other than a bit of grime which I'll clean off easily, the heat exchangers are in excellent shape. They will be available for sale along with the rest of the exhaust system, PM me if interested!
Tools used were the Porsche tool for barrel nut removal (thank-you Jonathon Rolstin) and a box-end wrench I found at the local parts store, which worked perfectly for this!
Ok, so exhausts removed means we deserve a beer, German beer seemed appropriate.
The oil return tubes came out easily, as they were the collapsible type. Pretty grimy!
Next we taclked the oil cooler. Was fairly grimy. One thing I'm enjoying about this entire process is taking it piece by piece and learning about each component individually, gaining an appreciation for how all the various parts of the engine interact and contribute to making this incredible machine perform the way it does!
Cleaned up, took a razor blade to the mating surfaces to get rid of burnt oil and gunk that had attached itself to the metal, careful not to mar the surface or edges. Lubed up the new seals with oil and installed the cleaned out oil cooler.
Finally, decided to do a valve adjustment and clean up the valve covers. I've done a few valve adjustments with the engine in the car, and WOW, what a difference when it is on the stand! Took half the time. All buttoned up:
03-16-2015, 10:18 PM
#44
Race Car
Thread Starter
Am picking up some goodies tomorrow, stay tuned!
Also heard from Brian at RarlyL8, he was starting on my 1 5/8" headers with heater boxes this past weekend and said they should be ready to ship shortly! I am VERY excited!
Also heard from Brian at RarlyL8, he was starting on my 1 5/8" headers with heater boxes this past weekend and said they should be ready to ship shortly! I am VERY excited!