
Projects on our (new to us) 1967 912-6
 01-23-2014, 10:43 PM
#61
Racer
Thread Starter

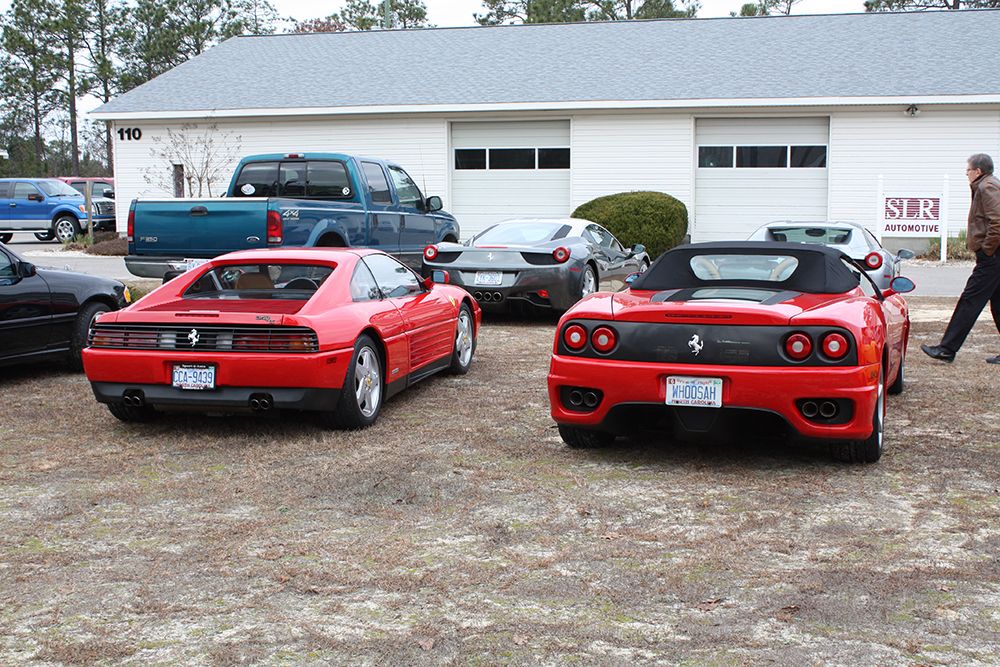
The engine is back in the Ferrari and I recently drove it to a Ferrari event to visit a restoration shop near Southern Pines, NC. Great shop. My work on preparing the Falcon to sell is complete. Time to get back on the Porsche projects.
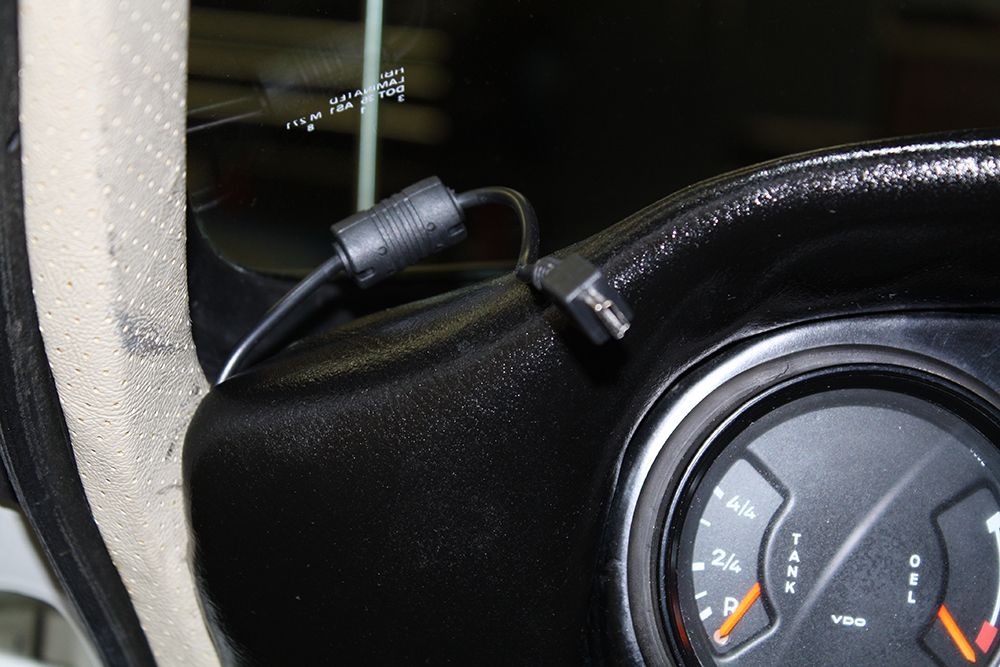
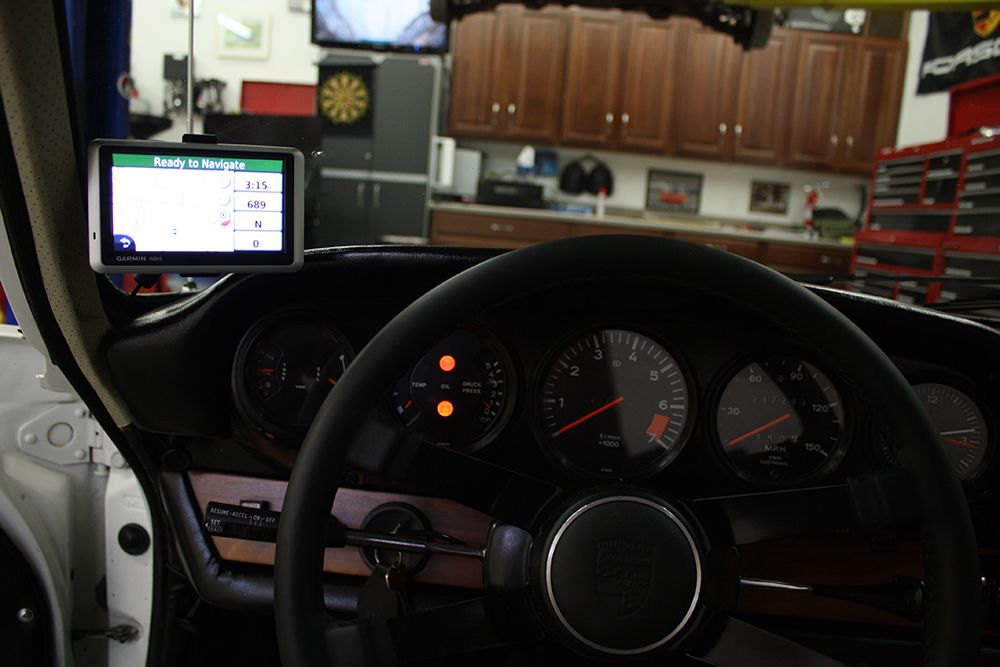
I hate having the cord dangling from my GPS so I hard wired it. I found a source for 12V ignition under the dash and ran the wire to the lower left corner of the windshield. Much cleaner looking and easier for me to see.

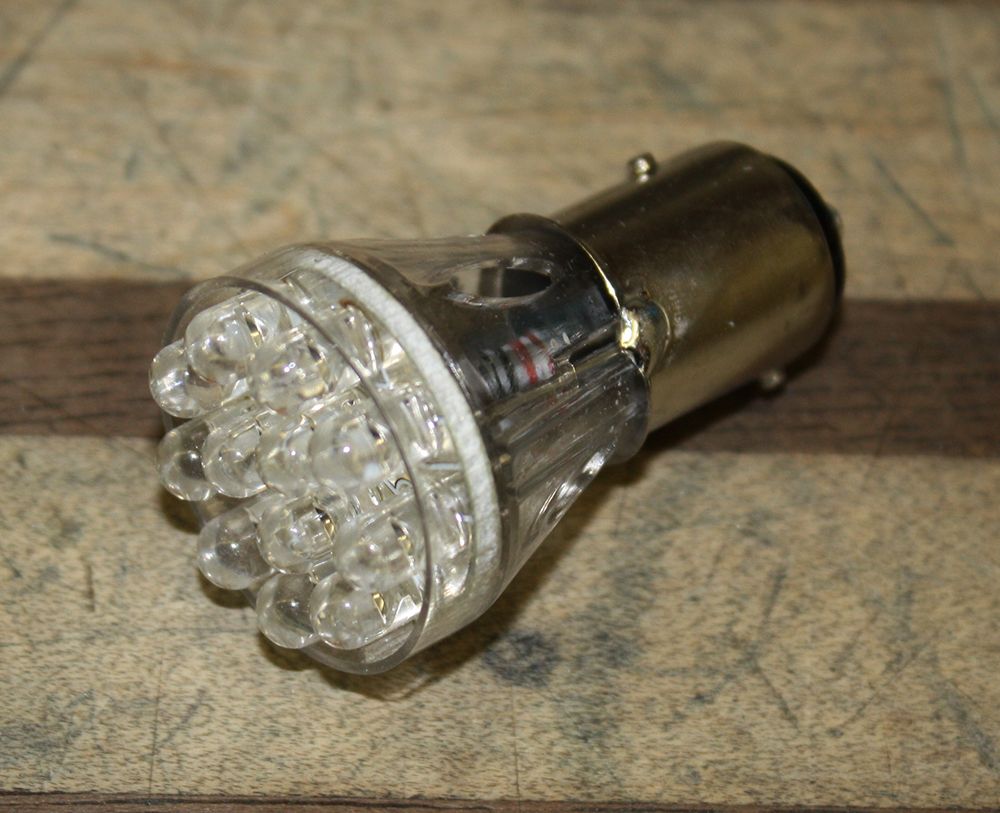
I have used LED light bulbs in place of the stock bulbs for turn signals and brake lights in other cars. Upon removing the right front turn signal I discovered that the wiring connectors were not in good shape and there was some corrosion on them as well. So I took each turn signal and taillight assembly out, soldered in new connectors, sanded down the terminals and, in general, refurbished them electrically. On one of the front turn signal assemblies, when I tried to remove the ground lead, the terminal detached from the housing. I tried to solder it but that did not work. Eventually I drilled a small hole in the housing and used a screw to mount the terminal. It worked and, overall, the lights are now brighter. BTW, the LED lights did not work in the taillight assemblies as the bulbs are mounted from the top so the LED's shined down rather than out. Too bad as they are much brighter and would last longer.

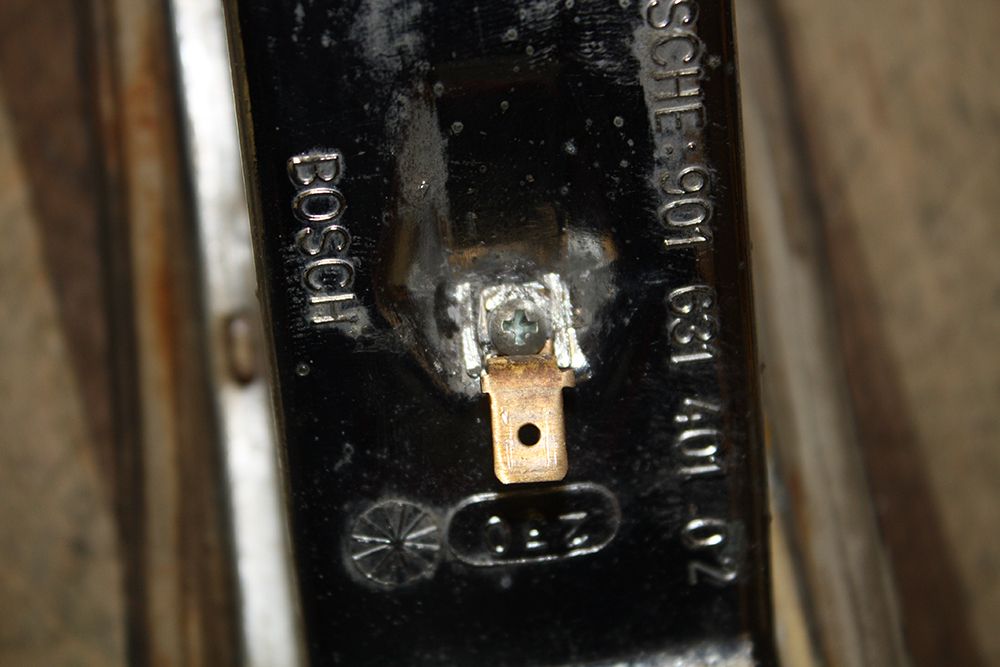
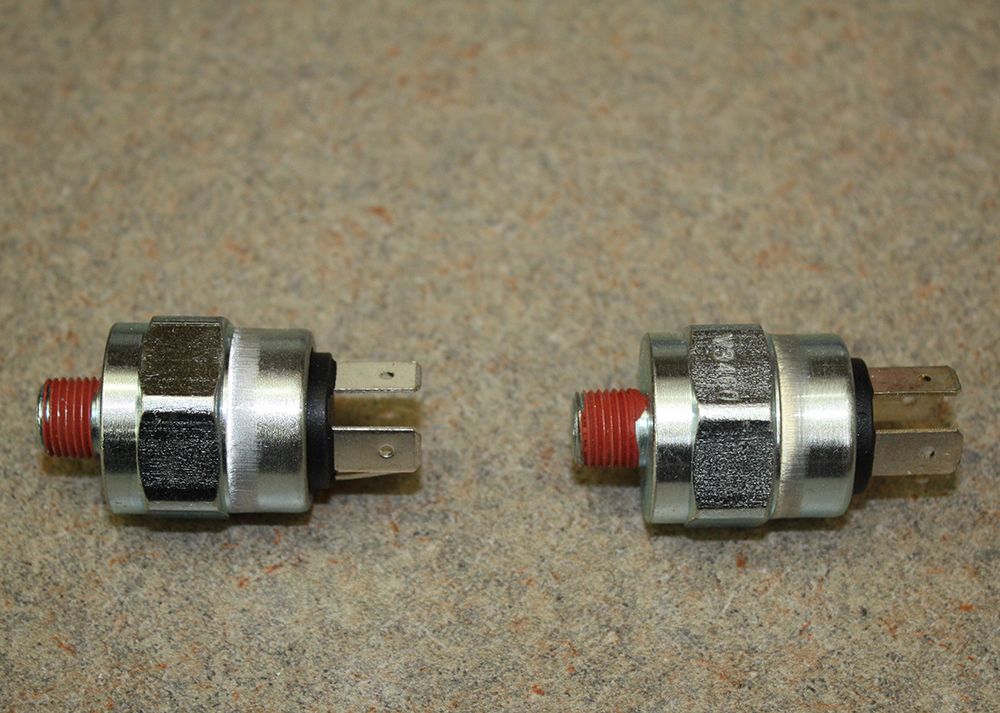
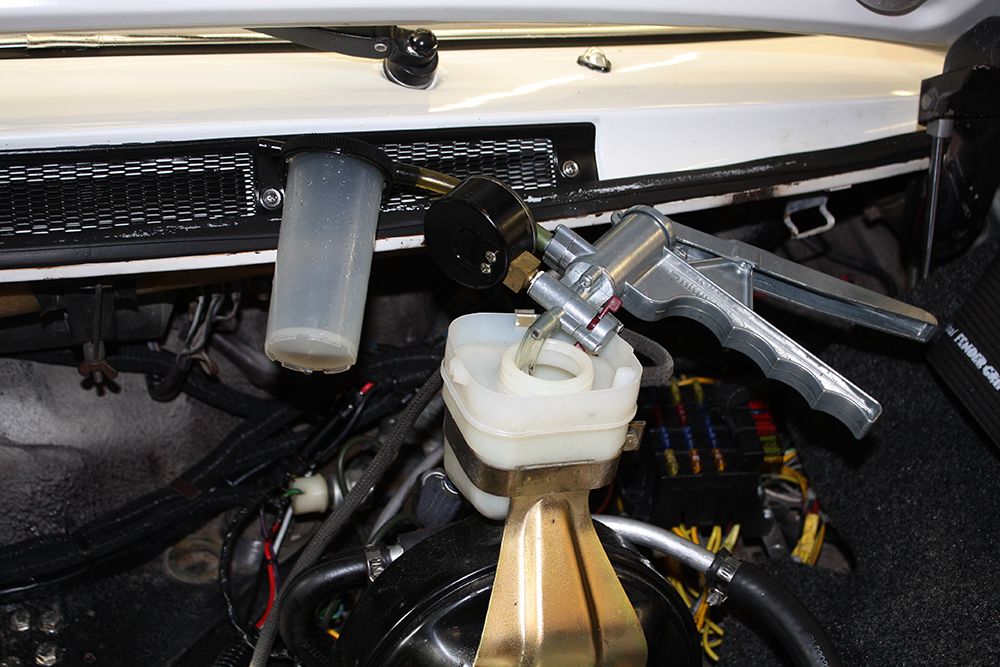
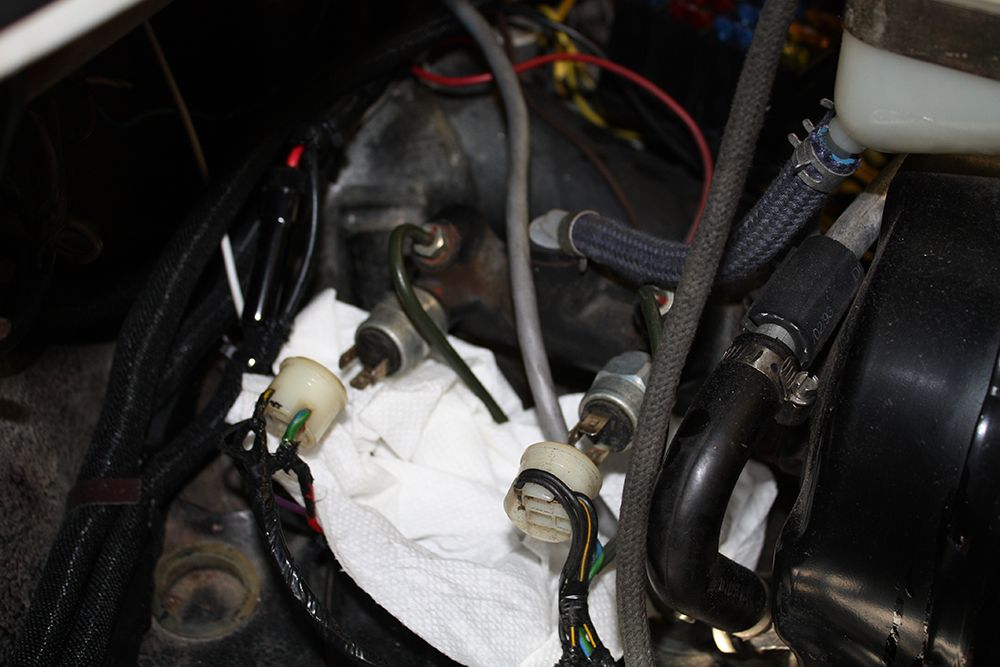
I had also noticed that to activate the brake lights the brake pedal must be pushed in very far. I did a search and one of the causes could be the brake switches on the master cylinder. Evidently, as they age, they don't activate as quickly. I first drained the brake fluid reservoir and then replaced the switches. Unfortunately, I cannot tell a difference. Any suggestions??
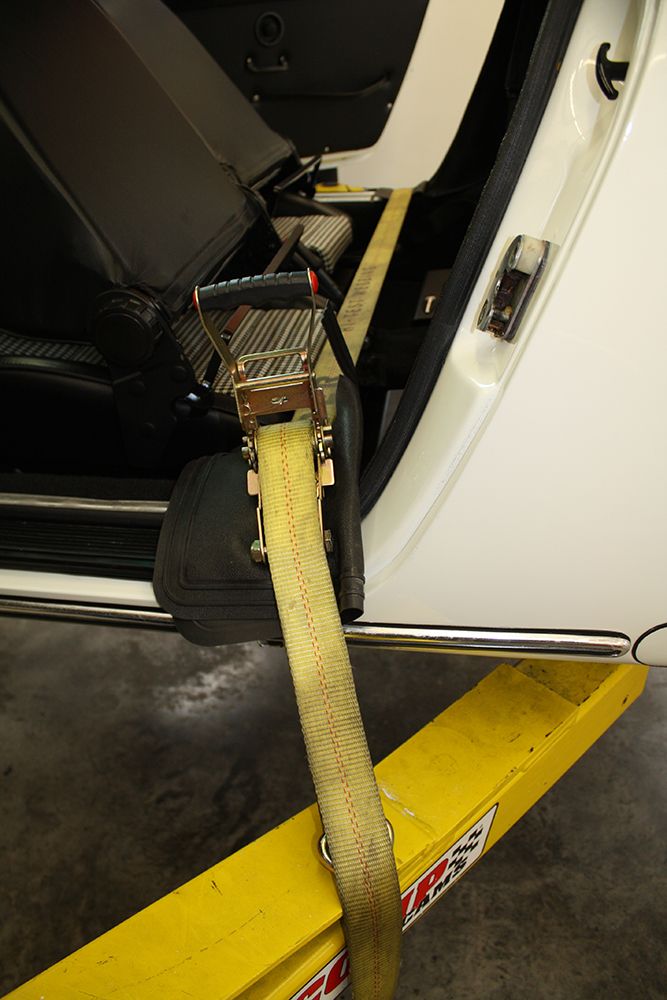
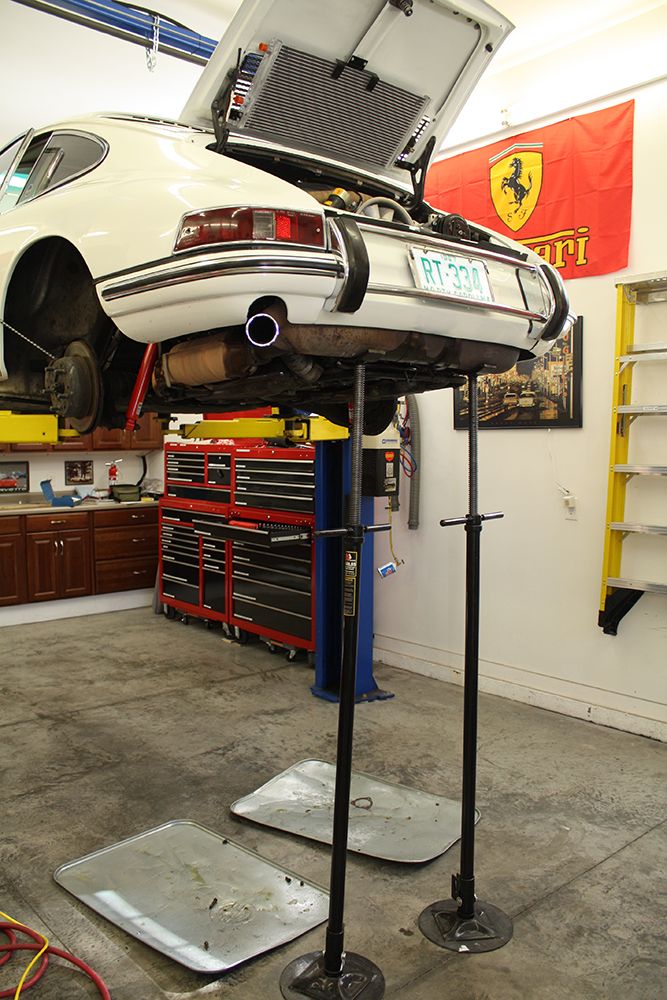
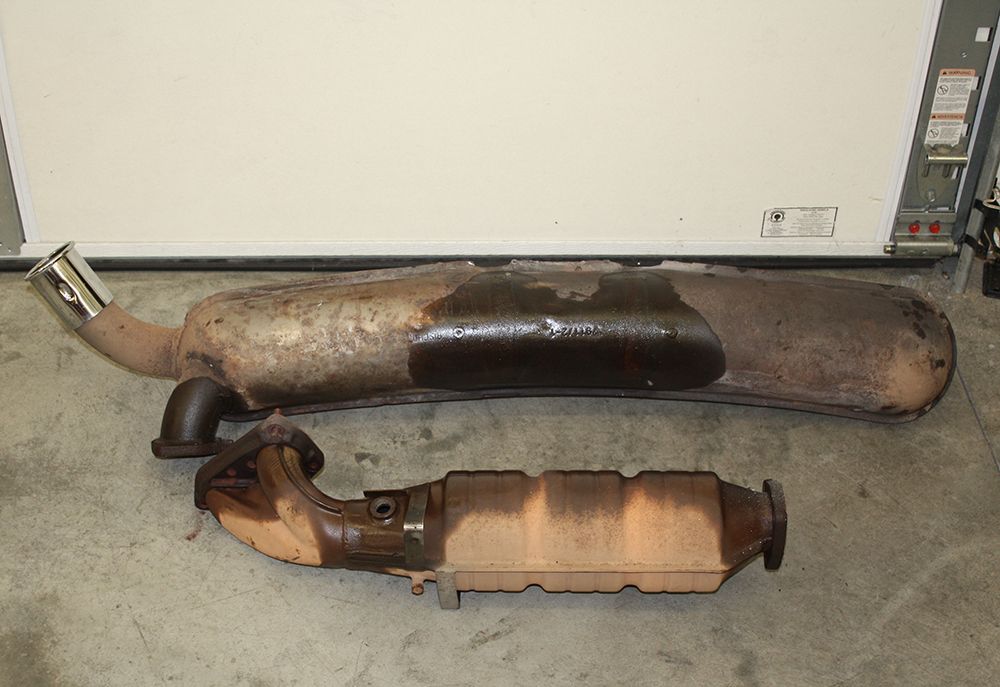
The car was owned by a California resident for 30 years. Being a California car, when he did the SC motor swap, he had to install all of the emissions equipment including the catalytic converter. I plan on backdating the exhaust to SSI heat exchangers and a stock muffler. To that end, I began removing the exhaust today. Since I plan on pulling the motor after the exhaust is removed, thus removing much weight from the rear end, I ran a tie down strap across the interior to the arms of the lift. Sure would hate to have the car tip forward off the lift.
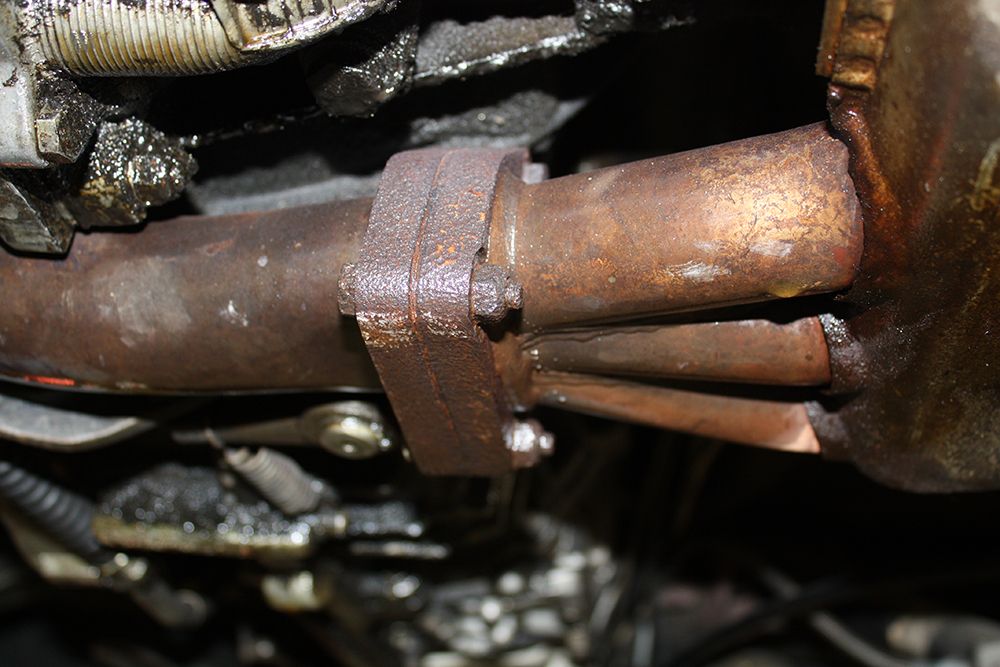
The muffler was the first to go followed by the catalytic converter. I soaked all of the bolts and nuts with penetrant for the past couple days. Of the three bolts mounting the muffler to the cat, one bolt unscrewed, one broke and I had to cut off the last one with my sawzall. Given that history, I was concerned about the bolts holding the cat to the heat exchangers. However, they all came out relatively easy after I had removed the O2 sensor with my special socket.
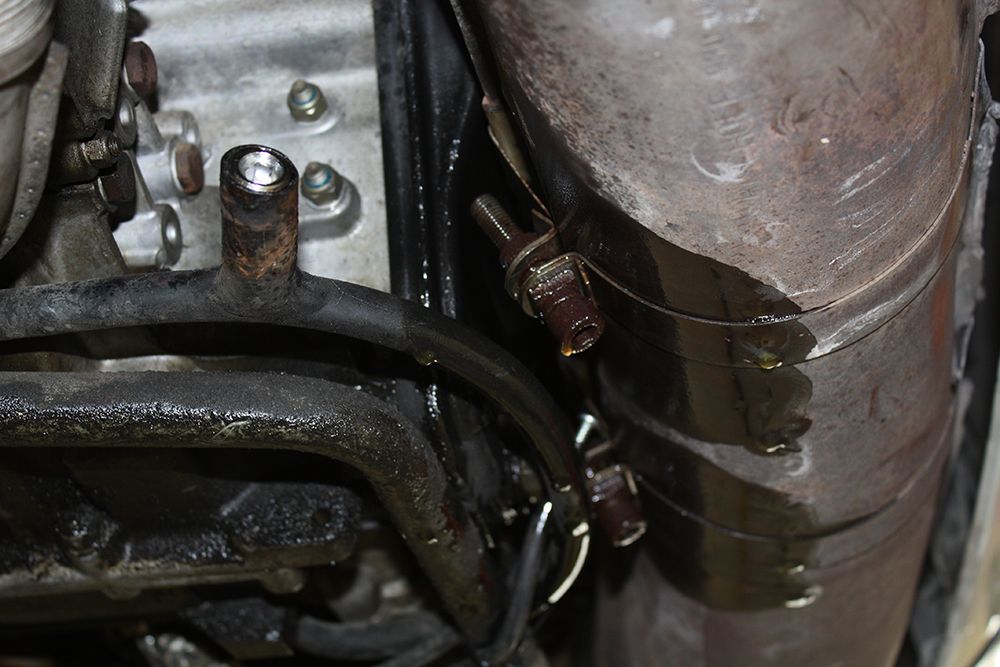
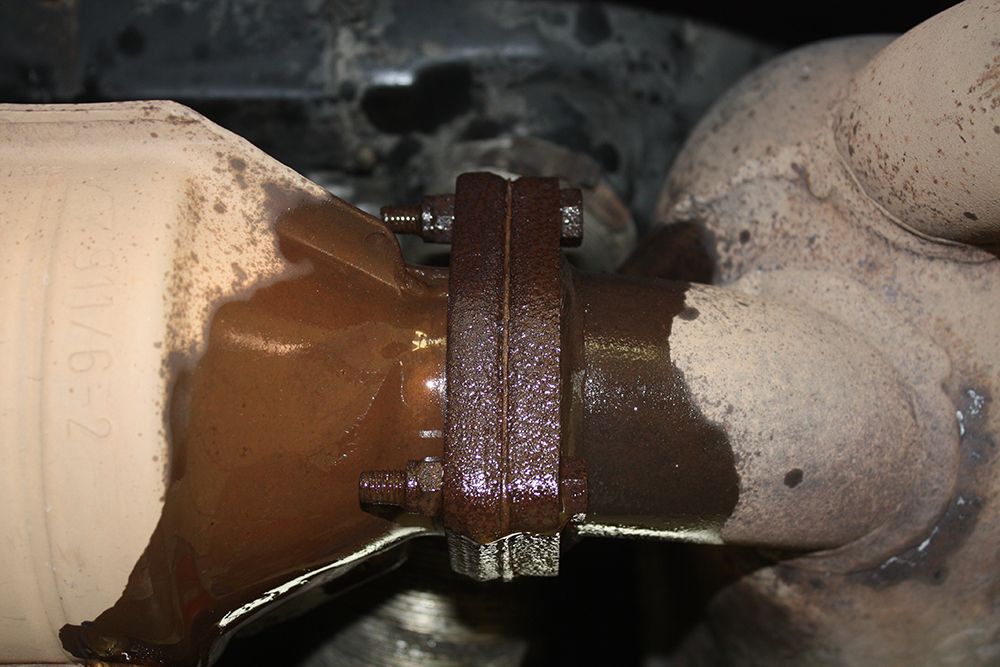
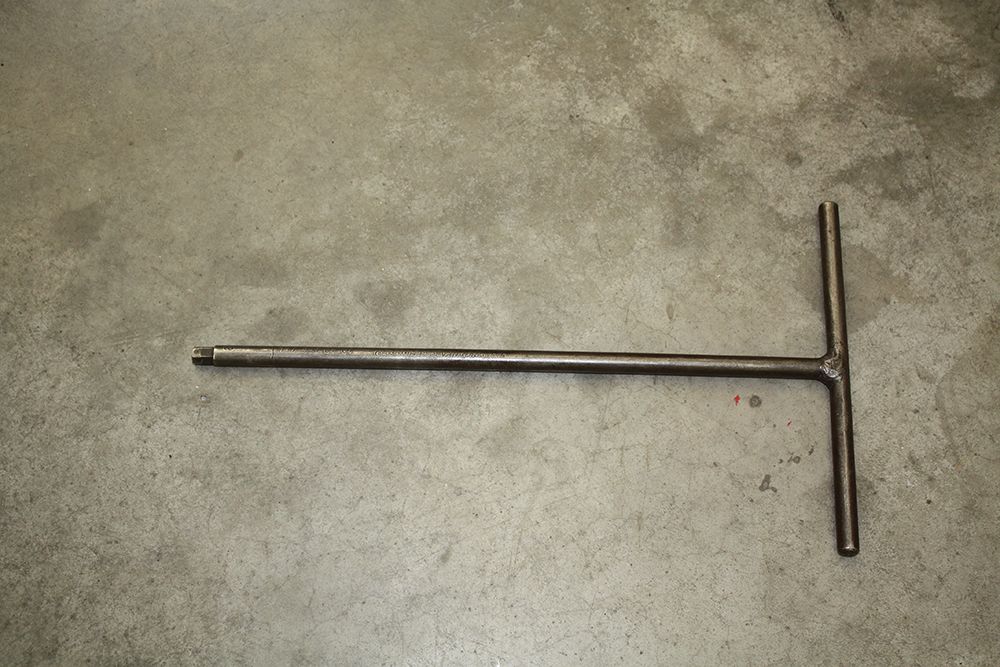
Now that those pieces were out of the way, I could remove the heat exchangers. I broke out a tool I have had for over 30 years to remove the hex nuts. A local Porsche repair place had told me that they heat the nuts until they are nearly cherry red before trying to remove them. The trick here is to not break off an exhaust stud. The heat worked on the three hex nuts on the left exchanger. And that is where I quit for the day. The remaining nuts will be a challenge as you must use a universal joint to get the socket on the nut which reduces the amount of torque one can apply and makes it easier to round of the nut. Should be interesting when I attack those.
www.jerryforthofer.wordpress.com
I hate having the cord dangling from my GPS so I hard wired it. I found a source for 12V ignition under the dash and ran the wire to the lower left corner of the windshield. Much cleaner looking and easier for me to see.


I have used LED light bulbs in place of the stock bulbs for turn signals and brake lights in other cars. Upon removing the right front turn signal I discovered that the wiring connectors were not in good shape and there was some corrosion on them as well. So I took each turn signal and taillight assembly out, soldered in new connectors, sanded down the terminals and, in general, refurbished them electrically. On one of the front turn signal assemblies, when I tried to remove the ground lead, the terminal detached from the housing. I tried to solder it but that did not work. Eventually I drilled a small hole in the housing and used a screw to mount the terminal. It worked and, overall, the lights are now brighter. BTW, the LED lights did not work in the taillight assemblies as the bulbs are mounted from the top so the LED's shined down rather than out. Too bad as they are much brighter and would last longer.


I had also noticed that to activate the brake lights the brake pedal must be pushed in very far. I did a search and one of the causes could be the brake switches on the master cylinder. Evidently, as they age, they don't activate as quickly. I first drained the brake fluid reservoir and then replaced the switches. Unfortunately, I cannot tell a difference. Any suggestions??


The car was owned by a California resident for 30 years. Being a California car, when he did the SC motor swap, he had to install all of the emissions equipment including the catalytic converter. I plan on backdating the exhaust to SSI heat exchangers and a stock muffler. To that end, I began removing the exhaust today. Since I plan on pulling the motor after the exhaust is removed, thus removing much weight from the rear end, I ran a tie down strap across the interior to the arms of the lift. Sure would hate to have the car tip forward off the lift.

The muffler was the first to go followed by the catalytic converter. I soaked all of the bolts and nuts with penetrant for the past couple days. Of the three bolts mounting the muffler to the cat, one bolt unscrewed, one broke and I had to cut off the last one with my sawzall. Given that history, I was concerned about the bolts holding the cat to the heat exchangers. However, they all came out relatively easy after I had removed the O2 sensor with my special socket.


Now that those pieces were out of the way, I could remove the heat exchangers. I broke out a tool I have had for over 30 years to remove the hex nuts. A local Porsche repair place had told me that they heat the nuts until they are nearly cherry red before trying to remove them. The trick here is to not break off an exhaust stud. The heat worked on the three hex nuts on the left exchanger. And that is where I quit for the day. The remaining nuts will be a challenge as you must use a universal joint to get the socket on the nut which reduces the amount of torque one can apply and makes it easier to round of the nut. Should be interesting when I attack those.


www.jerryforthofer.wordpress.com
Last edited by jerhofer; 01-28-2014 at 12:28 AM.
 01-24-2014, 08:55 AM
#63
Racer
Thread Starter


I sure felt like a piker in the parking lot with my lowly 348.


www.jerryforthofer.wordpress.com
Last edited by jerhofer; 01-28-2014 at 12:28 AM.
01-24-2014, 03:17 PM
#64
Thanks for the update.
I was a regular shop visitor when restoring a '62 190 SL and got to know Bjorn and his crew. Nice place to do business. Bjorn helped me out with parts and advice etc. as they specialized in the 190/300 SL's almost exclusively for some time years ago.
Good to see he's doing well.
Bjorn had a really nice metallic green/tan Ferrari 365 like the dark blue one in your pic....does he still have that car?
Pat
01-24-2014, 04:26 PM
#65
Team Owner
wow all those guys look old ...
The best car of the bunch is that yellow Targa looking one .. i dont know that brand very well .. is that a Dino ?
The best car of the bunch is that yellow Targa looking one .. i dont know that brand very well .. is that a Dino ?
Last edited by theiceman; 01-24-2014 at 04:59 PM.
01-24-2014, 04:43 PM
#66
Racer
Thread Starter
www.jerryforthofer.wordpress.com
Last edited by jerhofer; 01-28-2014 at 12:28 AM.
01-24-2014, 04:48 PM
#67
Racer
Thread Starter
The yellow car is a Daytona Spyder. Despite being 40 degrees and overcast, they drove in with the top down. More old guys!!!
www.jerryforthofer.wordpress.com
Last edited by jerhofer; 01-28-2014 at 12:29 AM.
01-24-2014, 07:26 PM
#70
Racer
Thread Starter
After the tour of the restoration shop, we drove a few miles to the Pinehurst Country Club for lunch. My wife and I sat at a table with three other guys, all in their late 30's, early 40's. (Everyone there was not old!) One guy had his seven year old son with him and began talking about tracking his 458 Italia and his MP12 Mclaren. Plus he is on the list to get the new Mclaren P1 at a cool 1.15 million!
He designs computer games and evidently does very, very well!! My Porsche and the Ferrari wouldn't even register on his list of cars to have!! But it was interesting listening to him as he was very enthusiastic about his cars. He wasn't showing off but was talking about how he enjoyed using the cars. BTW, he says the Mclaren is a better handling car than the 458 and is much stiffer with it's carbon fiber construction. When my wife asked his son which of his dad's cars were his favorites, he said it was the Mclaren. Not only did he choose that car, he gave my wife a number of reasons why!! Sharp kid!!
VIR is only a couple hours away from here and was his, and the other fellows, track of choice. I wish VIR had been open back when I was doing track events. From what I hear, it is a great track. However, it would have to be really, really good to beat Road America!
www.jerryforthofer.wordpress.com
Last edited by jerhofer; 01-28-2014 at 12:29 AM.
01-24-2014, 08:51 PM
#71
Sounds like a fun time, my old stomping ground...Camp Mackall, where Special Forces trains it's youngsters is just a tad south down the road from Pinehurst.
Nice to see guys with the money supporting the high end auto industry.
Hope that youngster grows up 'normal'....can be hard when around that kind of money.
Nice to see guys with the money supporting the high end auto industry.
Hope that youngster grows up 'normal'....can be hard when around that kind of money.
01-25-2014, 07:39 PM
#72
Racer
Thread Starter
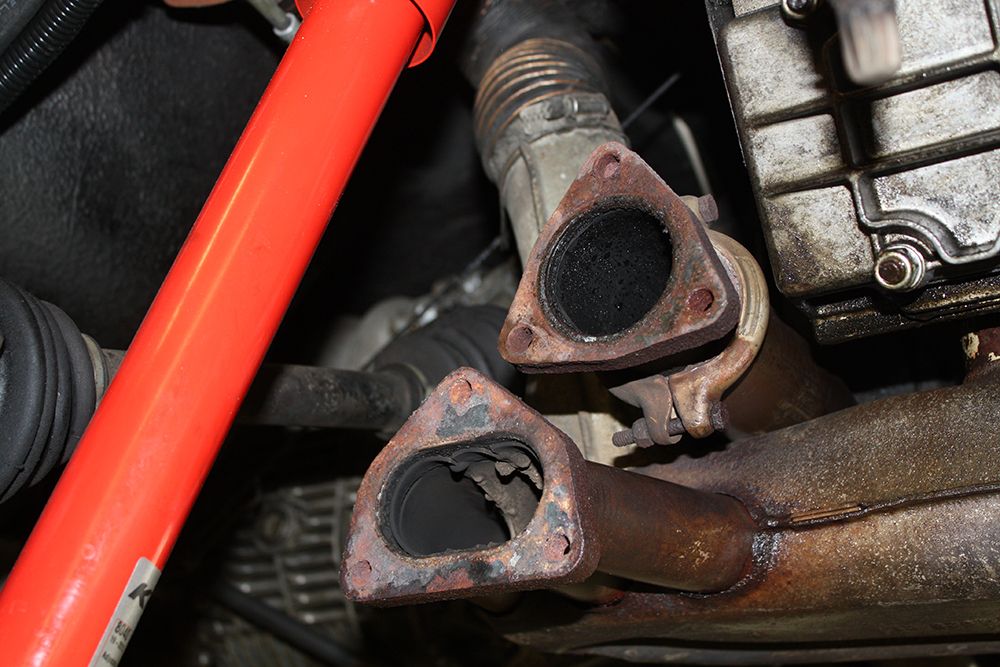
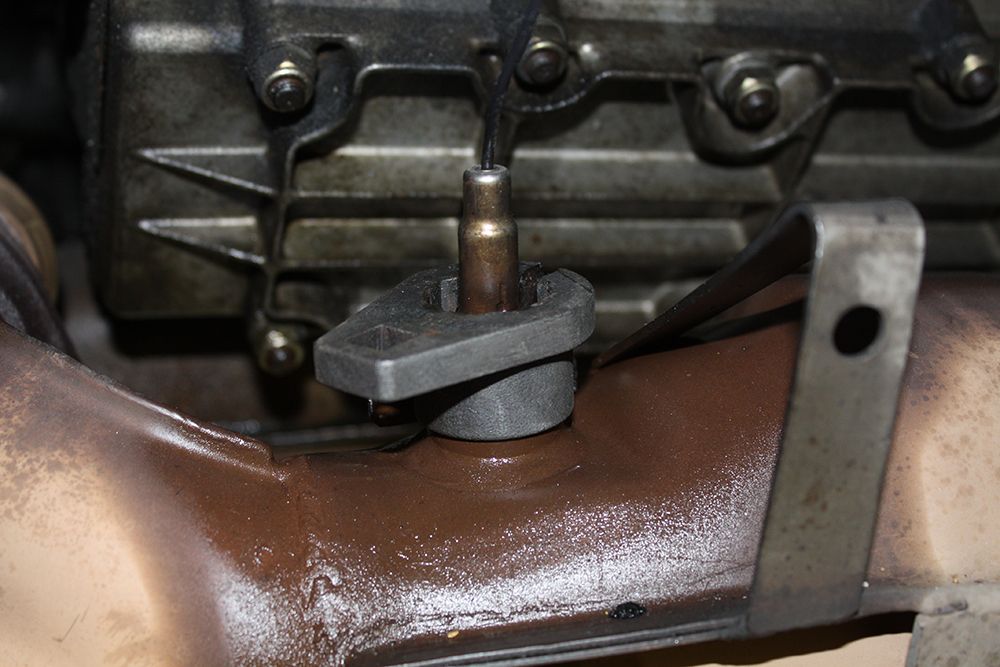
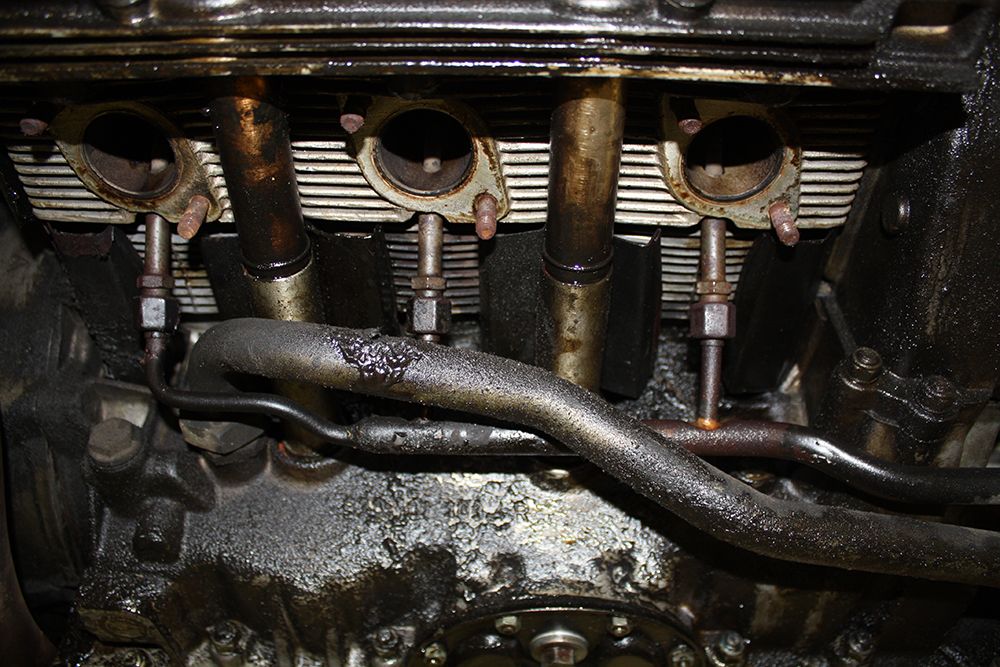
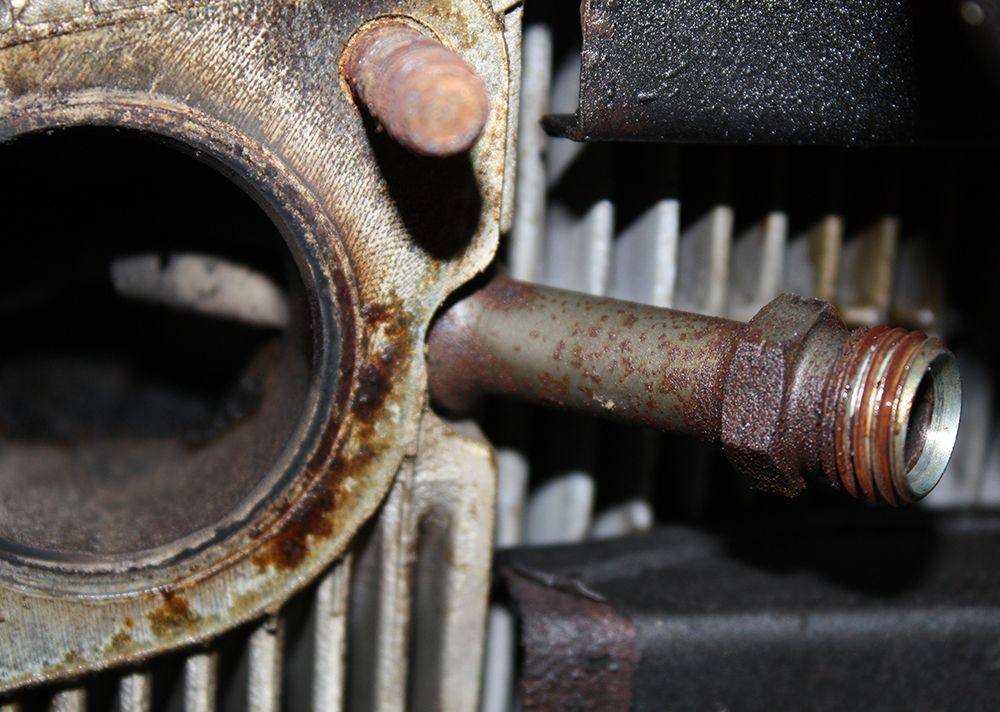
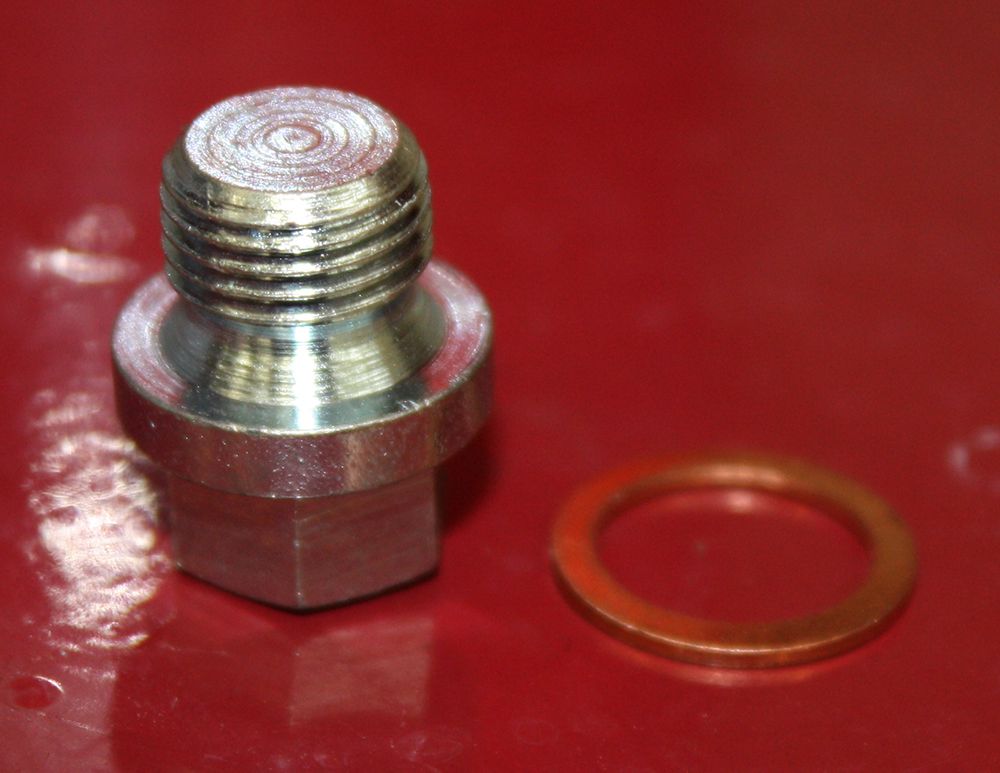
I removed all of the air injection lines today. There are individual air injectors into the bottom of each exhaust outlet. Once I had removed the lines, I then removed the injectors and plugged the holes with special bolts I had purchased.
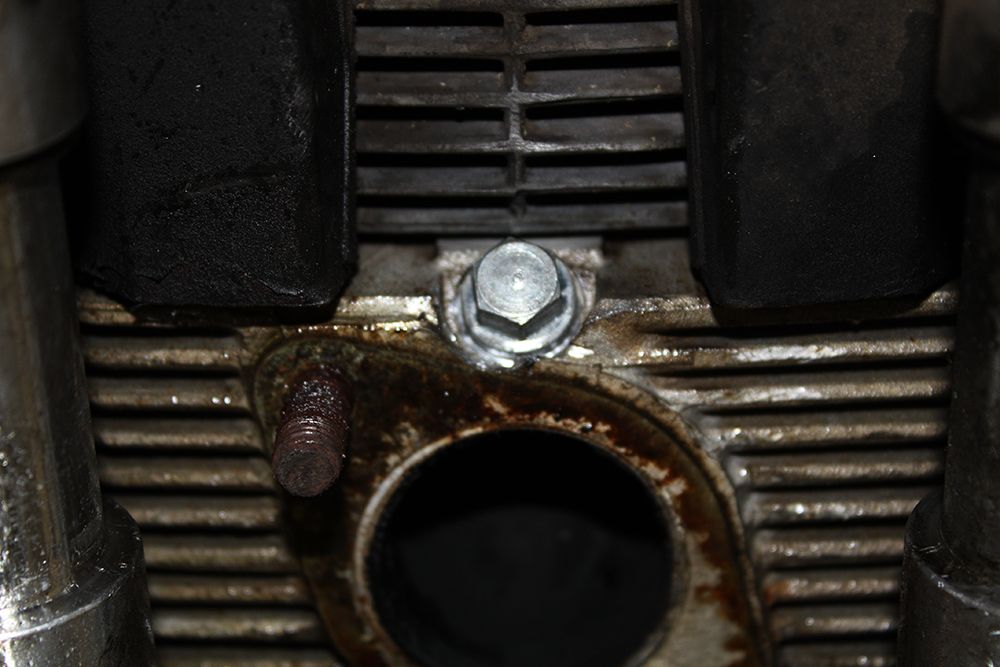
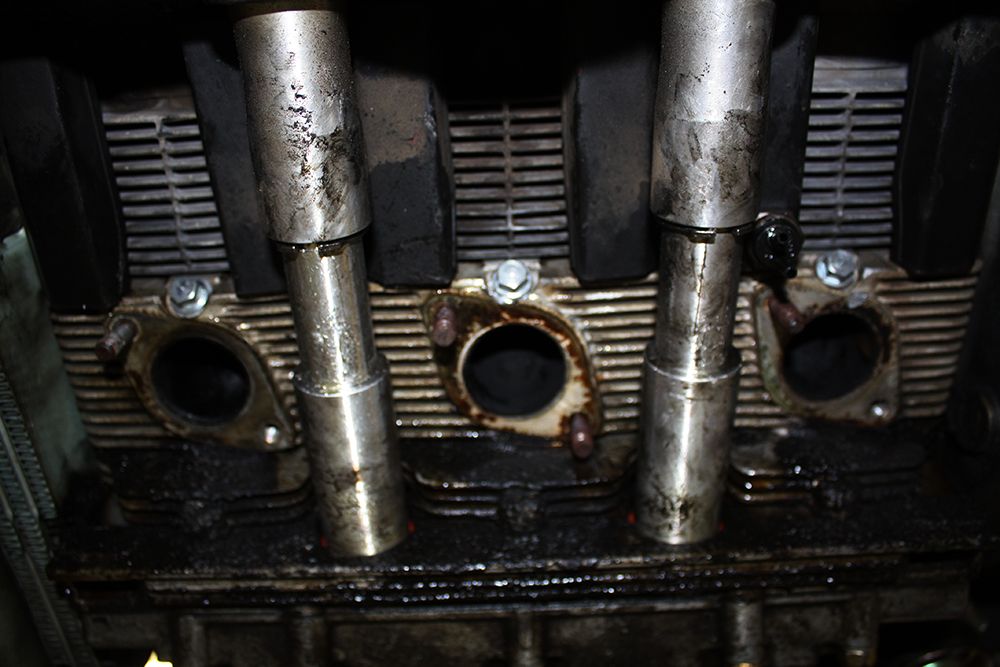
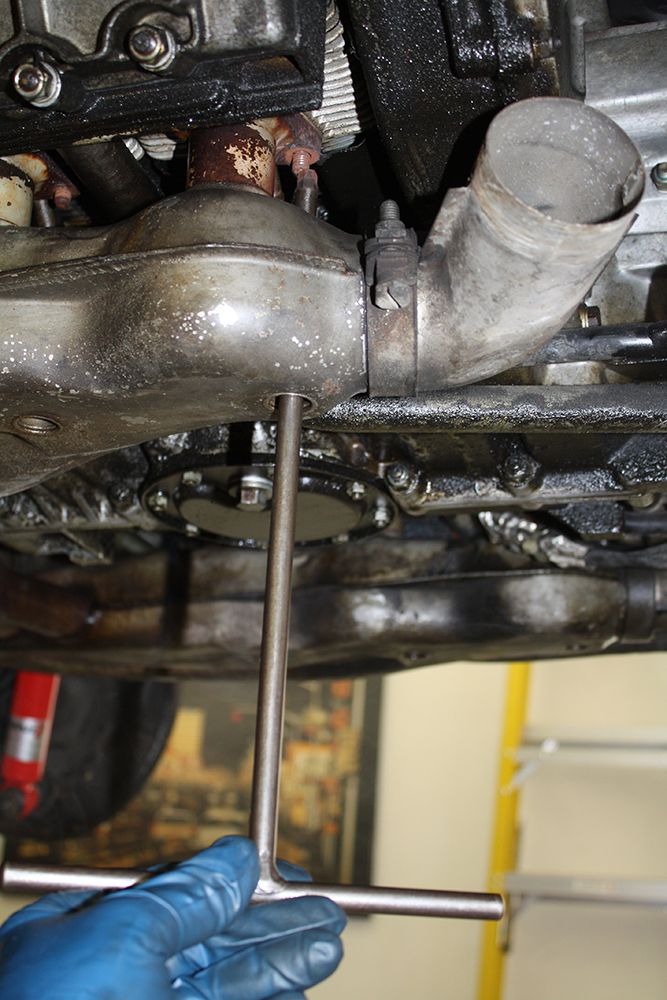
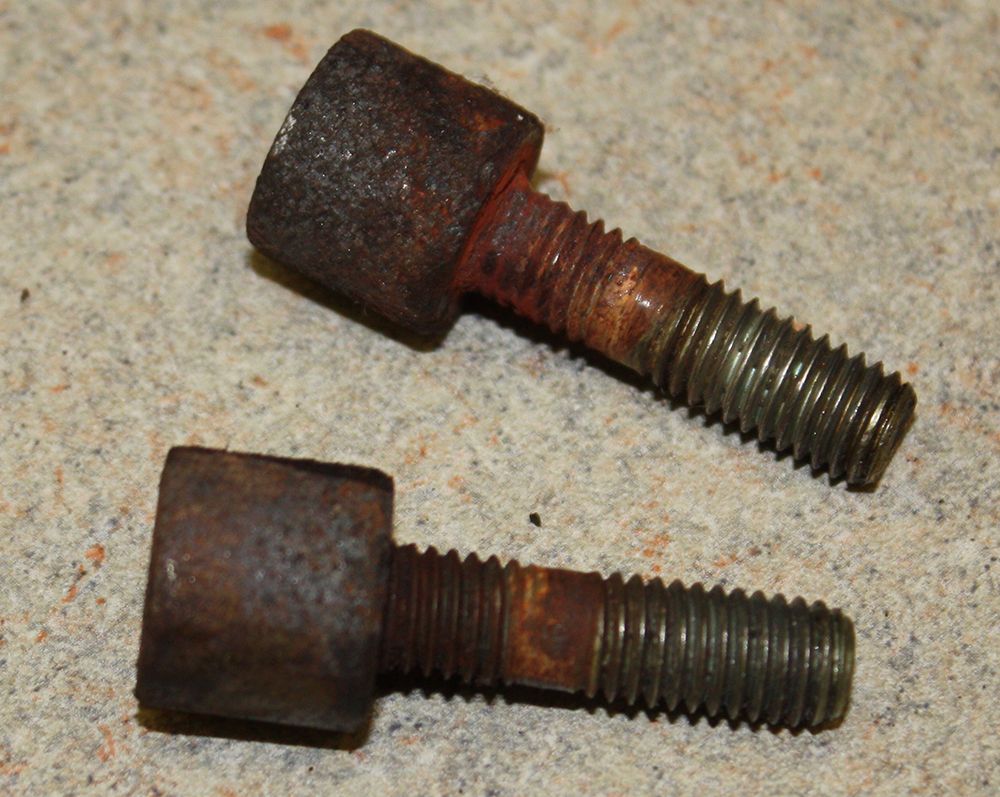
I took my time removing the nuts for the heat exhangers being sure to use the torch to heat them before trying to remove them. I also tightened them just a bit before trying to remove them to break the rust. I had to buy an offset box wrench to get the inside nuts on the right side. But success was mine as I did not break any studs. Two of the hex nuts came out with the stud on the right side but that is not a big issue as I will install new studs. I was very happy to have no broken studs. Now I can move on towards dropping the motor after I do a bit of cleaning on the bottom side.
www.jerryforthofer.wordpress.com


I took my time removing the nuts for the heat exhangers being sure to use the torch to heat them before trying to remove them. I also tightened them just a bit before trying to remove them to break the rust. I had to buy an offset box wrench to get the inside nuts on the right side. But success was mine as I did not break any studs. Two of the hex nuts came out with the stud on the right side but that is not a big issue as I will install new studs. I was very happy to have no broken studs. Now I can move on towards dropping the motor after I do a bit of cleaning on the bottom side.


www.jerryforthofer.wordpress.com
Last edited by jerhofer; 01-28-2014 at 12:29 AM.
01-27-2014, 05:37 PM
#73
Racer
Thread Starter
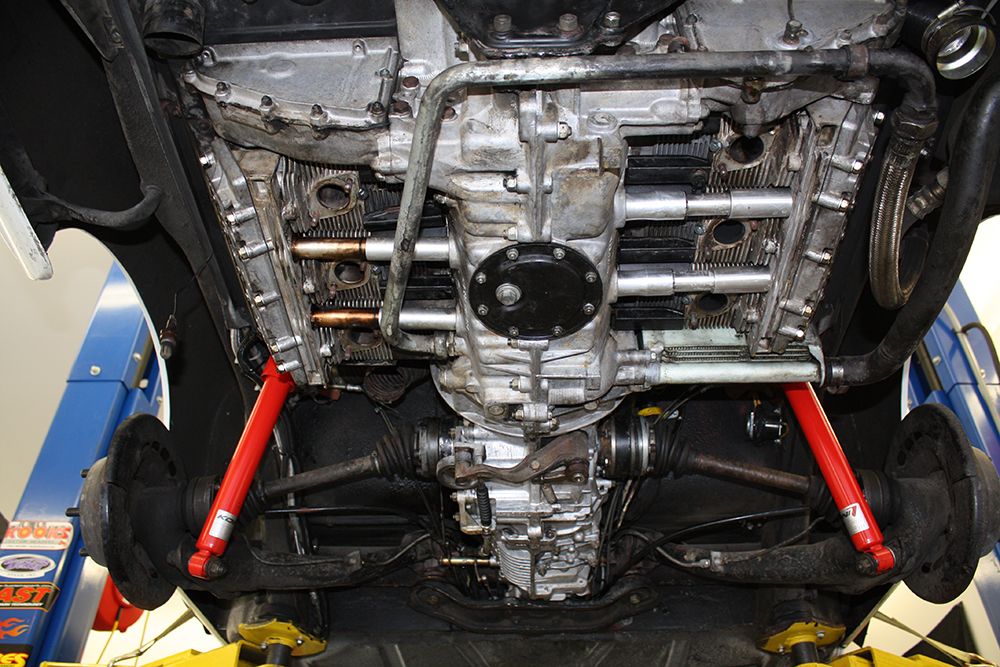
I spent all day cleaning the bottom of the motor and transmission. I began using engine degreaser which had zero effect. What worked was brake cleaner. It was a lot of work but is sure looks better than the photos above.
www.jerryforthofer.wordpress.com

www.jerryforthofer.wordpress.com
Last edited by jerhofer; 01-28-2014 at 12:30 AM.
01-27-2014, 06:36 PM
#74
Basic Sponsor
Rennlist
Site Sponsor
Rennlist
Site Sponsor
Nice work!!!!
Mark/Pelican Parts
Mark/Pelican Parts
__________________
Your Trusted Source For DIY and Parts
FREE SHIPPING over $99 click here
Porsche Parts | DIY Tech Articles | Facebook | Twitter | Instagram | YouTube | Promos
888.280.7799 | 6am - 5pm PST

FREE SHIPPING over $99 click here
Porsche Parts | DIY Tech Articles | Facebook | Twitter | Instagram | YouTube | Promos
888.280.7799 | 6am - 5pm PST