
Battery-area surprise!

 10-29-2009, 07:22 PM
#47
RL Community Team
Rennlist Member
Rennlist Member
Thread Starter
I was expecting to get the thing all back together for the end of the summer, but then I noticed the CV boots were split (I had left the axles hanging with the control arms only after removing the spring plates... the angle was too much for the old boots I guess...).
Anyway, this pretty much put paid to getting the car back together for the fall driving season and I just decided to carry on with the suspension re-fresh scheduled for the winter.
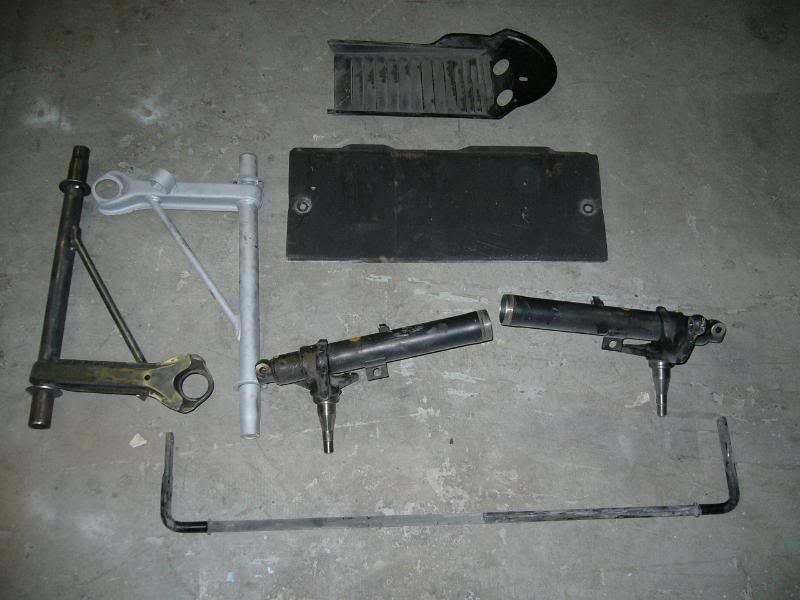
I pulled all the front and rear suspension, rear bumper, oil tank, oil lines etc. Aside from the suspension work, I will fix up the oil lines which have been partially crushed at some point in time.
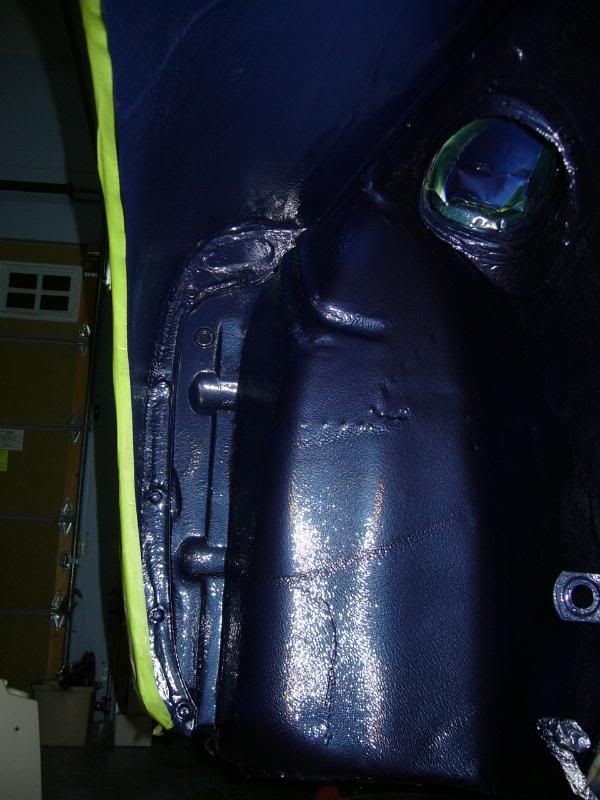
Once everything was off I decided to paint the wheel wells - to match the front chassis painting.
This is a hopelessly pointless job, made even more stupid by the extreme amount of work required to properly clean and prep those surfaces.
I have just finished the wheel wells off and they do look good:

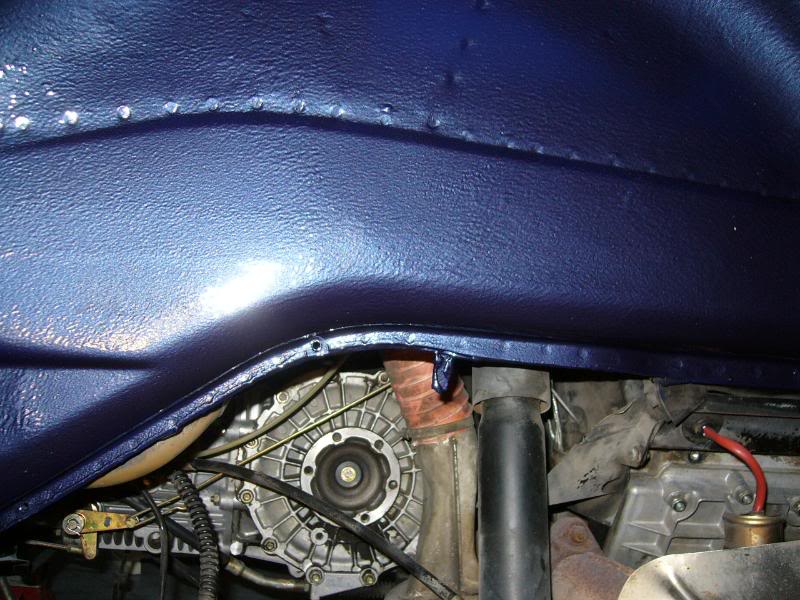
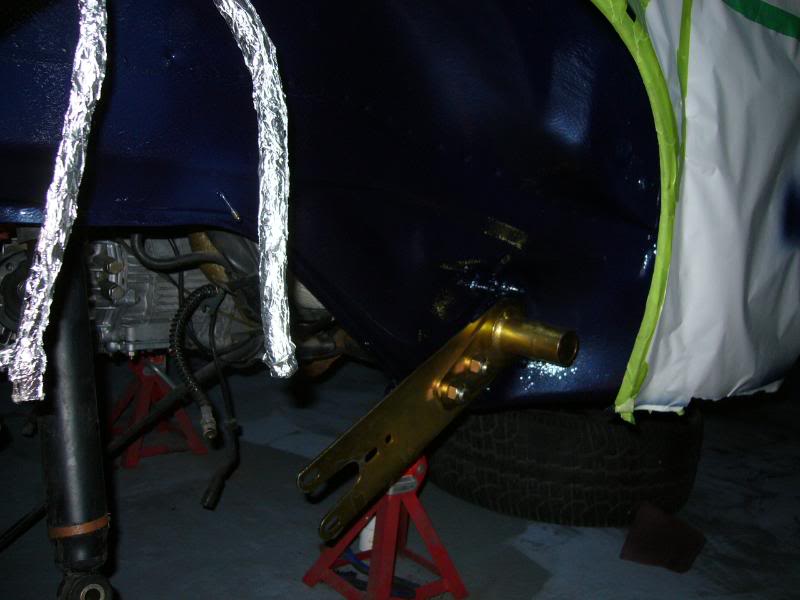
I wanted to see how the newly-plated springplate would look against the Prussian blue...
I have a pile of parts to re-plate and a bunch to have powder coated. The parts that need to be powder coated have to be blasted. In the past, this has been more expensive than the powder coating itself. So, I've kind-of-sort-of-pretty-much decided to blast all the parts myself using glass media and a siphon blasting gun. I've done one control arm and it took the better part of a $9 bag of media... Wow, this is going to take a while...
Anyway, this pretty much put paid to getting the car back together for the fall driving season and I just decided to carry on with the suspension re-fresh scheduled for the winter.
I pulled all the front and rear suspension, rear bumper, oil tank, oil lines etc. Aside from the suspension work, I will fix up the oil lines which have been partially crushed at some point in time.
Once everything was off I decided to paint the wheel wells - to match the front chassis painting.
This is a hopelessly pointless job, made even more stupid by the extreme amount of work required to properly clean and prep those surfaces.
I have just finished the wheel wells off and they do look good:
I wanted to see how the newly-plated springplate would look against the Prussian blue...
I have a pile of parts to re-plate and a bunch to have powder coated. The parts that need to be powder coated have to be blasted. In the past, this has been more expensive than the powder coating itself. So, I've kind-of-sort-of-pretty-much decided to blast all the parts myself using glass media and a siphon blasting gun. I've done one control arm and it took the better part of a $9 bag of media... Wow, this is going to take a while...
11-04-2009, 08:26 PM
#48
RL Community Team
Rennlist Member
Rennlist Member
Thread Starter
I have just done the banana arm bushings and wheel bearings. I put the photos etc. in a seperate thread so that if someone is ever searching on that topic, it will more likely be found:
https://rennlist.com/forums/911-foru...ml#post7047501
https://rennlist.com/forums/911-foru...ml#post7047501
11-16-2009, 02:22 AM
#49
RL Community Team
Rennlist Member
Rennlist Member
Thread Starter
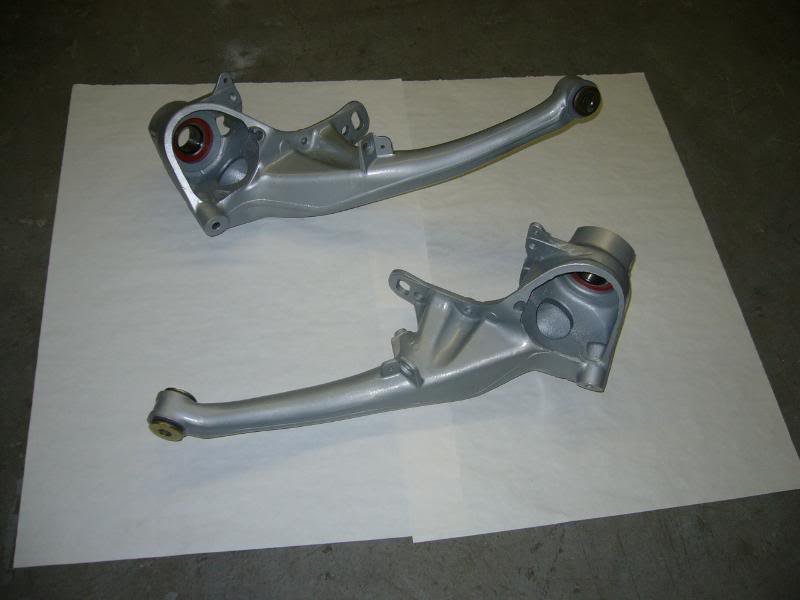
I am creeping steadily forward. As indicated above, I installed the new bushings and wheel bearings in the banana arms:
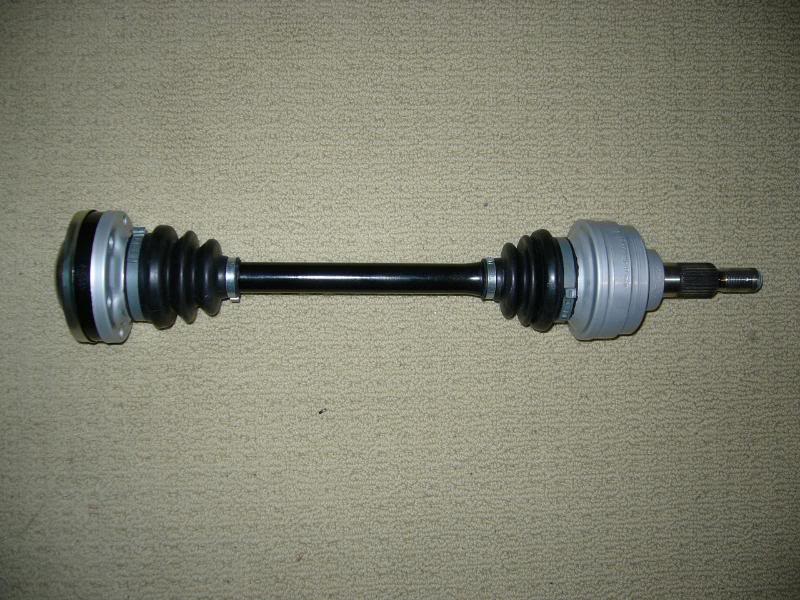
Then, I re-booted the drive axles. I could detect no play at all in the axles and the ***** and race-ways looked clear of any pitting, discoloration or other damage, so I think it was reasonable to go this route rather than buy new axles or CV joints at this stage.
Other than that I have been slowly stripping the paint off things like the control arms and cleaning parts to be re-plated. Tedious work...
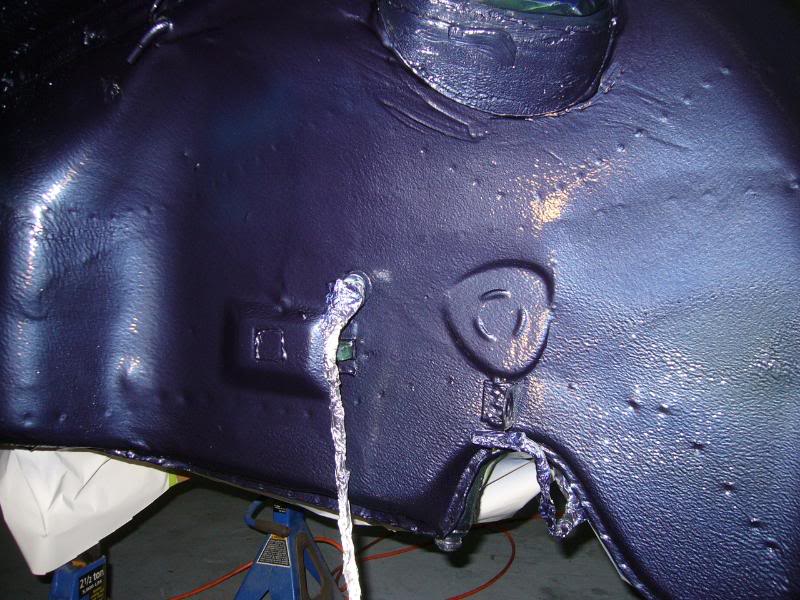
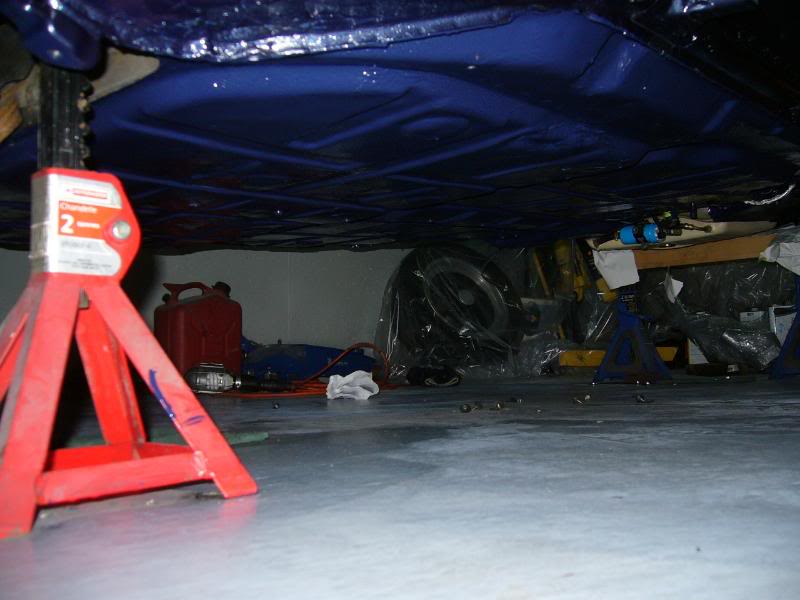
I also have painted the floor pan (Another senseless endeavor.) The hardest part was scrubbing and prepping the pan - only hard because I did it lying on my back on a cold concrete floor. There were various scrapes and nicks in the PVC coating that I "patched" with seam sealer. For the paint, I used a Glasurit single stage (i.e. 22-Line) color that was reasonably close-ish to the Prussian blue tone. The reason why I went this route was that spraying base/clear on the pan was not going to be all that practical unless I could raise the car even more. So, instead I used a urethane-safe paint roller... Hence the need to use a solid color instead of the metallic. Since the PVC has texture, you can't tell the difference between roller and spray application. I mixed the paint and hardener just as I would for spraying, except left out the small amount of reducer (thinner). I guess ants, caterpillars and worms will really dig my car...

Then, I re-booted the drive axles. I could detect no play at all in the axles and the ***** and race-ways looked clear of any pitting, discoloration or other damage, so I think it was reasonable to go this route rather than buy new axles or CV joints at this stage.
Other than that I have been slowly stripping the paint off things like the control arms and cleaning parts to be re-plated. Tedious work...
I also have painted the floor pan (Another senseless endeavor.) The hardest part was scrubbing and prepping the pan - only hard because I did it lying on my back on a cold concrete floor. There were various scrapes and nicks in the PVC coating that I "patched" with seam sealer. For the paint, I used a Glasurit single stage (i.e. 22-Line) color that was reasonably close-ish to the Prussian blue tone. The reason why I went this route was that spraying base/clear on the pan was not going to be all that practical unless I could raise the car even more. So, instead I used a urethane-safe paint roller... Hence the need to use a solid color instead of the metallic. Since the PVC has texture, you can't tell the difference between roller and spray application. I mixed the paint and hardener just as I would for spraying, except left out the small amount of reducer (thinner). I guess ants, caterpillars and worms will really dig my car...
03-17-2010, 11:45 PM
#50
1st Gear

Join Date: Dec 2009
Posts: 1
Likes: 0
Received 0 Likes
on
0 Posts
Amj......how would you rate the fit of the parts from Stoddard?
I am going down the same path but I am going to suply the parts to a restoration garage....I figure the better the fit out of the packaging the easier the repair.....
Neil
I am going down the same path but I am going to suply the parts to a restoration garage....I figure the better the fit out of the packaging the easier the repair.....
Neil
03-18-2010, 11:50 AM
#51
RL Community Team
Rennlist Member
Rennlist Member
Thread Starter
Hi Neil,
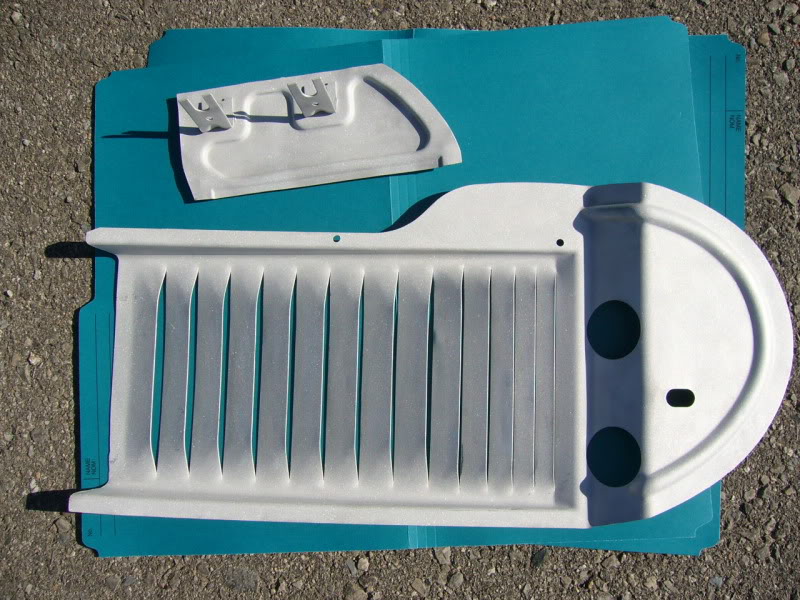
I was very satisfied with the Stoddard-supplied part. The fit was dead-on and the bosses etc. for the lower control arm mounting were securely welded. I've seen other pans (in photos) where there were considerably fewer spot welds. The small LCA reinforcements (they were supplied in black paint, look back to the start of this thread for pictures) were actually Porsche OEM parts (bought from Stoddard) and the larger parts (the pan and fuel tank support) I thought were Dansk, because that is what the guy I spoke to on the phone from Stoddards told me. Subsequent discussions on Pelican has confused that. Anyway, what I recieved from Stoddard was great. Shipping was fast too.
I imagine a restoration shop would be able to do this job blindfolded. However, if they have not done this particular job on a 911, you may want to print them out some of the photos from this thread (or others) thay may help them get a good picture of the structure - not that they wouldn't figure out easily enough on their own... just to make it as easy as possible. Good Luck!
While I'm posting here, I might was well update on my "while-I'm-in-there" odyssey that this job has turned into:
Generally things are going quite slow as some other priorities on have crowded in to my life that necessitate both time and money. However, I am gradually chipping away on a few items.
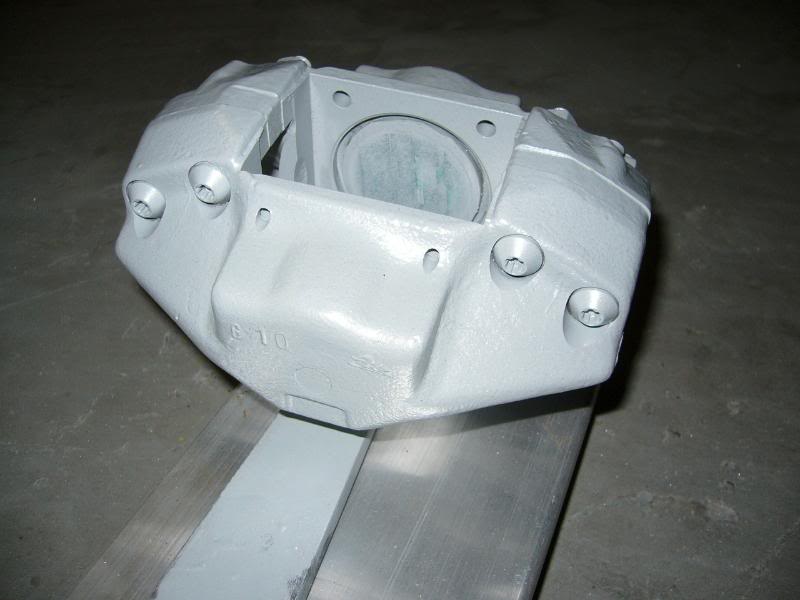
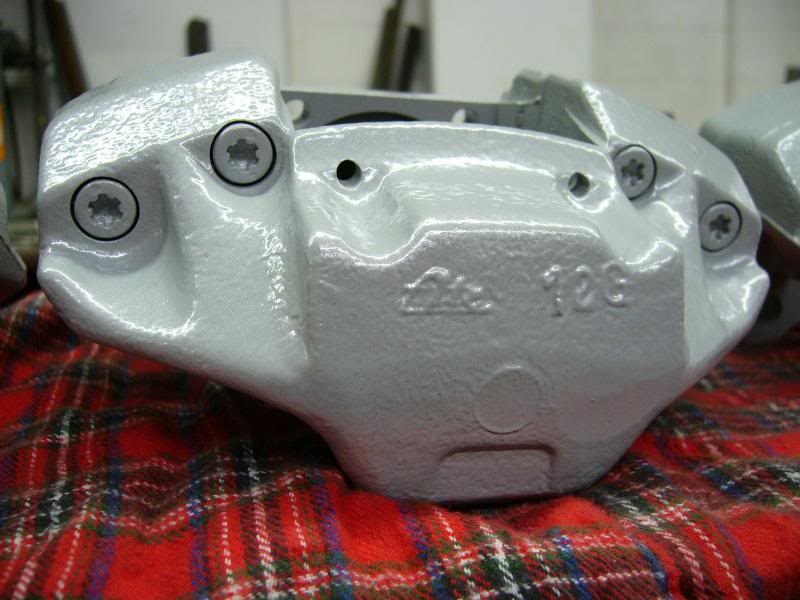
I am re-building my brake calipers and have decided to powder coat them. I used a blah-looking silver gray which was a bonus color from when I bought the powder coating kit a few years ago. Not very attractive, but at least the calipers look clean and the finish will be durable (and I am on a budget and did not want to buy new powder!):
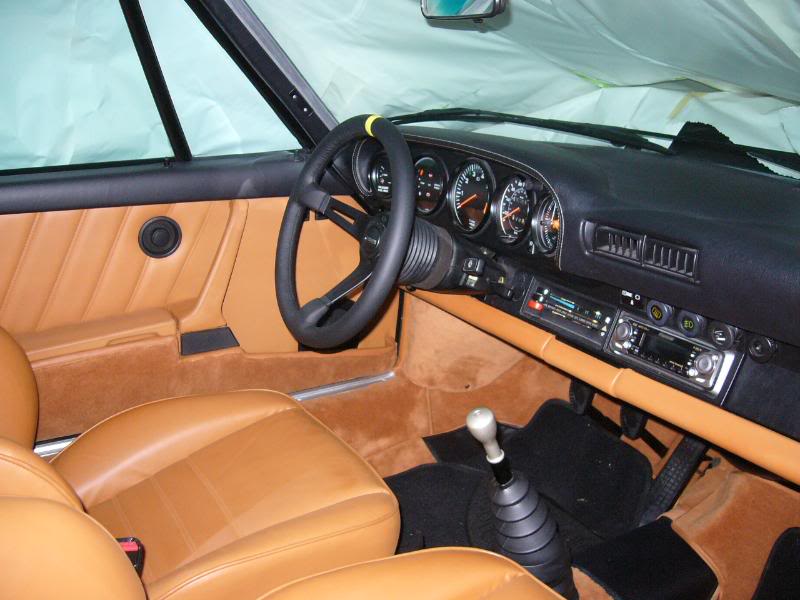
I've more-or-less finished the interior (just the P/S door panel left). Basically I replaced the headliner, carpet, rear deck, dash pad and then re-dyed all the leather. Some day I will get proper floor mats too!

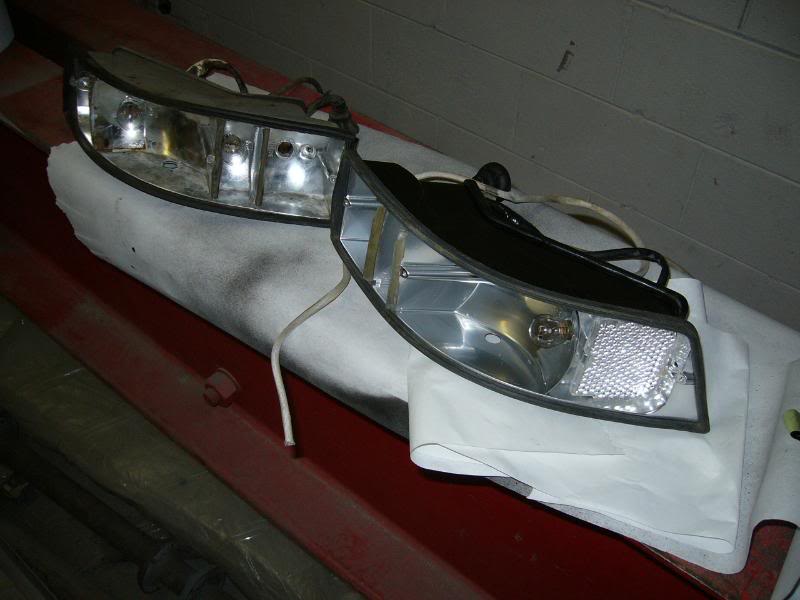
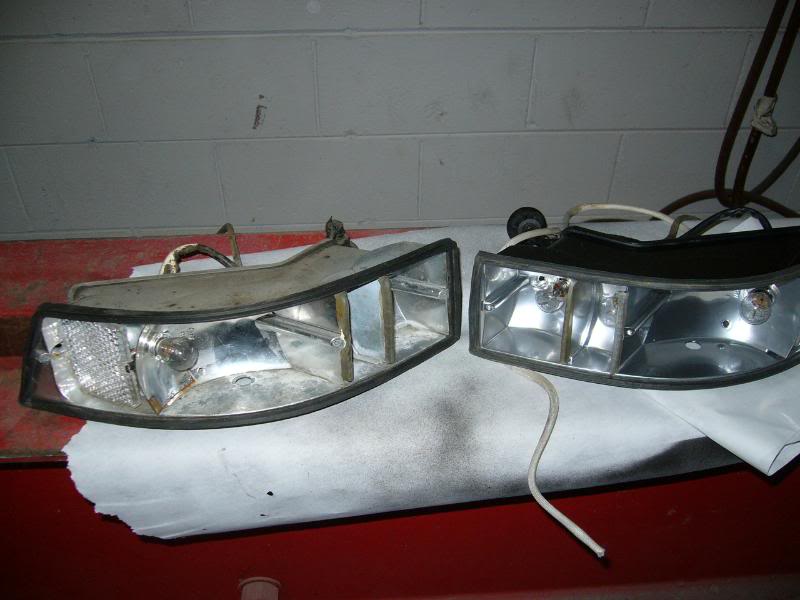
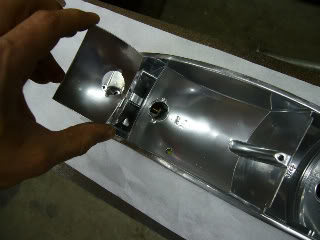
The tailight housings were pretty tired so I've refreshed them. Here is a pic comparing before and after. I am almost done the second one now.
I was very satisfied with the Stoddard-supplied part. The fit was dead-on and the bosses etc. for the lower control arm mounting were securely welded. I've seen other pans (in photos) where there were considerably fewer spot welds. The small LCA reinforcements (they were supplied in black paint, look back to the start of this thread for pictures) were actually Porsche OEM parts (bought from Stoddard) and the larger parts (the pan and fuel tank support) I thought were Dansk, because that is what the guy I spoke to on the phone from Stoddards told me. Subsequent discussions on Pelican has confused that. Anyway, what I recieved from Stoddard was great. Shipping was fast too.
I imagine a restoration shop would be able to do this job blindfolded. However, if they have not done this particular job on a 911, you may want to print them out some of the photos from this thread (or others) thay may help them get a good picture of the structure - not that they wouldn't figure out easily enough on their own... just to make it as easy as possible. Good Luck!
While I'm posting here, I might was well update on my "while-I'm-in-there" odyssey that this job has turned into:
Generally things are going quite slow as some other priorities on have crowded in to my life that necessitate both time and money. However, I am gradually chipping away on a few items.
I am re-building my brake calipers and have decided to powder coat them. I used a blah-looking silver gray which was a bonus color from when I bought the powder coating kit a few years ago. Not very attractive, but at least the calipers look clean and the finish will be durable (and I am on a budget and did not want to buy new powder!):
I've more-or-less finished the interior (just the P/S door panel left). Basically I replaced the headliner, carpet, rear deck, dash pad and then re-dyed all the leather. Some day I will get proper floor mats too!
The tailight housings were pretty tired so I've refreshed them. Here is a pic comparing before and after. I am almost done the second one now.
03-18-2010, 12:40 PM
#52
Burning Brakes

amjf088,
I really like what you have done to your car. What dye and method did you use for the leather and what product did you use to clean the tail lights?
I really like what you have done to your car. What dye and method did you use for the leather and what product did you use to clean the tail lights?
03-18-2010, 01:32 PM
#53
Burning Brakes
GREAT and informative thread. Nice job!
As I read it, though, I thought, "wow, this is the proverbial slippery slope." Once you get on it, you can't stop!
Nice work.
As I read it, though, I thought, "wow, this is the proverbial slippery slope." Once you get on it, you can't stop!
Nice work.
03-18-2010, 02:10 PM
#54
Just read through the thread and I am extremely impressed with your work! This is the type of project I one day see myself taking on, so it has been a very entertaining and interesting read.
Keep up the great work, your car looks absolutely stunning; inside and out. Hopefully we'll get a chance to see it in the flesh at one of the GTA GTG's this summer.
Keep up the great work, your car looks absolutely stunning; inside and out. Hopefully we'll get a chance to see it in the flesh at one of the GTA GTG's this summer.
03-18-2010, 04:28 PM
#55
RL Community Team
Rennlist Member
Rennlist Member
Thread Starter
Salukijac:
I used Leatherique dye and associated products and followed their instructions religiously. The hard work was sanding the leather. You use P400 paper with the prep solvent and basically sand most of the old dye away. This, plus the treatments with the conditioner as directed really made the leather nice and supple. I applied the dye with an airbrush. I used very light coats so it took a while to get coverage. The resulting finish seems to be very durable and "OEM-like". I dyed a few "scrap" pieces of leather and "torture tested" them out of curiousity. The dye stood up amazingly well. There are some other brands out there that also have good recommendations: ColorPlus and SEM are two that I know of.
The finish on the tailight housing was beyond repair, as it had failed in some areas. I sanded everything and simply used a Rustoleum metallic "chrome" paint over a white primer:
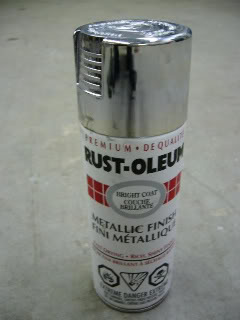
Here is the bar code and product number:
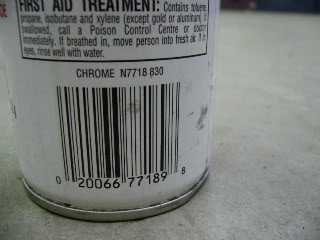
It worked quite nicely. There are probably higher quality options, but this is at least no worse than what was there before. The housing is zinc, but there is steel "parabolic" stamping around one bulb which I ended up removing to be able to deal with a bit of corrosion. I had to epoxy it back in place.
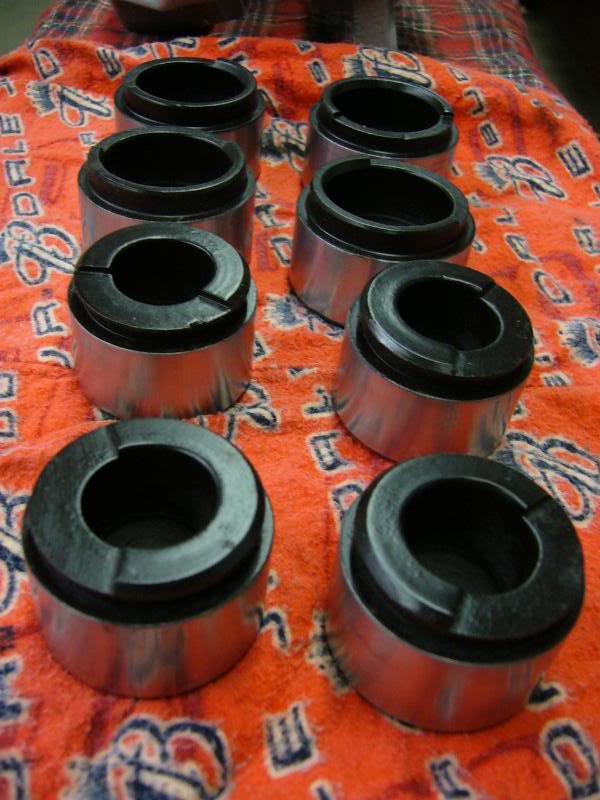
My calipers are powder coated and the pistons are ready to go:
Thank you for the kind words
I used Leatherique dye and associated products and followed their instructions religiously. The hard work was sanding the leather. You use P400 paper with the prep solvent and basically sand most of the old dye away. This, plus the treatments with the conditioner as directed really made the leather nice and supple. I applied the dye with an airbrush. I used very light coats so it took a while to get coverage. The resulting finish seems to be very durable and "OEM-like". I dyed a few "scrap" pieces of leather and "torture tested" them out of curiousity. The dye stood up amazingly well. There are some other brands out there that also have good recommendations: ColorPlus and SEM are two that I know of.
The finish on the tailight housing was beyond repair, as it had failed in some areas. I sanded everything and simply used a Rustoleum metallic "chrome" paint over a white primer:
Here is the bar code and product number:
It worked quite nicely. There are probably higher quality options, but this is at least no worse than what was there before. The housing is zinc, but there is steel "parabolic" stamping around one bulb which I ended up removing to be able to deal with a bit of corrosion. I had to epoxy it back in place.
My calipers are powder coated and the pistons are ready to go:
Thank you for the kind words
Last edited by 500; 03-18-2010 at 08:56 PM.
11-11-2010, 01:28 PM
#56
RL Community Team
Rennlist Member
Rennlist Member
Thread Starter
Would you believe my car is STILL not back together?
The reasons for this are largely related to career commitments that have sapped away most of my time. However, I have been gradually getting things ready to go back together. Aside from removing the entire suspension, I also removed all the external oil lines, oil tank and the entire exhaust.
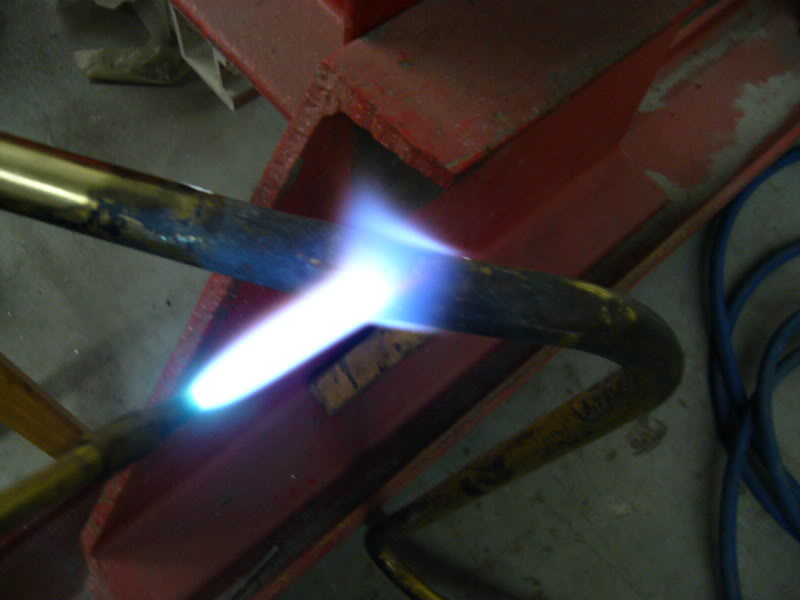
One of my hard oil lines was partially crushed (probably by a poorly placed jack or lift pad) and I repaired that with the pressurized air and heat method (worked very well).
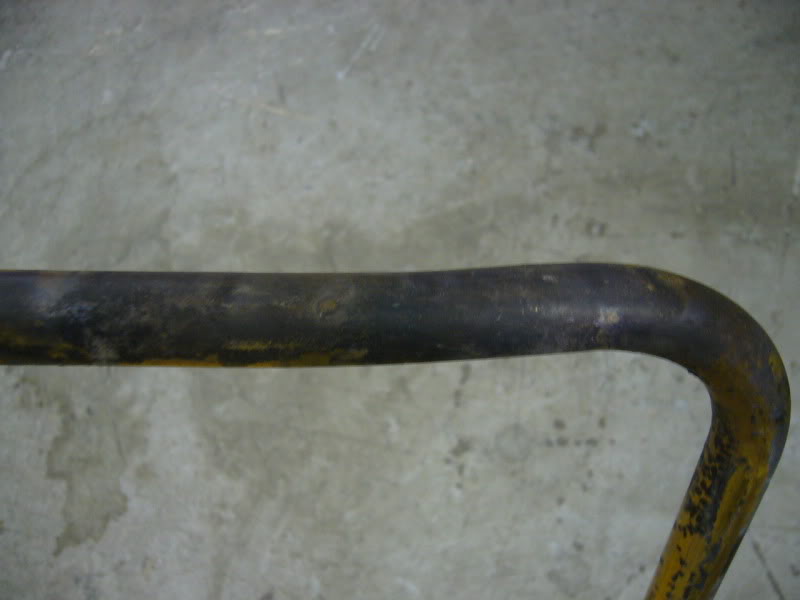
It looked like at some point, someone had tried to squeeze the line back into shape using a pair of channel locks and, as a result, left deep tooth marks in the brass. I silver brazed some copper sections on to the outside of the tube where those tooth marks are for peace-of-mind. The only drawback of this is that anyone looking at it might think that the tube was actually ruptured and then repaired, which would be a turn-off. But I am trying not to over-spend right now. I ended up dressing the lines up nicely so they shine! They are wrapped up in protective wrap, so no pics yet, but I will take pics when I put them on.
Refinished the oil tank, again, pics to come.
Bead-blasted all of the exhaust components and then painted them in VHT high-temperature silver and clear. Again, they are all wrapped up in the basement.
All of the large suspension parts were powder coated at a local facility. I did the bead-blasting however:
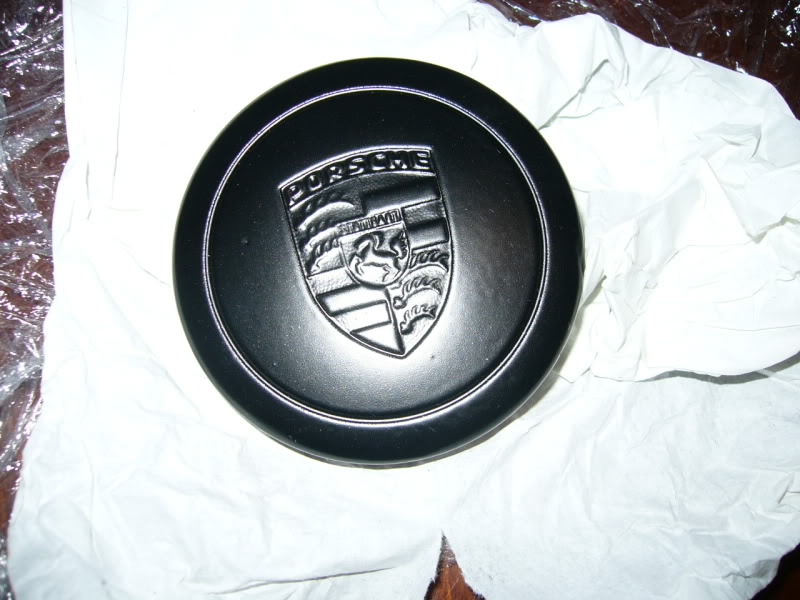
A lot of the smaller parts I powder coated myself (basically anything that could fit in the toaster oven that I use). My Fuchs had natural aluminum center caps, which I thought looked blah with the black centers, so I powder coated them too:
Tomorrow I have to pick up several pounds of parts from the plater’s. I might soon start to put stuff together.
Oh, the good news was that once I removed the heat exchangers, I was able to confirm that none of the exhaust ports showed any signs of leaky valve guides!
The reasons for this are largely related to career commitments that have sapped away most of my time. However, I have been gradually getting things ready to go back together. Aside from removing the entire suspension, I also removed all the external oil lines, oil tank and the entire exhaust.
One of my hard oil lines was partially crushed (probably by a poorly placed jack or lift pad) and I repaired that with the pressurized air and heat method (worked very well).
It looked like at some point, someone had tried to squeeze the line back into shape using a pair of channel locks and, as a result, left deep tooth marks in the brass. I silver brazed some copper sections on to the outside of the tube where those tooth marks are for peace-of-mind. The only drawback of this is that anyone looking at it might think that the tube was actually ruptured and then repaired, which would be a turn-off. But I am trying not to over-spend right now. I ended up dressing the lines up nicely so they shine! They are wrapped up in protective wrap, so no pics yet, but I will take pics when I put them on.
Refinished the oil tank, again, pics to come.
Bead-blasted all of the exhaust components and then painted them in VHT high-temperature silver and clear. Again, they are all wrapped up in the basement.
All of the large suspension parts were powder coated at a local facility. I did the bead-blasting however:
A lot of the smaller parts I powder coated myself (basically anything that could fit in the toaster oven that I use). My Fuchs had natural aluminum center caps, which I thought looked blah with the black centers, so I powder coated them too:
Tomorrow I have to pick up several pounds of parts from the plater’s. I might soon start to put stuff together.
Oh, the good news was that once I removed the heat exchangers, I was able to confirm that none of the exhaust ports showed any signs of leaky valve guides!
Last edited by 500; 11-11-2010 at 06:11 PM. Reason: usual lousy spelling...
11-12-2010, 04:06 PM
#58
RL Community Team
Rennlist Member
Rennlist Member
Thread Starter
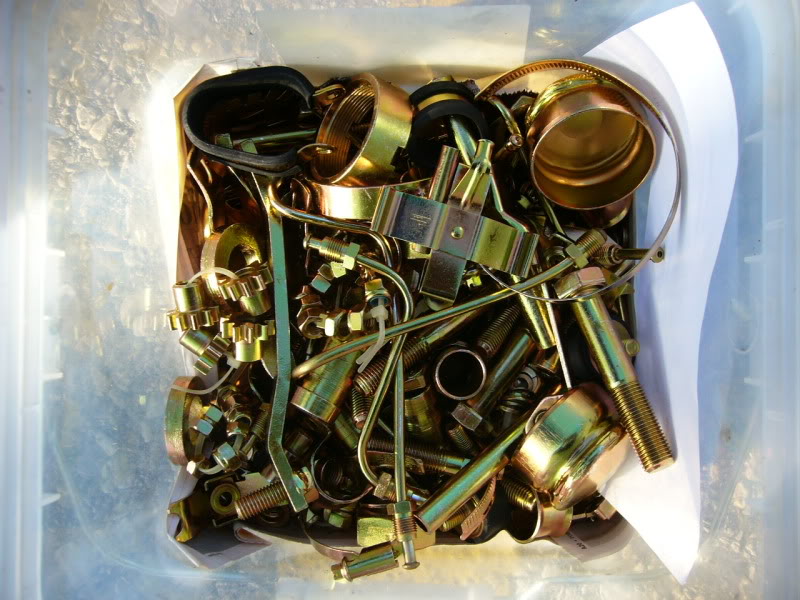
I picked up my pile of newly-plated parts. I already had one batch done (springplates etc) but this time I decided to try a different outfit. They were a little further away, but the price looked better. I was very pleasently suprised by how nicely the parts turned out.
Here is a pail of small odds and ends:
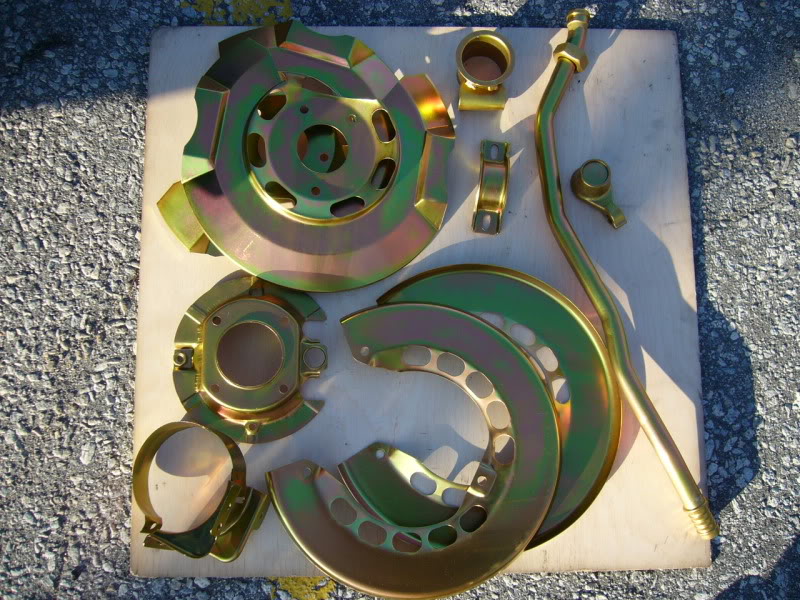
Here are a few of the larger parts:
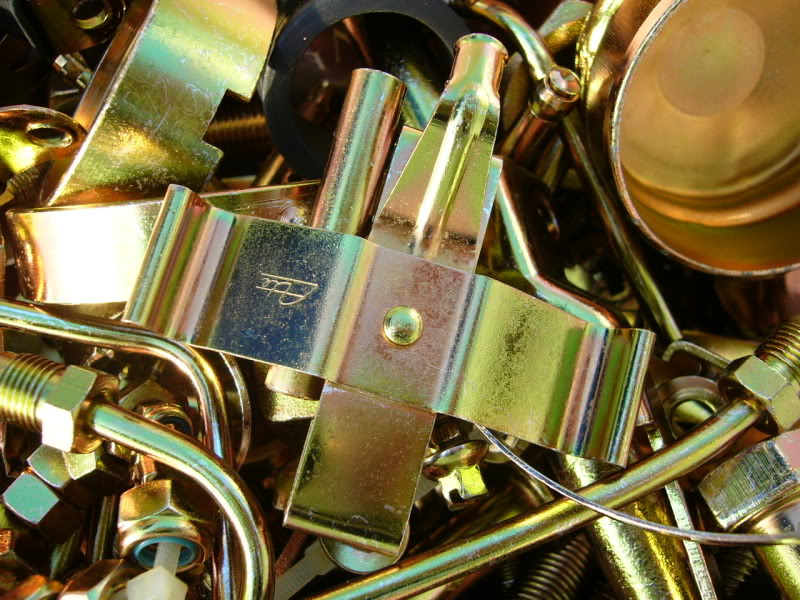
I do make some effort to clean and prepare the parts prior to taking them to the platers (I use a small wire wheel on a die grinder mostly) but many of the parts, like this brake spring clip, still looked pretty ratty prior to plating. I am very pleased with the results:
Now I can start putting a couple of things back together.
Here is a pail of small odds and ends:
Here are a few of the larger parts:
I do make some effort to clean and prepare the parts prior to taking them to the platers (I use a small wire wheel on a die grinder mostly) but many of the parts, like this brake spring clip, still looked pretty ratty prior to plating. I am very pleased with the results:
Now I can start putting a couple of things back together.
 11-13-2010, 10:05 PM
#60
Rennlist Member
Is 500_19B the same person as amjf088?
IIRC, you're Alan?
you gave me some advice about 4-5 years ago when I was painting my BMW racecar. I now have another racecar project, and a 78 911SC daily driver project.
awesome work on your 911.
IIRC, you're Alan?
you gave me some advice about 4-5 years ago when I was painting my BMW racecar. I now have another racecar project, and a 78 911SC daily driver project.
awesome work on your 911.