
Air Box Replacement Guide
 05-26-2008, 10:35 PM
#1
Team Owner
Thread Starter
Hi Guys .
This thread is to outline my adventure with my blown airbox. I would like to use it somewhat as a guide to those considering it. This is not a technical how to but more of an idea of what is required for those considering the options of doing it themselves or taking it to a shop .
As Most of you know by now after doing some routine maintanance ( a valve adjustment ) i hooked up the ignition wires all wrong and the resulting explosion detonated my airbox severely. My first atempt at starting the car failed and while i rechecked the wires ( still wrong ) the gasoline in the air box was vapourizing.
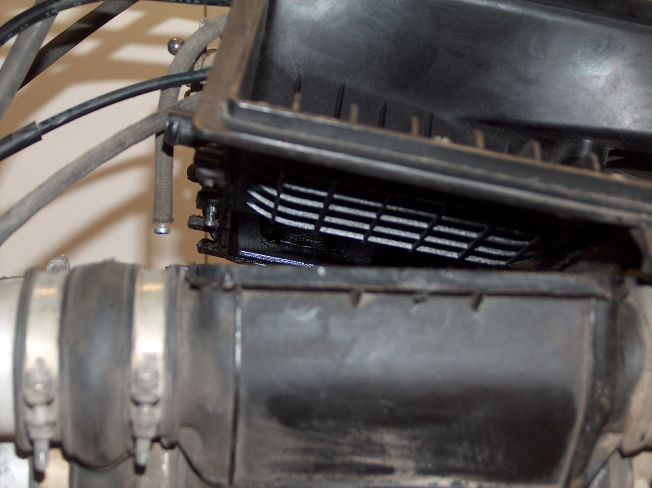
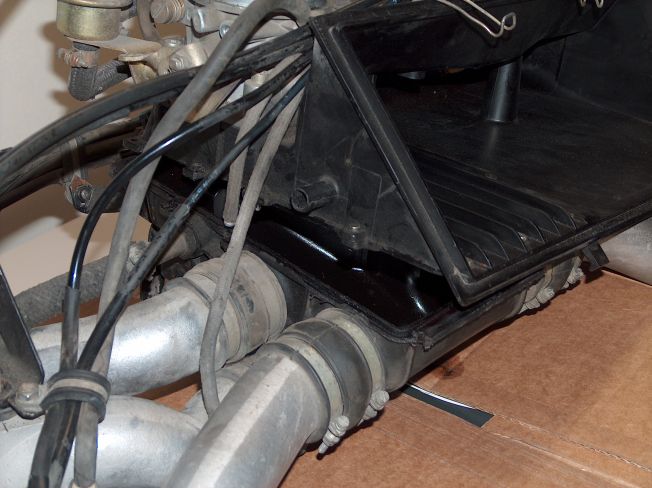
The second atempt at starting resulted in a very loud explotion which ripped my air box clean it two. No pop off valve in the world was gonna save that baby , in fact the whole top of the airbox became the pop off valve.
My first set of pics is to show the resulting damage.

This thread is to outline my adventure with my blown airbox. I would like to use it somewhat as a guide to those considering it. This is not a technical how to but more of an idea of what is required for those considering the options of doing it themselves or taking it to a shop .
As Most of you know by now after doing some routine maintanance ( a valve adjustment ) i hooked up the ignition wires all wrong and the resulting explosion detonated my airbox severely. My first atempt at starting the car failed and while i rechecked the wires ( still wrong ) the gasoline in the air box was vapourizing.
The second atempt at starting resulted in a very loud explotion which ripped my air box clean it two. No pop off valve in the world was gonna save that baby , in fact the whole top of the airbox became the pop off valve.
My first set of pics is to show the resulting damage.
Last edited by theiceman; 07-05-2021 at 12:49 PM.
 05-26-2008, 10:53 PM
#2
Team Owner
Thread Starter
So the first step is to take the airbox out. I decide to take the entire CIS system out of the car. Not too bad really . took me about 2 hours to do this. Not having the jacks and other support stuff to hold the engine and no helpers nearby i figure this is the best solution .
At this point i will say replacing the air box is not particularly difficult, but the benefit is to those who are organized and can document steps and procedures clearly. I took lots of photos as I went and this proved invaluable.
I disconnected the wiring harness, fuel lines breather hoses from the tank, i did not drain the oil and disconnect the oil hoses but it is definitely recomended. i disconected and marked the shift linkage. took the heating system out for room. took off the kidney bladdder and the crusie bracket. . Then i put the car on jack stands and lowered the engine about 3" from a jack underneath watching as i went.
once i got it where i wanted it, I unbolted ( but left connected ) the WUR so i could get to the runner nuts. I removed the auxiliary air valve. the electrical connectors for the safety, cold start injector, auxiliary air valve and WUR.
the two throttle springs , the throttle linkage, the accumulator and any remaining fuel lines.

geting the runner nuts was a real nightmare for a couple of them but i got them all with some imagination. I then undid a braket from the throttle plate Then the whole assembly pretty well lifted right out .. without much bother .. i should have taken the coil off for ease but did not ..
At this point i will say replacing the air box is not particularly difficult, but the benefit is to those who are organized and can document steps and procedures clearly. I took lots of photos as I went and this proved invaluable.
I disconnected the wiring harness, fuel lines breather hoses from the tank, i did not drain the oil and disconnect the oil hoses but it is definitely recomended. i disconected and marked the shift linkage. took the heating system out for room. took off the kidney bladdder and the crusie bracket. . Then i put the car on jack stands and lowered the engine about 3" from a jack underneath watching as i went.
once i got it where i wanted it, I unbolted ( but left connected ) the WUR so i could get to the runner nuts. I removed the auxiliary air valve. the electrical connectors for the safety, cold start injector, auxiliary air valve and WUR.
the two throttle springs , the throttle linkage, the accumulator and any remaining fuel lines.
geting the runner nuts was a real nightmare for a couple of them but i got them all with some imagination. I then undid a braket from the throttle plate Then the whole assembly pretty well lifted right out .. without much bother .. i should have taken the coil off for ease but did not ..
Last edited by theiceman; 07-05-2021 at 12:54 PM.
05-26-2008, 11:01 PM
#3
Team Owner
Thread Starter
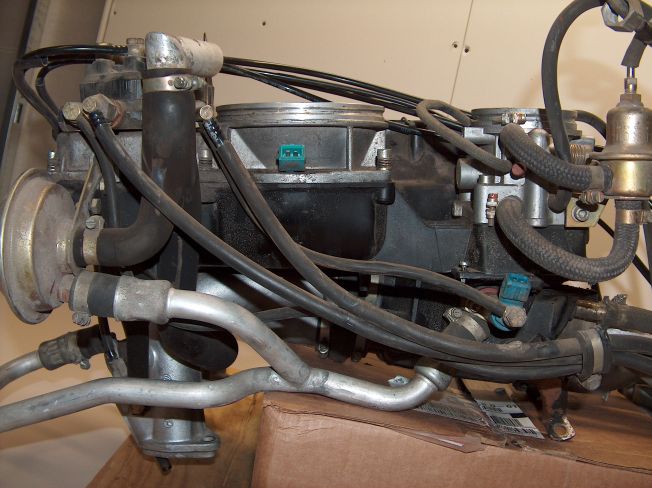
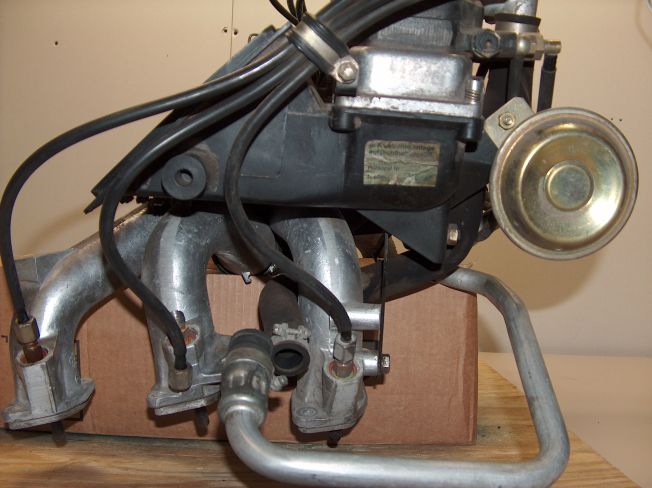
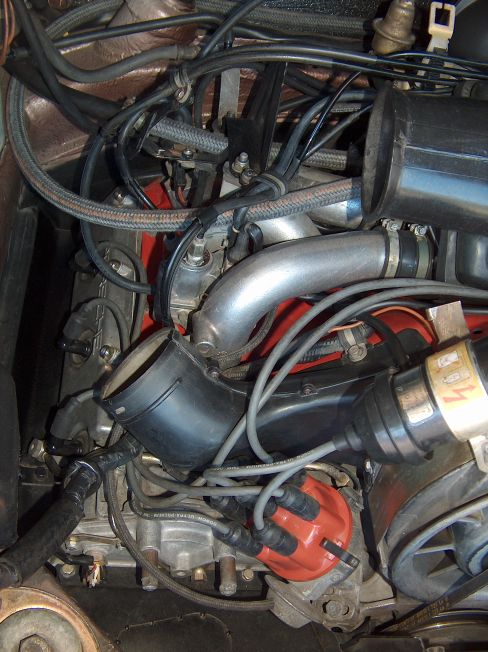
well with not much to do at this point i started the "while you are in there stuff". The throtle bushings ( more on this later ) the pressure switch , the air breather cover and the thermostat oring are all now readily available. Along with the breather hose itself.
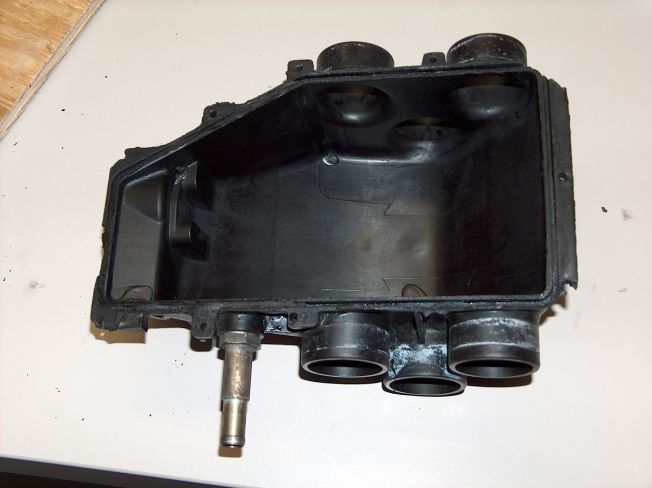
looking at the last post you could see it was quite the mess in there . Here it is a little more cleaned up
looking at the last post you could see it was quite the mess in there . Here it is a little more cleaned up
Last edited by theiceman; 01-09-2013 at 10:14 AM.
05-26-2008, 11:20 PM
#4
Team Owner
Thread Starter
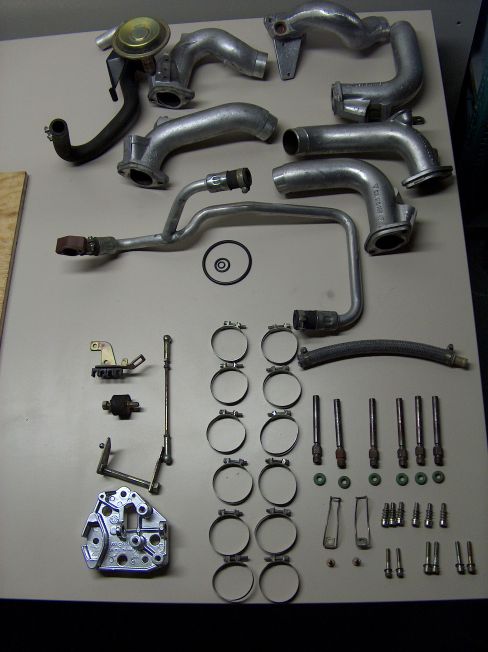
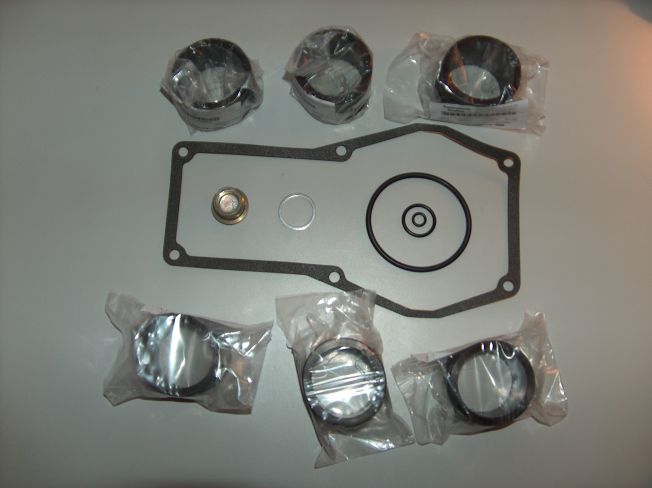
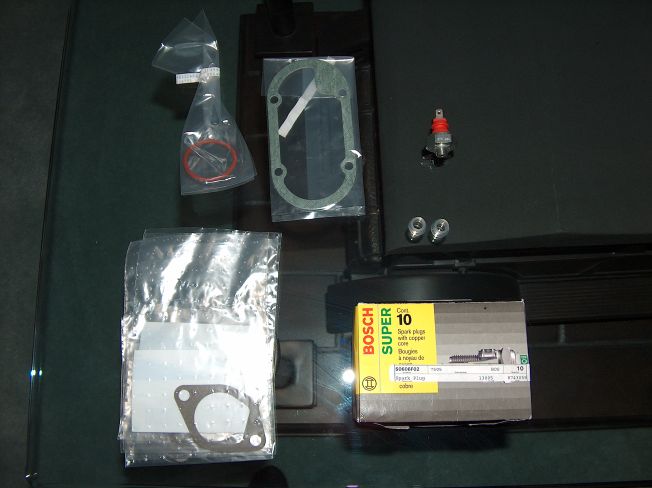
well now it was just a matter of ordering parts and cleaning things up . I took lots of pictures and documented as much as I could . if anyone wants detailed pics of something , just PM me. i left most of the tubing all connected for the most part , I just took each component off to clean then put it back . Oh don't forget you will need new crush washers if you take the fuel lines off the mixture control. one of them uses crush washers. It may be the cold start valve.
What I needed were .
1. 1 air box
2, 6 sleeves
3. mixture control gasket
4. throttle body o ring
5. large cold start o ring
6. Small cold start o ring
7. plug for newer style box
8. seal for newer style box
That is all I really needed to fix the airbox. But i sprung for lots of vacuum tubing to clean things up . it is amazing what a couple of cans of brake cleaner will do . cleaned it all up nice and took off any residues.
Last edited by theiceman; 07-05-2021 at 01:00 PM.
05-26-2008, 11:28 PM
#5
Team Owner
Thread Starter
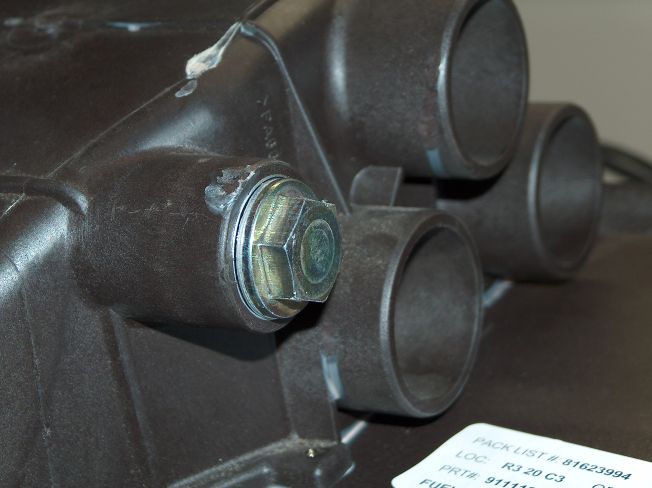
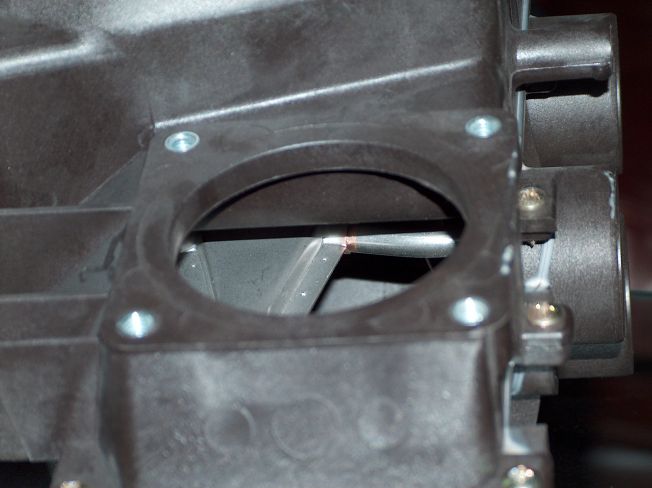
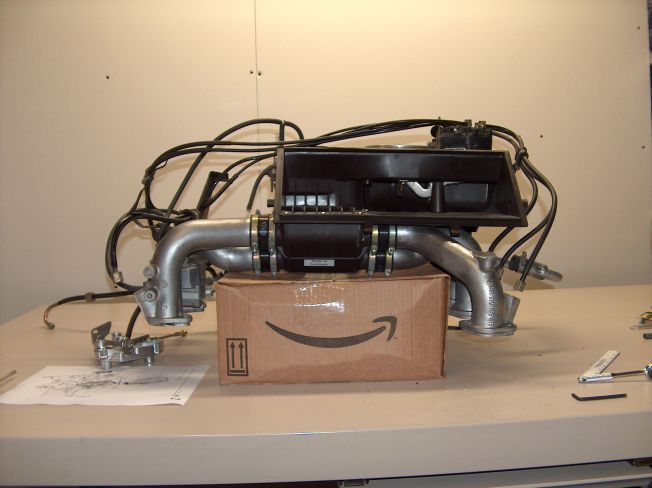
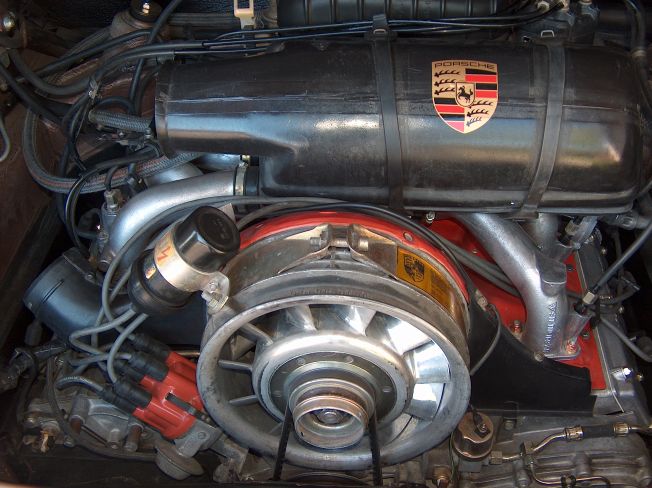
Here is the new box, you can see the box has the diffuser my old one did not have. would not have helped me though ... also putting on the plug and seal as reassembly begins.
Last edited by theiceman; 07-05-2021 at 01:01 PM.
05-26-2008, 11:34 PM
#6
Team Owner
Thread Starter
okay while we were in there
I ordered :
2 throtle busings - old ones shot
1 breather gasket,
1 switch pressure
1 thermostat o ring
1 breather hose
6 injector o rings
6 spark plugs
6 runner gaskets
i actually put the throttle plate together wrong , the ball joint on the wrong side . I would sure pay for THAT mistake later ..
I ordered :
2 throtle busings - old ones shot
1 breather gasket,
1 switch pressure
1 thermostat o ring
1 breather hose
6 injector o rings
6 spark plugs
6 runner gaskets
i actually put the throttle plate together wrong , the ball joint on the wrong side . I would sure pay for THAT mistake later ..
Last edited by theiceman; 07-05-2021 at 01:03 PM.
05-26-2008, 11:46 PM
#7
Team Owner
Thread Starter
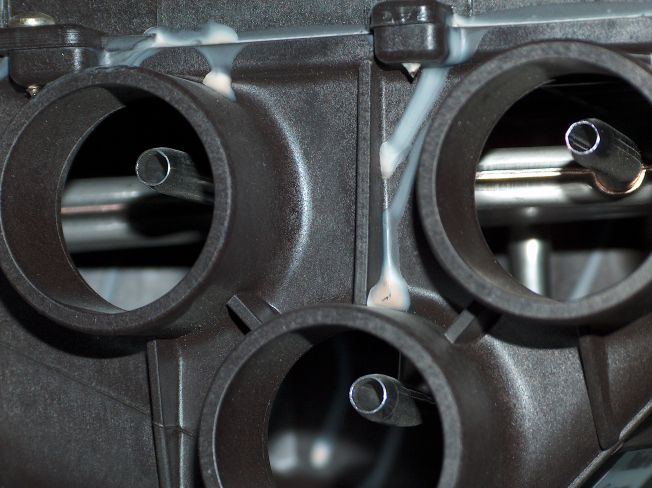
now it was just a matter of putting the parts back on .. putting it in was a bit of a challenge, but patience pays here. you are really just aligning 4 as the back two ( close to you number 1 and 4 ) , you can align afterwards, as the screws are accessable on the rubber sleeve.
Last edited by theiceman; 07-05-2021 at 01:06 PM.
Trending Topics
05-26-2008, 11:52 PM
#8
Team Owner
Thread Starter
once it's in just hook everything back up following the procedure you used to remove..
.. i put the fuel lines in cans and primed it all by lifting the air plate with the ignition on , it gave me a chance to see if i had connected the two identical same colour interchangable connectors for the safety switch and the cold start valve backwards. ( Thanks Porsche ) but still had a rough time starting a couple of times ( the cold start injector line I could not figure out how to prime )
but now it starts and runs great . I had a small air leak in a runner i had to correct but after that it was great . originally it popped through the exhaust..
Last edited by theiceman; 07-05-2021 at 01:08 PM.
05-26-2008, 11:55 PM
#9
Team Owner
Thread Starter
..and the first place I went ...... to the track of course ......
i didn't run my car there ,,, but it just felt like the right place to go ..
..and without Petes advice and encouraging words i don't think i could have gotten through this , and John sent me some really valuable links on other people who had done it. I consider this to be a total Rennlist victory.
I still have to have my CO checked .. but it all looks good, idles nice now , and pulls like it always did.
Thanks Guys for all your support ..
I did glue my box back together but i did not use it. I will make a seperate thread about this . I did it as a side project.
But for those wondering I am NOT going to out a pop off in. I belive it is not required in a good tuned car, and if I am wrong .. well I have a glued together spare ..
Last edited by theiceman; 01-09-2013 at 10:14 AM.
 05-27-2008, 09:06 AM
#12
Addict
Rennlist Member
Rennlist Member
Very nice, thanks for taking the time to do that. Great to see the pics too, to help understand how some of the parts that are not usually visible fit together. Congrats on getting it all back together!
05-27-2008, 01:15 PM
#15
Pro
Join Date: Jun 2001
Location: Oak Park, CA
Posts: 576
Likes: 0
Received 0 Likes
on
0 Posts
While I've never done this myself, I have contemplated it. I don't need to do it now, thank goodness! But, I've always wondered, just how do you tighten the hose connectors on the intake runners under the box once you have it all connected? I assume you can't tighten them before putting everything down otherwise you might not have the runners aligned right. Is it just having a short enough screwdriver and small enough hands?

