
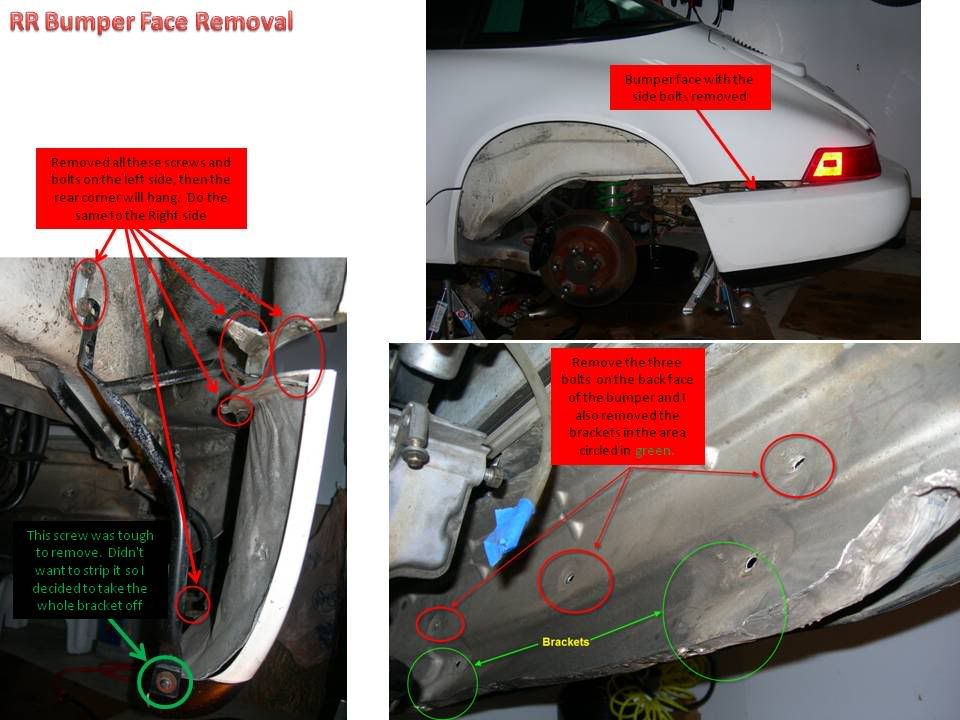
How to Remove Rear Bumper Face
 11-29-2009, 12:43 AM
#1
Rennlist Member
Thread Starter
Here is a How To on Removing the Rear Bumper Face.
This is a pretty easy thing to do.

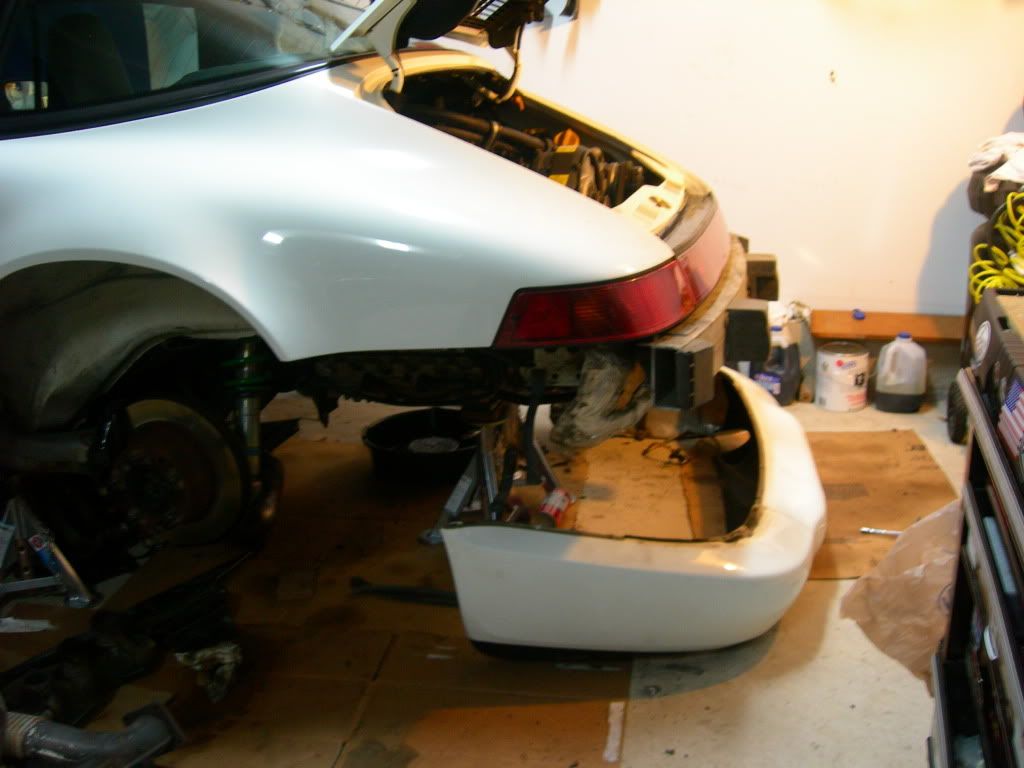
This is what it looks like with the Bumper Face removed. Now time for cleaning.
This is a pretty easy thing to do.
This is what it looks like with the Bumper Face removed. Now time for cleaning.
 11-29-2009, 06:21 AM
#3
Addict
Rennlist Member
Rennlist Member
Excellent - thanks for sharing!
 11-30-2009, 12:26 AM
#6
Three Wheelin'
Join Date: Dec 2003
Location: Rancho Palos Verdes CA
Posts: 1,569
Likes: 0
Received 2 Likes
on
2 Posts
You can actually just remove the two long bolts holding the whole assembly including the alloy beam as one piece. I found it a bit easier that way.
Lots of cleaning ahead for you, but its worth it.
Looking good so far.
Lots of cleaning ahead for you, but its worth it.
Looking good so far.
11-30-2009, 07:54 AM
#7
Rennlist Member
Thread Starter
Yeah I thought about that too. No joke about the cleaning. There is so much dirt in all the nooks and crannies. Its gonna take a while.
Trending Topics
 12-01-2009, 12:36 PM
#10
 This part is fixed with rivets ( hope this is the right word ) under the middlepart.
 Awe crap! :
12-01-2009, 06:58 PM
Awe crap! :
12-01-2009, 06:58 PM
#13
Nordschleife Master
Are people saying that the bumper face (rear PU) is rivetted to the reinforcement bar? And therefore the reinforcement bar should also be removed as per Pete's additional instructions above?
12-02-2009, 05:54 AM
#14
 )
) wide Regards
Norbert
12-02-2009, 10:40 AM
#15
Nordschleife Master
Let's assume you have a bone-stock 964 still having those 5 bumper rivets:
1) If you were of a mind to leave them in place, does someone know of a DIY "rivets stay in place" bumper removal thread?
or,
2) You drilled out the 5 rivets' heads for bumper removal. Is there a noticable sloppiness to the bumper upon its "no rivet" reassembly? (Or, any other downside?)
or,
2) You drilled out the 5 rivets' heads for bumper removal. Is there a noticable sloppiness to the bumper upon its "no rivet" reassembly? (Or, any other downside?)

